Note
Access to this page requires authorization. You can try signing in or changing directories.
Access to this page requires authorization. You can try changing directories.
[This topic is prerelease documentation and is subject to change.]
After the model creation, it's likely that you'll need to improve your model regularly using production data. The feedback loop feature will help you automate this continuous process.
Important
- This is a preview feature.
- Preview features aren’t meant for production use and may have restricted functionality. These features are available before an official release so that customers can get early access and provide feedback.
- Only custom document processing models are supported by the feedback loop feature.
Select documents to add in the feedback loop
The first thing you'll have to do is select the data eligible for the feedback loop. This has to be done from within the Power Automate cloud flow that runs your model.
New Power Automate cloud flow
If you don't have a Power Automate cloud flow to run your model yet, you can create a new one from the model detail page after publishing the model.
Sign in to Power Apps or Power Automate.
On the left pane, select AI Builder > Models.
Select the model for which you'd like to set up the feedback loop.
If your model isn't published yet, select Publish before continuing.
Select Use model > Build intelligent automations.
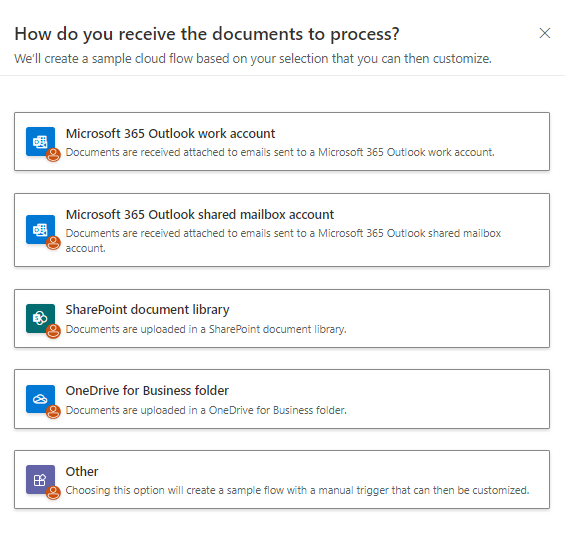
Select the template that best fits your needs.

Validate the template connections to land in the Power Automate flow authoring experience.
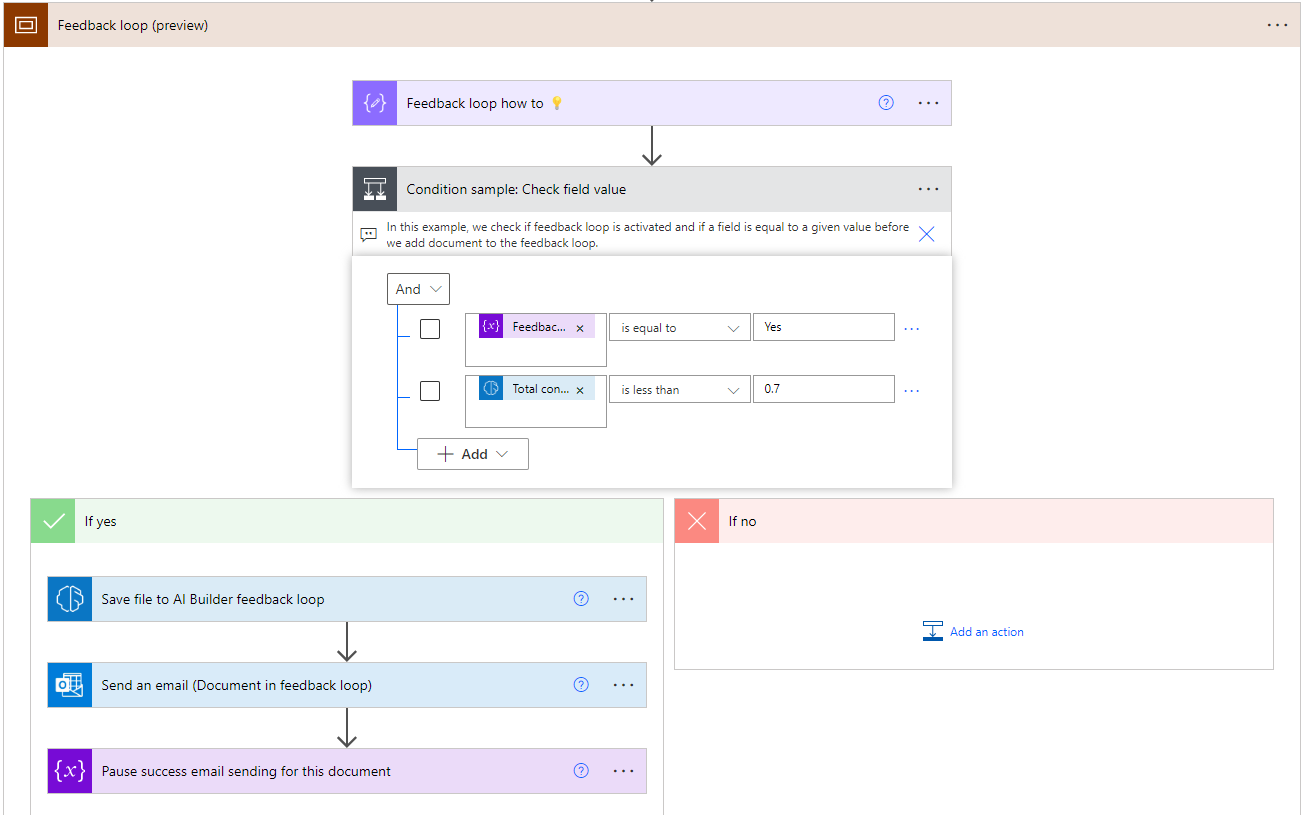
Go to the Feedback loop (preview) section to edit the conditions that will allow you to add data in the feedback loop storage.

In this example, we updated the condition stating that confidence score of the Total field should be less than 0.7 (70%). If it is, the data goes in the feedback loop storage.
Note
The feedback loop storage is a Microsoft Dataverse table within the the same environment in which the flow runs. The table is called AI Builder Feedback Loop. Unless you need to delete records in the table, you don't need to access it directly to make the feedback loop work.
Existing Power Automate cloud flow
If you already have a cloud flow running with your AI Builder model, you're able to add the feedback loop storage functionality within.
Sign in to Power Automate.
On the left pane, select My flows.
Select your Power Automate cloud flow.
On the toolbar, select Edit.
After the AI Builder action card, insert a new step:
- Select the plus sign (+) that appears when you hover over the arrow.
- Select Add an action.
In the Actions list, select Condition. This is where you'll enter the condition that defines if the data needs to go in the feedback loop (yes) or not (no).

In this example, we added a condition stating that confidence score of the Total field should be less than 0.7 (70%). If it is, the data goes in the feedback loop storage.
In the If yes section:
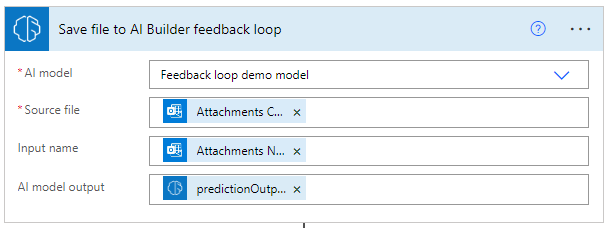
- Add the action Save file to AI Builder feedback loop.
- Select the model you're using to place it in the AI model field.
- Select the source file to place it in the Source file field.
- Select the expression predictionOutput to place it in the AI model output field.

Use data in the feedback loop to improve your model
Now that you have data in the AI Builder feedback loop, you can use it to improve your model.
Sign in to Power Apps or Power Automate.
On the left pane, select AI Builder > Models.
Select the model to improve using data in the feedback loop. Models that can be improved have the status Documents to review.
Select Edit model and continue to the wizard section to add new training data.
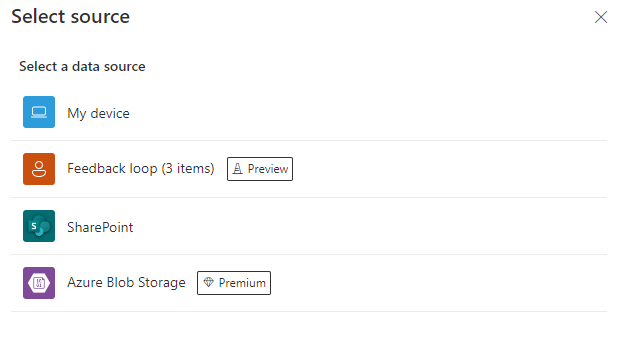
For document processing models, select the desired collection and select Add documents. You'll get the Feedback loop data source option. If documents have been added to the feedback loop, they'll appear there.

Select Feedback loop and add the documents that could improve your model.
Tag these new documents and retrain the model.
Your model is now improved with new documents coming from the feedback loop.
Limitations
- The feedback loop feature is limited to custom document processing models.
- Feedback loop data can be added only from Power Automate cloud flows.
- Feedback loop data can't transit between environments currently.
- The owner of the model and owner of the cloud flow containing the feedback loop logic should be the same person.