Note
Access to this page requires authorization. You can try signing in or changing directories.
Access to this page requires authorization. You can try changing directories.
A custom prompt in Power Apps empowers makers to incorporate custom generative AI capabilities into their apps, thus addressing their business needs with state of the art intelligence.
Once you create and test your prompts using the prompt builder, you can use them within your application by calling them through Power Fx Functions. Custom prompts can be invoked as Power Fx function calls, this allows you to seamlessly integrate AI capabilities into your application.
Important
- AI Builder prompts are running on GPT 4o Mini and GPT 4o model versions powered by Azure OpenAI Service.
- This capability is limited to some regions.
- This capability might be subject to usage limits or capacity throttling.
Prerequisite
You created a custom prompt.
Create an app and configure it
To use a prompt as a Power Fx function, you simply need to call it by its name and pass any required arguments. The function then returns the response generated by the prompt, which can be used within your application as needed. This straightforward approach allows you to leverage the power of AI without needing to write complex code.
Using a prompt in an application is similar to using a custom AI model. Once the prompt is added from the Add data menu, it can be used as a Power Fx function by calling the .Predict on its name, and pass any required arguments. The function then returns the response generated by the GPT model, which can be used in your application. This straightforward approach enables leveraging the power of generative AI without needing to write complex code.
Sign in to Power Apps.
Select +Create > Blank app > Create.
In the App name field, enter Task ID.
Under the Format heading, select Phone.
Select Create.
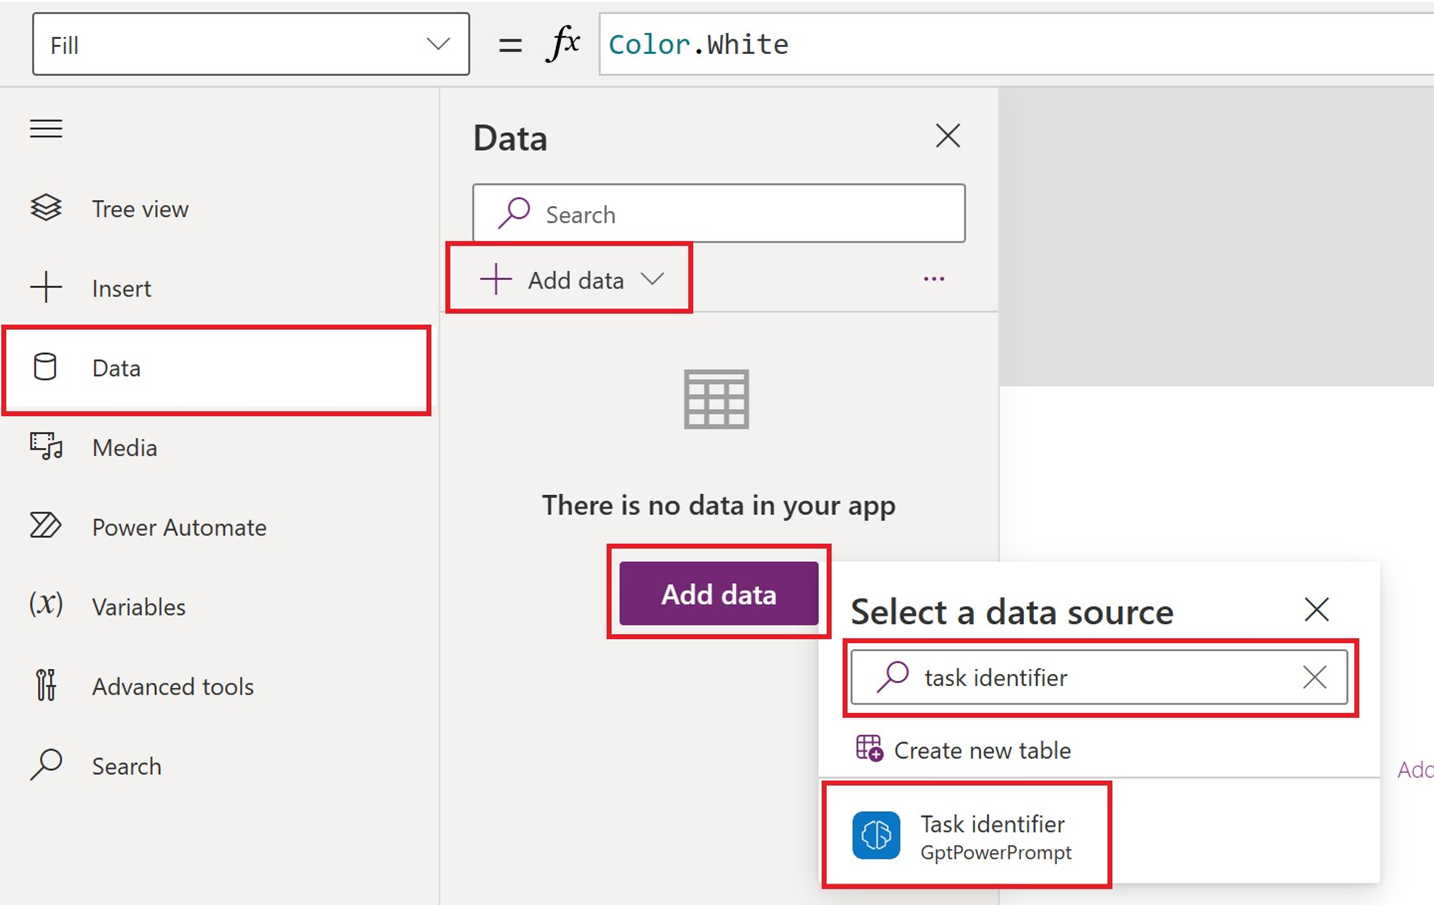
On the left pane, select Data > +Add Data > your custom prompt.
The following example shows a custom prompt named Task identifier.
On the menu at the top of the page, do the following:
- Select +Insert > Text input.
- Select +Insert > Button.
- Select +Insert > Text label.
Resize Text input and Text label accordingly.
On the left pane, select Button1 > OnSelect (the property).
In the formula bar, enter
Set(result, 'Task identifier'.Predict(TextInput1.Text));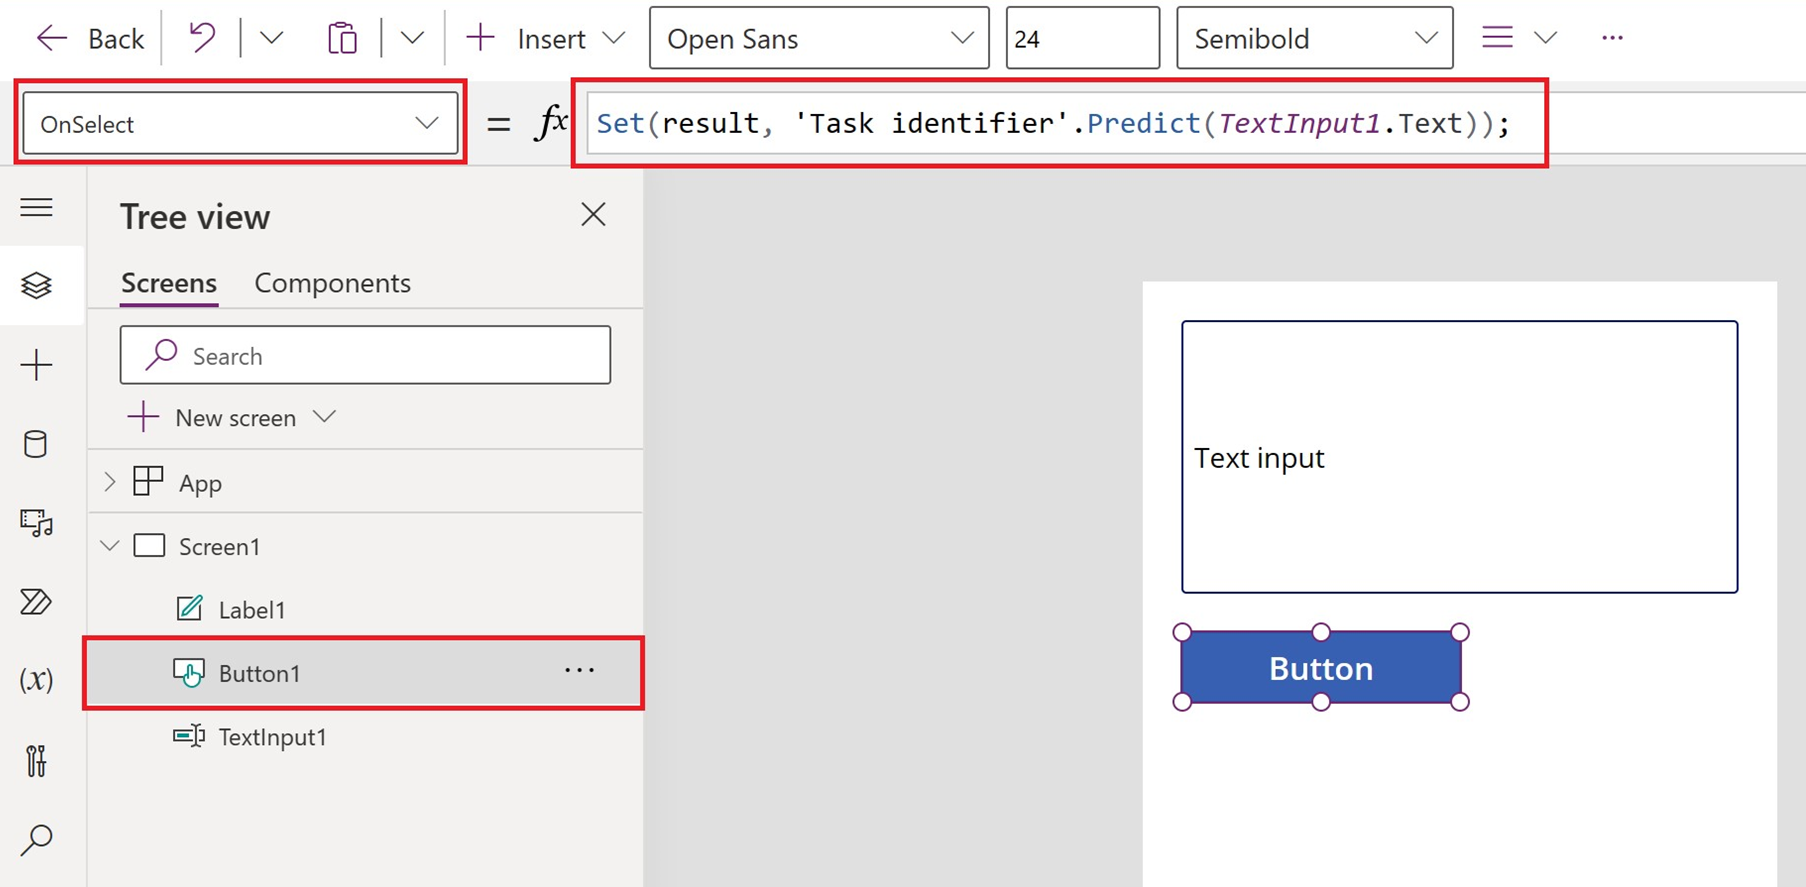
On the left pane, Select label1 > Text (the property).
In the formula bar, enter
result.textSelect Save.
Test your app
- On the menu at the top of the page, select the play button.
- Enter your text in the Text input screen.
- Check the AI text generated in the text label.