Note
Access to this page requires authorization. You can try signing in or changing directories.
Access to this page requires authorization. You can try changing directories.
Applies to:  SQL Server 2019 and later Analysis Services
Azure Analysis Services
Fabric/Power BI Premium
SQL Server 2019 and later Analysis Services
Azure Analysis Services
Fabric/Power BI Premium
In this lesson, you use Get Data to connect to the AdventureWorksDW sample database, select data, preview and filter, and then import into your model workspace.
Under the hood, Get Data is Power Query, which provides a vast array of tools for connecting to and reshaping data for modeling and analysis. To learn more, see Power Query Documentation.
Note
Tasks and images in this tutorial show connecting to an AdventureWorksDW database on an Azure Synapse Analytics resource. In some cases, an AdventureWorksDW database on SQL Server Data Warehouse may show different objects; however, they are fundamentally the same.
Estimated time to complete this lesson: 10 minutes
Prerequisites
This article is part of a tabular modeling tutorial, which should be completed in order. Before performing the tasks in this lesson, you should have completed the previous lesson: Lesson 1: Create a new tabular model project.
Create a connection
To create a connection to the AdventureWorksDW database
In Tabular Model Explorer, right-click Data Sources > Import from Data Source.
This launches Get Data, which guides you through connecting to a data source. If you don't see Tabular Model Explorer, in Solution Explorer, double-click Model.bim to open the model in the designer.
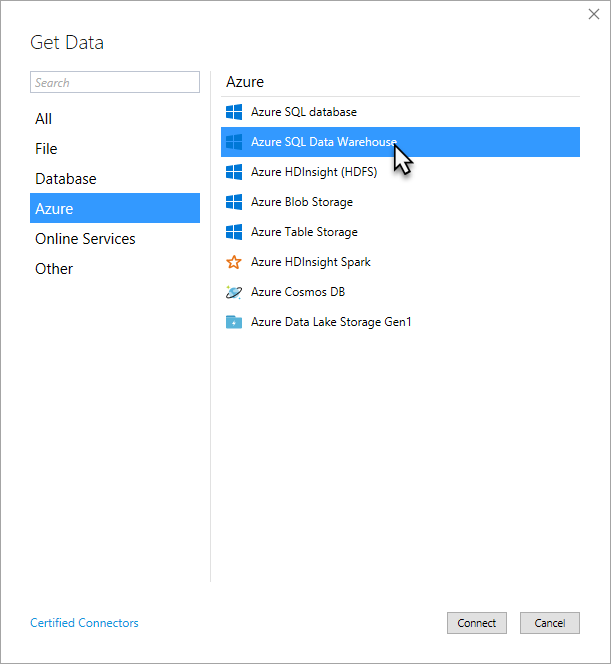
In Get Data, click Azure > Azure SQL Data Warehouse, and then click Connect.
In the SQL Server Database dialog, in Server, type or paste the name of the server where you installed the AdventureWorksDW database, and then click Connect.
If you created an Azure SQL Data Warehouse with the AdventureWorksDW sample database, you can copy the server name from the Overview page in the Azure portal.
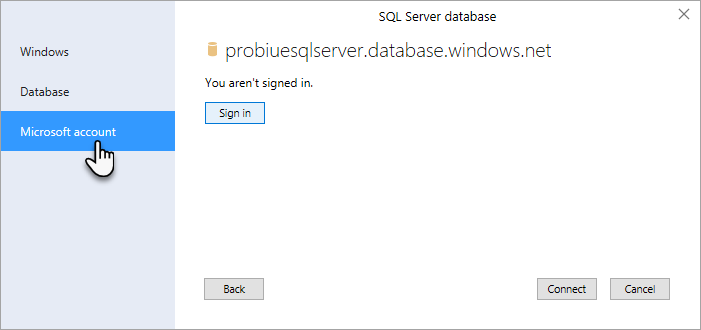
When prompted to enter credentials, you need to specify the credentials Analysis Services uses to connect to the data source when importing and processing data. Select Microsoft account, and then click Sign in. Follow the prompts. When you're signed in, click Connect.
If your datasource is an on-premises or VM SQL Server Data Warehouse, choose Windows > Impersonate Account, and then enter an account name and password.
In Navigator, select the AdventureWorksDW database, and then click OK. This creates the connection to the database.
In Navigator, select the check box for the following tables: DimCustomer, DimDate, DimGeography, DimProduct, DimProductCategory, DimProductSubcategory, and FactInternetSales. After selecting the tables, click Transform Data.
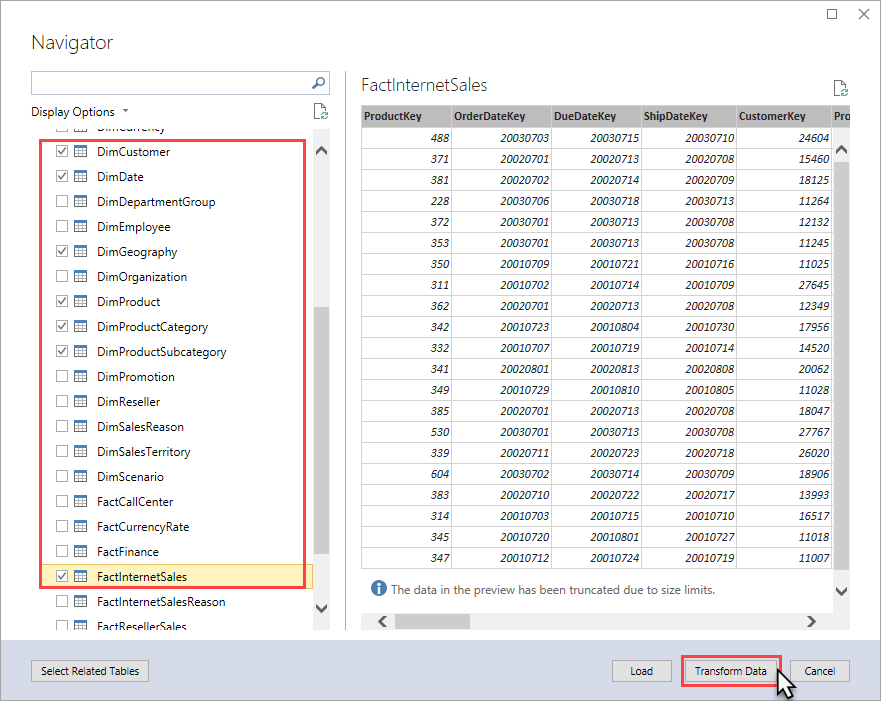
After you click Transform Data, Power Query Editor opens. In the next section, you select only the data you want to import.
Filter the table data
Tables in the AdventureWorksDW sample database have data that isn't necessary to include in your model. When possible, you want to filter out unnecessary data to save in-memory space used by the model. You filter out some of the columns from tables so they're not imported into the workspace database, or the model database after it has been deployed.
To filter the table data before importing
In Power Query Editor > Queries, select the DimCustomer table. A view of the DimCustomer table at the datasource (your AdventureWorksDW sample database) appears.
Multi-select (Ctrl + click) SpanishEducation, FrenchEducation, SpanishOccupation, FrenchOccupation, then right-click, and then click Remove Columns.
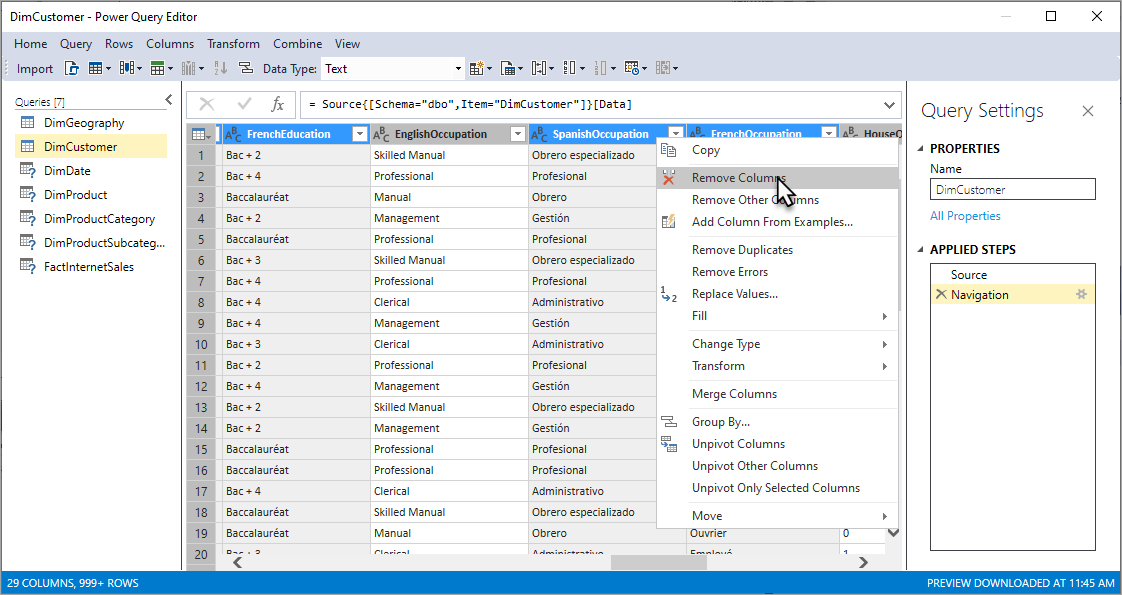
Since the values for these columns are not relevant to Internet sales analysis, there is no need to import these columns. Eliminating unnecessary columns makes your model smaller and more efficient.
Tip
If you make a mistake, you can backup by deleting a step in APPLIED STEPS.

Filter the remaining tables by removing the following columns in each table:
DimDate
SpanishDayNameOfWeek FrenchDayNameOfWeek SpanishMonthName FrenchMonthName DimGeography
SpanishCountryRegionName FrenchCountryRegionName DimProduct
SpanishProductName FrenchProductName FrenchDescription ChineseDescription ArabicDescription HebrewDescription ThaiDescription GermanDescription JapaneseDescription TurkishDescription DimProductCategory
SpanishProductCategoryName FrenchProductCategoryName DimProductSubcategory
SpanishProductSubcategoryName FrenchProductSubcategoryName FactInternetSales
No columns removed.
Import the selected tables and column data
Now that you've previewed and filtered out unnecessary data, you can import the rest of the data you do want. The wizard imports the table data along with any relationships between tables. New tables and columns are created in the model and data that you filtered out isn't imported.
To import the selected tables and column data
Review your selections. If everything looks okay, click Import. The Data Processing dialog shows the status of data being imported from your datasource into your workspace database.
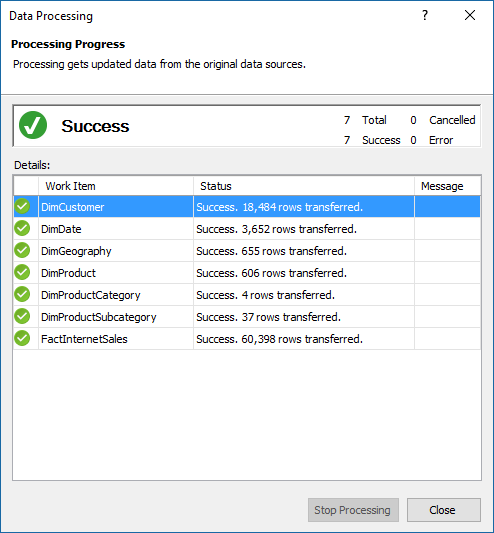
Click Close.
Save your model project
It's important to frequently save your model project.
To save the model project
- Click File > Save All.