If you boot to the UEFI:
The UEFI settings can be adjusted only during system startup. To load the UEFI firmware settings menu:
- Shut down your Surface and wait 10 seconds.
- Press and hold the volume-up button on your Surface and at the same time, press and release the power button.
- The Microsoft or Surface logo appears on your screen. Continue to hold the volume-up button. Release the button once the UEFI screen appears.
does it show the SSD not detected icon?
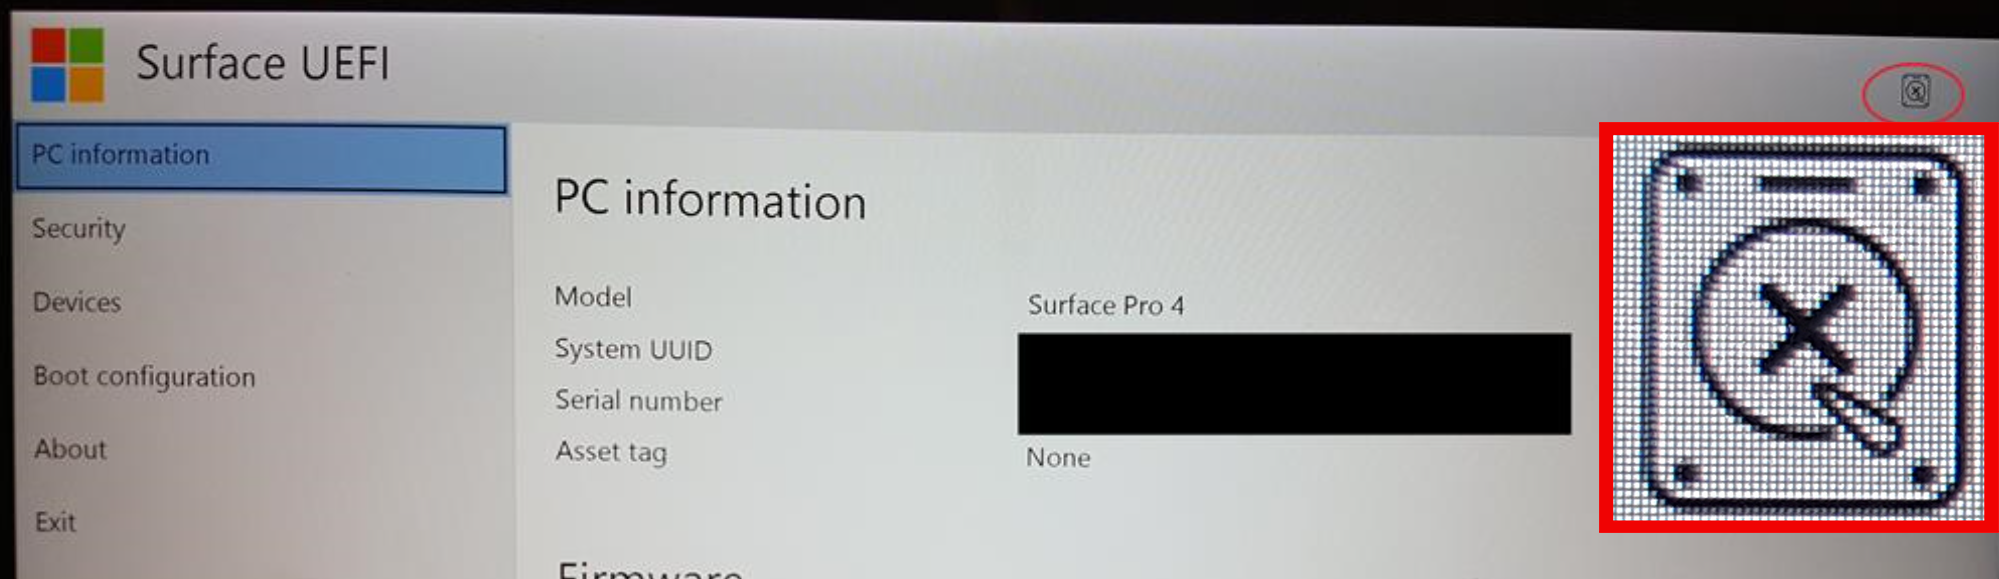
If it does not show this icon, can you try a downloadable recovery image:
Go to https://support.microsoft.com/en-us/surfacerecoveryimage
(with a different Windows computer if yours is not working properly)
and download a recovery image for your Surface. You will need a 16GB USB stick formatted FAT32 (use a Windows computer). Use FULL format and not quick format. Give the volume a name like surfboot.
Unzip/extract the recovery zip to the formatted USB stick and then-
To reset your Surface from a USB recovery drive:
Step 1: Make sure your Surface is turned off and plugged in (hold down the power button for 30 seconds).
Step 2: Insert the USB recovery drive into the USB port on your Surface.
Step 3: Press and hold the volume-down button while you press and release the power button on your Surface.
Step 4: When the Surface logo appears, release the volume button.
Step 5: When prompted, select the language and keyboard layout you want.
Step 6: Select Troubleshoot > Reset your PC.
If prompted for a recovery key, select Skip this drive at the bottom of the screen.
Step 7: Select the target operating system you wish to reset. This refers to the current operating system installed on your Surface.
Step 8: Select Yes, repartition the drives, and on the next page, select Next.
Step 9: Choose Just remove my files.
Step 10: Select Reset.
Surface restarts and the Surface logo displays while the reset process continues (this can take a while).
' cx='32' cy='32' r='32' /%3E%3Ctext x='50%25' y='55%25' dominant-baseline='middle' text-anchor='middle' fill='%23FFF' %3EA%3C/text%3E%3C/svg%3E)

