I am still having this issue and it's a much MUCH older Cumulative Security driver, for those that are just as annoyed as I became with this problem, give these methods a shot and see if it stops this known unnecessary
annoyance.
Method 1: Mark your WiFi connection as metered
to disable forced Win10 updates.
Method 2: Stop the Win10 update service from the startup
- open the Run command by pressing Windows + R, type
services.msc, and hit Enter.
- Locate the Windows Update service, click it and open it.
- To disable it, under the General tab, find Startup Type and change it to
Disable.
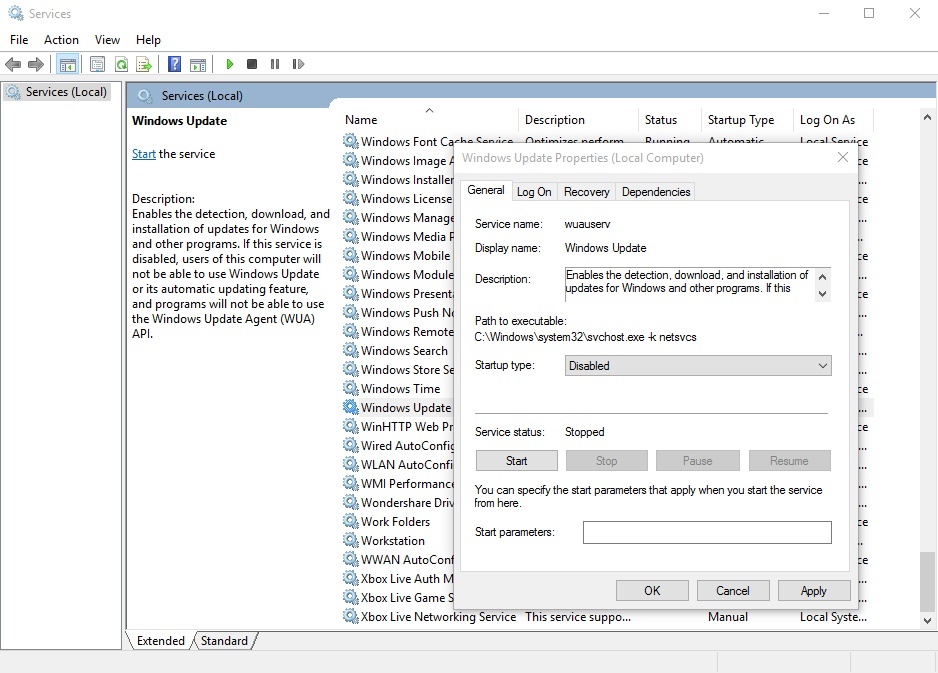
- Now restart your PC to apply these settings.
To restart the Windows updates, simply follow the steps above and change the Startup Type to
Automatic.
Method 3: Windows 10 Home patch allows you to turn off automatic app updates. (Only works for app updates. If you wish to continue receiving Win10 security updates, you can use this method ).
Microsoft enabled the option to turn off the automatic app updates in Cumulative Update 5. If you don't have this patch, go to Settings > Update & Security > Windows Update and receive that Windows Patch.
After this, open the Store app and click the
Profile button in the toolbar. Here you will be able to toggle the switch from automatic updates to disable Windows 10 forced updates.
Method 4: Diable forced Win10 updates by making changes in the Group Policy Editor.
This option is invisible by default. However, you can tweak a few settings in the Group Policy Editor to re-enable the option to stop your computer from downloading the updates from
Microsoft.
(Windows 10 Home users can't use this option as it is only for Preview builds of Windows 10 Education, Pro, and Enterprise editions).
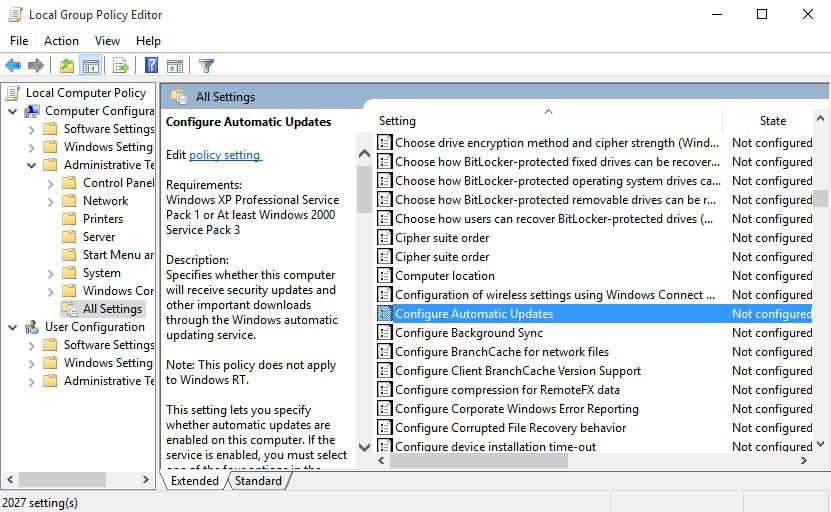
- In the Windows 10 desktop search, type Group Policy Editor and open the tool.
- Find the Computer Configuration and click on the Administrative Templates folder to expand it.
- Now select All Settings and then find the Configure Automatic Updates entry in the new-window.
- Double-click on it and enable it by choosing the Enable button located at the top-left.
- After this step, you'll also be able to change the Options located at the bottom. From the drop bar, choose the option saying
Allow local admin to choose settings to disable Win10 forced updates.
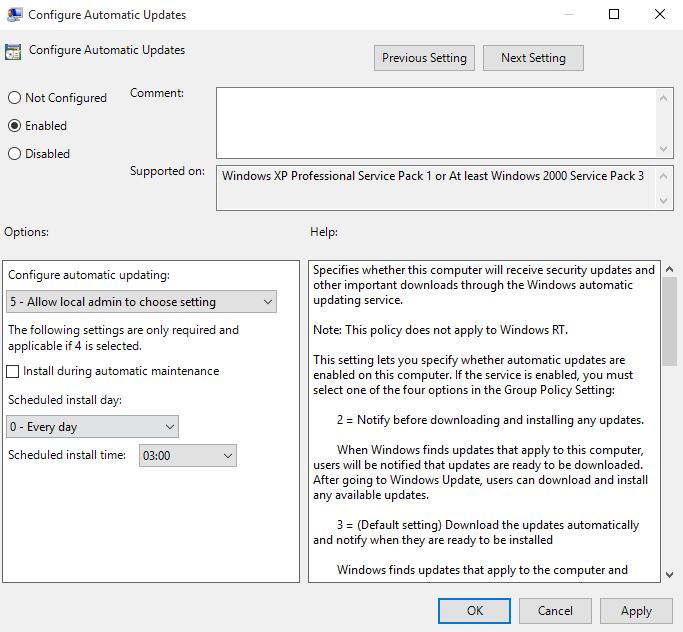
- This will make the option to disable the automatic updates download enabled in Control Panel.
Follow these steps next:
- Go to Control Panel and select System and Security.
- Click on Windows Update and select Change settings. Here, you will see the option
Check for updates but let me choose whether to download and install them. Select this option and your PC will check for updates, but download and install them only after your permission.
Method 5: Disable Specific Windows 10 updates by following these guidelines.
Download the tool found in the guidelines linked above and follow the instructions from Microsoft's website to help disable the persistent problematic Win10 forced updates.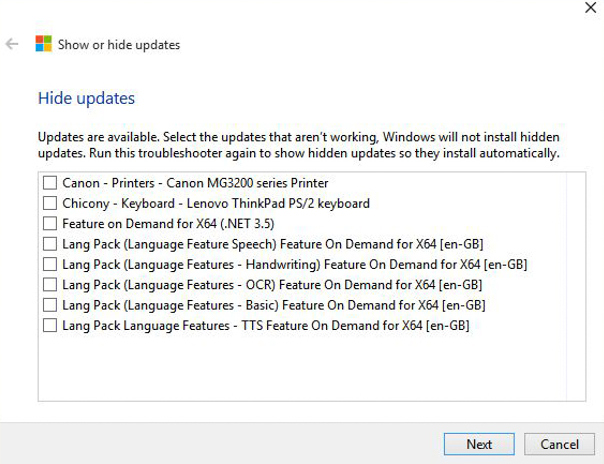
If you're STILL having the problem, here's 3 Commands you can try using the command line:
Open Command Prompt with administrative permissions by going to the Startmenu and searching Command Prompt or cmd.exe. You should see a sub-menu displayed that gives you the option Run as Administrator.
Now, One by one, type the following commands & hit enter:
net stop wuauserv
This will stop the Win10 Update service.
Next:
net stop bits
This stops Background Intelligent Transfer Service or BITS.
Next:
net stop dosvc
This stops delivery optimization service.
For those that may not have tried these methods, I hope it helps!! It finally worked for me after giving the command line option a shot. :)
' cx='32' cy='32' r='32' /%3E%3Ctext x='50%25' y='55%25' dominant-baseline='middle' text-anchor='middle' fill='%23FFF' %3EA%3C/text%3E%3C/svg%3E)