How to increase RowDefinition Height in Auto sizing in WPF?

MERUN KUMAR MAITY 636 Reputation points
2021-12-18T18:04:40.93+00:00

I have a WPF application where I using fluid layout. That means I use Auto and Star (*) sizing to distribute my Grid space.

Here is the XAML code :

 <Grid.RowDefinitions>
                <RowDefinition Height="Auto" />
                <RowDefinition Height="*"/>
                <RowDefinition Height="Auto"/>
            </Grid.RowDefinitions>

My question is, I want to increase the First RowDefinition Height which has Auto sizing in my case. I know how to increase height in Star () sizing, just giving values 2, 3* but I don't know how to increase height in Auto sizing.

Developer technologies | Windows Presentation Foundation
Developer technologies | C#
0 comments No comments
{count} votes

Accepted answer
  1. Karen Payne MVP 35,586 Reputation points Volunteer Moderator
    2021-12-18T22:48:15.11+00:00

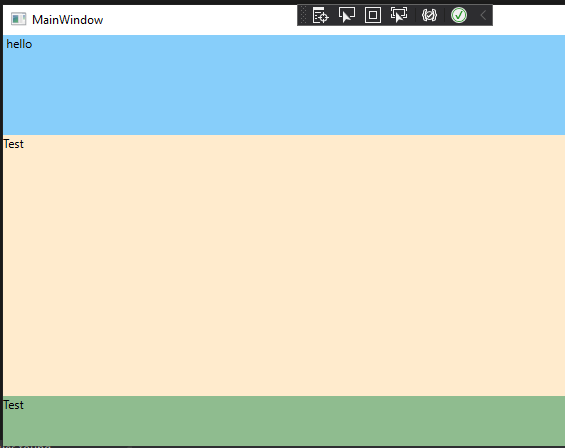
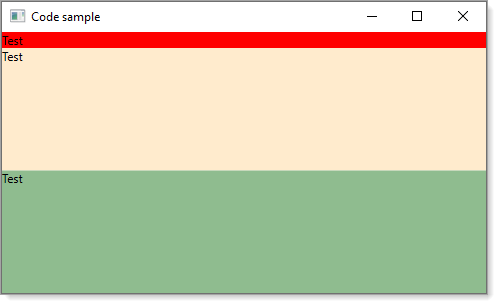
    See if this works for you at runtime.

    <Window  
        x:Class="WpfApp1.MainWindow"  
        xmlns="http://schemas.microsoft.com/winfx/2006/xaml/presentation"  
        xmlns:x="http://schemas.microsoft.com/winfx/2006/xaml"  
        xmlns:d="http://schemas.microsoft.com/expression/blend/2008"  
        xmlns:local="clr-namespace:WpfApp1"  
        xmlns:mc="http://schemas.openxmlformats.org/markup-compatibility/2006"  
        Title="Code sample"  
        Width="500"  
        Height="800"  
        MinWidth="200"  
        MinHeight="300"  
        WindowStartupLocation="CenterScreen"  
        mc:Ignorable="d">  
      
        <Grid>  
            <Grid.RowDefinitions>  
                <RowDefinition Height="Auto" />  
                <RowDefinition Height="*" MinHeight="10" />  
                <RowDefinition Height="*" MinHeight="10" />  
            </Grid.RowDefinitions>  
      
            <Grid Grid.Row="0" Background="Red">  
                <TextBlock>Test</TextBlock>  
            </Grid>  
            <Grid Grid.Row="1" Background="BlanchedAlmond">  
                <TextBlock>Test</TextBlock>  
            </Grid>  
            <Grid Grid.Row="2" Background="DarkSeaGreen">  
                <TextBlock>Test</TextBlock>  
            </Grid>  
        </Grid>  
    </Window>  


    158774-figure1.png

    1 person found this answer helpful.

3 additional answers

Sort by: Most helpful
  1. Ken Tucker 5,861 Reputation points
    2021-12-18T19:07:29.837+00:00
    1 person found this answer helpful.
    0 comments No comments

  2. Hui Liu-MSFT 48,681 Reputation points Microsoft External Staff
    2021-12-20T07:16:34.48+00:00

    Auto sizing distributes space evenly based on the size of the content that is within a column or row. You could set the height of the content of the row to increase the height of the row.

    <Grid>  
            <Grid.RowDefinitions>  
                <RowDefinition Height="Auto" MinHeight="80" />  
                <RowDefinition Height="*"  />  
                <RowDefinition Height="Auto" MinHeight="10" />  
            </Grid.RowDefinitions>  
      
            <Grid Grid.Row="0" Background="LightSkyBlue">  
                <TextBlock Text=" hello"  Height="100" />  
            </Grid>  
            <Grid Grid.Row="1" Background="BlanchedAlmond">  
                <TextBlock>Test</TextBlock>  
            </Grid>  
            <Grid Grid.Row="2" Background="DarkSeaGreen">  
                <TextBlock Height="50">Test</TextBlock>  
            </Grid>  
        </Grid>  
    

    The result:
    158952-image.png


    If the response is helpful, please click "Accept Answer" and upvote it.
    Note: Please follow the steps in our documentation to enable e-mail notifications if you want to receive the related email notification for this thread.

    1 person found this answer helpful.
    0 comments No comments

  3. PatrickTalon38 51 Reputation points
    2021-12-18T22:57:37.387+00:00

    If you want the top and bottom of the three row definitions to remain on Auto (which reacts to fit in whatever controls are placed in that row), then a way to somewhat increase the height look and feel of that row, without resorting to fixed pixel size, and without resorting to number-star ratios, is to place Margins on whatever content controls are placed within that row=0. Even just adding Margins="0,2,0,2" to the control/element properties of each control placed in that row, does thicken the row slightly.

    0 comments No comments

Your answer

Answers can be marked as Accepted Answers by the question author, which helps users to know the answer solved the author's problem.