Azure Virtual Desktop
A Microsoft desktop and app virtualization service that runs on Azure. Previously known as Windows Virtual Desktop.
1,835 questions
This browser is no longer supported.
Upgrade to Microsoft Edge to take advantage of the latest features, security updates, and technical support.
' cx='32' cy='32' r='32' /%3E%3Ctext x='50%25' y='55%25' dominant-baseline='middle' text-anchor='middle' fill='%23FFF' %3EAD%3C/text%3E%3C/svg%3E)
so im trying to setup a minecraft server inside on an azure vds
i did the setup before on my pc and it worked with some adjustments
im using duckdns for people to connect to my server which is only possible when i open a dmz from my routers settings
so i need to set up a dmz on the vds im using for duckdns to work but theres no router settings and i cant figure it out on control panel.
' cx='32' cy='32' r='32' /%3E%3Ctext x='50%25' y='55%25' dominant-baseline='middle' text-anchor='middle' fill='%23FFF' %3EKM%3C/text%3E%3C/svg%3E)
Hello, @assddsad-7149!
Azure Virtual Desktop may be a more complex solution than you need for a Minecraft server. Are you open to a Windows or Linux VM? There's a great tutorial for setting up a Minecraft server on an Azure VM and I'd be happy to go through the process if you'd like.
Basic Game Server Hosting on Azure
https://learn.microsoft.com/en-us/gaming/azure/reference-architectures/multiplayer-basic-game-server-hosting


Thanks for answering!
Yes its so complex for a new guy like so me so its really hard to fix
im using a windows vm
No worries, @assddsad-7149!
I'll go through the Windows VM version of the documentation this afternoon and then review the process with you.
Thank you so much.
Hello, @assddsad-7149!
How do I create a Minecraft server on Azure?
The documentation is going to be your best resource here and while there's too much for me to include everything here, I'll go through the VM creation as best I can (there are a couple variations depending on your Minecraft version and which OS you choose to use). Here is the official documentation:
https://learn.microsoft.com/en-us/gaming/azure/reference-architectures/multiplayer-basic-game-server-hosting
Edit: For anyone looking for a complete walkthrough including screenshots of each step, check out this developer blog by Azure MVP cyruswong that goes through the process of creating a Minecraft server on Azure and connecting to it:
https://techcommunity.microsoft.com/t5/educator-developer-blog/how-to-deploy-your-free-private-minecraft-server-with-azure-for/ba-p/3693328
These are the steps from the official documentation:
Note: You can use Windows or Linux. In this example I'll be using Windows Server 2016 Datacenter.
We're going to create a virtual machine in the Azure portal (search for virtual machines > select Virtual machines under services > Create / Azure virtual machine).
In the Basics tab, we'll:
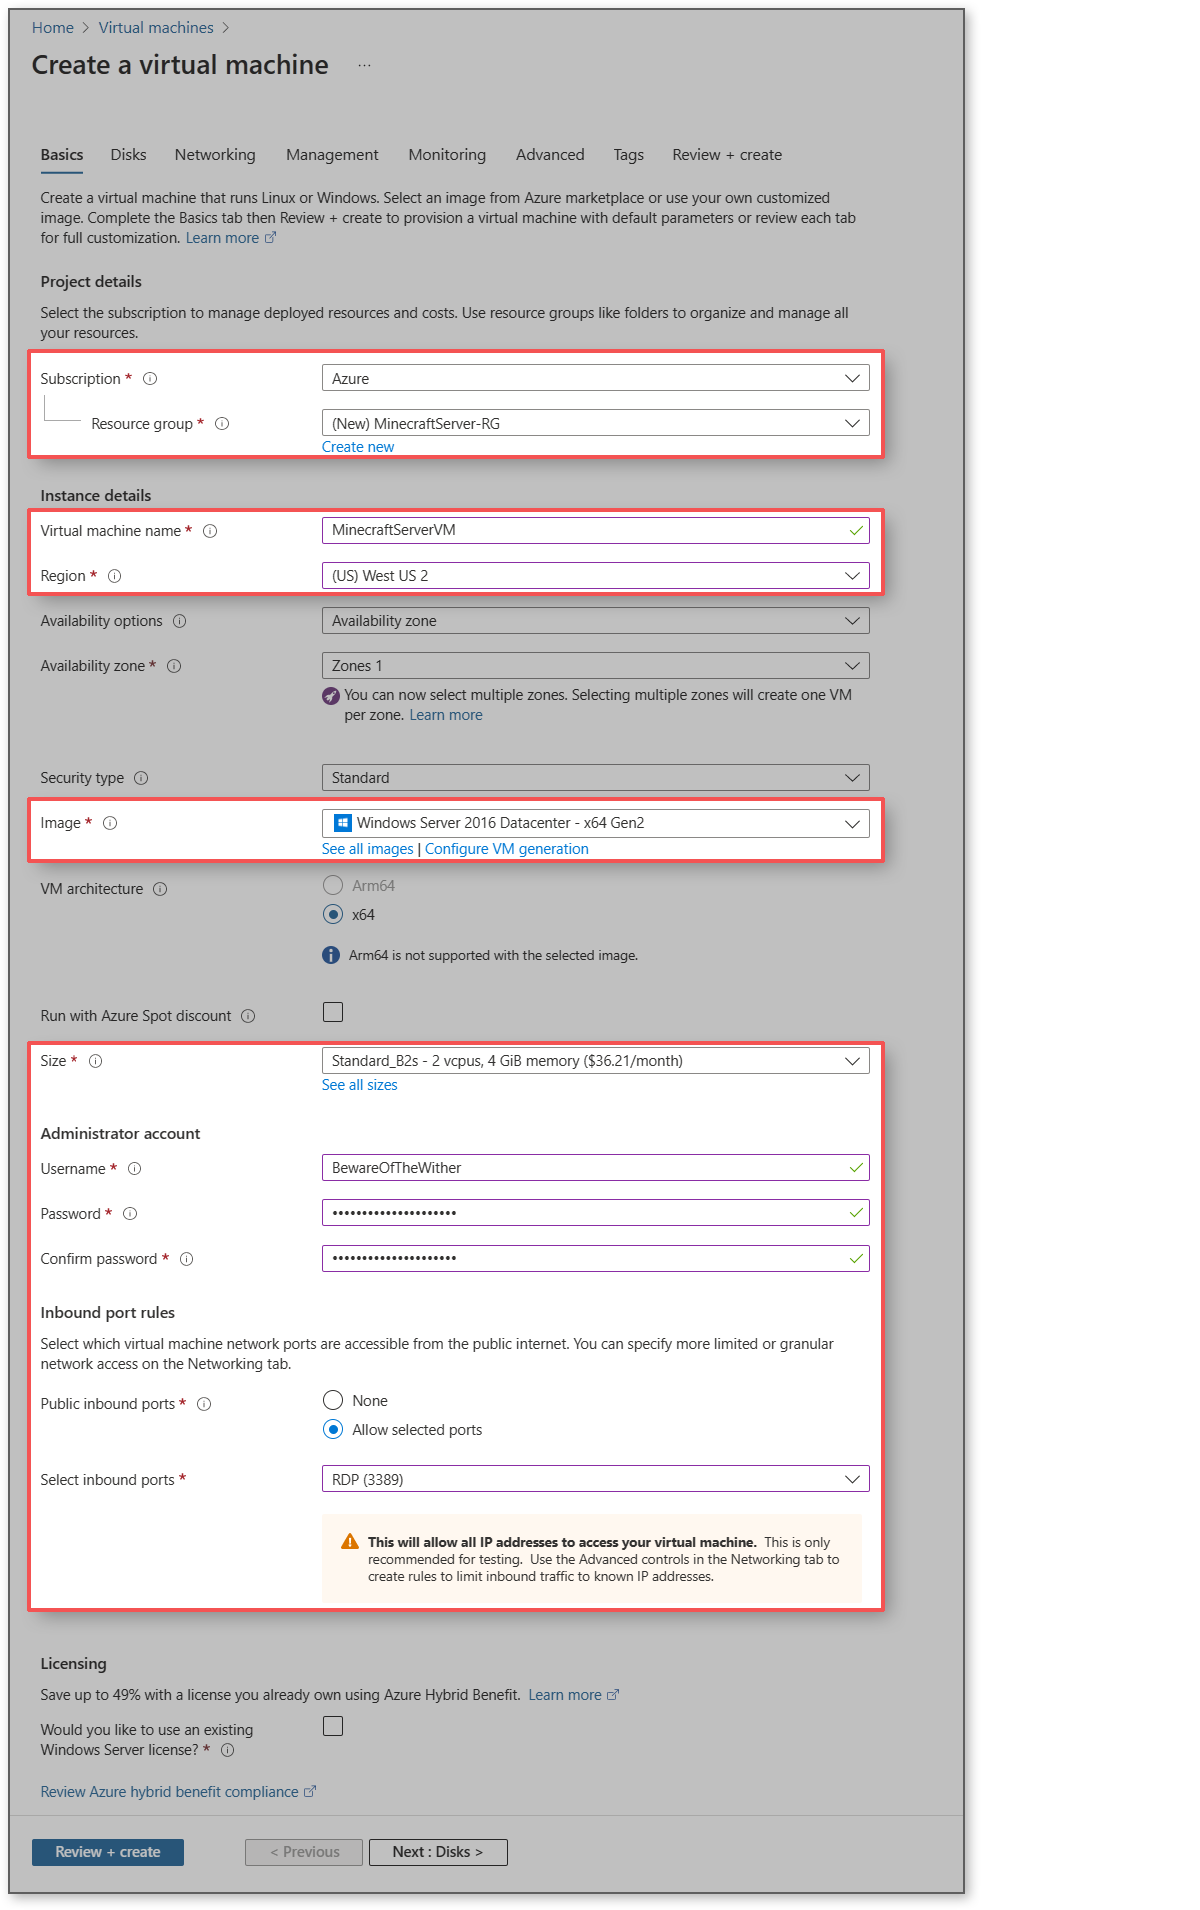
On the Disks tab we'll select create and attach a new data empty disk to the Azure Virtual Machine, to store the game server executable and the data files it produces. The source type is none (empty disk).
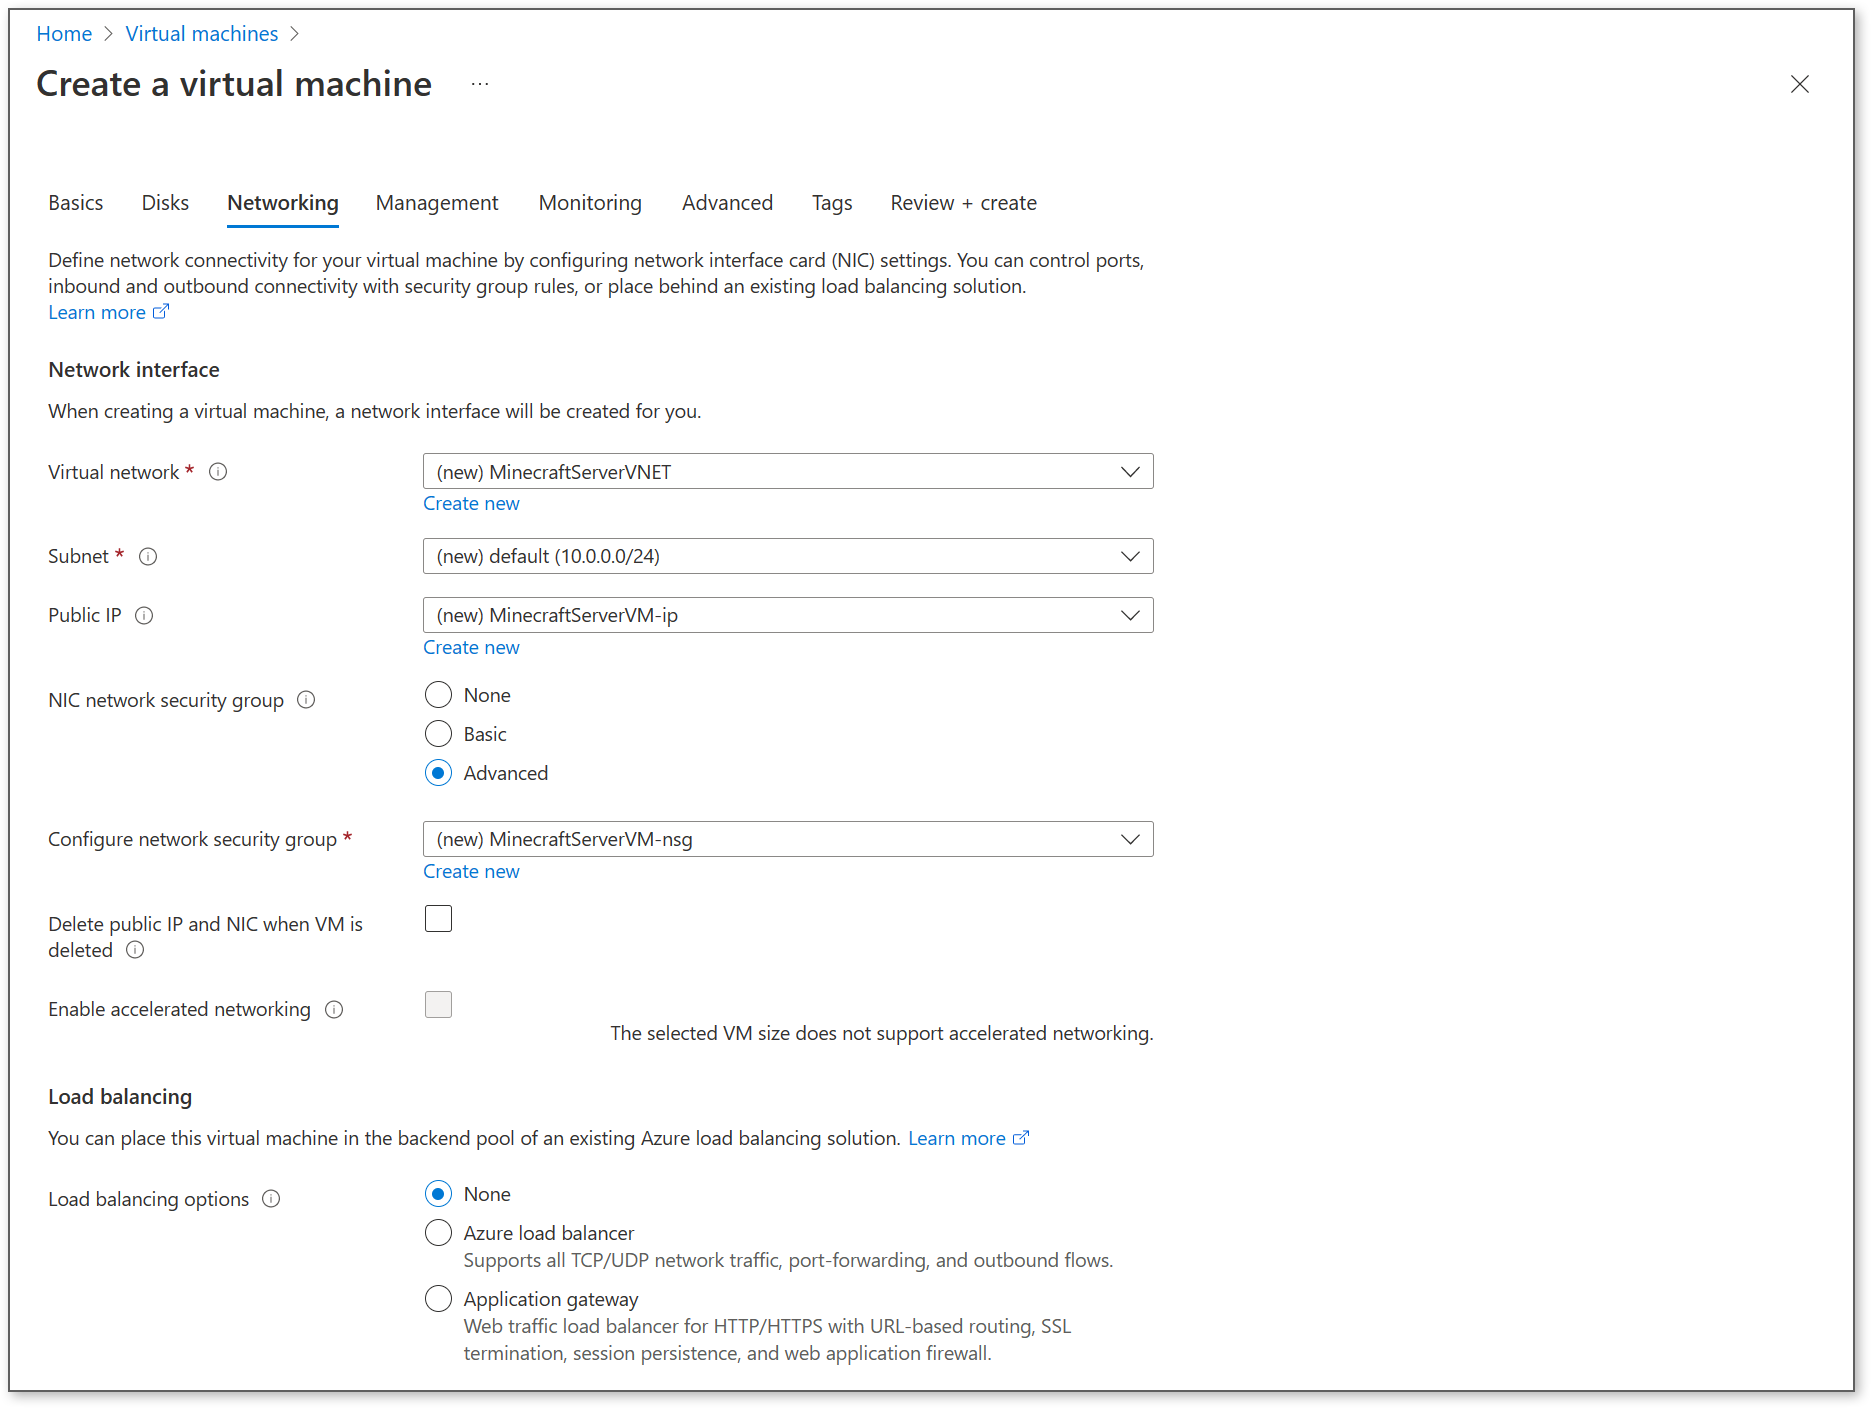
On the Networking tab instructions vary depending on your Minecraft edition so you'll want to refer to the official documentation. Below is an example of what my networking looked like when I was done:
Review and create the virtual machine. It will take a few minutes to complete the deployment.
At this point, you are ready to connect to your VM and configure it, starting with setting up your OS firewall (steps 3 and 4). These steps will vary depending on which OS you use and your version of Minecraft so pick back up with the official documentation here:
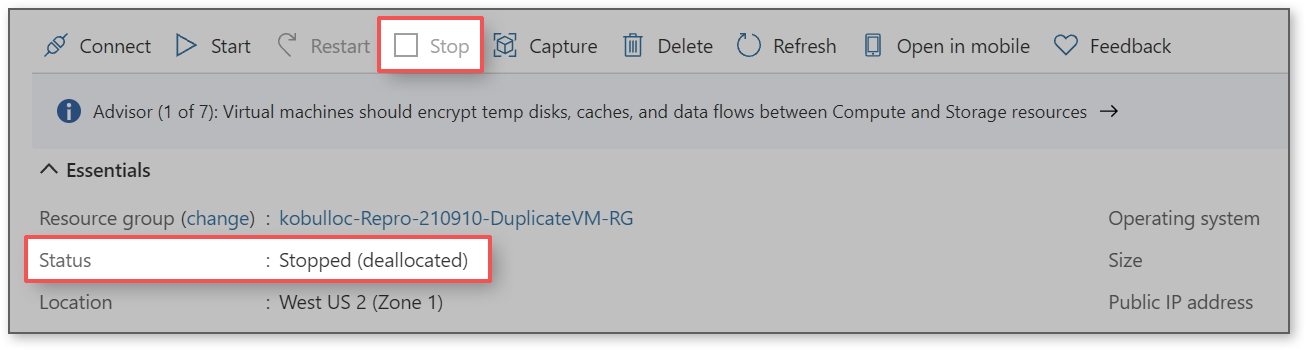
It's going to take some time to get everything set up but I hope this helps you get started. Remember that to save on VM costs, you can deallocate your VM when it isn't in use. Having the server up just during the evenings or weekends could save a lot of VM costs. Best of luck and happy gaming!
thanks for the info!
i tried it all and came to the last part
my server is open and the port is listening
but i dont know what should i write to the server adress to acsess the server
ive tried the external ip with the port in front of it but it gave no results
this is the place where i have problems everytime my own pc cant see the server no matter what i write so what do i do?
Hello, @assddsad-7149!
Happy to help and sorry for the delayed reply! Just to make sure we are on the same page, you're currently on "Run the game server and double check that the ports are open"? There are some variables depending on the OS and Minecraft version that are outside the scope of what I'm able to troubleshoot here but perhaps a better approach is to reference a recent developer blog from Azure MVP cyruswong.
His blog will walk you through each step of setting up a Linux/Ubuntu server on Azure that runs the Bedrock version of Minecraft. There's a 30 minute video and a text version with over 50 screenshots that goes through everything from creating a VM to connecting to the game server.
How to deploy your free private Minecraft server with Azure for Student?
https://techcommunity.microsoft.com/t5/educator-developer-blog/how-to-deploy-your-free-private-minecraft-server-with-azure-for/ba-p/3693328