Azure Data Factory
An Azure service for ingesting, preparing, and transforming data at scale.
This browser is no longer supported.
Upgrade to Microsoft Edge to take advantage of the latest features, security updates, and technical support.
' cx='32' cy='32' r='32' /%3E%3Ctext x='50%25' y='55%25' dominant-baseline='middle' text-anchor='middle' fill='%23FFF' %3EA%3C/text%3E%3C/svg%3E)
I am trying to create a daily snapshot of data from Azure SQL into a newly created csv file.
What I did was just pointed an Azure file share folder as a destination, indicated "File extension" as .csv and ran the regular "Copy data" in Azure Data Factory.
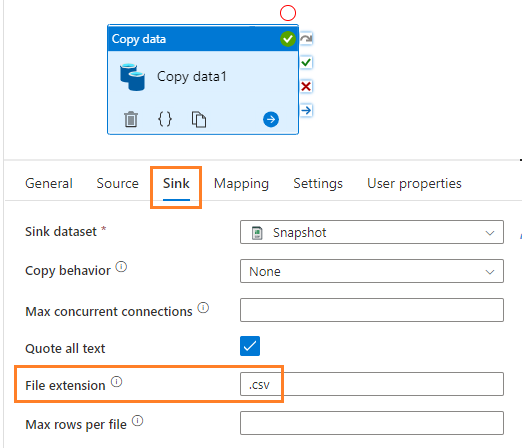
After I ran, what I realized was that the name of csv file is just the name of SQL object, and it did not have any date or time stamp on the csv file name itself.
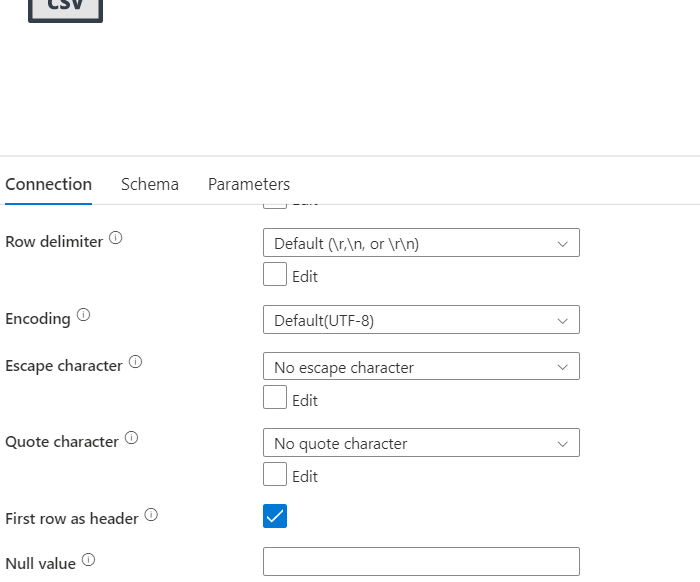
And also, the csv file did not start with header from the source, but started with data on the 1st row.
What I am trying to do is create daily snapshot of SQL data into a new csv file.
So ideally, it would have the "name of object..2022_12_20..csv"
How do I go about doing it in ADF?
Here are requirements:
Thanks.

To create a CSV file with a date stamp and a header using Azure Data Factory, you can follow these steps:
In Azure Data Factory, create a new pipeline and add a Copy Data activity to it.
In the Source tab, specify the source data store and the query that retrieves the data you want to include in the CSV file.
In the Sink tab, choose "CSV" as the output format and specify the location where you want to save the file.
To add a date stamp to the file name, you can use dynamic content in the file name field. For example, you can use the expression @{formatDateTime(utcNow(),'yyyyMMdd')} to generate a date stamp in the format YYYYMMDD.
In the Columns tab, specify the column names and data types for the header. You can also specify the column delimiter, row delimiter, and other formatting options.
Run the pipeline to create the CSV file with the date stamp and header.
I hope this helps! Let me know if you have any questions or need further assistance.

Hey,
Enable 1st row as header
for parameterization:
https://www.sqlservercentral.com/articles/dynamically-add-a-timestamp-to-files-in-azure-data-factory