Hi,
The simple messaging scenario's core part of the code
The following code sends the message to the HTML page:
webview->PostWebMessageAsJson(L"{\"SetColor\":\"blue\"}");
And there is related script in HTML:
  window.chrome.webview.addEventListener('message', arg => {
      if ("SetColor" in arg.data) {
          document.getElementById("colorable").style.color = arg.data.SetColor;
      }
There is <p> tag with id <p id="colorable">. When receiving message with arg SetColor, the text color will be set as arg.data.SetColor.
Below is a simple Win32 sample based on Win32_GettingStarted sample.
What you need to do:
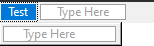
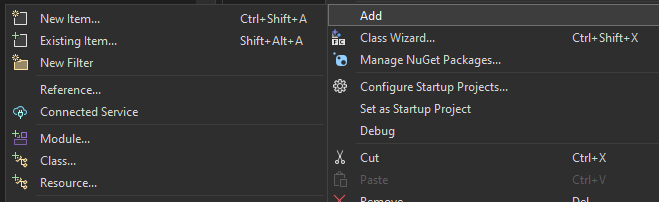
Add a Resource menu (default id:IDR_MENU1).
Add menu item: Test and right click Test-> properties, give it an id IDM_Test
On line: webview->Navigate(L"file:///XXX:/test.html"); ,replace the path.
// compile with: /D_UNICODE /DUNICODE /DWIN32 /D_WINDOWS /c

#include <windows.h>
#include <stdlib.h>
#include <string>
#include <tchar.h>
#include <wrl.h>
#include <wil/com.h>
// <IncludeHeader>
// include WebView2 header
#include "WebView2.h"
// </IncludeHeader>
#include"resource.h"
using namespace Microsoft::WRL;

// Global variables

// The main window class name.
static TCHAR szWindowClass[] = _T("DesktopApp");

// The string that appears in the application's title bar.
static TCHAR szTitle[] = _T("WebView sample");

HINSTANCE hInst;

// Forward declarations of functions included in this code module:
LRESULT CALLBACK WndProc(HWND, UINT, WPARAM, LPARAM);

// Pointer to WebViewController
static wil::com_ptr<ICoreWebView2Controller> webviewController;

// Pointer to WebView window
static wil::com_ptr<ICoreWebView2> webview;

int CALLBACK WinMain(
	_In_ HINSTANCE hInstance,
	_In_ HINSTANCE hPrevInstance,
	_In_ LPSTR     lpCmdLine,
	_In_ int       nCmdShow
)
{
	WNDCLASSEX wcex;

	wcex.cbSize = sizeof(WNDCLASSEX);
	wcex.style = CS_HREDRAW | CS_VREDRAW;
	wcex.lpfnWndProc = WndProc;
	wcex.cbClsExtra = 0;
	wcex.cbWndExtra = 0;
	wcex.hInstance = hInstance;
	wcex.hIcon = LoadIcon(hInstance, IDI_APPLICATION);
	wcex.hCursor = LoadCursor(NULL, IDC_ARROW);
	wcex.hbrBackground = (HBRUSH)(COLOR_WINDOW + 1);
	wcex.lpszMenuName = NULL;
	wcex.lpszClassName = szWindowClass;
	wcex.hIconSm = LoadIcon(wcex.hInstance, IDI_APPLICATION);

	if (!RegisterClassEx(&wcex))
	{
		MessageBox(NULL,
			_T("Call to RegisterClassEx failed!"),
			_T("Windows Desktop Guided Tour"),
			NULL);

		return 1;
	}

	// Store instance handle in our global variable
	hInst = hInstance;

	// The parameters to CreateWindow explained:
	// szWindowClass: the name of the application
	// szTitle: the text that appears in the title bar
	// WS_OVERLAPPEDWINDOW: the type of window to create
	// CW_USEDEFAULT, CW_USEDEFAULT: initial position (x, y)
	// 500, 100: initial size (width, length)
	// NULL: the parent of this window
	// NULL: this application does not have a menu bar
	// hInstance: the first parameter from WinMain
	// NULL: not used in this application
	HWND hWnd = CreateWindow(
		szWindowClass,
		szTitle,
		WS_OVERLAPPEDWINDOW,
		CW_USEDEFAULT, CW_USEDEFAULT,
		1200, 900,
		NULL,
		NULL,
		hInstance,
		NULL
	);

	if (!hWnd)
	{
		MessageBox(NULL,
			_T("Call to CreateWindow failed!"),
			_T("Windows Desktop Guided Tour"),
			NULL);

		return 1;
	}
	HMENU hMenu = LoadMenu(hInst, MAKEINTRESOURCE(IDR_MENU1));
	SetMenu(hWnd, hMenu);

	// The parameters to ShowWindow explained:
	// hWnd: the value returned from CreateWindow
	// nCmdShow: the fourth parameter from WinMain
	ShowWindow(hWnd,
		nCmdShow);
	UpdateWindow(hWnd);

	// <-- WebView2 sample code starts here -->
	// Step 3 - Create a single WebView within the parent window
	// Locate the browser and set up the environment for WebView
	CreateCoreWebView2EnvironmentWithOptions(nullptr, nullptr, nullptr,
		Callback<ICoreWebView2CreateCoreWebView2EnvironmentCompletedHandler>(
			[hWnd](HRESULT result, ICoreWebView2Environment* env) -> HRESULT {

				// Create a CoreWebView2Controller and get the associated CoreWebView2 whose parent is the main window hWnd
				env->CreateCoreWebView2Controller(hWnd, Callback<ICoreWebView2CreateCoreWebView2ControllerCompletedHandler>(
					[hWnd](HRESULT result, ICoreWebView2Controller* controller) -> HRESULT {
						if (controller != nullptr) {
							webviewController = controller;
							webviewController->get_CoreWebView2(&webview);
						}

						// Add a few settings for the webview
						// The demo step is redundant since the values are the default settings
						wil::com_ptr<ICoreWebView2Settings> settings;
						webview->get_Settings(&settings);
						settings->put_IsScriptEnabled(TRUE);
						settings->put_AreDefaultScriptDialogsEnabled(TRUE);
						settings->put_IsWebMessageEnabled(TRUE);

						// Resize WebView to fit the bounds of the parent window
						RECT bounds;
						GetClientRect(hWnd, &bounds);
						webviewController->put_Bounds(bounds);

						// Schedule an async task to navigate to Bing
						webview->Navigate(L"file:///XXX:/test.html");


						// <NavigationEvents>
						// Step 4 - Navigation events
						// register an ICoreWebView2NavigationStartingEventHandler to cancel any non-https navigation
						EventRegistrationToken token;
						webview->add_NavigationStarting(Callback<ICoreWebView2NavigationStartingEventHandler>(
							[](ICoreWebView2* webview, ICoreWebView2NavigationStartingEventArgs* args) -> HRESULT {
								wil::unique_cotaskmem_string uri;
								args->get_Uri(&uri);

								std::wstring source(uri.get());
								if (source.substr(0, 5) != L"https") {
									//args->put_Cancel(true);
								}
								return S_OK;
							}).Get(), &token);
						// </NavigationEvents>

						// <Scripting>
						// Step 5 - Scripting
						// Schedule an async task to add initialization script that freezes the Object object
						webview->AddScriptToExecuteOnDocumentCreated(L"Object.freeze(Object);", nullptr);
						// Schedule an async task to get the document URL
						webview->ExecuteScript(L"window.document.URL;", Callback<ICoreWebView2ExecuteScriptCompletedHandler>(
							[](HRESULT errorCode, LPCWSTR resultObjectAsJson) -> HRESULT {
								LPCWSTR URL = resultObjectAsJson;
								//doSomethingWithURL(URL);
								return S_OK;
							}).Get());
						// </Scripting>

						// <CommunicationHostWeb>
						// Step 6 - Communication between host and web content
						// Set an event handler for the host to return received message back to the web content
						webview->add_WebMessageReceived(Callback<ICoreWebView2WebMessageReceivedEventHandler>(
							[](ICoreWebView2* webview, ICoreWebView2WebMessageReceivedEventArgs* args) -> HRESULT {
								wil::unique_cotaskmem_string message;
								args->TryGetWebMessageAsString(&message);
								// processMessage(&message);
								webview->PostWebMessageAsString(message.get());
								return S_OK;
							}).Get(), &token);

						// Schedule an async task to add initialization script that
						// 1) Add an listener to print message from the host
						// 2) Post document URL to the host
						webview->AddScriptToExecuteOnDocumentCreated(
							L"window.chrome.webview.addEventListener(\'message\', event => alert(event.data));" \
							L"window.chrome.webview.postMessage(window.document.URL);",
							nullptr);
						// </CommunicationHostWeb>

						return S_OK;
					}).Get());
				return S_OK;
			}).Get());


	// <-- WebView2 sample code ends here -->

	// Main message loop:
	MSG msg;
	while (GetMessage(&msg, NULL, 0, 0))
	{
		TranslateMessage(&msg);
		DispatchMessage(&msg);
	}

	return (int)msg.wParam;
}

//  FUNCTION: WndProc(HWND, UINT, WPARAM, LPARAM)
//
//  PURPOSE:  Processes messages for the main window.
//
//  WM_DESTROY  - post a quit message and return
LRESULT CALLBACK WndProc(HWND hWnd, UINT message, WPARAM wParam, LPARAM lParam)
{
	TCHAR greeting[] = _T("Hello, Windows desktop!");

	switch (message)
	{
	case WM_COMMAND:

		// Test for the identifier of a command item.

		switch (LOWORD(wParam))
		{
		case IDM_Test:
		{
			webview->PostWebMessageAsJson(L"{\"SetColor\":\"blue\"}");
		}
			break;


			// Process other menu commands.

		default:
			break;

		}
		return 0;

	case WM_SIZE:
		if (webviewController != nullptr) {
			RECT bounds;
			GetClientRect(hWnd, &bounds);
			webviewController->put_Bounds(bounds);
		};
		break;
	case WM_DESTROY:
		PostQuitMessage(0);
		break;
	default:
		return DefWindowProc(hWnd, message, wParam, lParam);
		break;
	}

	return 0;
}
Sample HTML:
<!DOCTYPE html>
<html>
<head>
<title>ScenarioWebMessage</title>
<script>
"use strict";
//! [chromeWebView]
window.chrome.webview.addEventListener('message', arg => {
if ("SetColor" in arg.data) {
document.getElementById("colorable").style.color = arg.data.SetColor;
}
});
</script>
</head>
<body>
<h1>WebMessage sample page</h1>
<p>This page demonstrates basic interaction between the host app and the webview by
means of Web Messages.</p>
<h2>Posting Messages</h2>
<p id="colorable">Messages can be posted from the host app to the webview using the
functions <code>ICoreWebView2::PostWebMessageAsJson</code> and
<code>ICoreWebView2::PostWebMessageAsString</code>. Try using the menu item
"Script->Post Message JSON" to send the message <code>{"SetColor":"blue"}</code>.
It should change the text color of this paragraph.</p>
</body>
</html>
Best regards,
Minxin Yu
If the answer is the right solution, please click "Accept Answer" and kindly upvote it. If you have extra questions about this answer, please click "Comment".
Note: Please follow the steps in our documentation to enable e-mail notifications if you want to receive the related email notification for this thread.
' cx='32' cy='32' r='32' /%3E%3Ctext x='50%25' y='55%25' dominant-baseline='middle' text-anchor='middle' fill='%23FFF' %3EPN%3C/text%3E%3C/svg%3E)
' cx='32' cy='32' r='32' /%3E%3Ctext x='50%25' y='55%25' dominant-baseline='middle' text-anchor='middle' fill='%23FFF' %3EMY%3C/text%3E%3C/svg%3E)