The first answer didn't work, but it did reveal new information. So I have edited this entry to reflect what I've learned.
I have a Microsoft Storage Spaces 3 disk "parity" array (presumably a proprietary MS software RAID 5) under Windows 11 pro. Some time ago, 2 of the 3 disks almost simultaneously were marked as "retired". Since it was 2 of 3, it is supposedly irrepairable. However, as WD Reds that aren't that old, with highly filtered power, it seems unlikely for both to go out simultaneously.
I would like to try to get the data off this array before replacing the disks. I believe it should be doable by:
- Changing the status of the storage pool to allow it to be accessed
- Allow writing to the two retired physical disks
- Set the two retired physical disks to "autoselect"
I don't know if we also have to then connect the virtual disk (s) and possibly other take other steps, but it appears the above are likely necessary...
The affected storage space. Note operational status "Read-only"
Here is how it looks from Storage Spaces
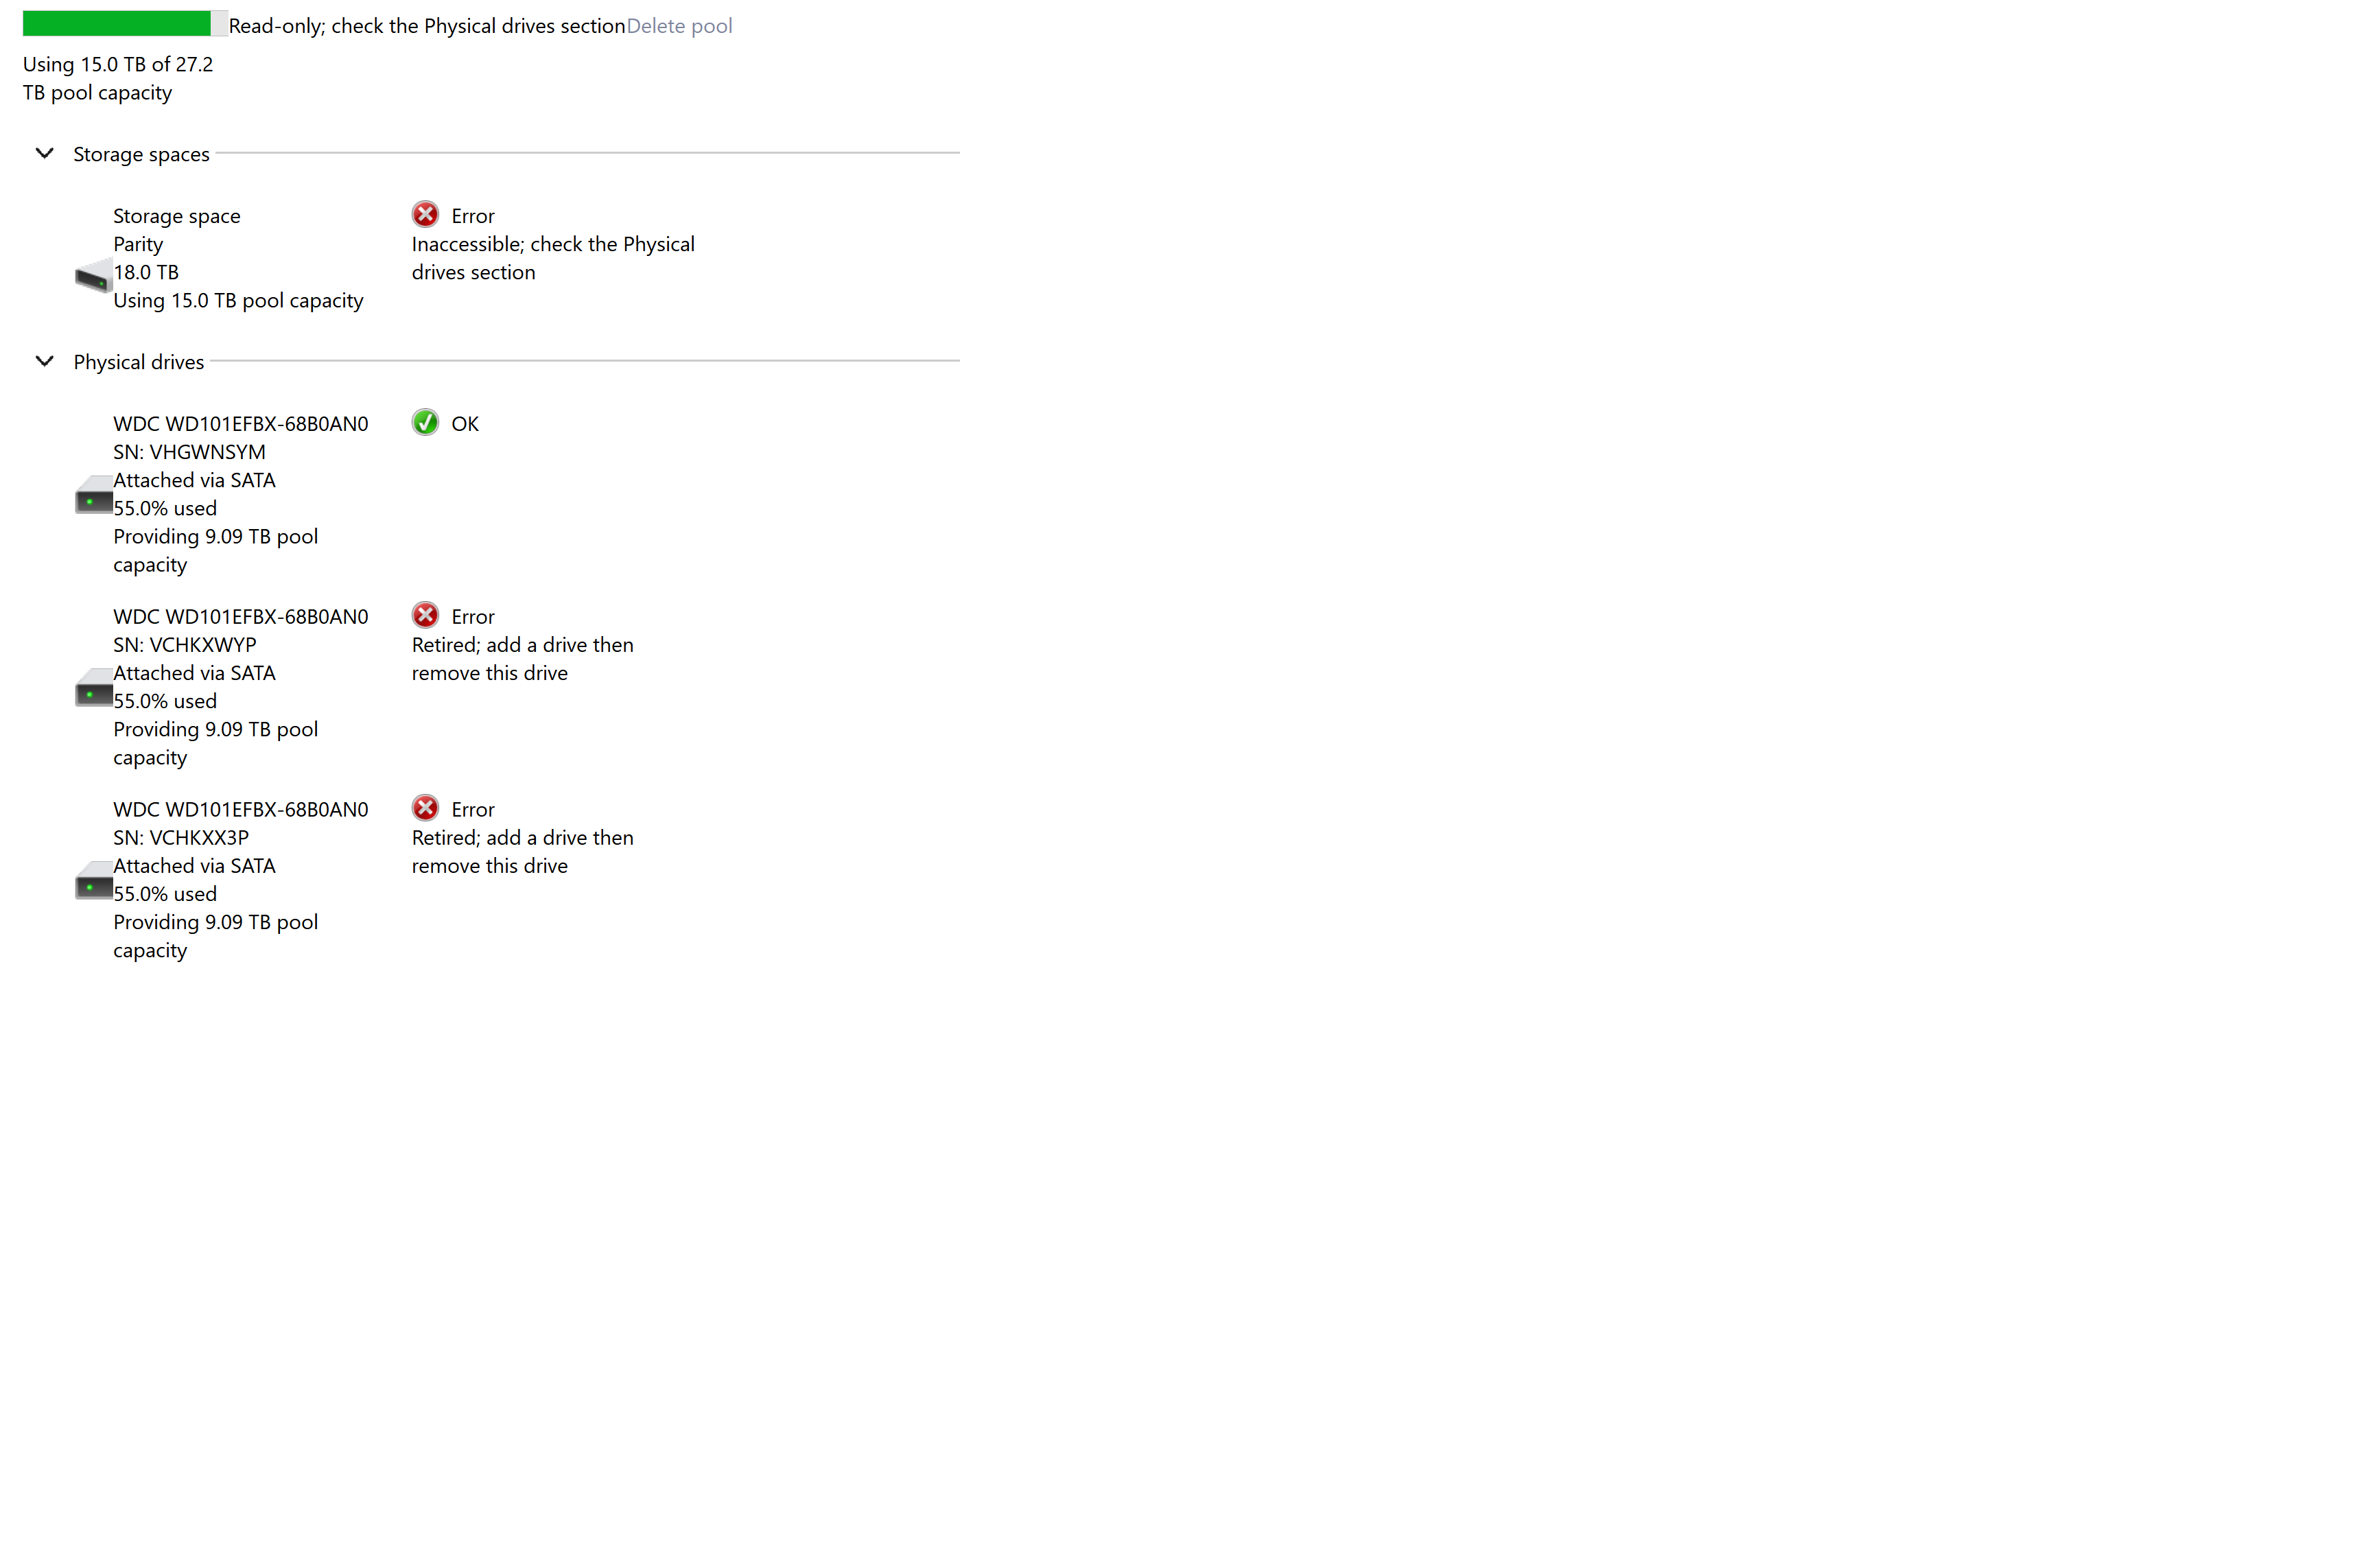
specific info on the physical disks involved

I'm a former computer professional... but don't know powershell well enough, nor do I know the Storage Spaces implementation of this parity array well enough. I suspect all that needs to be done is change the appropriate metadata on these disks. But, I've failed spectacularly so far and the chat techs have failed. Level 2 techs were scheduled to call.... but I never heard from them.
Please help.
' cx='32' cy='32' r='32' /%3E%3Ctext x='50%25' y='55%25' dominant-baseline='middle' text-anchor='middle' fill='%23FFF' %3ETH%3C/text%3E%3C/svg%3E)
' cx='32' cy='32' r='32' /%3E%3Ctext x='50%25' y='55%25' dominant-baseline='middle' text-anchor='middle' fill='%23FFF' %3EA%3C/text%3E%3C/svg%3E)