Hi, I am Henry, I want to discuss with you with this topic.
"I always used to download the 1-2 month demo images for testing software on, but these developer-ready VM VHD images are no longer published. I am going to assume that a permanent decision to stop these was made, and want to know why updated documentation for people like myself is not clear anymore."
For this one, I tried to research the reason behind the discontinuation of the developer-ready VM VHD images, but I couldn’t find any definitive explanation either.
"I am just plain unable to find any answered questions that show that using Hyper-V on Windows 11 will be easy somehow. Clues please. HyperV starts the Windows 11 installer I grabbed off of https://www.microsoft.com/en-gb/evalcenter/download-windows-11-enterprise and then decides it just will not install due to incompatibility. There is no easy to find documentation explaining working settings I need to tweak or choose Gen1/Gen2 etc in VShere, after trying a few things, still no joy."
I see you mentioned vSphere. Are you referring to VMware vSphere? If so, I’m sorry, but I won’t be able to assist you with installing a VM using VMware. However, it seems like you’re trying to use Hyper-V on Windows 11 to install and run a virtual machine with the Windows 11 Enterprise OS but are encountering issues with settings and compatibility. If you’d like, I can guide you step-by-step on how to set up a new VM using Hyper-V on Windows 11.
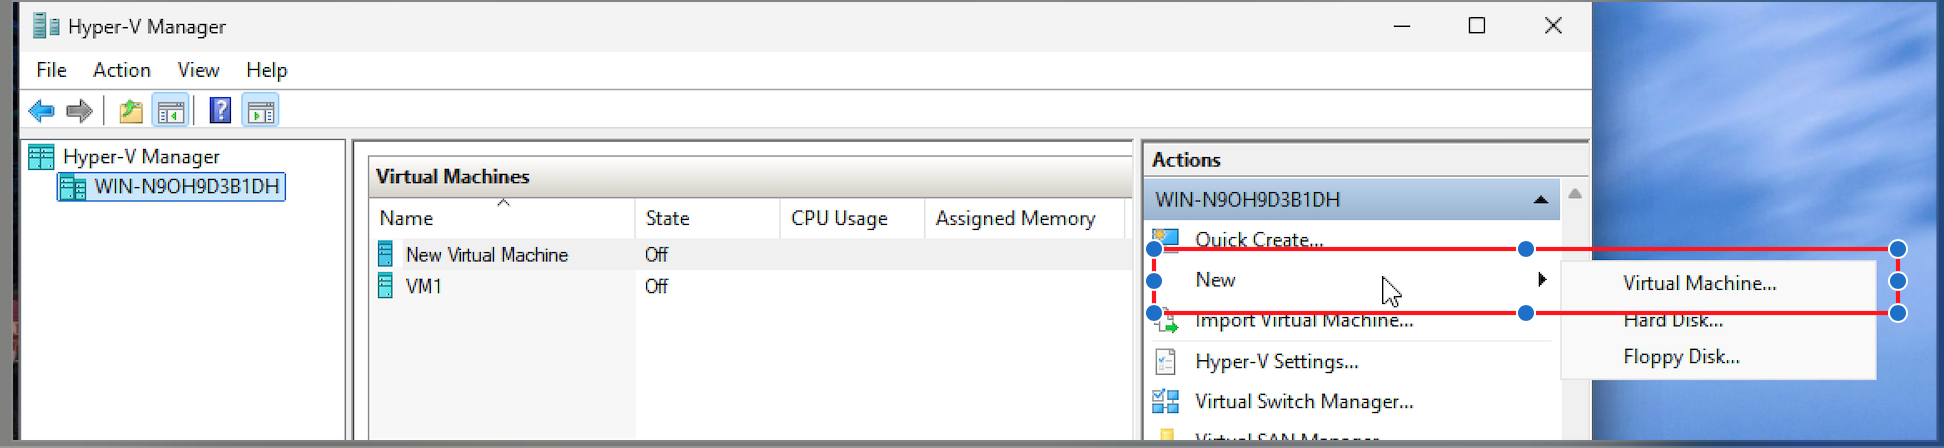
Step 1: Access Hyper-V Manager
- From the Start menu, search for Hyper-V Manager.
- If it doesn’t appear, follow these steps to enable it:
- Navigate to "Turn Windows features on or off" through the Control Panel or Settings app.
- Check the boxes for "Hyper-V", "Hyper-V Management Tools", and "Hyper-V Platform".
- Click "OK" and restart your computer.
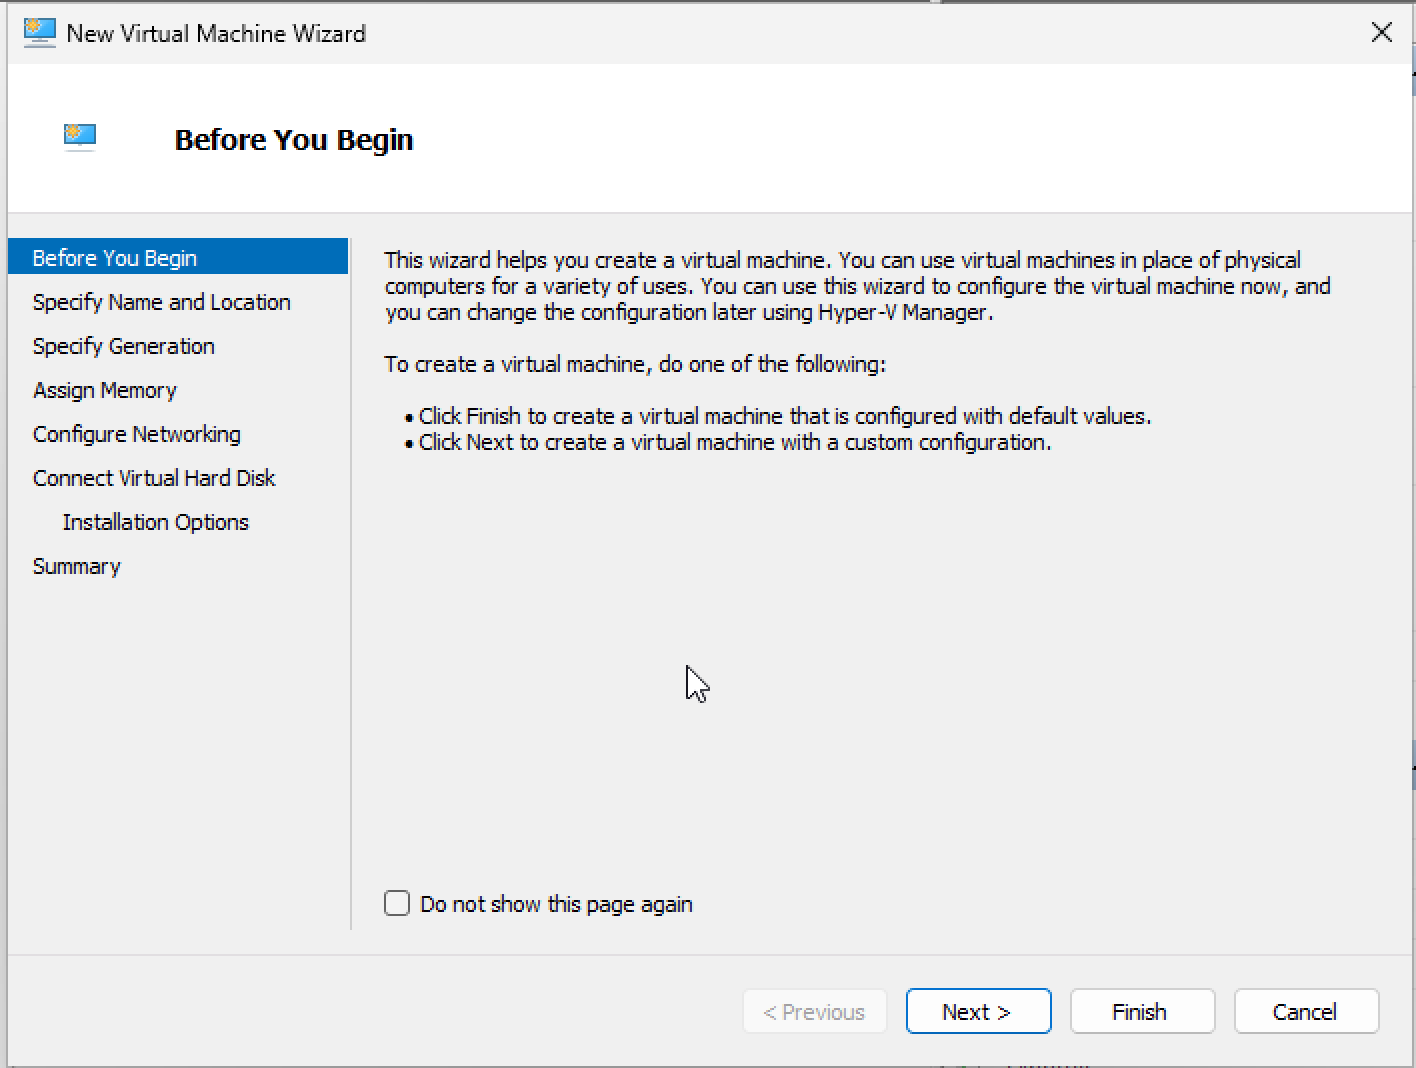
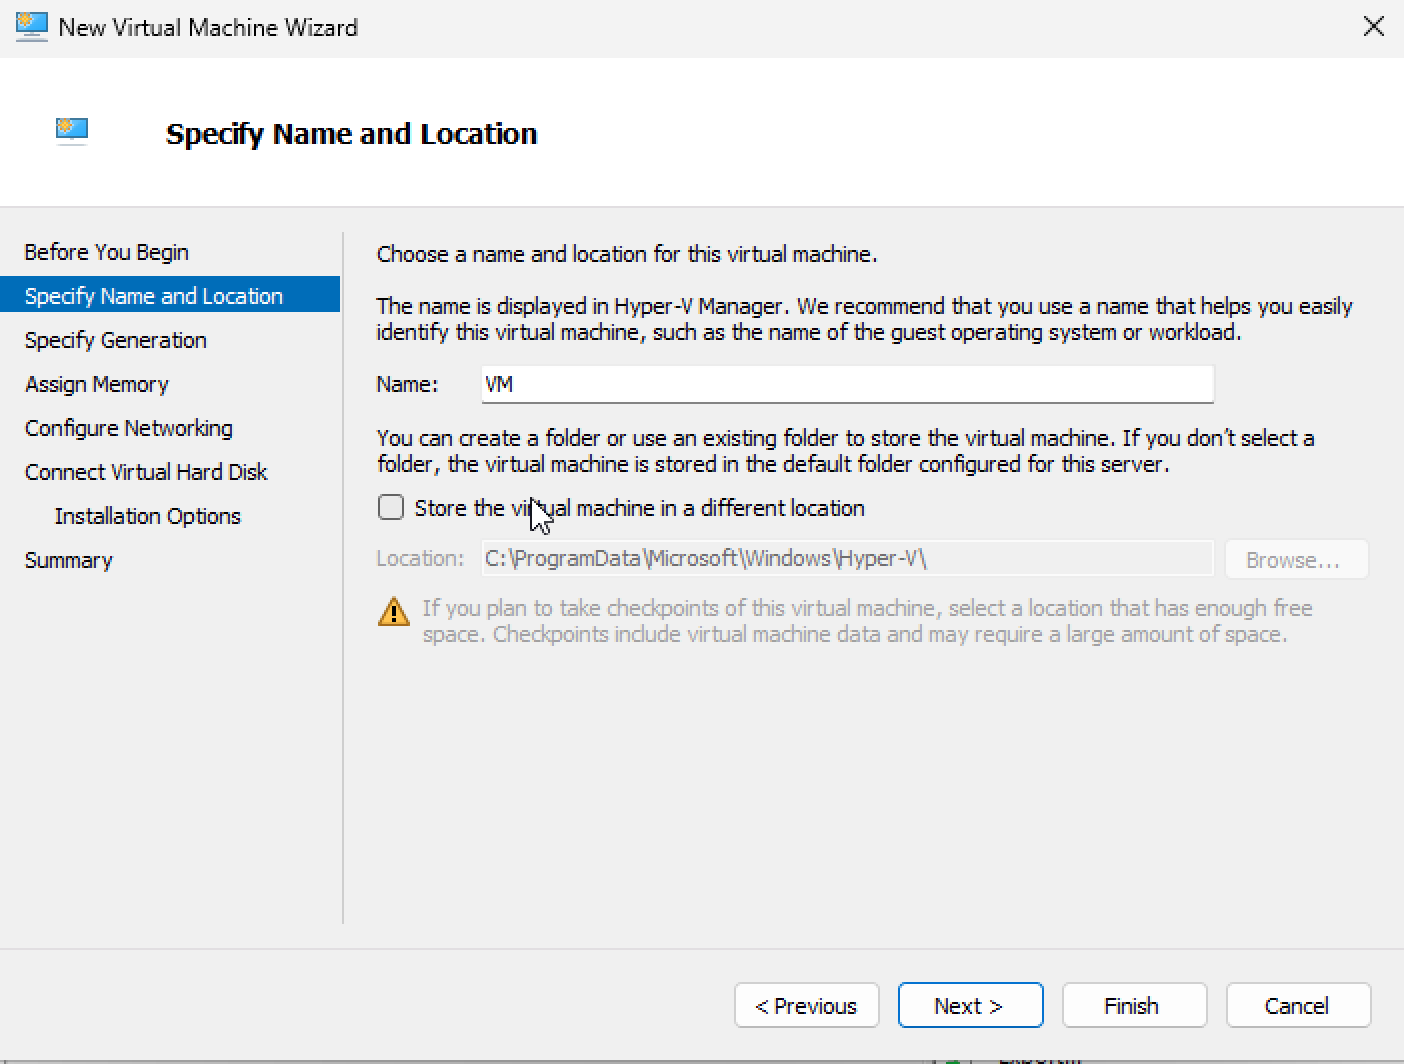
Step 2: Create a New VM
- Open Hyper-V Manager and begin setting up a new virtual machine. You can refer to this official guide for details about configuring generation, RAM, and disk.
https://learn.microsoft.com/en-us/windows-server/virtualization/hyper-v/get-started/create-a-virtual-machine-in-hyper-v?tabs=hyper-v-manager
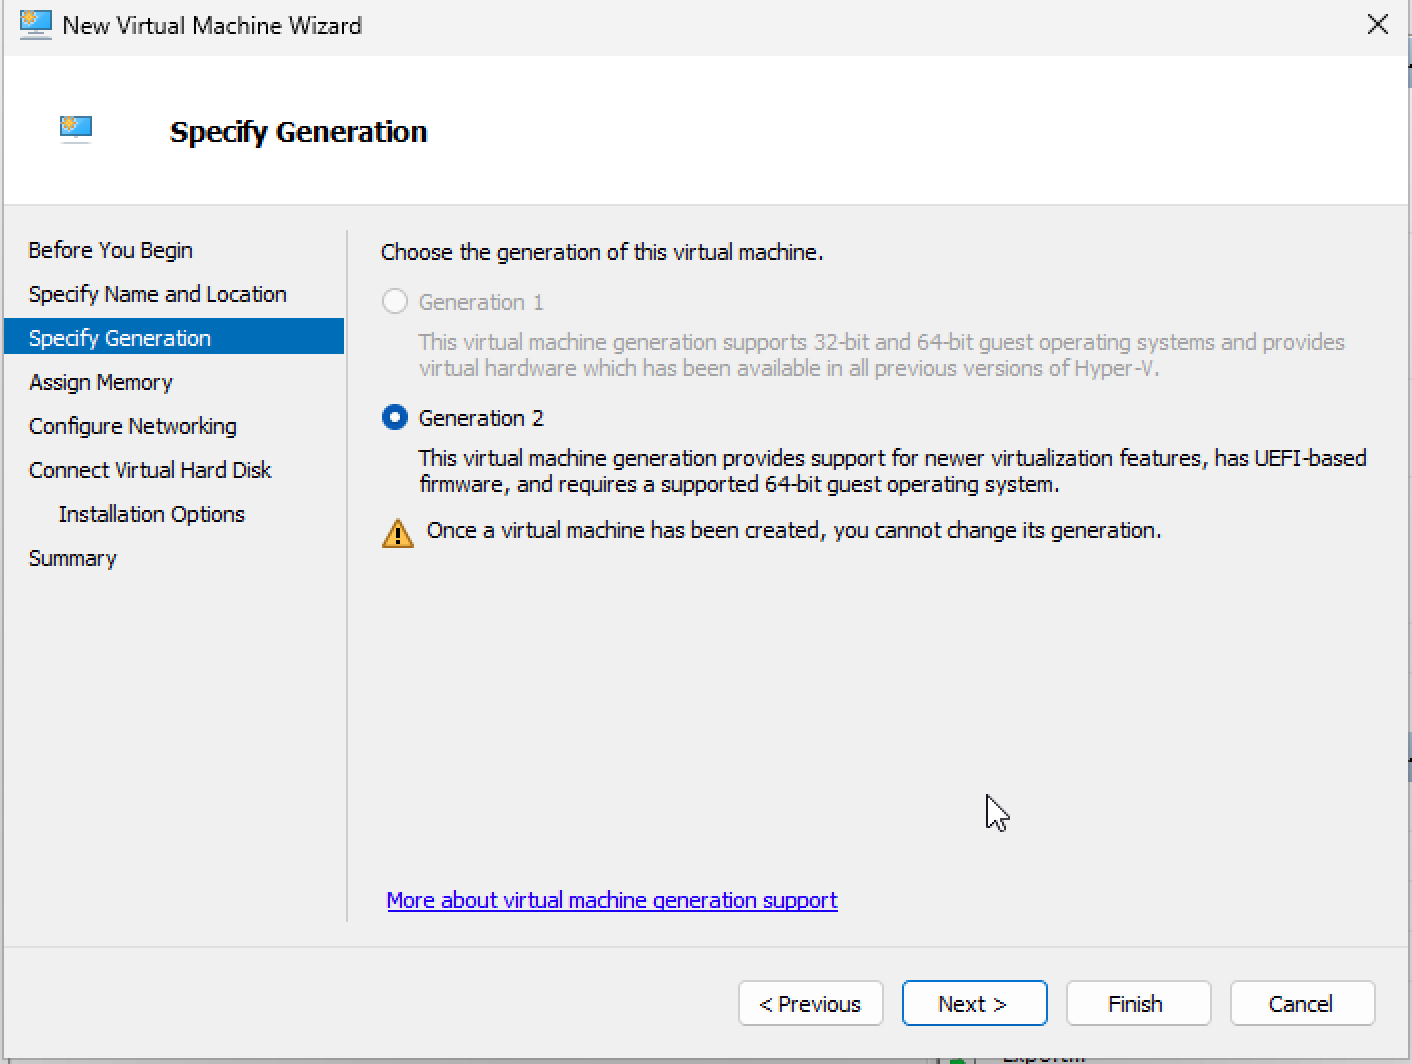
Step 3: Select the Virtual Machine Generation
- When creating the VM, decide whether to use Generation 1 or Generation 2. For more details about these options, refer to this link: Should I create a Generation 1 or 2 VM?
https://learn.microsoft.com/en-us/windows-server/virtualization/hyper-v/plan/should-i-create-a-generation-1-or-2-virtual-machine-in-hyper-v
Step 4: Configure VM Resources
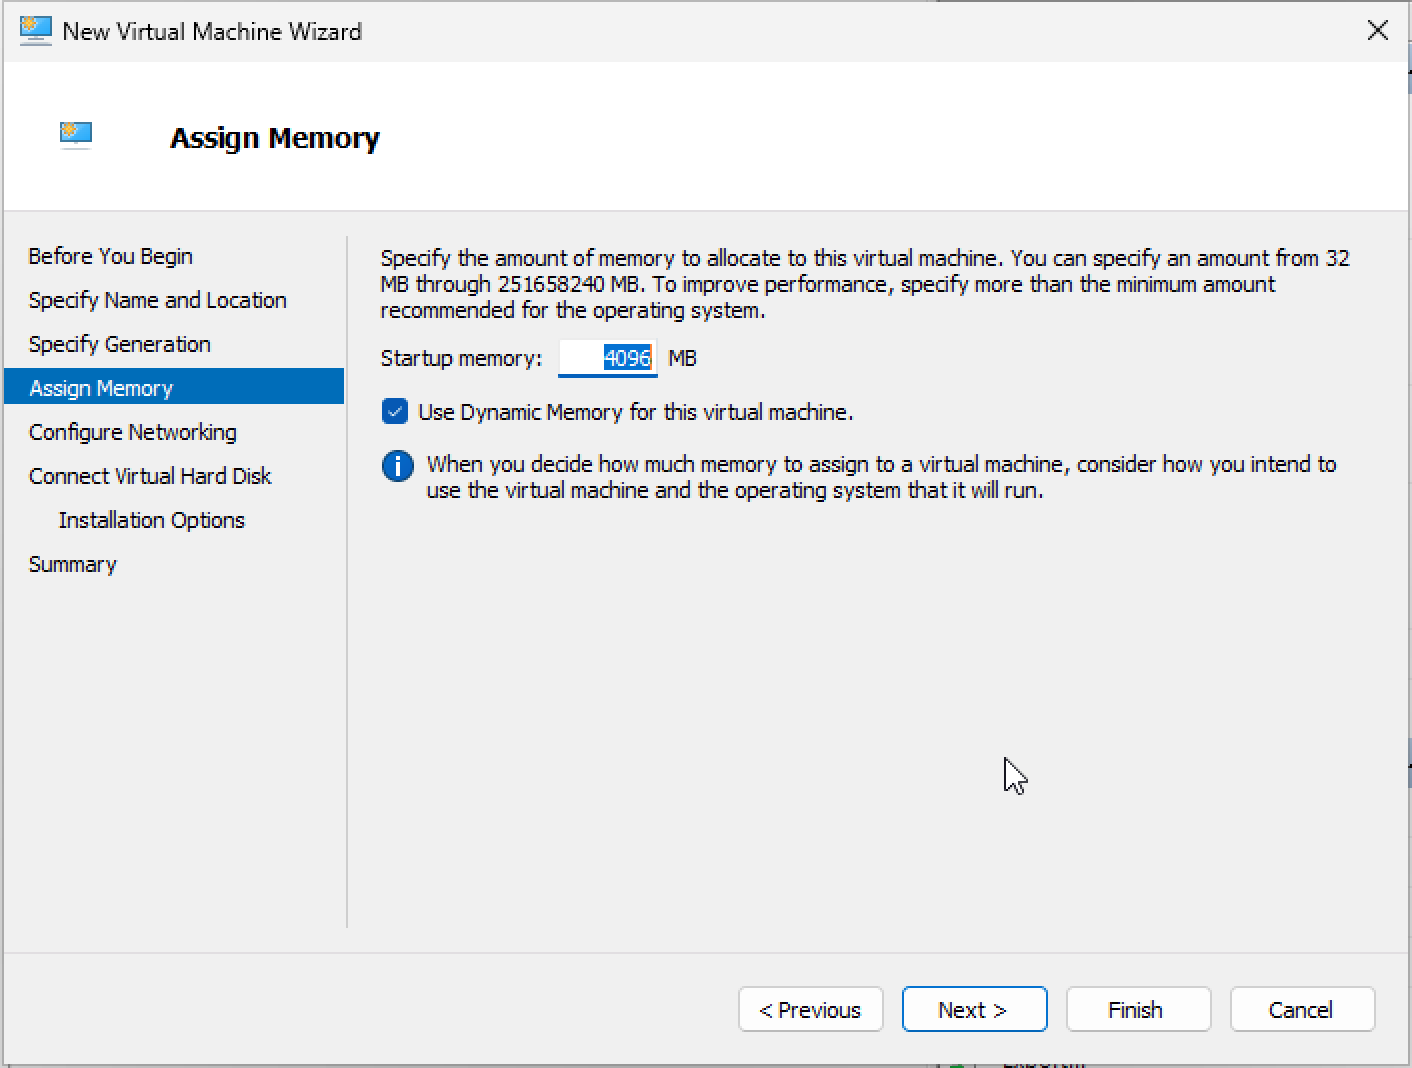
- Memory: Since the VM shares memory with the host machine, set the startup memory conservatively (e.g., 4GB or 8GB).
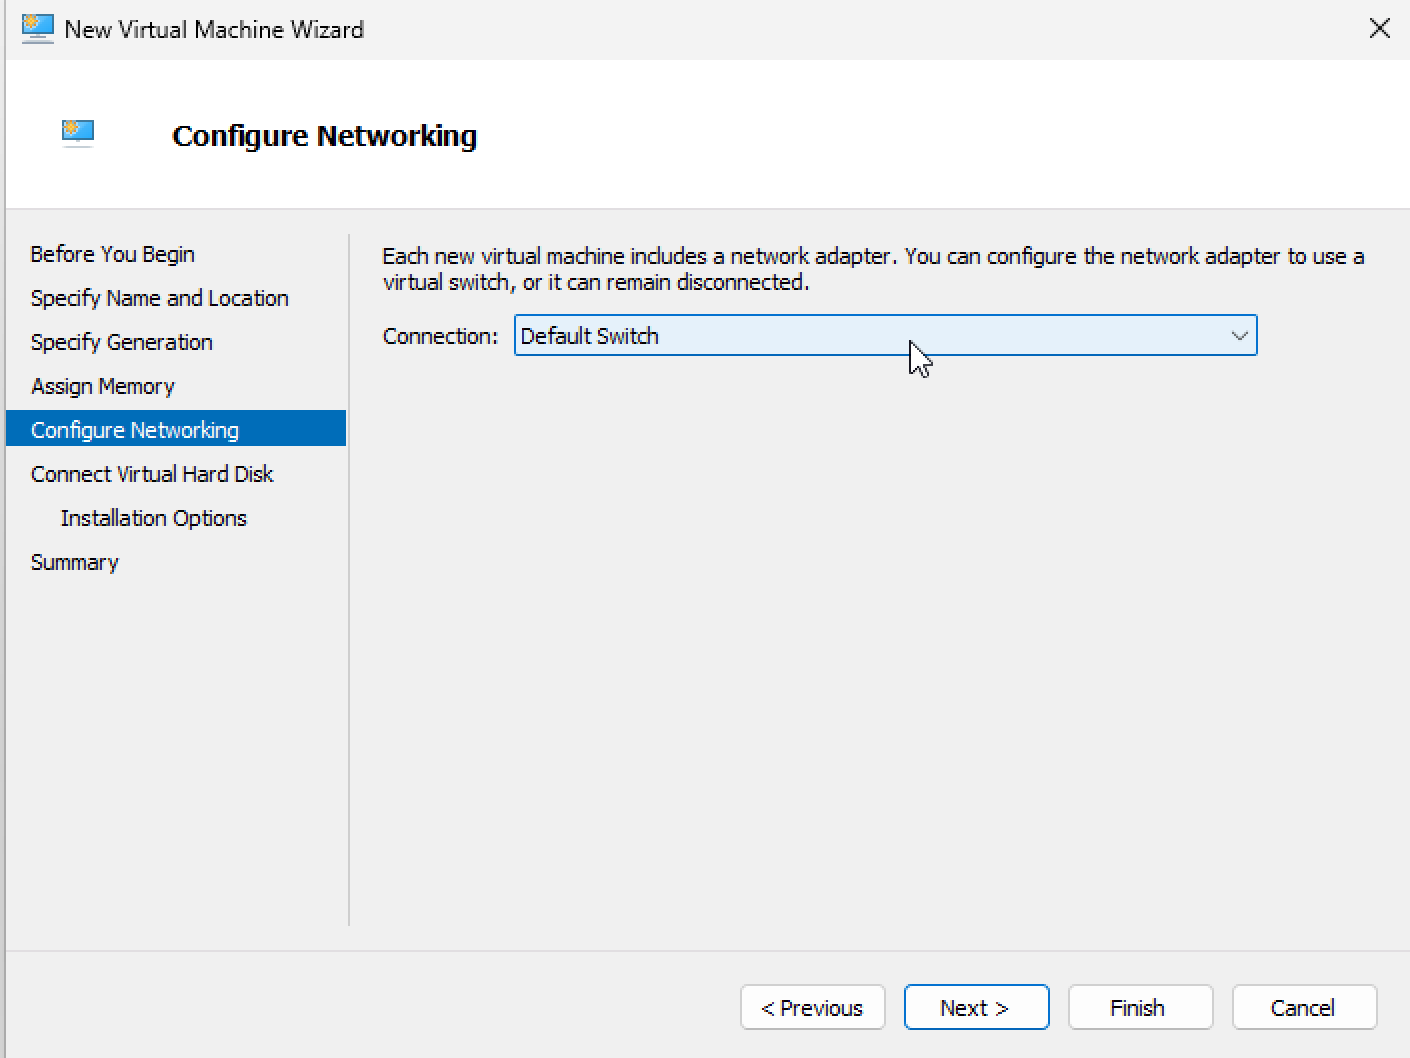
- Networking: Use the default switch configuration, which is pre-set on the host machine.
- Storage: Each VM requires a virtual hard disk. Ensure you allocate disk size cautiously to avoid exhausting the host machine’s storage.
-

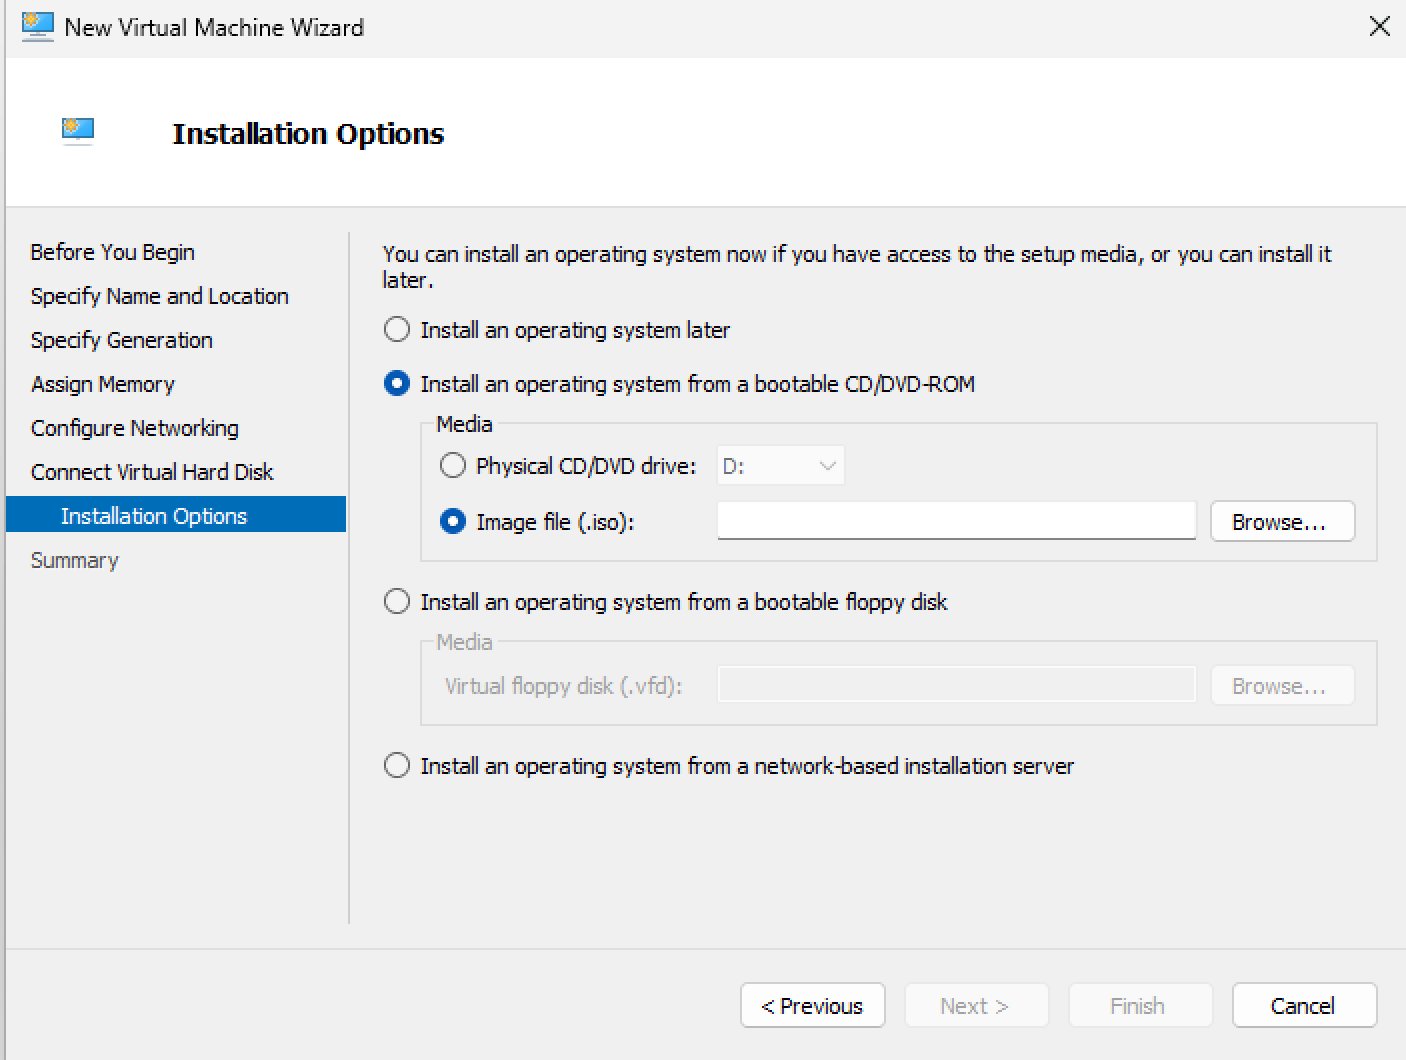
Step 5: Install the Operating System
- Download the installation media for Windows 11:
- Use the Windows 11 Enterprise Evaluation if you need a trial version.
- Alternatively, use the Media Creation Tool and convert it to an ISO file if you face issues downloading ISO files directly.
- Import the ISO file to the VM during setup.
- As we need to install the OS, we you can access this link to download the media and then convert it to iso and import to the image file https://www.microsoft.com/en-gb/evalcenter/download-windows-11-enterprise or you can download the media creation and then convert to iso if you got issue with iso directly https://www.microsoft.com/en-us/software-download/windows11
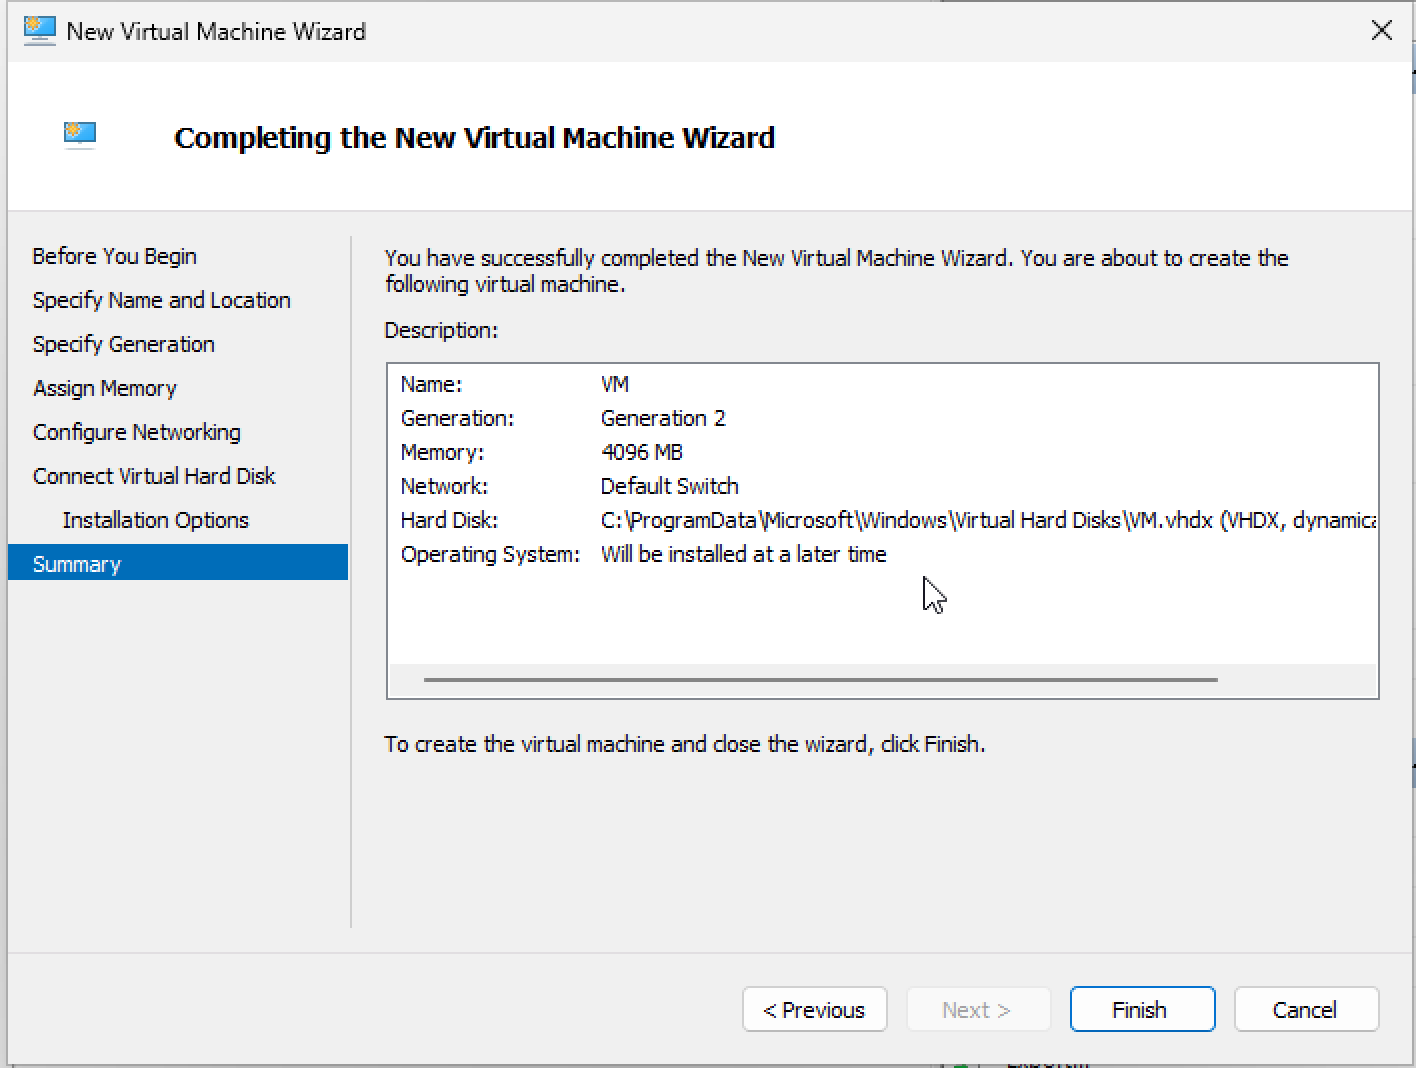
Step 6: Finalize and Start the VM
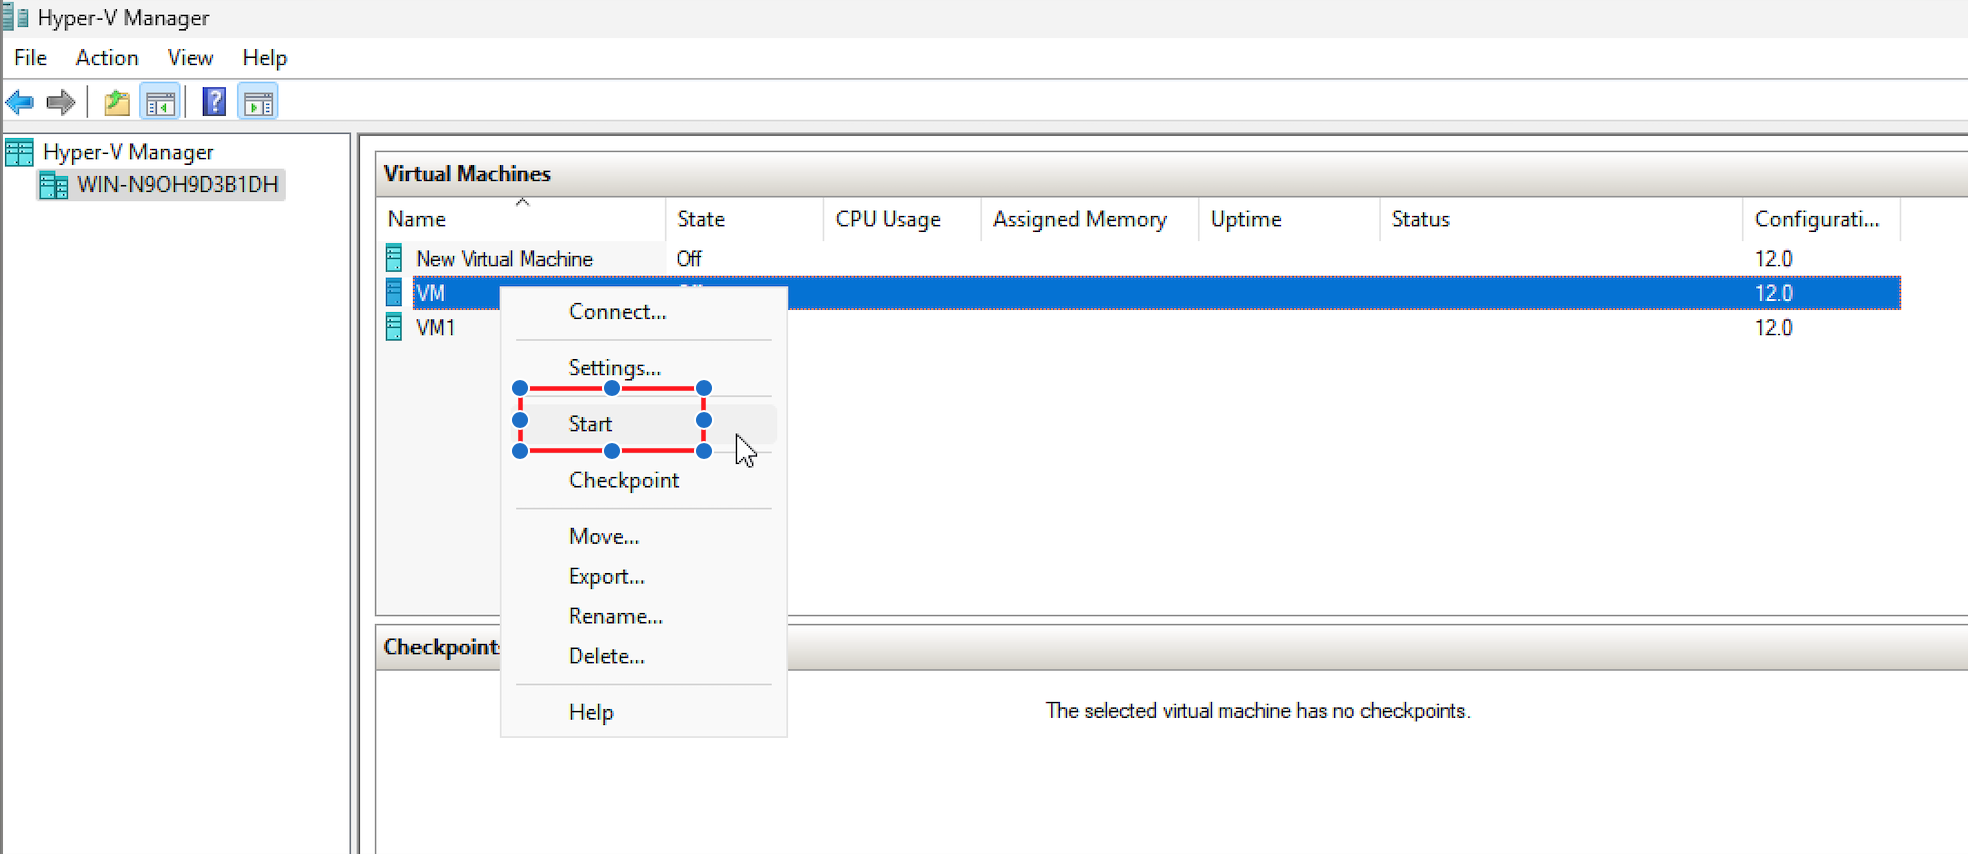
- After completing the configuration, click Finish, and the VM will appear under the "Virtual Machine" list in Hyper-V Manager.

- Right-click the new VM, select Start, and proceed with the installation process. Once complete, you can fully utilize Hyper-V to run Windows 11 on your host machine.
Let me know if you need more discussion about this set up.
' cx='32' cy='32' r='32' /%3E%3Ctext x='50%25' y='55%25' dominant-baseline='middle' text-anchor='middle' fill='%23FFF' %3ECB%3C/text%3E%3C/svg%3E)
' cx='32' cy='32' r='32' /%3E%3Ctext x='50%25' y='55%25' dominant-baseline='middle' text-anchor='middle' fill='%23FFF' %3EES%3C/text%3E%3C/svg%3E)
' cx='32' cy='32' r='32' /%3E%3Ctext x='50%25' y='55%25' dominant-baseline='middle' text-anchor='middle' fill='%23FFF' %3EHM%3C/text%3E%3C/svg%3E)