Hi, you do not see the role “Trusted Signing Identity Verifier” because it appears only in the scope of the Trusted Signing account, not at the subscription or resource group level: first register the Microsoft.CodeSigning provider (az provider register --namespace Microsoft.CodeSigning), then create or open your Trusted Signing Account (Home - Trusted Signing Accounts - + Create) and, inside that account, go to Access control (IAM), click Add - Role assignment, search for “Trusted Signing Identity Verifier”, choose the role, select yourself among the members and confirm; if you do not have permission to assign roles on that scope ask an Owner or a Global/Privileged-Role Admin to do it for you; after a few seconds of propagation, reload the page: the role will be assigned, the “New identity” button in the Identity Validation section will become clickable and you will be able to complete the verification needed to sign your software.
cannot add Trusted Signing Identity Verifier to as Owner and User Access Administrator
https://x.com/winnieletsgo/status/1937636519134769378
I am trying to get Trusted Signing working to code sign my desktop app. I am prevented from adding any role on my azure instance in any IAP panel.
I have followed the docs: https://learn.microsoft.com/en-us/azure/trusted-signing/quickstart.
I keep getting stuck on the identity verification part where i need to add the role.
The button to select the role and add it is not there.
I am the Owner and the User Access Administrator
Flagged this on Twitter and was told to make a question here.
Azure Trusted Signing
2 answers
Sort by: Most helpful
-
-
Raja Pothuraju 23,465 Reputation points Microsoft External Staff Moderator
2025-06-30T05:22:38.5166667+00:00 Hello snoolord,
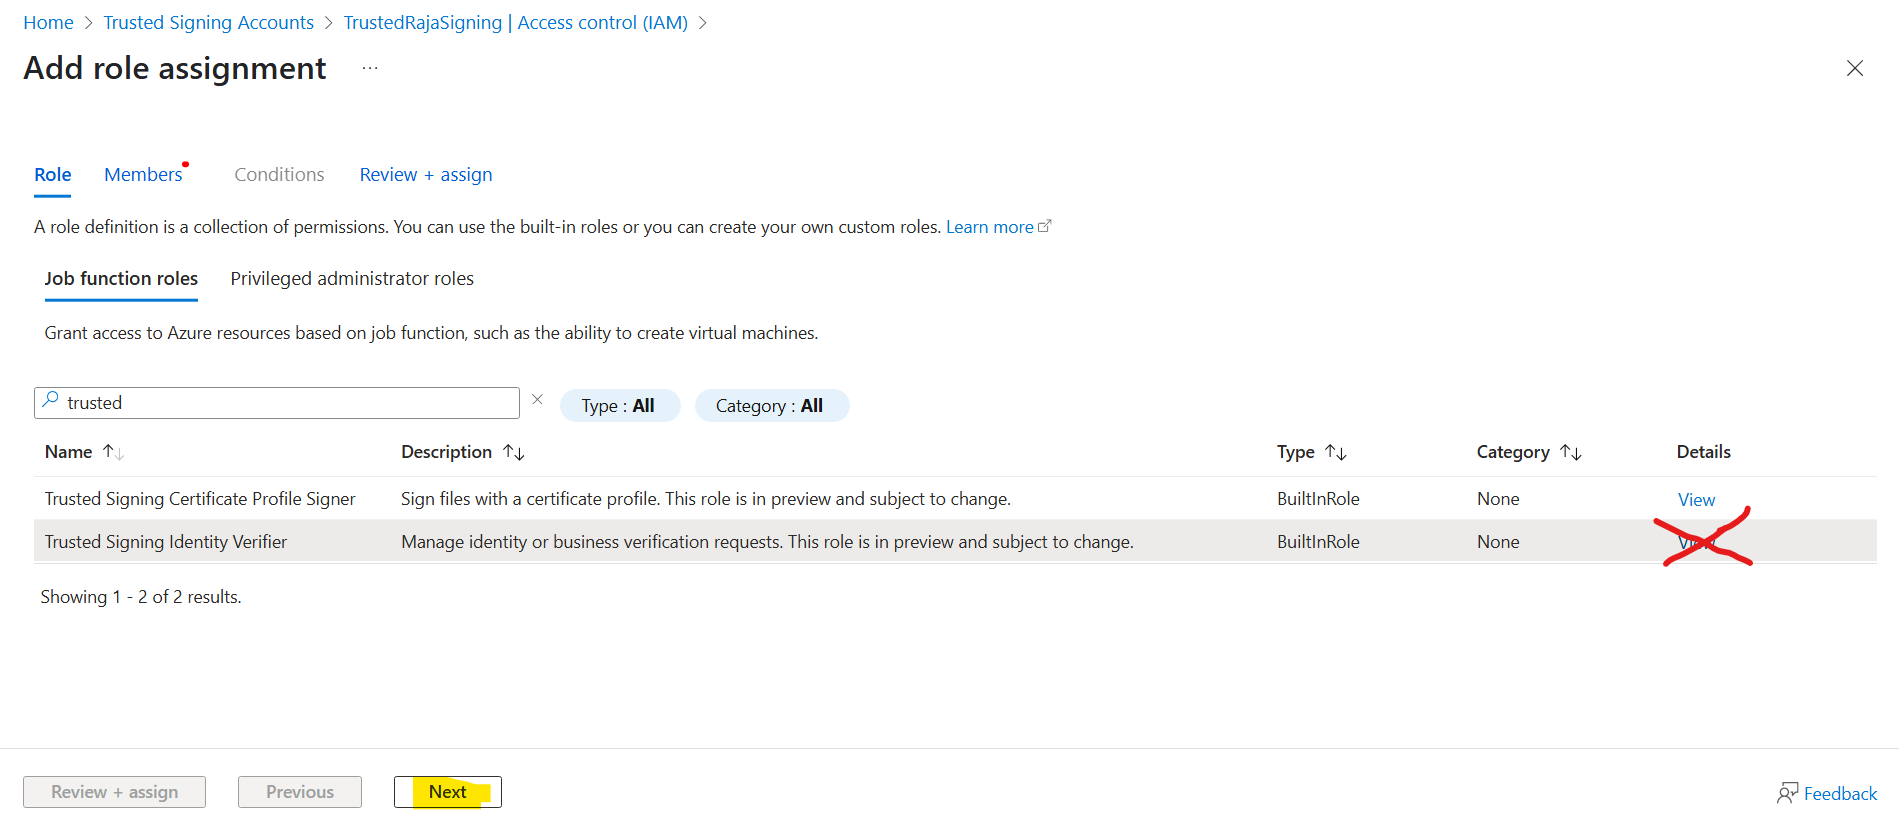
Based on your description, I understand that you’re unable to assign the Trusted Signing Identity Verifier role to your trusted signing account. This is a built-in role — when you click View, it only shows you the actions the role allows. I see that you’re clicking View and expecting an option to assign it there.
To assign the role, please close the View dialog window and click Next in the bottom left corner to continue with the assignment steps. Please refer to the screenshot below for reference.
Once you click Next, you’ll see the Assign access to page, where you can select your user account.
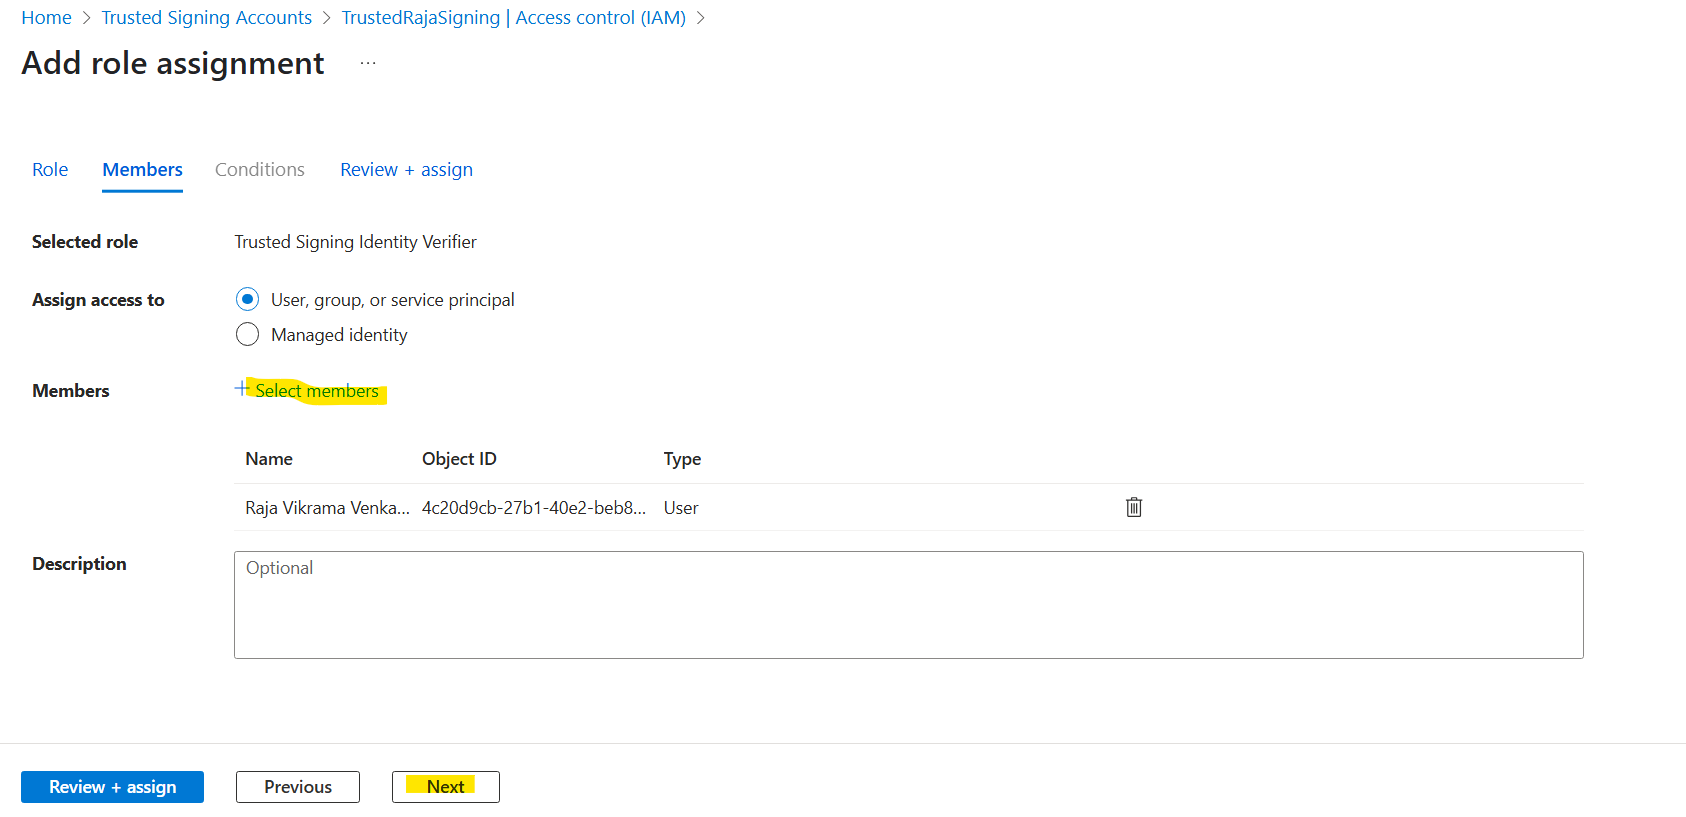
After selecting your account, click Next, then Review + assign to complete the role assignment.