' cx='32' cy='32' r='32' /%3E%3Ctext x='50%25' y='55%25' dominant-baseline='middle' text-anchor='middle' fill='%23FFF' %3EMT%3C/text%3E%3C/svg%3E)
3,283 questions

Welcome to the Microsoft Q&A (Preview) platform. Happy to answer your question.
Please follow these steps to delete your Azure AD B2C tenant:
- Delete all the User flows (policies) in your Azure AD B2C tenant.
- Delete all the Applications you registered in your Azure AD B2C tenant.
- Next, sign in to the Azure portal as the Subscription Administrator. Use the same work or school account or the same Microsoft account that you used to sign up for Azure.
- Switch to the Azure AD B2C tenant you want to delete.
- Select Azure Active Directory on the left-hand menu.
- Under Manage, select Users.
- Select each user in turn (exclude the Subscription Administrator user you are currently signed in as). Select Delete at the bottom of the page and select YES when prompted.
- Under Manage, select App registrations (or App registrations (Legacy)).
- Select View all applications
- Select the application named b2c-extensions-app, select Delete, and then select Yes when prompted.
- Under Manage, select User settings.
- If present, under LinkedIn account connections, select No, then select Save.
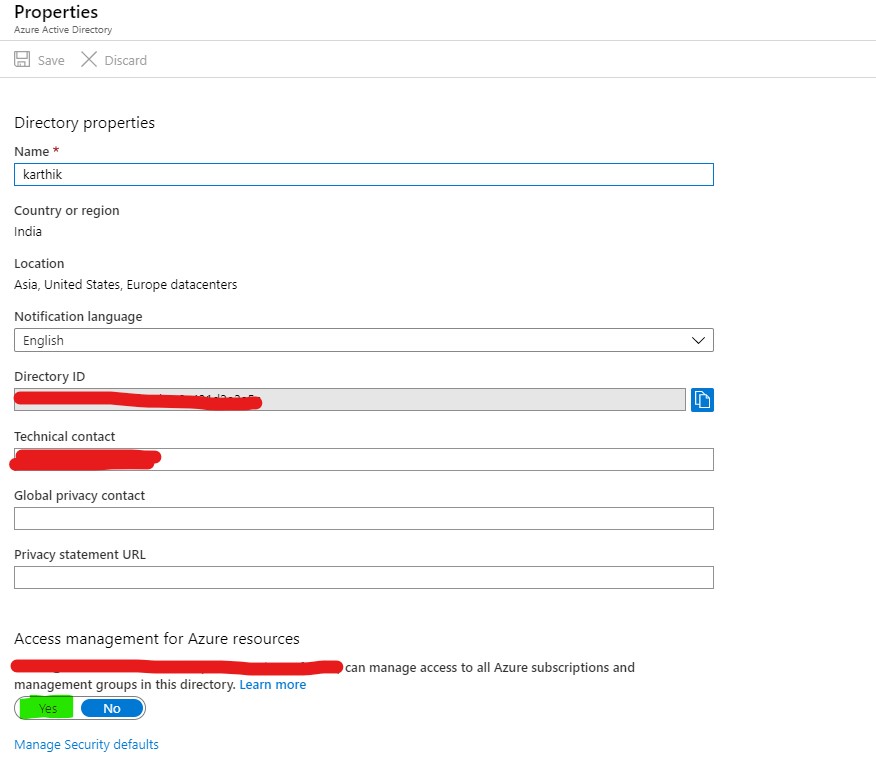
- Under Manage, select Properties
- Under Access management for Azure resources, select Yes, and then select Save.
- Sign out of the Azure portal and then sign back in to refresh your access.
- Select Azure Active Directory on the left-hand menu.
- On the Overview page, select Delete directory. Follow the on-screen instructions to complete the process.

' cx='32' cy='32' r='32' /%3E%3Ctext x='50%25' y='55%25' dominant-baseline='middle' text-anchor='middle' fill='%23FFF' %3ECG%3C/text%3E%3C/svg%3E)

' cx='32' cy='32' r='32' /%3E%3Ctext x='50%25' y='55%25' dominant-baseline='middle' text-anchor='middle' fill='%23FFF' %3EM%3C/text%3E%3C/svg%3E)


' cx='32' cy='32' r='32' /%3E%3Ctext x='50%25' y='55%25' dominant-baseline='middle' text-anchor='middle' fill='%23FFF' %3ESS%3C/text%3E%3C/svg%3E)
' cx='32' cy='32' r='32' /%3E%3Ctext x='50%25' y='55%25' dominant-baseline='middle' text-anchor='middle' fill='%23FFF' %3EJB%3C/text%3E%3C/svg%3E)