Migrate local groups from 2008 to 2019 Server

gardenzwerg 21 Reputation points
2020-07-30T06:26:46.397+00:00

Hi

How can I migrate local groups with SID from our 2008 R2 to 2019 Server ?
Windows Server Migration Tools support only 2008-2012

Thanks

Windows Server Migration
Windows Server: A family of Microsoft server operating systems that support enterprise-level management, data storage, applications, and communications.Migration: The process of making existing applications and data work on a different computer or operating system.
434 questions
{count} votes

2 answers

Sort by: Most helpful
  1. Leon Laude 85,816 Reputation points
    2020-07-30T06:43:01.777+00:00

    Hi,

    You can use Storage Migration Service tool to migrate local users and groups to the new server, it supports from Windows Server 2003 to Windows Server 2019.

    Storage Migration Service overview
    https://learn.microsoft.com/en-us/windows-server/storage/storage-migration-service/overview

    Best regards,
    Leon

    0 comments No comments

  2. Xiaowei He 9,906 Reputation points
    2020-08-03T05:29:43.977+00:00

    Hi,

    I tested in my lab, Windows Server Migration Tools also support Windows Server 2019. Since Server 2008 is out of support, so I tested from Windows Server 2016 to Server 2019, you may use the command on Server 2008 instead of the command on Server 2016.

    Below are the detailed steps:

    ==================

    1. Install Windows Server Migration Tool both on Server 2016 (you may install on Server 2008) and Server 2019.
    2. On Server 2016 use the following command to export Local group and users:

    SmigDeploy.exe /package /architecture amd64 /os WS16 /path <destination host shared path>

    (On server 2008: SmigDeploy.exe /package /architecture amd64 /os WS08 /path <destination host shared path>)

    Export-SmigServerSetting -User All -Group -Path <destination host shared path> -Verbose
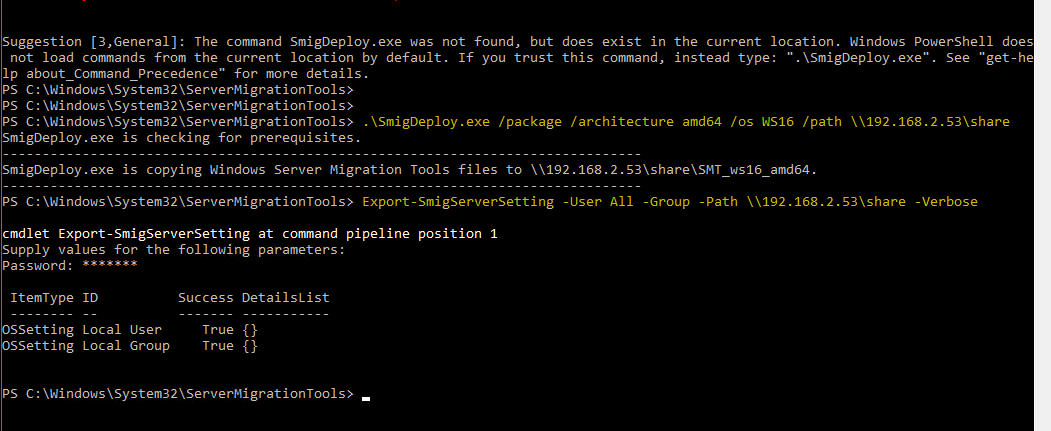
    15054-sn1.png

    Then the local Groups and users will be export to the destination host shared folder, like below:
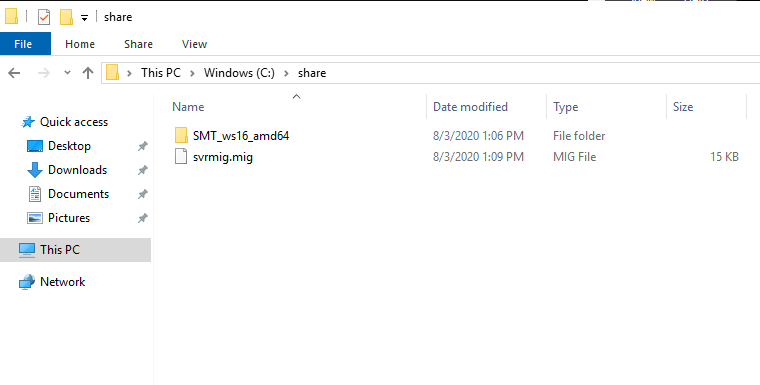
    15048-sn2.png

    1. On the destination host Server 2019, open Windows Server Migration Tool, run as administrator. Type the following command:

    Import-SmigServerSetting -User Enabled -Group -Path <shared folder path> -Verbose
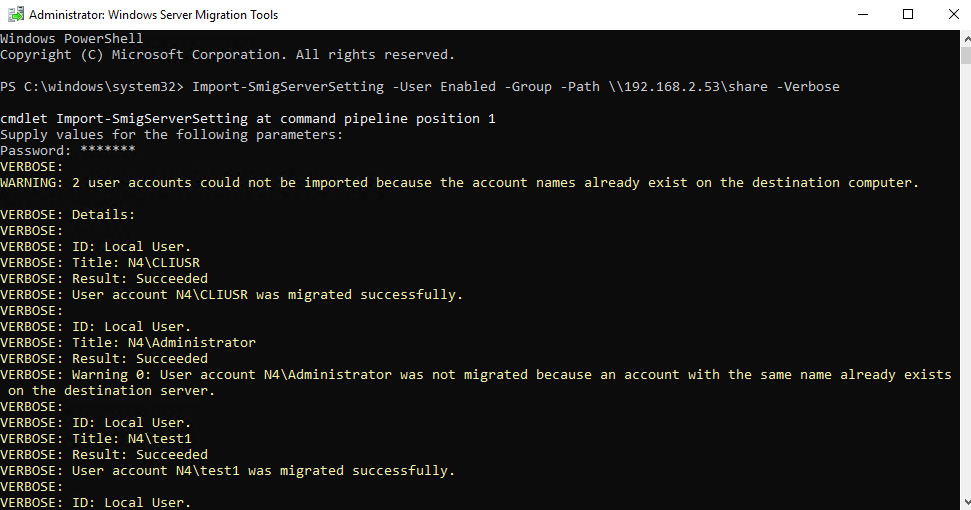
    15037-sn3.png

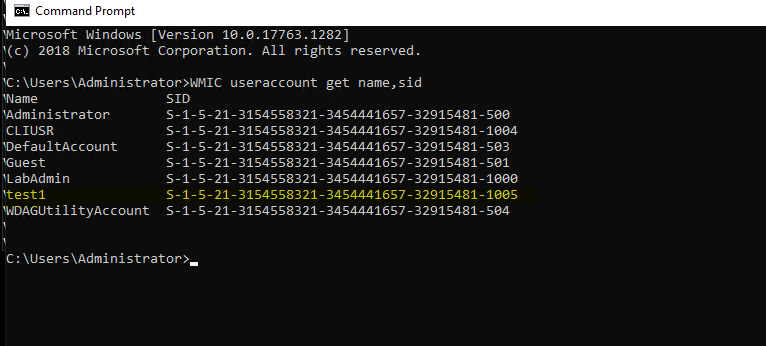
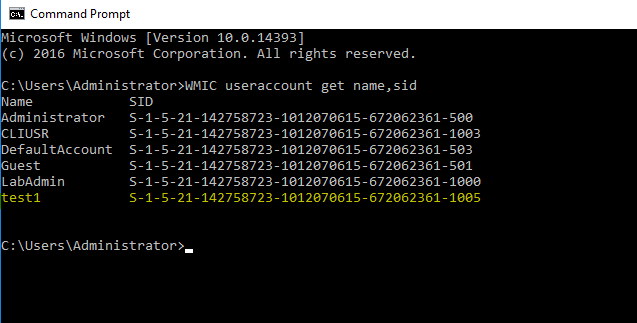
    After migration, check the SID of the users and the Groups:

    On the source server:
    15107-sn4.png

    On the destination server:

    14958-sn6.png

    Thanks for your time! If you have any other concerns or questions, please feel free to feedback.
    Best Regards,
    Anne


Your answer

Answers can be marked as Accepted Answers by the question author, which helps users to know the answer solved the author's problem.