Create VM with Custo-sized OS Disk

Ken Onwere 21 Reputation points
2021-09-23T18:51:42.253+00:00

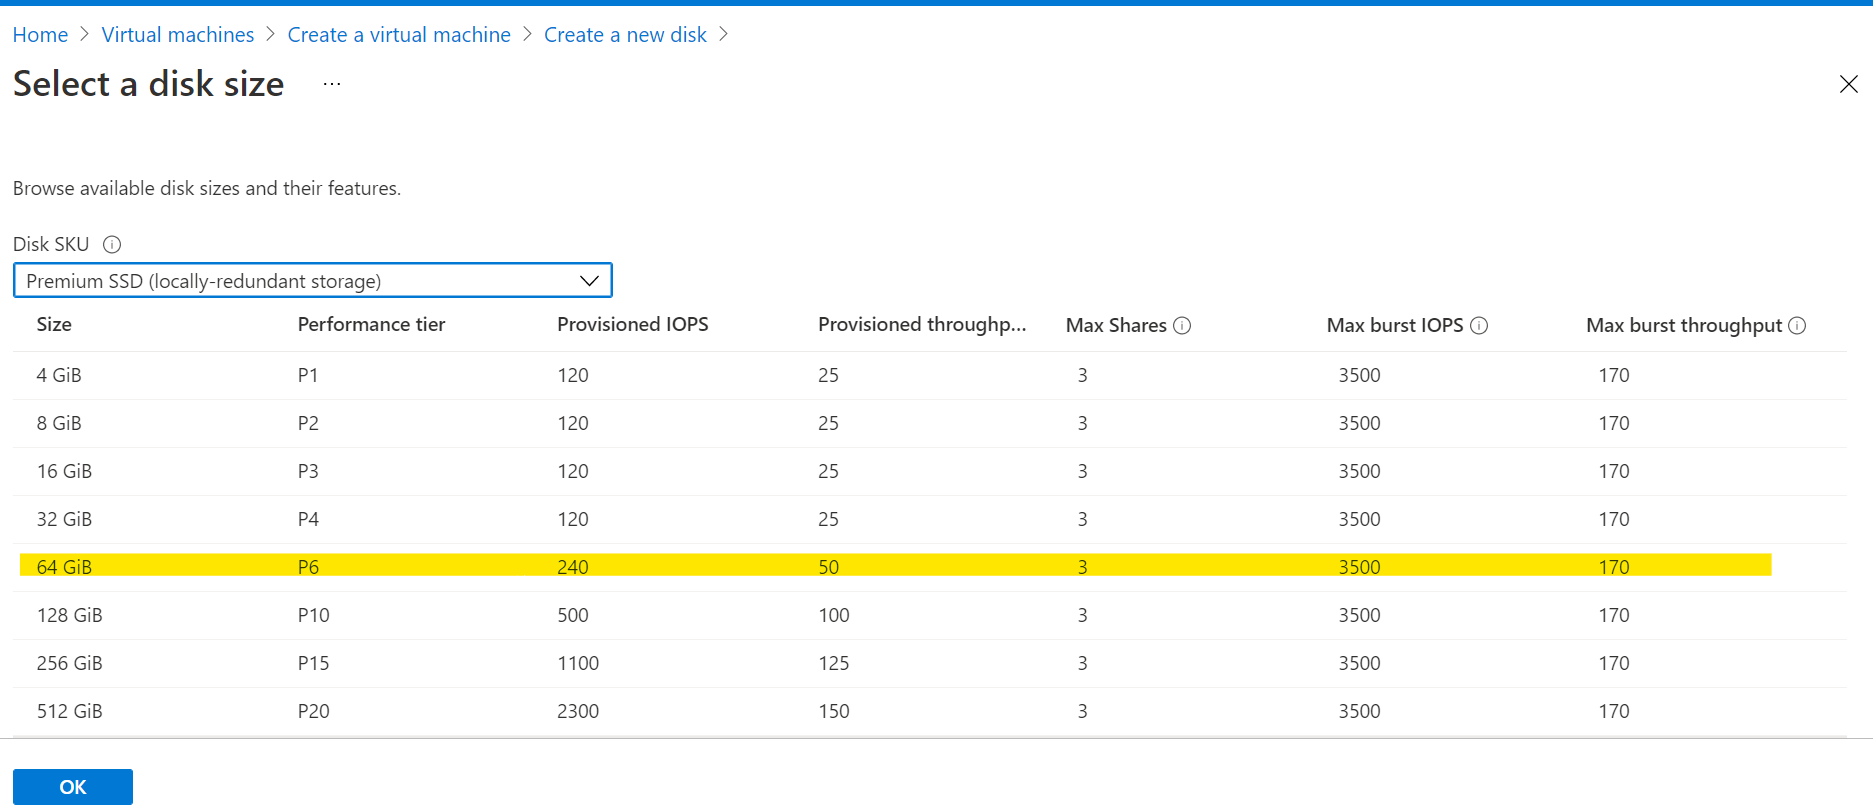
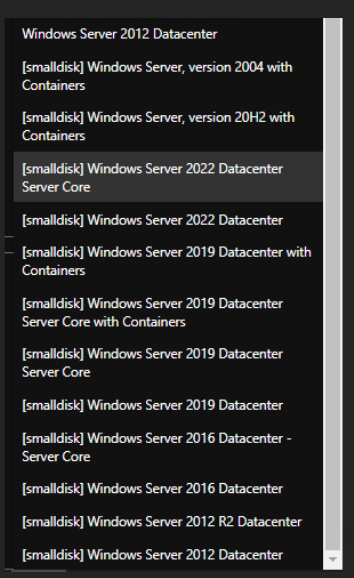
When provisioning VMs, how may I select a custom size for the OS disk? I'd like to use P6 64- GB SSD premium disks to take advantage of the 12 month free tier. Unfortunately, the free tier templates available within the portal does not support my desired OS images.

Azure Virtual Machines
An Azure service that is used to provision Windows and Linux virtual machines.
7,762 questions
Azure Disk Storage
Azure Disk Storage
A high-performance, durable block storage designed to be used with Azure Virtual Machines and Azure VMware Solution.
622 questions
0 comments No comments
{count} votes

3 answers

Sort by: Most helpful
  1. TravisCragg-MSFT 5,681 Reputation points Microsoft Employee
    2021-10-05T02:03:32.88+00:00

    @Ken Onwere What your looking for is not in the marketplace, so you will need to create a custom disk with the OS image on it in the proper size. This is a surprisingly complicated process.

    The easiest way to do this is to spin up a VM with the image you would like, stop and delete the VM, but save the disk. You can do this with a managed or unmanaged disk.

    Next, create a new VM and attach the first VM's OS disk as a data disk to this VM, along with a new blank data disk, sized for your desired OS disk size (64gb).

    Copy the data from your 1st VM's OS disk (currently attached as a data disk) to the 64GB blank data disk. You can do this using a simple copy + paste and file explorer. Once this is done, detach the data disk, mark it is a SPECIALIZED OS disk, and then create a new VM with this disk.

    Once your new VM with the correct sized disk is up and running, generalize that OS and register it as a custom image.

    Editing an existing managed disk is not something you can do via the portal. You will need to use PowerShell or CLI to mark a disk as a data disk, OS disk, and image type.

    If you would like detailed instructions on any of these steps, please let me know.

    4 people found this answer helpful.
    0 comments No comments

  2. prmanhas-MSFT 17,891 Reputation points Microsoft Employee
    2021-09-24T12:04:56.54+00:00

    @Ken Onwere Apologies for the delay in response and all the inconvenience caused because of the issue.

    I tested same in my lab with free Subscription and I was able to create one. Can you check below and let me know if you are able to create one during VM provisioning.

    As mentioned here

    134998-image.png

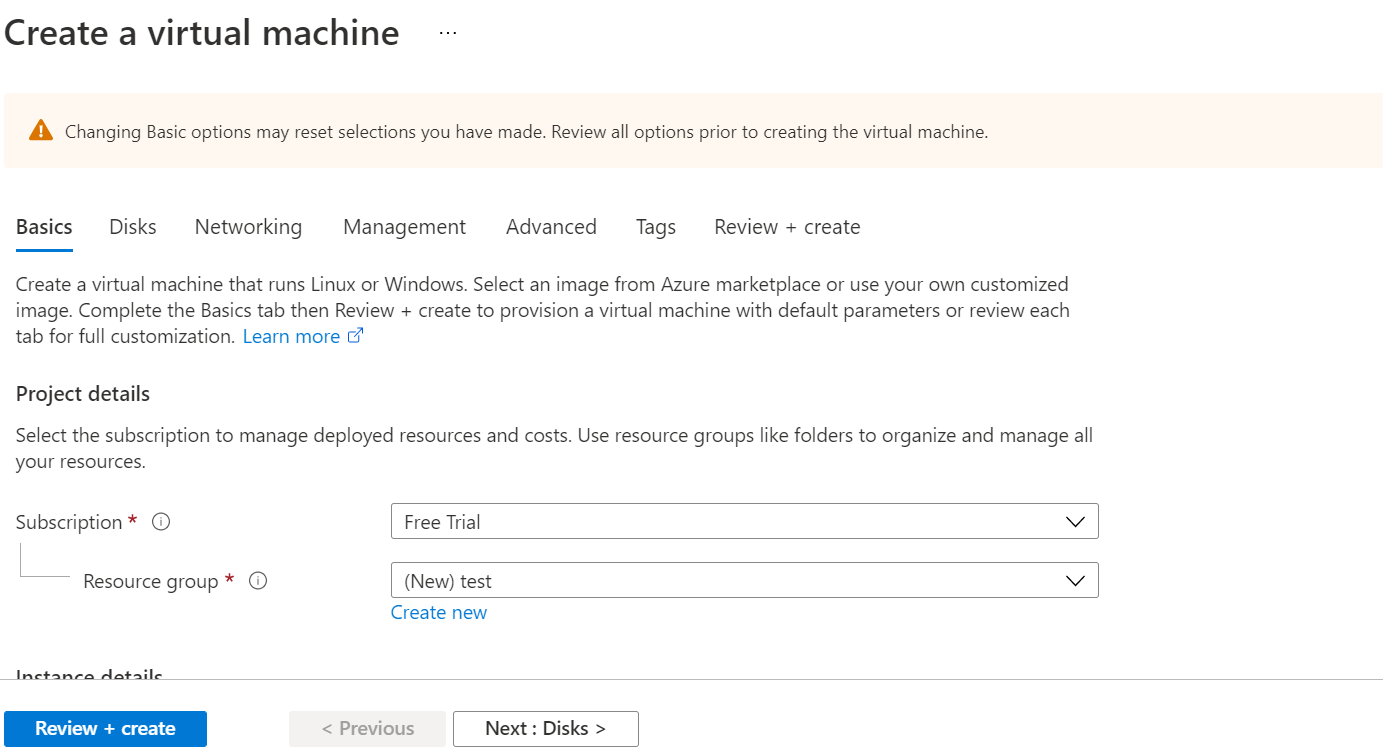
    First I created Azure VM as below.

    134950-image.png

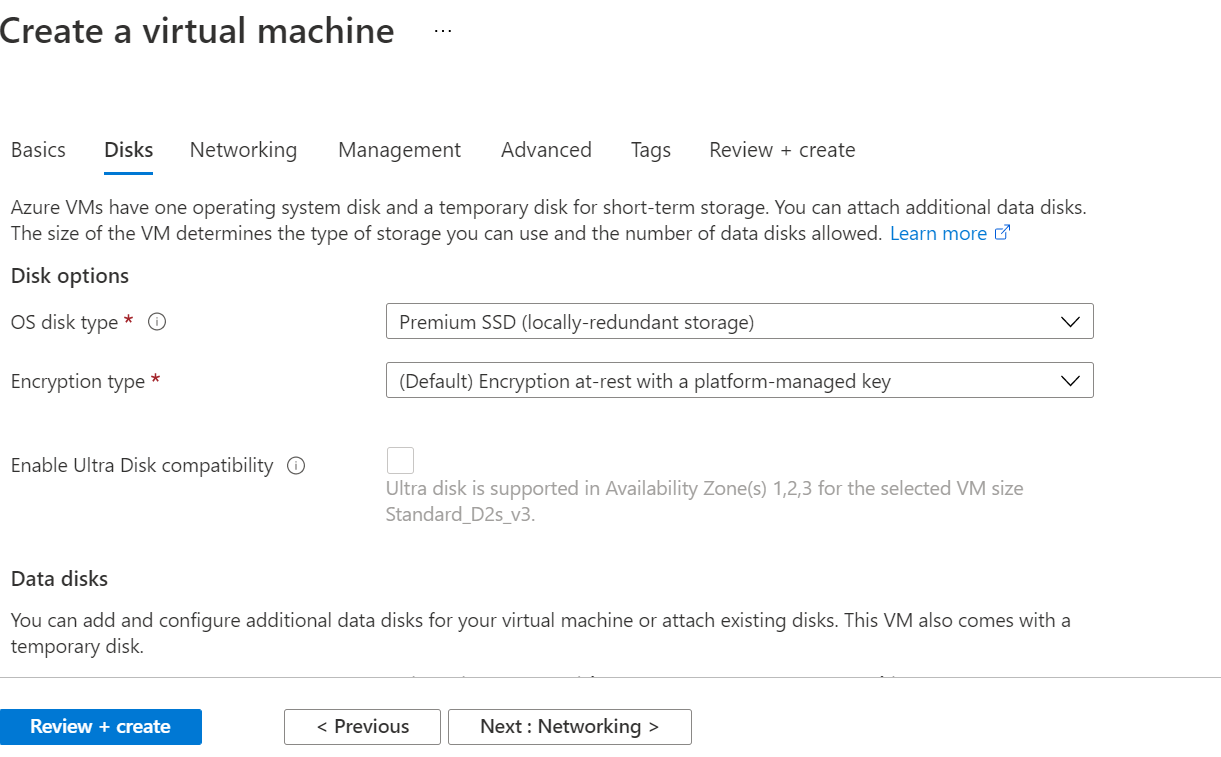
    Now clicking on Disk button on bottom you will be redirected to page like below:

    135008-image.png

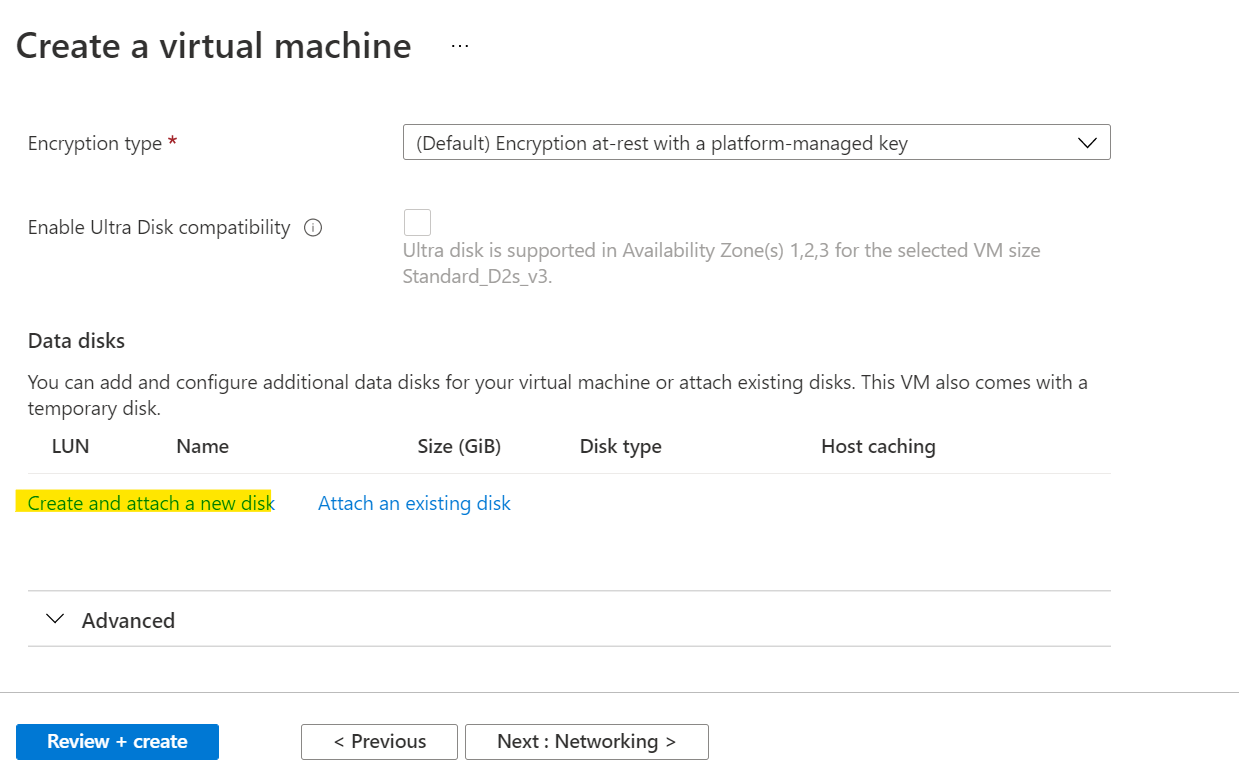
    Here when you Scroll down click on option of disk as below:

    135046-image.png

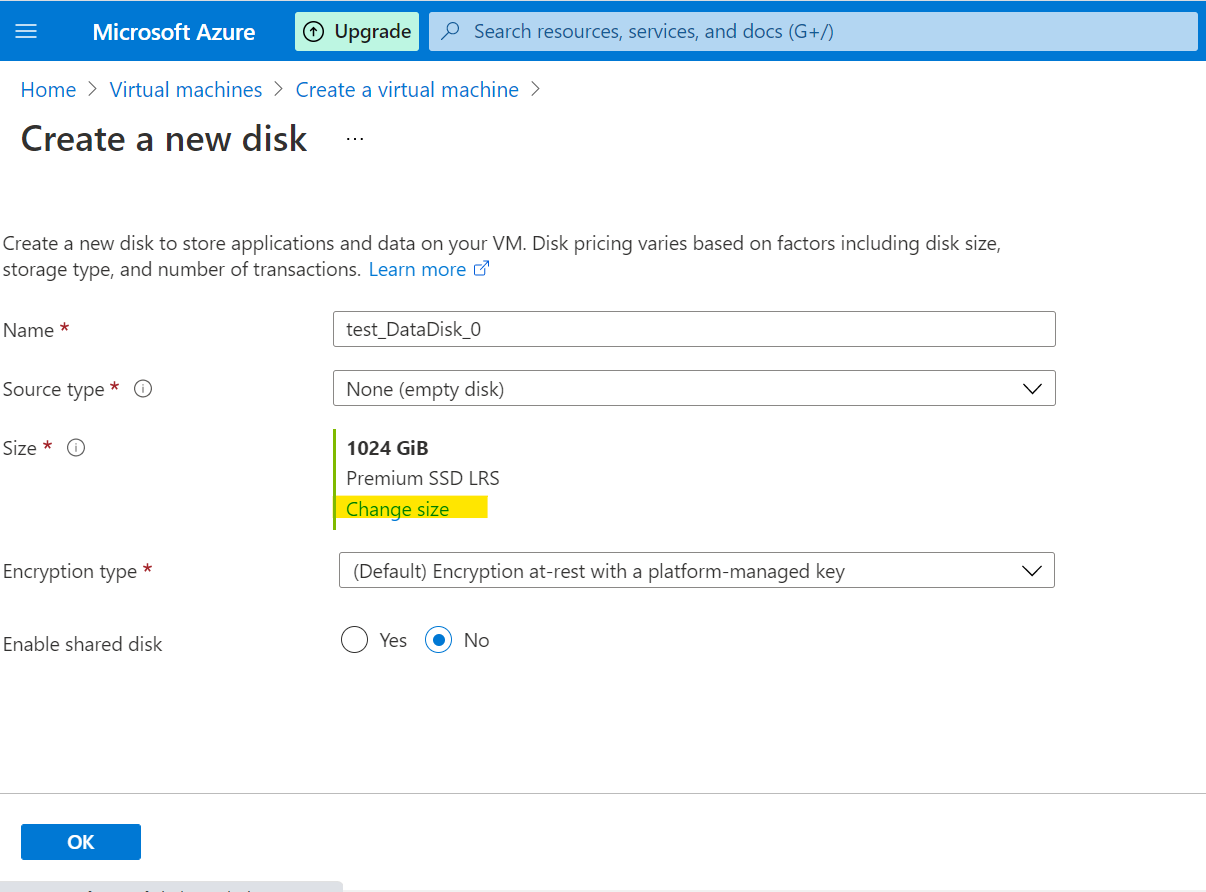
    Here you will get default options like this click on the highlighted option where you will get the the list of Premium disks you can attach:

    135033-image.png

    135057-image.png

    Click on Ok and then move with creation part of VM. It should show you successful deployment on Azure portal with desired OS Disk size as per your mentioned requirement.

    Hope it helps!!!

    Please "Accept as Answer" if it helped so it can help others in community looking for help on similar topics.

    1 person found this answer helpful.

  3. TechGuy_MS1 61 Reputation points
    2022-09-08T07:01:08.03+00:00

    Hello @TravisCragg-MSFT

    You mentioned in your response, mark the disk as SPECIALIZED OS DISK. Can you kindly help how to mark the disk as SPECIALIZED OS DISK in Azure portal?

    Thanks.


Your answer

Answers can be marked as Accepted Answers by the question author, which helps users to know the answer solved the author's problem.