Azure App Service
Azure App Service is a service used to create and deploy scalable, mission-critical web apps.
8,970 questions
This browser is no longer supported.
Upgrade to Microsoft Edge to take advantage of the latest features, security updates, and technical support.
' cx='32' cy='32' r='32' /%3E%3Ctext x='50%25' y='55%25' dominant-baseline='middle' text-anchor='middle' fill='%23FFF' %3EDV%3C/text%3E%3C/svg%3E)
Hi,
I have generated the certificate in azure key vault.
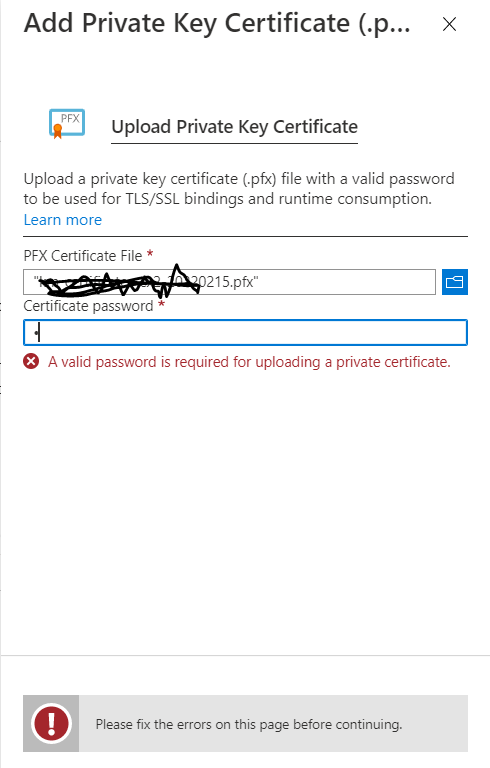
While Importing Key Vault Certificate on azure app service getting error "Failed to get App Service Principal"
Also downloaded the same .pfx certificate and while uploading it is asking for the password.
Please let me know from where I can get the password for the certificate


Try a single space.
Not working .
' cx='32' cy='32' r='32' /%3E%3Ctext x='50%25' y='55%25' dominant-baseline='middle' text-anchor='middle' fill='%23FFF' %3ENS%3C/text%3E%3C/svg%3E)
Certificate .pfx file downloaded from KeyVault doesn't have password protection. Steps to generate a password protected .pfx file:
Import PFX
If we want to have this pfx with a password, the easiest way is to just import it on a Windows machine and export it again but this time with a password. Here is how to do this:
Export PFX with password
Now we need to export the certificate but this time with a password. We need to browse the machine's certificate store to initialize this.
Open Certificate Manager
Export certificate
That's it. You now have an exported copy of the App Service Certificate in a .pfx format and with a password ready to be used anywhere you want.
@Michael Gaddis FYI
' cx='32' cy='32' r='32' /%3E%3Ctext x='50%25' y='55%25' dominant-baseline='middle' text-anchor='middle' fill='%23FFF' %3EM%3C/text%3E%3C/svg%3E)
Huge help, thank you @Nayan Shah
' cx='32' cy='32' r='32' /%3E%3Ctext x='50%25' y='55%25' dominant-baseline='middle' text-anchor='middle' fill='%23FFF' %3ESS%3C/text%3E%3C/svg%3E)
Thank you. This is exactly what I needed.
' cx='32' cy='32' r='32' /%3E%3Ctext x='50%25' y='55%25' dominant-baseline='middle' text-anchor='middle' fill='%23FFF' %3ESP%3C/text%3E%3C/svg%3E)
Thank you
' cx='32' cy='32' r='32' /%3E%3Ctext x='50%25' y='55%25' dominant-baseline='middle' text-anchor='middle' fill='%23FFF' %3EDY%3C/text%3E%3C/svg%3E)
Why doesn't certreq -config give an option to set a PFX password?
seems extremely ridiculous we have to get a pfx from an internal CA, THEN import it into local cert store JUST to export it again to set a password
Microsoft - if you're reading this - you need to put some new work into certreq and internal CA if you're going to keep supporting it as a product

Well guys, that's great, glad it worked for you but the link no longer works, how about posting the answer here.
' cx='32' cy='32' r='32' /%3E%3Ctext x='50%25' y='55%25' dominant-baseline='middle' text-anchor='middle' fill='%23FFF' %3ESM%3C/text%3E%3C/svg%3E)
Thanks for reply! Once you created the certificate in Azure Key vault and downloaded same as in pfx format you need to configure password for .pfx this is required while uploading a pfx, you always need to provide a password.
' cx='32' cy='32' r='32' /%3E%3Ctext x='50%25' y='55%25' dominant-baseline='middle' text-anchor='middle' fill='%23FFF' %3EMP%3C/text%3E%3C/svg%3E)
This worked for me. Thank you!
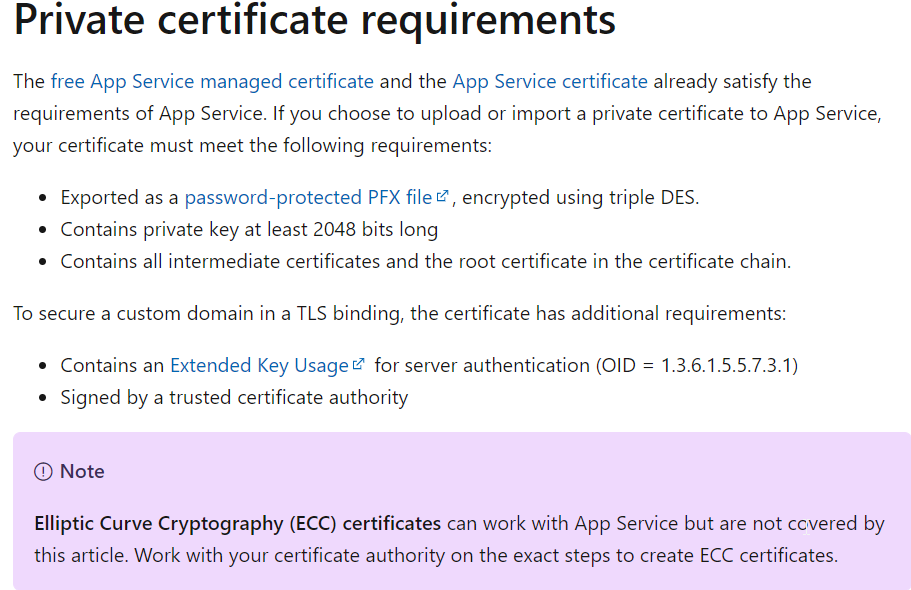
Thanks for asking question! If I have understood right you are trying to Import a certificate from Key vault, If so then you may want to know that you can import a PKCS12 certificate from Key Vault into App Service as long as it satisfies the below requirements.
Also, By default, the App Service resource provider doesn’t have access to the Key Vault.
In order to use a Key Vault for a certificate deployment, you need to authorize the resource provider read access to the KeyVault.
Also, check if you are owner of the subscription and not contributor might helps.
Let us know if issue remains.
Hi @SnehaAgrawal-MSFT
I created the certificate in Azure Key vault and downloaded same as in pfx format.
But while uploading the same pfx cert in azure app it is asking for the password, What will be that password ?
Also as per the doc tried adding abfa0a7c-a6b6-4736-8310-5855508787cd to the access policy of Azure Key Vault where I have created the Certificate.
But not able to add it on access policy

Also, when you say by following "the doc tried adding abfa0a7c-a6b6-4736-8310-5855508787cd to the access policy of Azure Key Vault where I have created the Certificate. But not able to add it on access policy" Could you please elaborate what error you are receiving here to help you better on this.
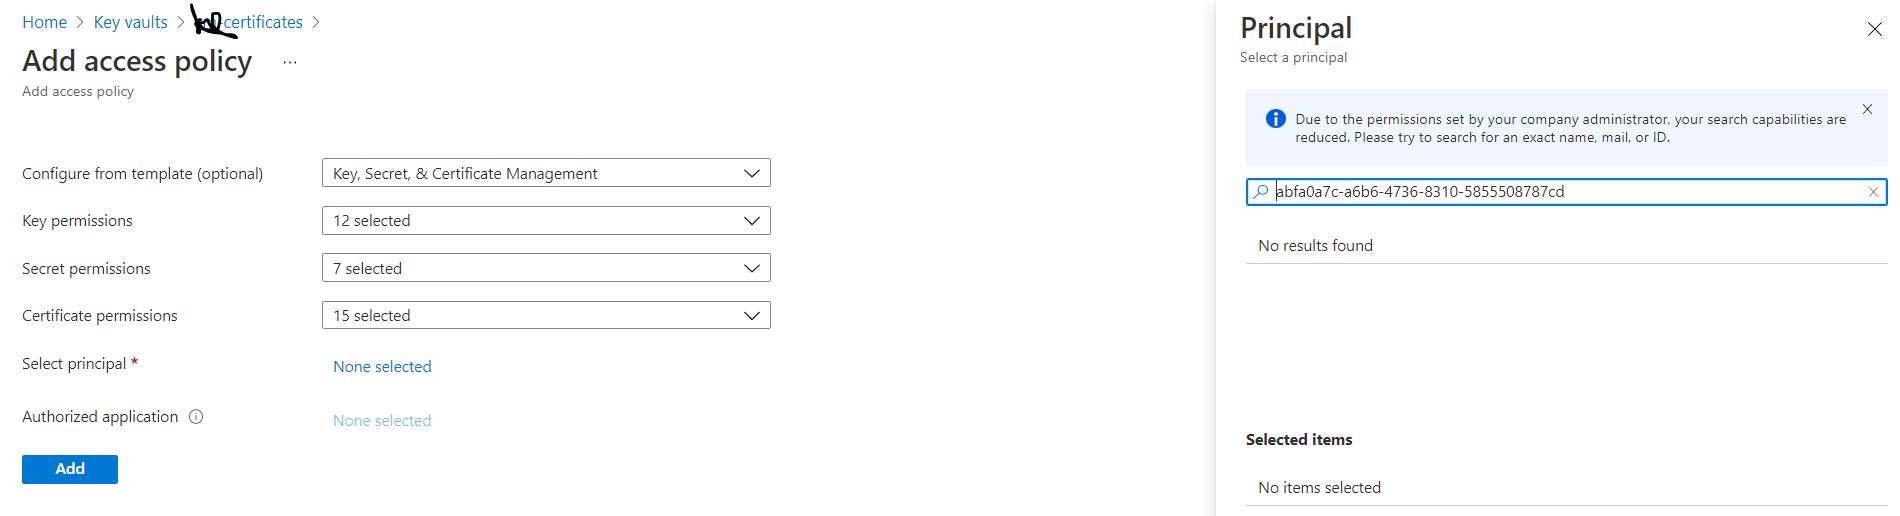
Error while adding in Principal
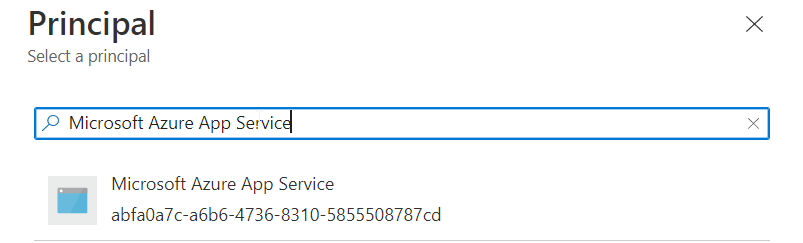
Thanks! It seems there is permissions set by your company admin on search capabilities, Could you try to search with Microsoft Azure App Service
Also for uploading a pfx suggest you to refer to detailed steps mention here to Configure password for .pfx and then use.
Let us know.