Microsoft 365 and Office | SharePoint Server | For business
A family of Microsoft on-premises document management and storage systems.
This browser is no longer supported.
Upgrade to Microsoft Edge to take advantage of the latest features, security updates, and technical support.
' cx='32' cy='32' r='32' /%3E%3Ctext x='50%25' y='55%25' dominant-baseline='middle' text-anchor='middle' fill='%23FFF' %3EP%3C/text%3E%3C/svg%3E)
Hi everyone,
I have synced a SharePoint folder which is like 25GB onto my laptop.
I want to free up the disk space by deleting the Sync folder.
I stopped the Sync of the said SharePoint from OneDrive app. Then I tried to delete the folder from File Explorer.
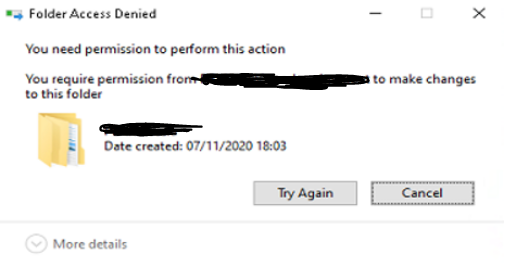
It asks for elevated permissions to delete the folder.
I'm a standard user in the company domain, and I asked the IT to check it.
When he enter the Admin password, it then gives an error 'Folder Access Denied" asking for permissions from my user account but it only shows the error, no option to enter any credentials.
Can you please help with this, how to get the folder deleted?
Thank you

Hi @PM006 ,
I am currently looking into this issue and will give you an update as soon as possible.
Thank you for your understanding and support.
Hi @PM006 ,
Would you please provide the path of the OneDrive sync folder and a screenshot with it?
Thank you so much for helping out here
It's under the
C:\Users\"USER NAME" \OneDrive - 'COMPANY NAME'
by the way, we trid creating a local admin account, then login with that ..moving to the user profiles (into my domain account profile) and tried removing the SharePoint sync folders, but it gave out the same error ...
Please help me out here
Thank you
Hi @PM006 ,
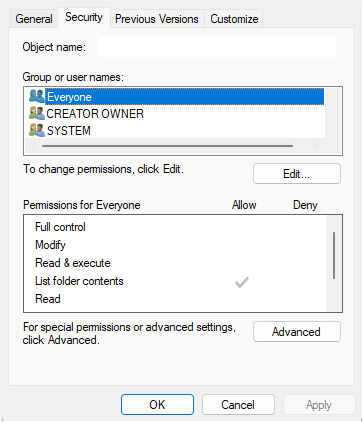
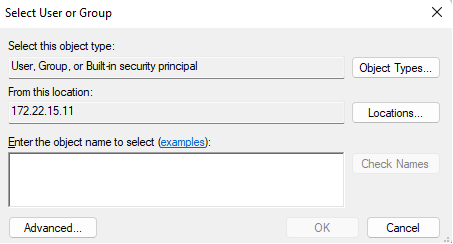
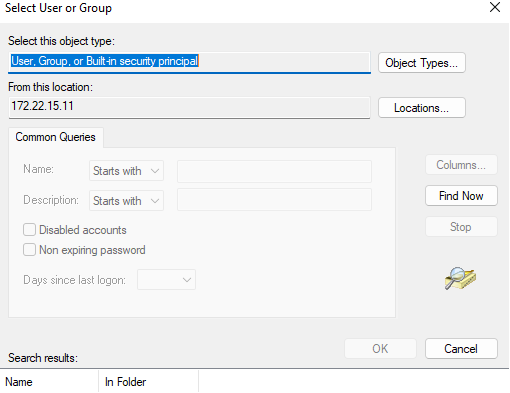
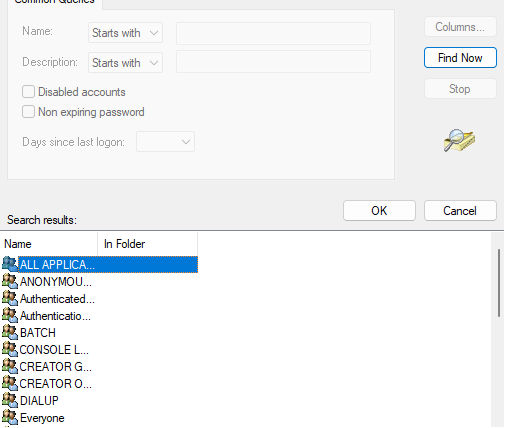
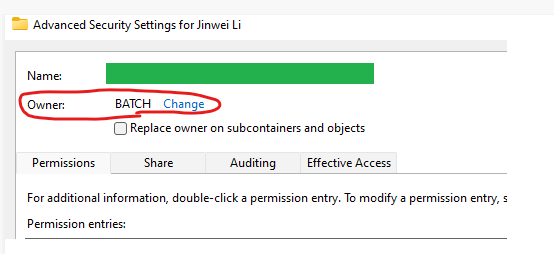
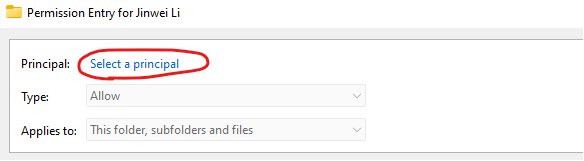
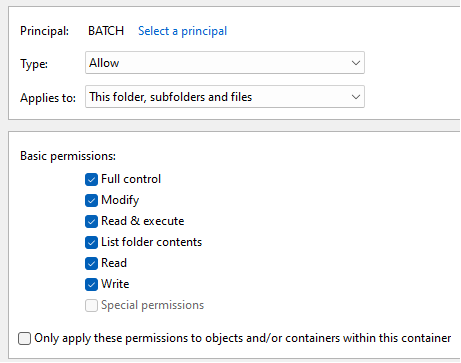
You could try to change the present user access controls on the file. Here is how to get it done:
If the answer is helpful, please click "Accept Answer" and kindly upvote it. If you have extra questions about this answer, please click "Comment".
Note: Please follow the steps in our documentation to enable e-mail notifications if you want to receive the related email notification for this thread.
Hi @PM006 ,
Is there any update on this thread? Comment here if you still need any help.