Windows 10 Network
Windows 10: A Microsoft operating system that runs on personal computers and tablets.Network: A group of devices that communicate either wirelessly or via a physical connection.
2,316 questions
This browser is no longer supported.
Upgrade to Microsoft Edge to take advantage of the latest features, security updates, and technical support.
' cx='32' cy='32' r='32' /%3E%3Ctext x='50%25' y='55%25' dominant-baseline='middle' text-anchor='middle' fill='%23FFF' %3ESC%3C/text%3E%3C/svg%3E)
After updating to the latest Windows 10 preview i cannot access my shares on my device
The error message i get is 'System error 58 has occurred. The specified server cannot perform the requested operation'
Has anyone else come across this or can provide a solution?
Prior to the recent update, network shares appeared to work successfully on previous insider builds
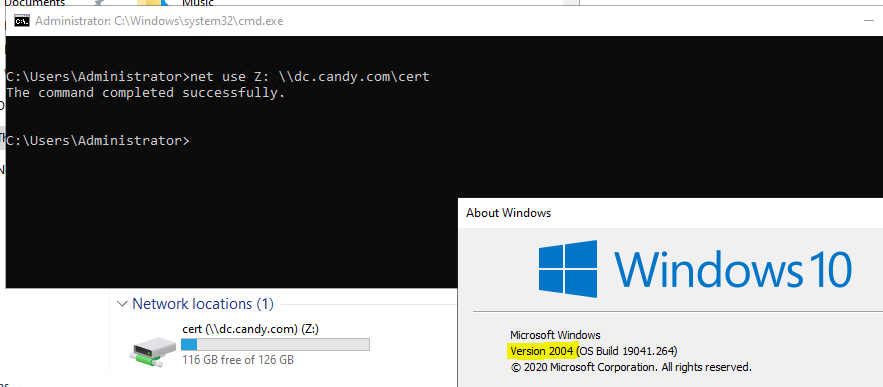
Current Version is 2004 (OS Build 20206.1000)
Previous version when it worked Version 2004 (OS Build 20190.1000)

Hello,
Let us know what OS build you're on right now and the previous build. Run winver command to get this.
Regards.
I couldn't locate this as a known issue for build 20206. I recommend you to report this via Feedback hub app. Others with same issue may join and upvote you so it gets resolved in upcoming build.
Regards.

Hi,
Can you please provide the specific command you use to get your sharing folder? Because I have tested in my own environment and use the command "net use e: \computername\sharename", it works successfully.
In your situation, it seems that the problem is not with the NET USE command. It is about File sharing. Folowing are some general solutions for File sharing, please try:
1.Turn on network discovery and file and printer sharing on the remote (server) computer, and turn off password protected sharing.
(1) Select the Start button, then select Settings > Network & Internet , and on the right side, select Sharing options.
(2) Under Private select Turn on Network discovery and Turn on file and printer sharing.
(3) Under All Networks, select Turn off password protected sharing.
2.Make sharing services start automatically.
(1) Press the Windows logo key + R.
(2) In the Run dialog box, type services.msc, and then select OK.
(3) Right-click each of the following services, select Properties, if they're not running, select Start, and next to Startup type, select Automatic:
□ Function Discovery Provider Host
□ Function Discovery Resource Publication
□ SSDP Discovery
□ UPnP Device Host
============================================
If the Answer is helpful, please click "Accept Answer" and upvote it.
Note: Please follow the steps in our documentationhttps://learn.microsoft.com/en-us/answers/articles/67444/email-notifications.html to enable e-mail notifications if you want to receive the related email notification for this thread.
Hi,
Just want to confirm the current situations. Please feel free to let us know if you need further assistance.
Hi,
Would you mind letting me know the update of the problem? If you need further assistance, feel free to let me know.