Set up User Segmentation to drive adaptive experiences in a Product Catalog in SharePoint 2013
Adaptive Experience is about tailoring the user experience in order to better match the interests of the end user. This can have a great effect on sales, since a better match between products and user needs increases the chance of a sale.
Let’s take a look at the following scenario:
Pete Smith owns an online store selling electrical consumer goods. New Windows mobile 8 phones have arrived recently, and Pete wants to promote one of these phones to the customers he believes is interested in the state of the art products. He decides to bring this product to attention to all end users using Internet Explorer 10 as their browser, as he thinks people using the state of the art browsers, are interested in state of the art mobile phones. In order to differentiate between end users, he divides them into different user segments and gives the different user segments a different user experience. While those end users running Internet Explorer 10 will get an Ad displaying one of the newest Windows mobile phones in stock, end users running on older versions will not see this particular campaign. They may be offered other products (but that is not a part of this example).
By segmenting his users and giving different user experiences to different end users, Pete is able to tailor his market campaigns towards different users at the same time. He could segment his users by numerous things; location, gender, age, etc as long as he has this data available.
This blog post describes how to set up user segmentation based on browser type, and how we can change the user experience in a product catalog by the use of Query Rules. The only custom made part in this example is the web part which is fetching the end user browser data and matching it with custom properties in the user segments we are setting up. I will give code examples on the most important parts of such a web part.
Topics covered in this blog:
- This is how it’s working
- Prerequisites
- Create a term set defining the User Segments.
- Create a custom web part that fetches the User Agent String
- Create an image to be used as the Ad
- Create a Query Rule that will activate on User Segment IE10
- Add a web part to the category page for displaying the Ad
- Verify the end result
This is how it’s working
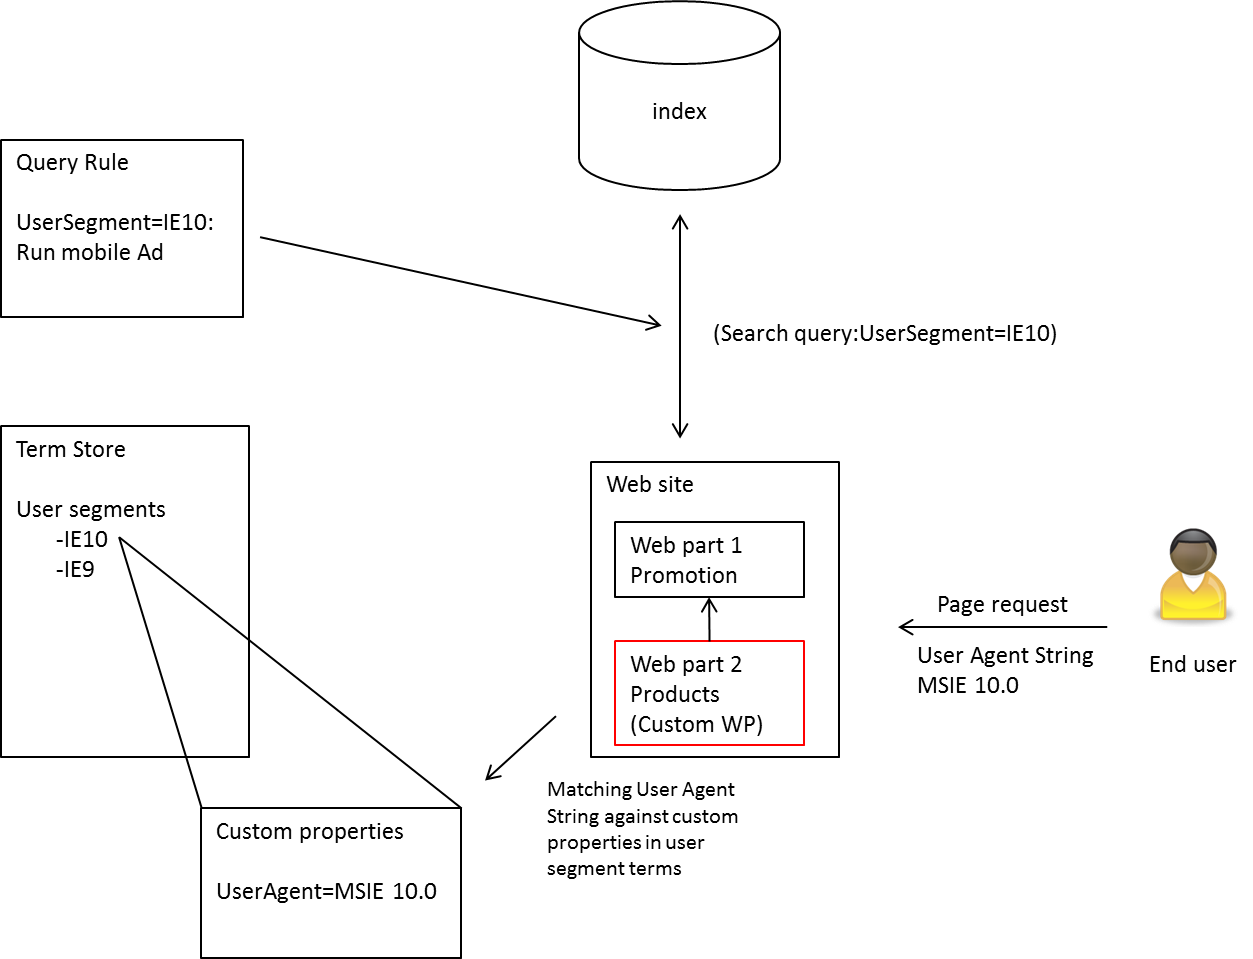
The end user is doing a page request towards the web site, and is at the same time sending its User Agent String with this request. The custom web part (web part 2) extracts the User Agent String value (MSIE 10.0) and matches it against Custom Properties for User Segment Terms in the term set. When matching, the relevant User Segment name (IE10) is added as a parameter to the search query which is sent to the index to fetch items to be presented in web part 2. A Query Rule monitors the search queries, and activates when the search parameter User Segment=IE10. The Query Rule is configured to return a search result (the Ad), to the web part sending the query in the first place. The Ad is a part of the resultset SpecialTermResults. Another web part (web part 1) is added to the web site in order to display the Ad (Promotion). This web part does not send out search queries, but fetches results from web part 2. The resultset SpecialTermResult is fetched. This contains the Ad sent from the Query Rule, and consists of a Title and an URL to the image to be promoted. Web part 2 can now display the Ad for the new Windows mobile phone.
Prerequisites
- A Product catalog site collection has been created.
- A list of products has been created
- Navigation term set is created
- Products list is shared with publishing site collection using XSP.
- A publishing site collection has been created.
- The web site is build up by a category page, and an item details page to display the items.
- The site collection is available to anonymous users
- Skills to create a custom web part in Visual Studio and deploy it in SharePoint as a Solution
Let’s see how all the different parts are configured to get this scenario working.
Create a term set defining the User Segments.
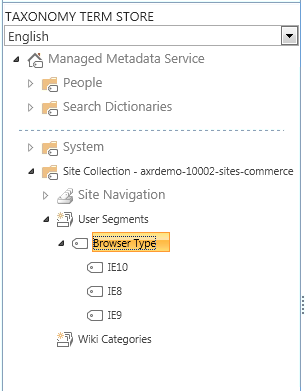
On your publishing site, in SharePoint, navigate to Site Settings=> Term store management => Taxonomy term store. In the Taxonomy Term Store navigation pane at the left, navigate to Managed Metadata Service => Site collection (the one mapped to the product catalog site collection). Create a new term set (User Segments). Then create the term Browser Type, and the child terms IE8, IE9, IE10.
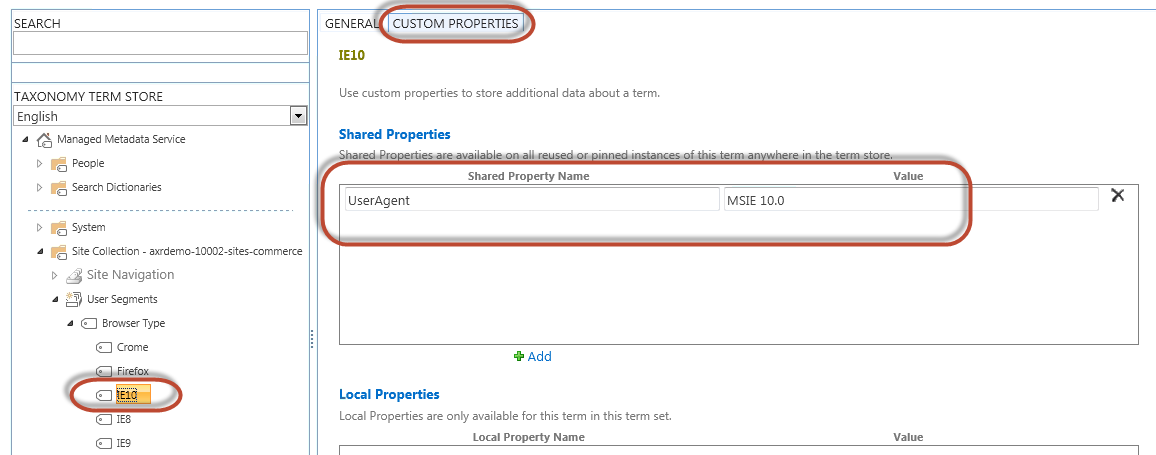
For each child term in the Browser Type term set, click on Custom Properties tab, and add unique properties for that user segment in the Shared Properties section.
- Shared Property Name: UserAgent.
- Value: Set the User Agent String for that particular browser type. E.g. for user segment term IE10, Value= MSIE 10.0. For user segment IE9, value=MSIE 9.0, etc
Create a custom web part that fetches the User Agent String
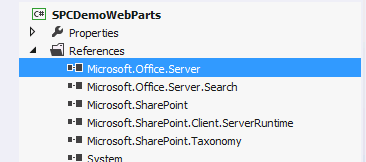
You will have to create your own custom solution in Visual Studio. This project is called SPCDemoWebParts. The custom web part you are creating has to be a part of this solution. In Visual Studio give the custom web part at title and in which group the web part will end up in.
This web part will be a modified ContentBySearchWebPart. This is done by sub-classing the ContentBySearchWebPart and adding the methods described below.
… using Microsoft.SharePoint; using Microsoft.SharePoint.Taxonomy; using Microsoft.Office.Server.Search.WebControls;
namespace SPCDemoWebParts.TargetedContentSearch { [ToolboxItemAttribute(false)] public partial class TargetedContentSearch : ContentBySearchWebPart { …
Note that you will also need to add some references to required assemblies for your project
In addition to show content by search, it will also fetch the UserAgent string given by the end user. The web part will then split the user agent string into parts, and check each part for a matching custom property in the term store.
private void AddUserAgentSegmentTerms(List<string> userSegmentTerms) { SPSite site = SPContext.Current.Site; TaxonomySession session = new TaxonomySession(site); TermStore defaultSiteCollectionStore = session.DefaultSiteCollectionTermStore;
var userAgentparts = Page.Request.UserAgent.Split(new char[] { ';', '(', ')' }); foreach (var part in userAgentparts) { var entry = part.Trim(); var terms = termStore.GetTermsWithCustomProperty("UserAgent", entry, false); if (terms.Count > 0) { userSegmentTerms.Add(terms[0].Id.ToString()); } } }
Thus the code will split a User Agent String such as "Mozilla/5.0 (compatible; MSIE 10.0; Windows NT 6.1; Trident/6.0)" into the list { "Mozilla/5.0", "compatible", "MSIE 10.0", "Windows NT 6.1", "Trident/6.0" } and then check the term store for any matching custom property.
The GUIDs of any matching terms will then be added to the search query for fetching products. This is done by adding the list of GUIDs to the UserSegmentTerms property of the DataProviderWebPart.
private void AddMycustomProperties(object sender, BeforeSerializeToClientEventArgs e) { DataProviderScriptWebPart dataProvider = sender as DataProviderScriptWebPart; List<string> userSegmentTerms = new List<string>(); AddUserAgentSegmentTerms(userSegmentTerms); dataProvider.Properties["UserSegmentTerms"] = userSegmentTerms.ToArray(); }
All that now remains is to stitch the AddMycustomProperties into the OnLoad method of the web part, so it’s called before the page is rendered.
protected override void OnLoad(EventArgs e) { if (this.AppManager != null) { if (this.AppManager.QueryGroups.ContainsKey(this.QueryGroupName) && this.AppManager.QueryGroups[this.QueryGroupName].DataProvider != null) { this.AppManager.QueryGroups[this.QueryGroupName].DataProvider.BeforeSerializeToClient += new BeforeSerializeToClientEventHandler(AddMycustomProperties); } } base.OnLoad(e); }
The same method can easily be used for segmenting users in other ways based on browsing history or login information.
The custom web part created is packaged as a solution with a .wsp extention.
You will have to upload the solution into the Public site Collection, and use it when setting up the category page, to display items in a category.
Upload the custom web part as a solution
Assuming the .wsp file is placed in C:\Temp\MyCustomWebPart.ws
- Start «SharePoint» 2013 Management Shell as Administrator
- Run: Add-SPSolution -LiteralPath C:\temp\MyCustomWebPart.wsp
- Run: Install-SPSolution -identity MyCustomWebPart.wsp -GACDeployment –AllWebApplications
- In the publishing site collection, navigate to Site settings=> Site collection Administration => Site collection features: Deactivate and activate site collection feature "Adaptive Experiences WebParts"
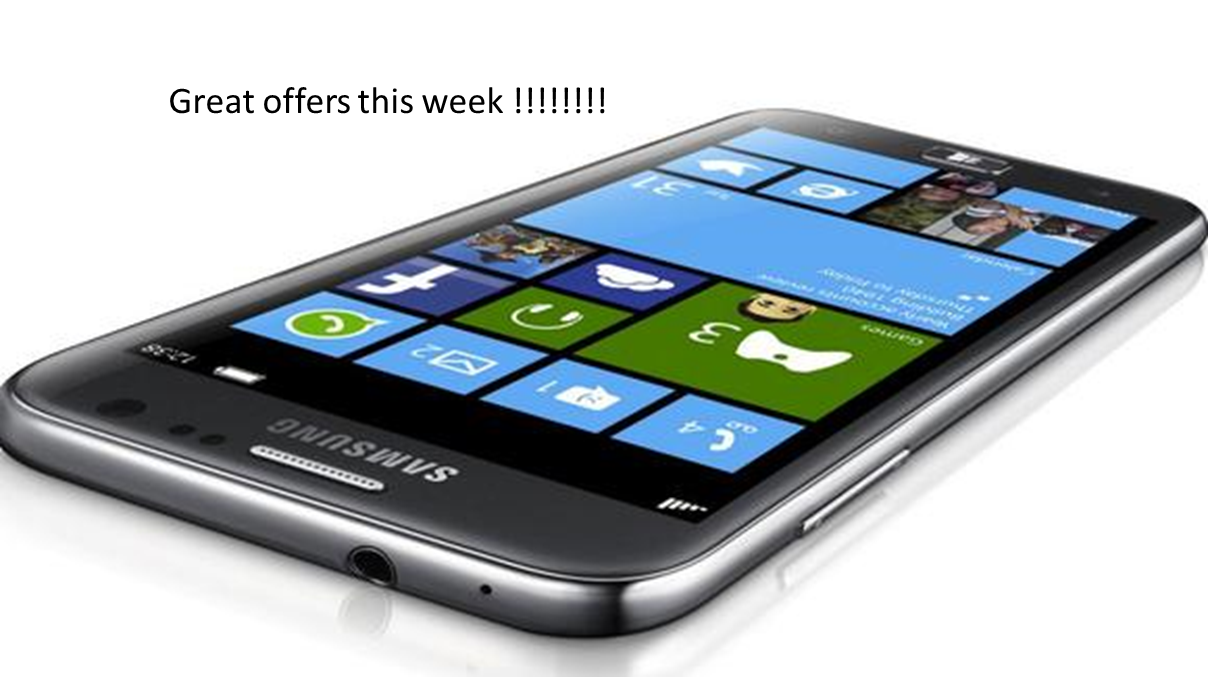
Create an image to be used as the Ad
We need an image to be displayed as the Ad. In this example I’ve used an image of a Windows mobile phone, and added some text to it. Place the image in the Image library in the publishing site collection.
Create a Query Rule that will activate on User Segment IE10
The goal is to have the Query Rule to be activated by end users using the browser Internet Explorer 10. When activated the Query Rule shall place an Ad (the image placed in the Image library) at the top of every category page.
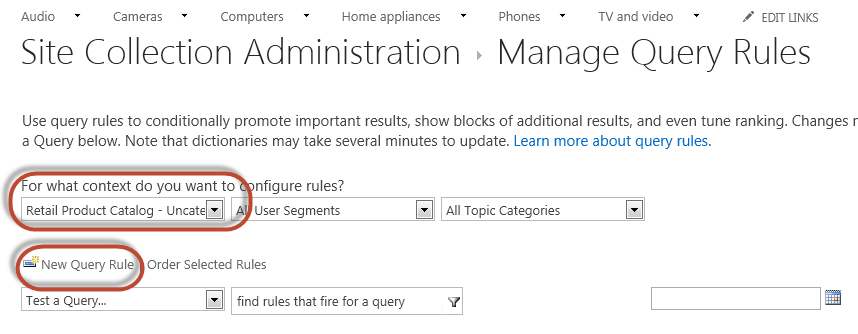
In the publishing site collection in Site Settings, navigate to Site Collection Administration=> Search Query Rules. Select your product catalog as source, before clicking on New Query Rule.
Set Rule Name: Mobile Ad for IE10 users.
Click on Context.
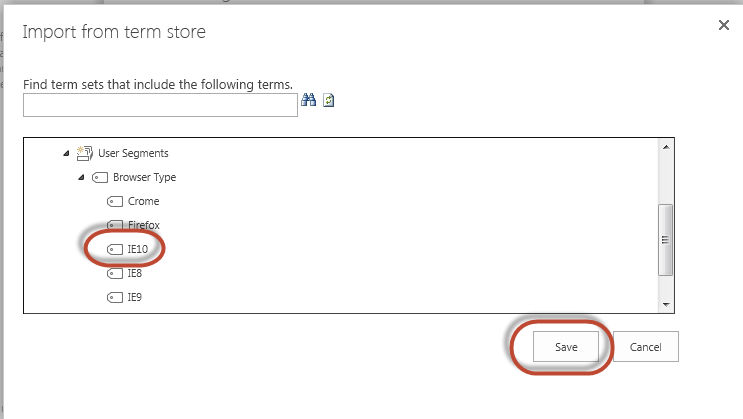
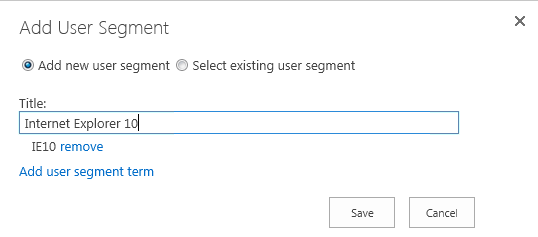
Under the section Query is performed by these user segments, click the radio button “One of these user segments”. Then click Add user segment. From the Import UI that pops up, navigate to Managed Metadata Service => Site Collection => User Segments => Browser Type and choose the IE10 term.
Then give the User Segment the name Internet Explorer 10.
You have now mapped the Query Rule to the User Segment called Internet Explorer 10, that again is mapped to the User segment Term IE10, which contains the value MSIE 10.0, which again can be matched (by the custom web part) with the User Agent String returned from the end-user. In other words; the query rule will execute on end-users running on Internet Explorer 10.
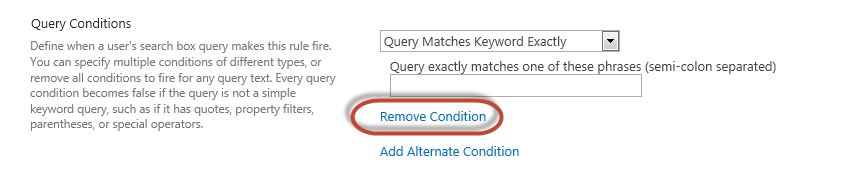
Note: Under the section Query conditions: click on Remove Condition, as this Query Rule is not to be triggered by any (manuel) query.
We now have to set the Actions performed by the Query Rule.
Under the section Actions, click on Add promoted result. Type Mobile campaign in the text box for Title, and insert the URL of the image to be displayed as the Ad in the text box for URL. Thuis is the URL to the image placed in the Image library. Select the checkbox Render the URL as a banner instead of a hyperlink.
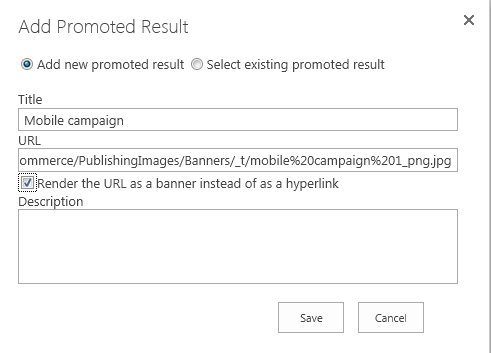
Then click Save.
The Query Rule definition now looks like this:
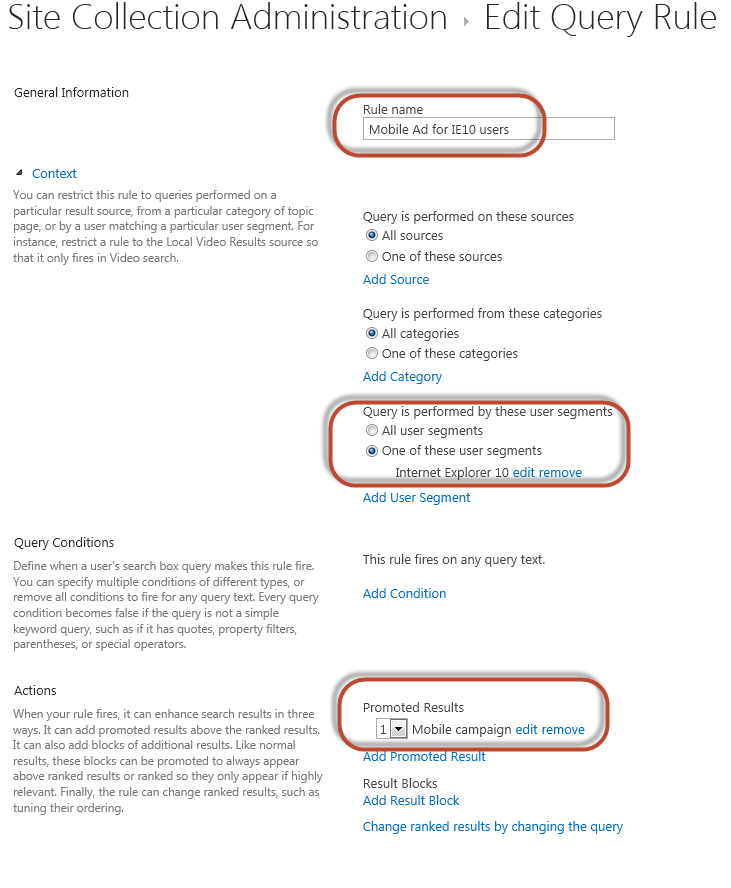
Click on Save to store the Query Rule.
Add a web part to the category page for displaying the Ad
In this section we shall add another web part at the top of the category page, to display our Ad.
Navigate to a category page, click on Edit page and Edit page template.
Click on Add a Web Part in the top section of the page. Select a Content search web part from the Content Rollup category. (you can also use your custom web part if that is based on a Content search web part) From the drop down menu in the upper right corner of the web part, click Edit Web Part.
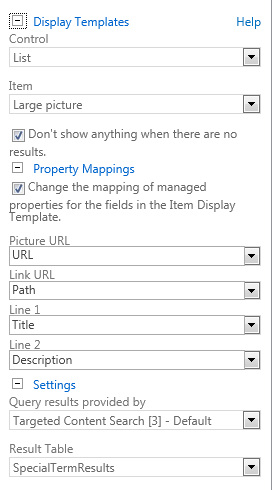
- Expand the Display Templates section. Under Control choose List. Under Item choose Large picture.
- Expand the Property mappings section . Select the checkbox for “Change the mapping of managed properties for the fields in the Item Display Template” . In the Field Picture URL type URL.
- Expand the section Settings, and in the drop down menu for Query results provided by, select the web part that this web part shall get its result from. In other words, select the custom target content search web part that is used on that category page. In the same section in the drop down menu for Result table, select SpecialTermResults. This is the result set where the Ad is placed by the Query Rule.
The respective sections in the web part editor shall now look like this.
Click OK to save the configuration.
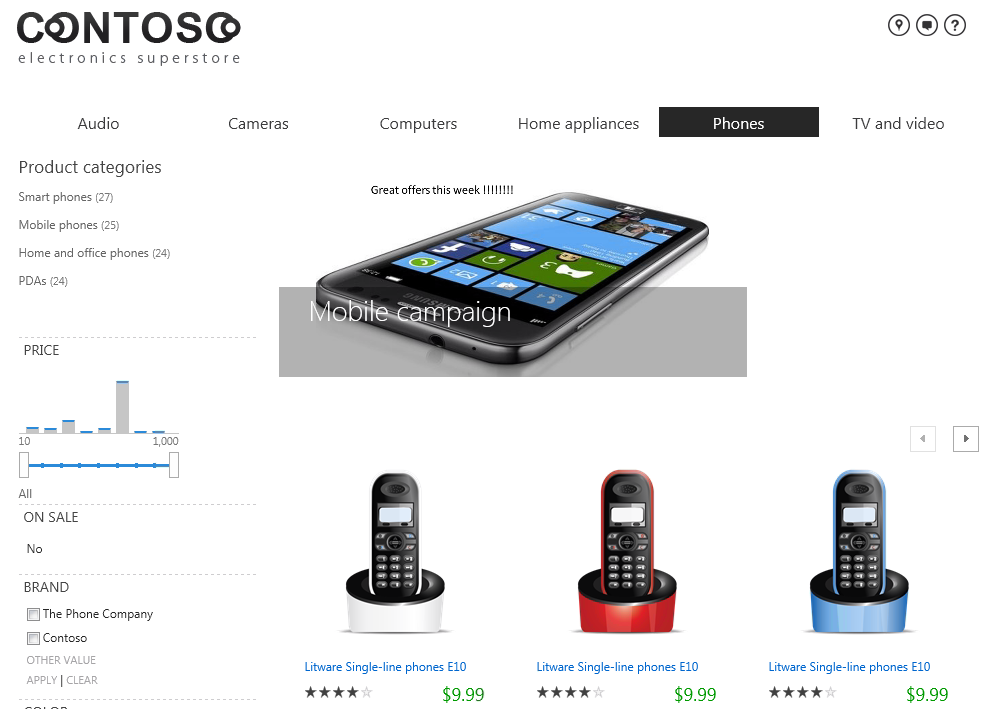
Verify the end result
Navigate to one of your category pages. By using an Internet Browser 10, you will now see the Ad on top of any category page: