Note
Access to this page requires authorization. You can try signing in or changing directories.
Access to this page requires authorization. You can try changing directories.
UPDATE: Look for a newer version of this post that uses the new TFS 2017/Visual Studio Team Services new architecture.
First: yes, it's been a long time since I published anything. It's been a busy year and finding time to blog was really tough. For the commenters on my previous posts: apologies for not being prompt on replies.
Anyway, one of my 2015 resolutions is to do better at blogging. :-)
The idea behind this post is to show what I've done on 2 of my clients where we implemented build automation and Release Manager, getting a proof-of-concept application to successfully deploy to environments and to properly manage web.config transformations leveraging Release Manager.
Scenario
I'm going to use a dummy MVC Web Application that's basically the Visual Studio 2013 template plus a small modification to the web.config so that we can demo the workflow.
The example I have is to show a message on the home page from a setting in the web.config. This setting then varies based on the environment (dev, prod, etc) the application is running on, and this will be the variable that will be changed by web.config transformations and Release Manager.
Although I'm using an AppSettings key, you can use it for other settings and connection strings as well. The same rules apply.
I made the following modifications:
Index.cshtml

HomeController.cs

Web.config
The application should show the msg from the web.config settings as per below (running from Visual Studio);

Setting up web.config transforms
I'll not go into too much detail on how to setup web.config transforms and what the transformation syntax is for them, as they've been very well explained on MSDN.
The strategy that I used here was to structure my transformations so that:
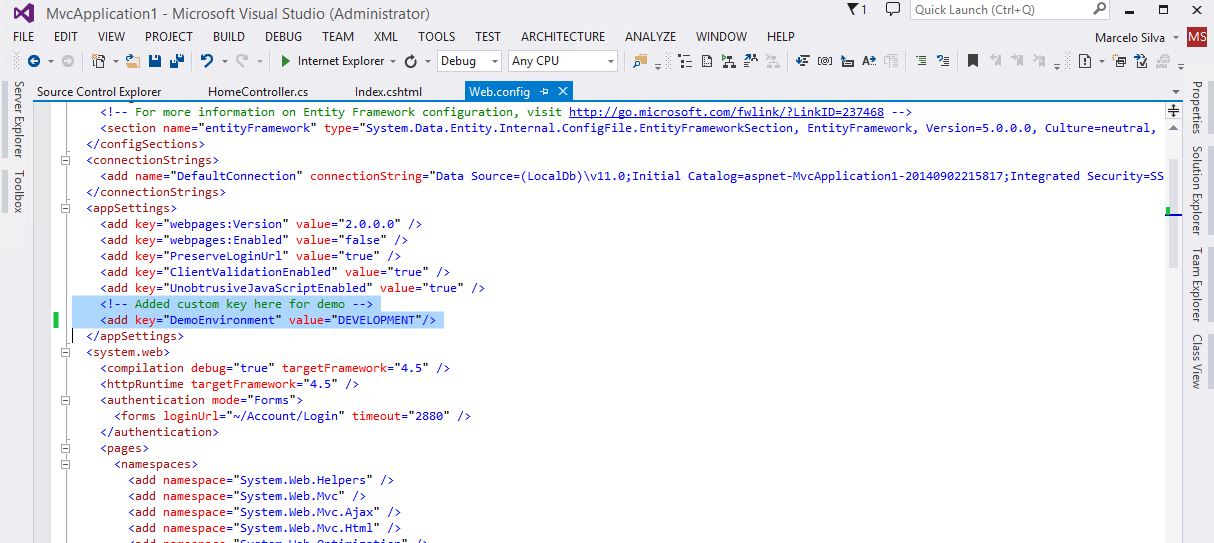
- The original web.config file has the settings needed for the developer to run in debug mode in Visual Studio
- I added a new configuration (Release) that will have the proper web.config transformations to put tokens in the key/values that I need to be changed later by Release Management:
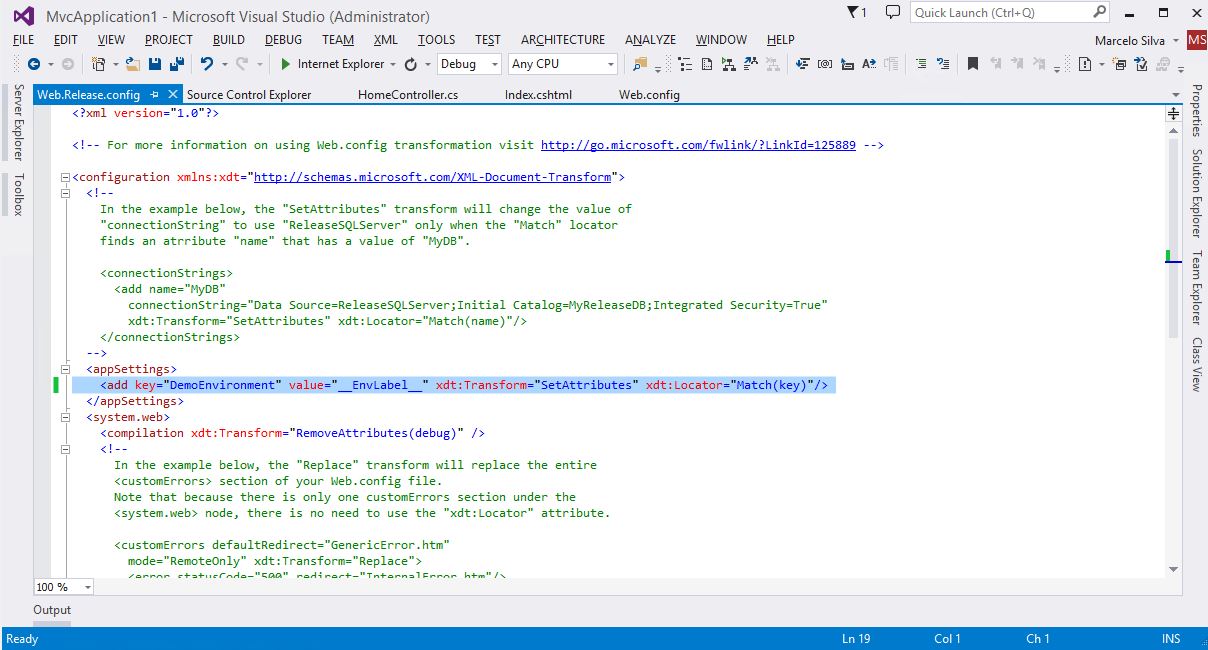
The same transformed config using Release configuration will be used by Release Management (RM) to deploy to all the environments in the release path.RM will then substitute the "__EnvLabel__" token with the appropriate value for each target deployment environment.
TFS Build
You can use any template for the build, including the RM template to trigger a release directly from the build.
The trick here is to force the web config transformation to happen during build, so you end up with a web.config that has the tokens RM is expecting. By default, web config transformations only happen during deployment.
In order for you to add this behaviour, you can add the following arguments to MSBuild:
/p:UseWPP_CopyWebApplication=true /p:PipelineDependsOnBuild=false

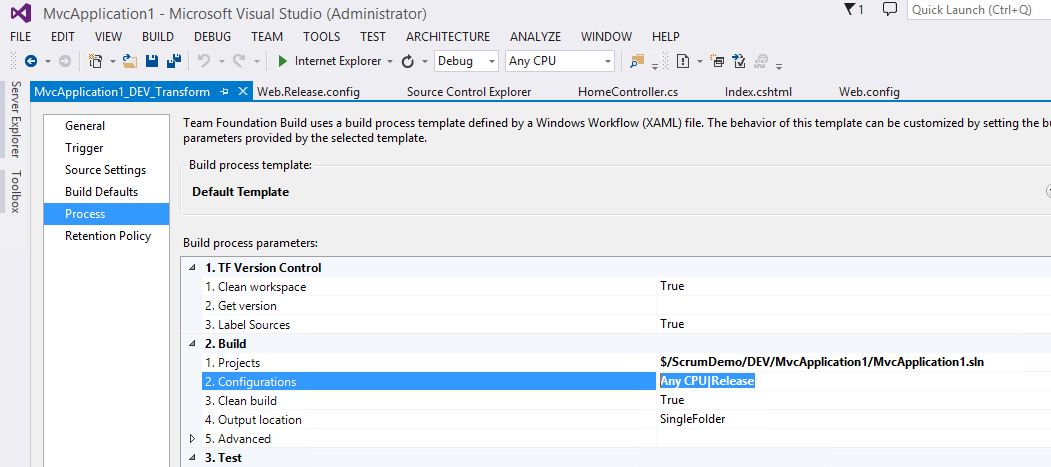
Also, make sure that you're building the correct configuration that has the transforms to add the token (in our example is Any CPU and Release):
Once the build finishes, the output should look like this (noticed the web.config transformed to include the token):


Release Path setup
Now, we have to take that config and replace the tokens with the proper values according to the target environment. In this example, I'm going to use an Agent-based setup. I'll update this later to also include an Agent-less deployment using PowerShell Desired State Configuration (DSC).
First we configure Release Manager Server, Release Management Client and a deployment agent on the target server. You can find more detailed information on setting up those parts here: Install Release Management Server and Client, Install Deployment Agents..
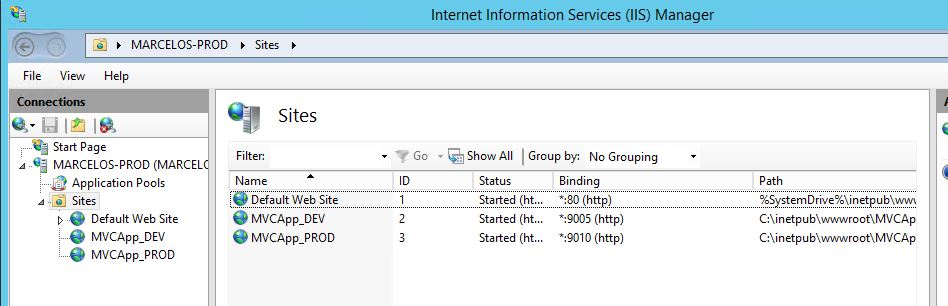
I used the same target server to simulate both DEV and PROD IIS environments, by using two different ports:
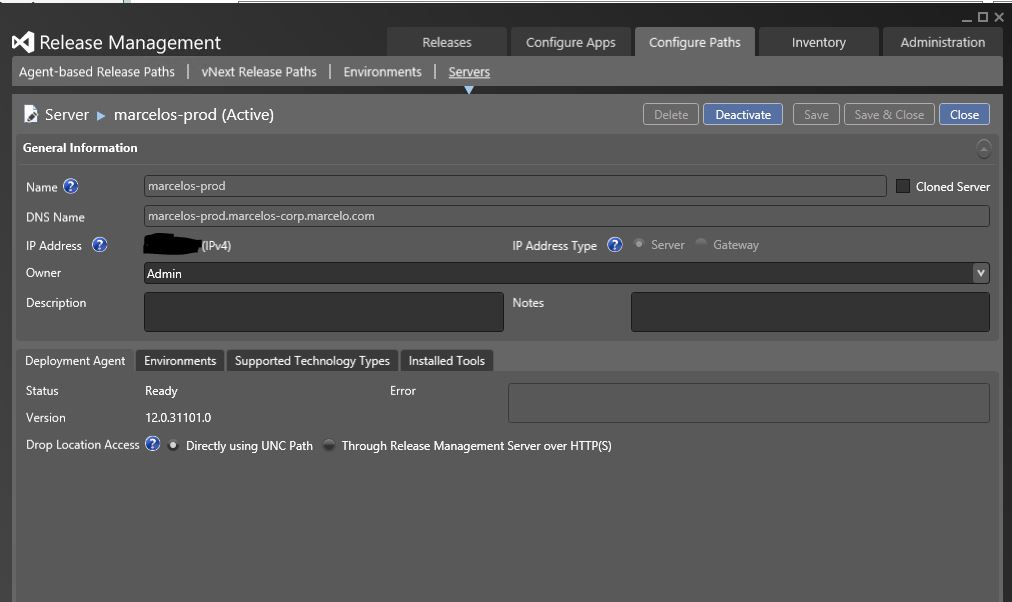
Then I configured a server in RM to point to that box:
Next I configured the two environments, DEV and PROD:


Next step is to configure a release path where we have a DEV -> PROD deployment flow:

The setup above is, of course, overly simplistic for demo purposes. What you should have in mind is that you can configure who can approve (individuals or groups), who can validate and whether those steps are automated or not. In my example, I don't need approvals for DEV, but need one for PROD. When the deployment workflow is initiated, DEV will be deployed automatically while PROD will wait for an approval before proceeding.
Next step is to configure the components to be deployed, in this case our web application:
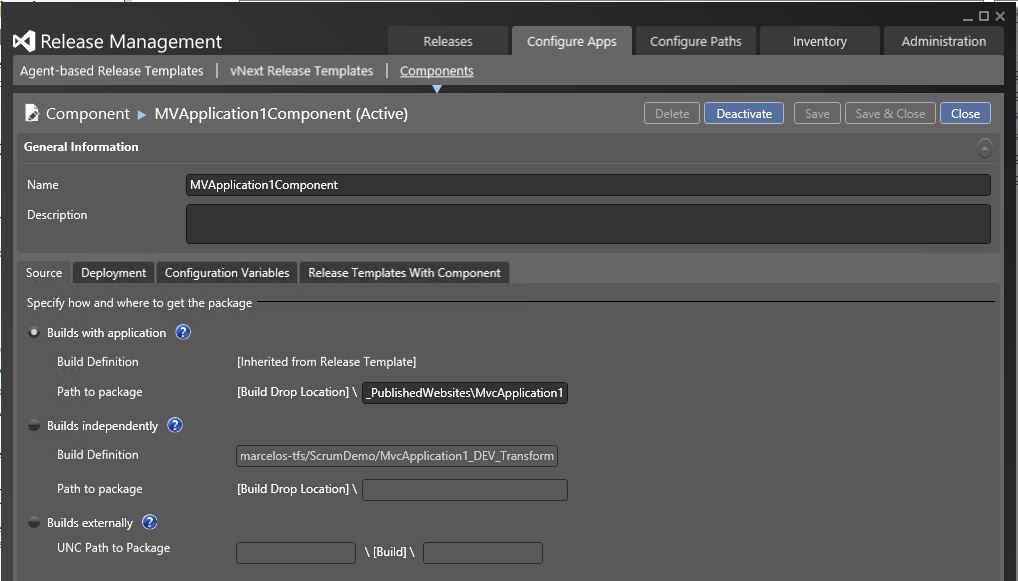
I chose to use the "builds with application" option, since I'm going to use the build definition that will be defined in the release path.
Next, I'll setup the deployment tool. In my case, XCopy, but you can use MS Deploy or other tool as appropriate:

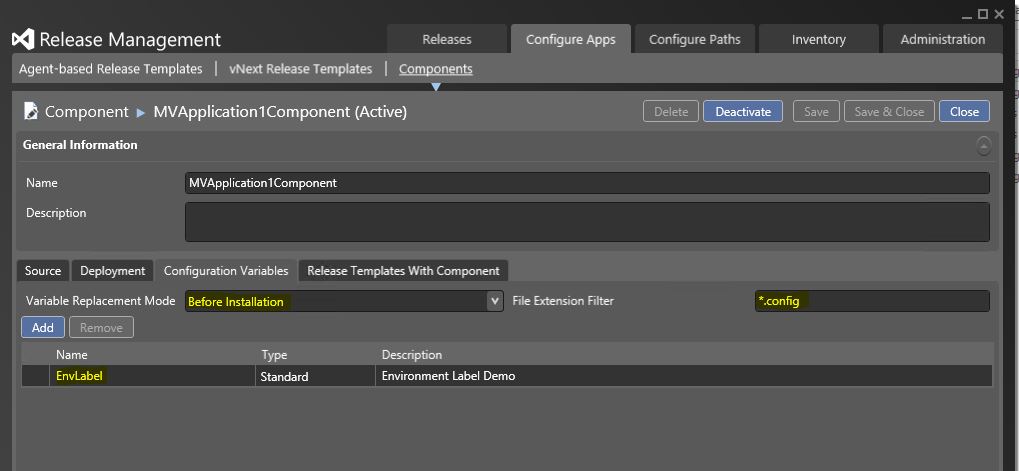
The secret of the web.config token replacement happens here on the Configuration Variables. We specify that the replacement happens "Before Installation", so that the config file is updated before being copied to the target server. We also specify the wildcard to tell RM what files we want RM to look for tokens: in this case *.config.
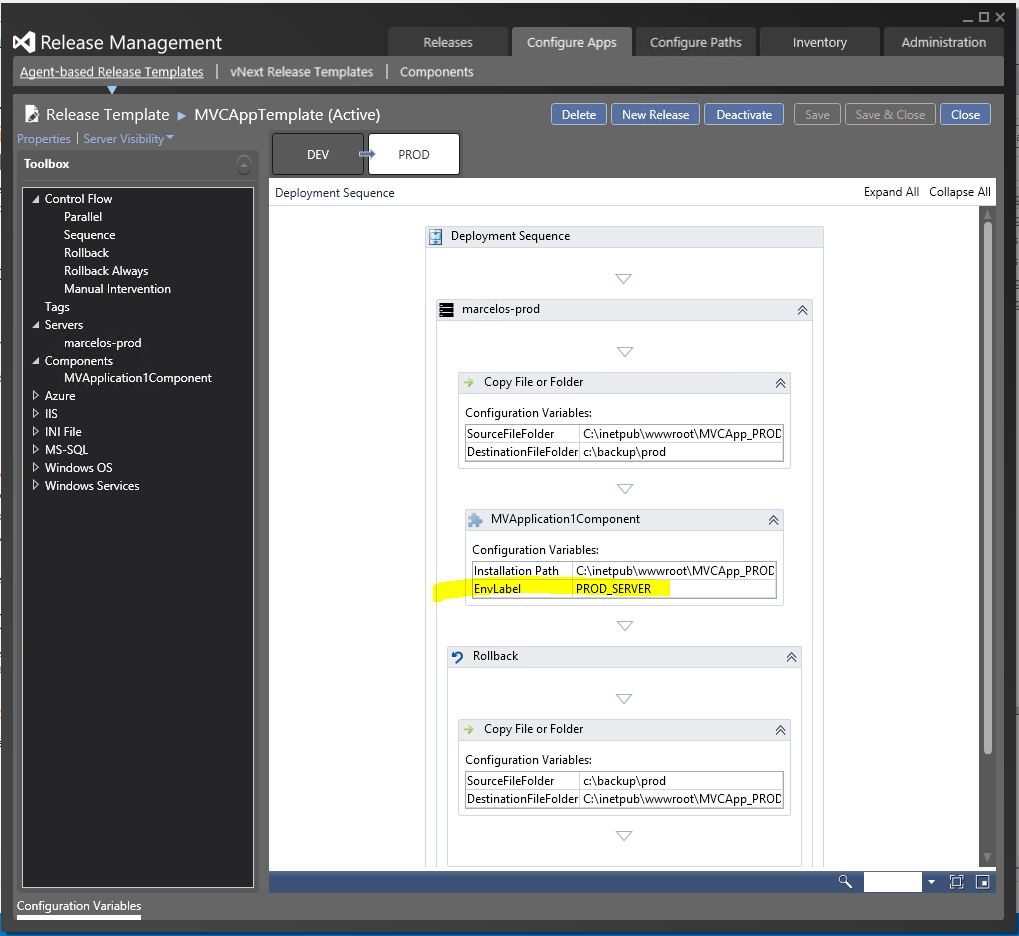
Next we define the release template. In this example:
- You can see the DEV -> PROD workflow
- Servers in the deployment (I only have one in this example, but you might have multiple most likely)
- Components: the application being deployed (you might have to manually add it by right-clicking Components
- I included optional steps to backup current site, and to rollback in case deployment fails (more of a best practice, but they're not necessary)
Notice that the "EnvLabel" token we specified before gets a value here, depending on the environment, along with the other variables like target and backup folders:

Deploying
Let's get some action going!
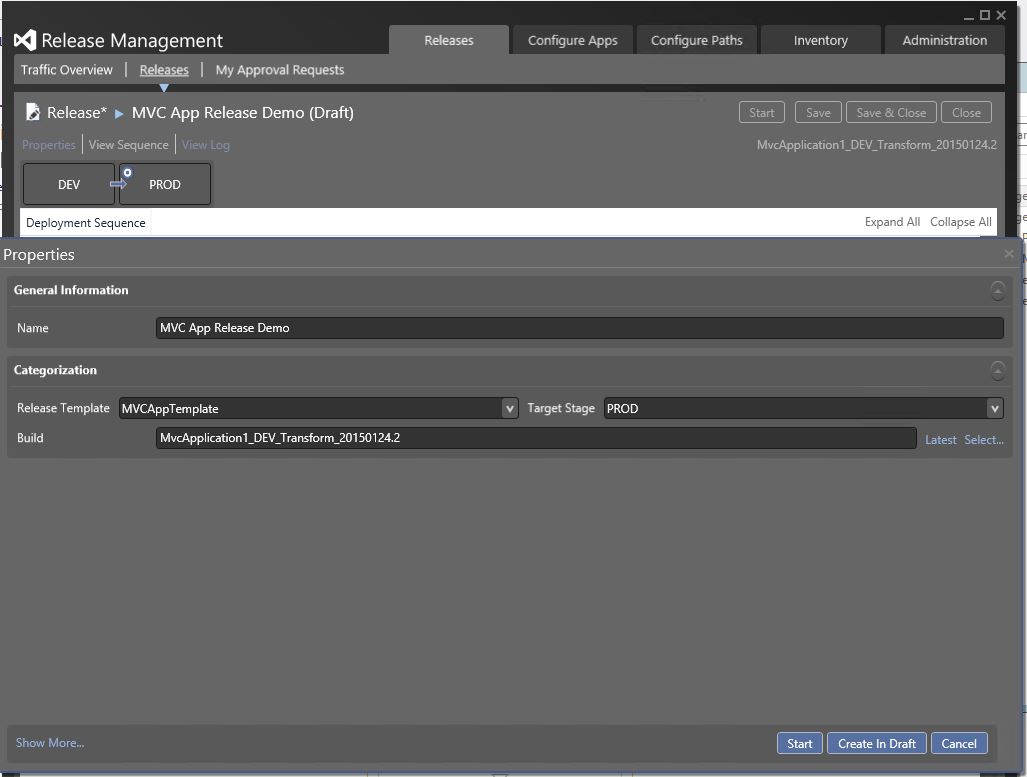
We initiate the release manually, choosing the template we configured previously, PROD as the last stage and selecting the last build as the one to deploy:
After a while we should see the following results:

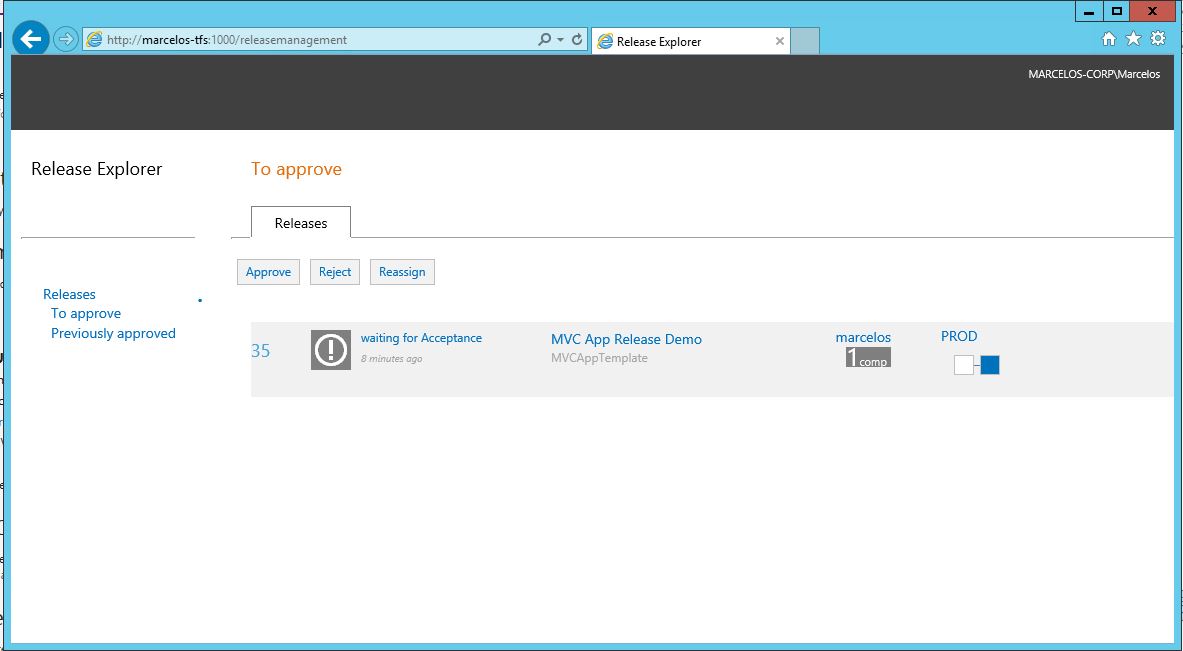
Notice that the deployment to DEV was completed, but deployment to PROD is waiting for approval.
DEV has been successfully deployed:

While PROD has not yet:
The reason is that we're waiting for approval. Let's go ahead and open the approval window using the RM web client:
Clicking on the "Approve" for the selected release, we get the following dialog:

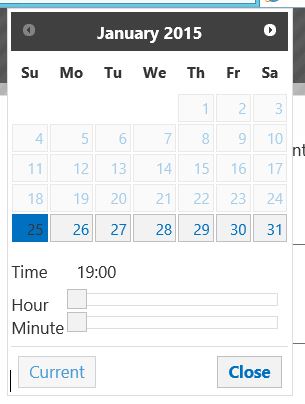
If we want to approve, but delay the deployment for later (off-hours deployment), we can click on the "Deferred Deployment" and select a day/time for when the deployment will execute:
After approval is given, the workflow resumes and finishes deploying to PROD:


There you have it!
Comments
- Anonymous
April 21, 2015
The comment has been removed - Anonymous
May 25, 2016
How would you be able to do this using the new release manager in TFS- Anonymous
February 09, 2017
I'm going to update this post for TFS 2017/VSTS using the new build/RM architecture. Stay tuned!
- Anonymous