Note
Access to this page requires authorization. You can try signing in or changing directories.
Access to this page requires authorization. You can try changing directories.
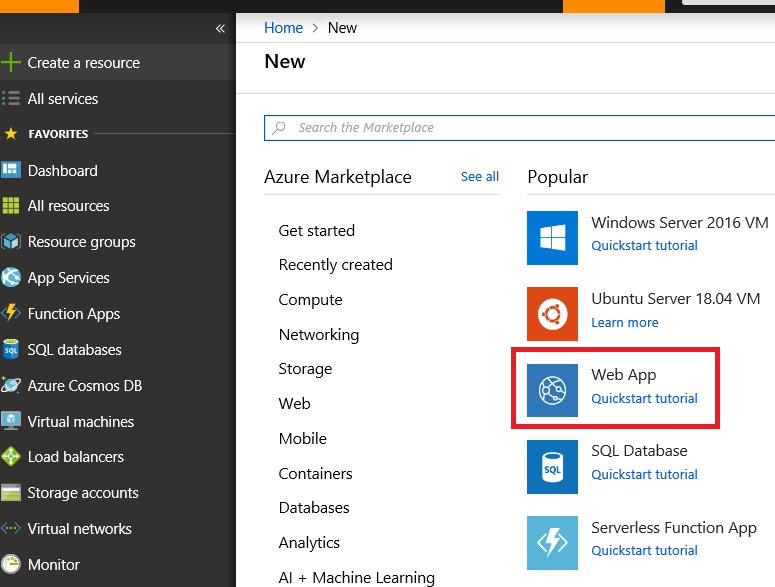
Create the Azure WebApp
- Create new WebApp using Azure portal
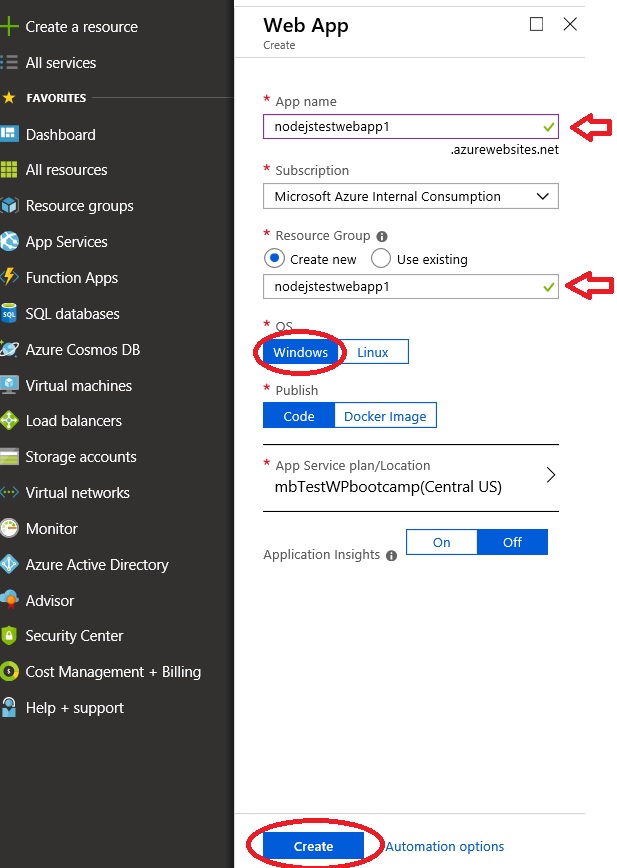
- Set the App name, Resource Group and click "Create"
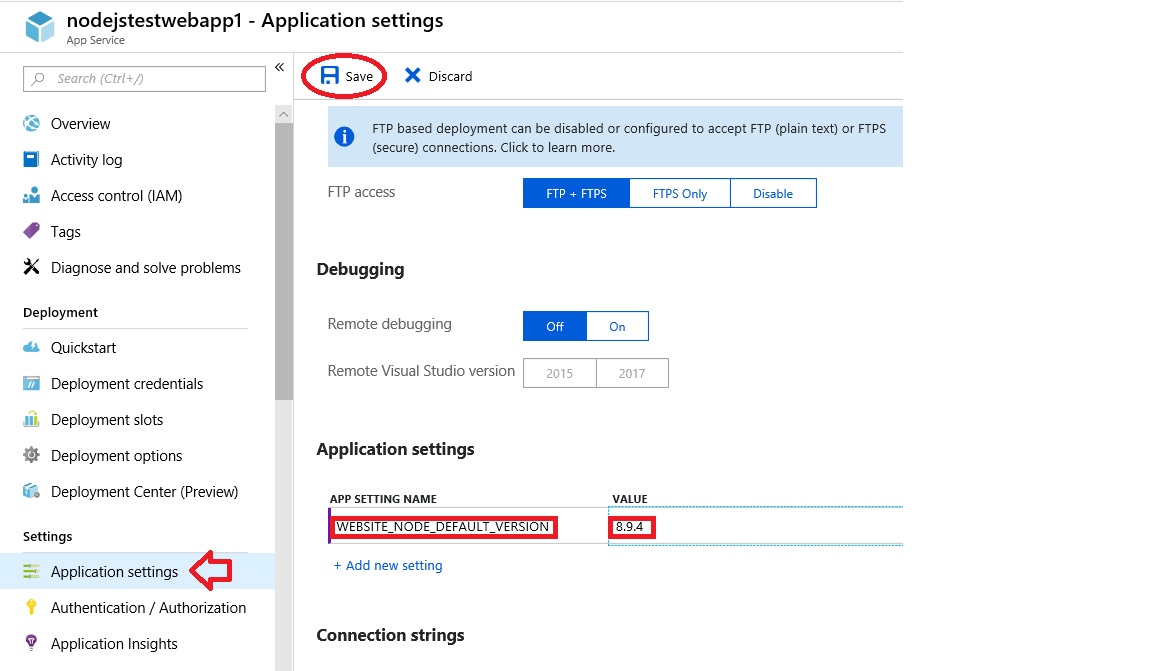
- Wait for deployment to succeed and then click on Application Settings for the new Webapp.
- Add a new setting with App Setting Name "WEBSITE_NODE_DEFAULT_VERSION" and Value "8.9.4" and click Save. If you would like to use a different version of node, please refer to the section "How to find available node.js versions for Windows Webapps" below.
- You can now start developing your node.js application in Azure Environment.
How to find available node.js versions for Windows Webapps.
For nodejs release schedule, please refer to
https://github.com/nodejs/Release
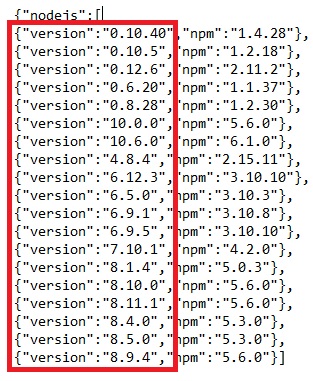
To find current nodejs versions available in Azure Windows WebApps, navigate to this link:
https://<yourwebappname>.scm.azurewebsites.net/api/diagnostics/runtime
You can only use the versions available in this list.
New versions are added regularly, so please check for newer versions using the /api/diagnostics/runtime url above.
Common Error that indicates the node.js version is missing or incorrect.
If your application is getting the following error, please check whether WEBSITE_NODE_DEFAULT_VERSION is set to a valid value.
 Application has thrown an uncaught exception and is terminated:
SyntaxError: Unexpected token {
at Module._compile (module.js:434:25)
at Object..js (module.js:464:10)
at Module.load (module.js:353:31)
at Function._load (module.js:311:12)
at Module.require (module.js:359:17)
at require (module.js:375:17)
at Object.<anonymous> (D:\Program Files (x86)\iisnode\interceptor.js:459:1)
at Module._compile (module.js:446:26)
at Object..js (module.js:464:10)
at Module.load (module.js:353:31)