Note
Access to this page requires authorization. You can try signing in or changing directories.
Access to this page requires authorization. You can try changing directories.
This post is applicable only to SQL Server 2012, SQL Server 2012 SP1 with SharePoint 2013 SP1.
Before you implement RBS, I highly recommend that you evaluate its potential costs and benefits. For more information and recommendations about how to use RBS in a SharePoint 2013 installation, see Plan for RBS in SharePoint 2013.
1. Prerequisites
1.1 Environment
- A ready to use SharePoint 2013 SP1 farm.
- A ready to use SQL Server 2012 machine.
1.2 Roles
- The Farm account with local administrator rights on all the SharePoint 2013 Web Front Ends.
- The Farm account must also be assigned with dbcreator and securityadmin server roles on the SQL Server 2012 instance.
1.3 Binaries
- From : SQL Server 2012 Feature Pack page, click on Install Instructions, and find : Remote Blob Store
-
- You want to download : RBS.msi (X64 Package)
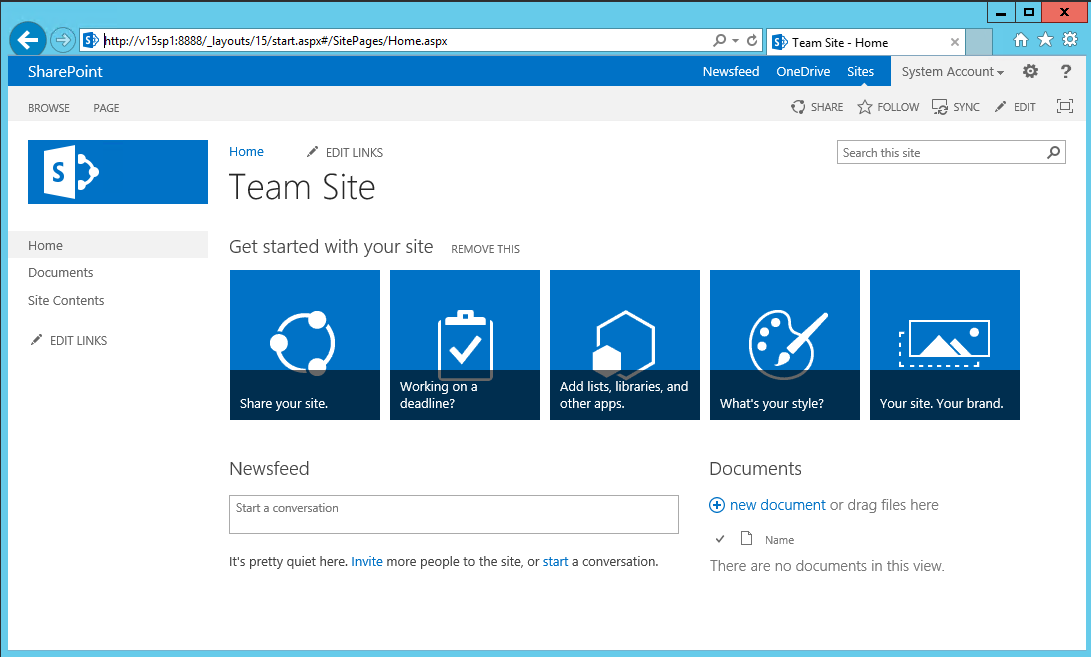
2. Provision a SharePoint 2013 site collection
2.1 Create a new Web Application if there is none created (w/o Central Admin Web Application)
- Open the Central Administration with a Farm admin account
- Click on : Application Management --> Manage web applications --> New
-
- Name : SharePoint - 8888
- Port : 8888 (or any of your convenience)
- URL : https://V15SP1:8888 (this is the public url if host header is not specified)
- Application pool name : SharePoint - 8888
- Database server : SQL2012SERVER
- Database name : WSS_Content_RBS
- Authentication : Windows
2.2. Create a site collection in the newly created WebApp
- Login on any SharePoint machine as a farm admin
- Launch PowerShell ISE as Administrator

- Create a new site collection using PowerShell cmdlets :
Add-PSSnapin *
New-SPSite -Url https://v15sp1:8888/ -OwnerAlias "GBG\SP_Farm" -ContentDatabase "WSS_Content_RBS" -Template STS#0

- Make sure that the site collection has been successfully created.
3. Configure SQL Server 2012 SP2 for RBS
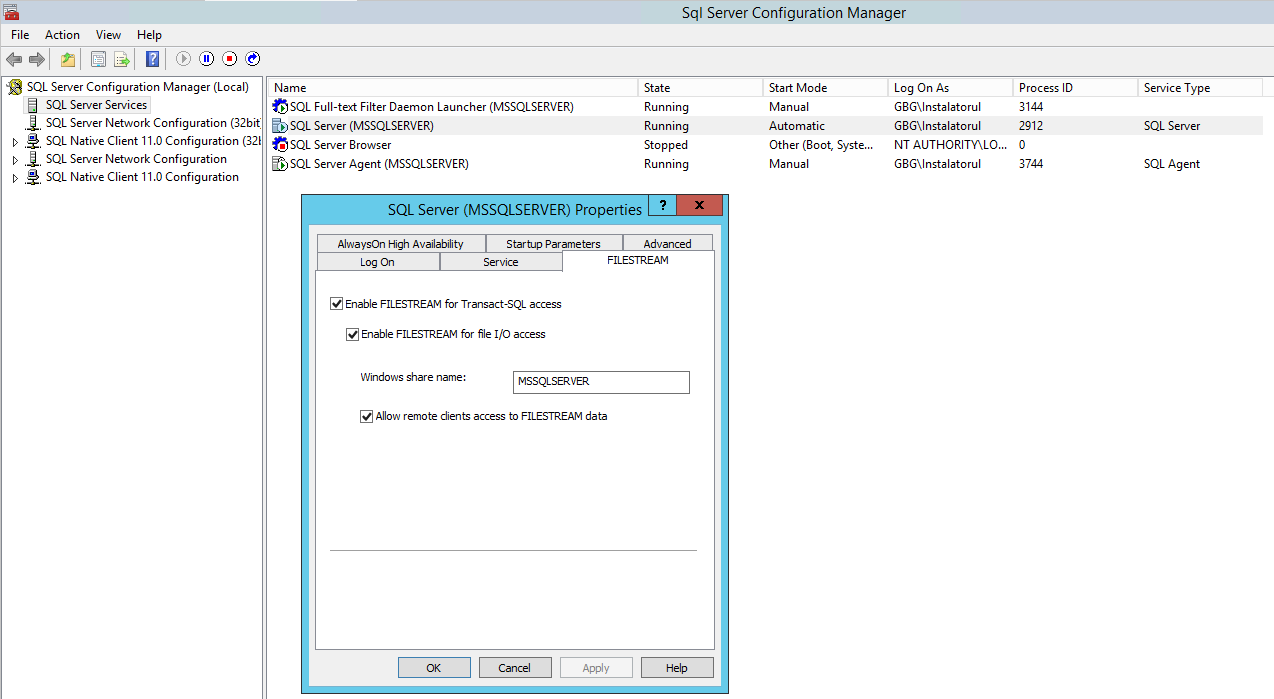
3.1. Enable FILESTREAM on the SQL Server Instance
- Login on the SQL Server 2012 machine and open SQL Server Configuration Manager.
- Click on SQL Server Services
- In the list of services, locate the instance of SQL Server on which you want to enable FILESTREAM, right-click on it and click Properties.
- In the SQL Server Properties box, click the FILESTREAM tab and select :
- Enable FILESTREAM for Transact-SQL access check box.
- Enable FILESTREAM for file I/O access.
- Allow remote clients to have streaming access to FILESTREAM data.
- Hit Apply and then OK.
Open SQL Server Management Studio
Click New Query
In the Query Editor, enter the following SQL code:
EXEC sp_configure filestream_access_level, 2
RECONFIGURE
Select and execute them one by one. You should notice the following Messages:
"Configuration option 'filestream access level' changed from 0 to 2. Run the RECONFIGURE statement to install."
"Command(s) completed successfully."
3.2. Provision a BLOB Store for the content database
- Open the SQL Server Management Studio
- Connect to the SQL Server Instance that hosts the content database
- Find the content database for which you want to create a BLOB store, right click in it and then click New Query.
- Run the following SQL queries in the following order, replacing the highlighted text accordingly :
Note that the Blob store process creates a folder in the location that you specify and this can be done only one time. If you will try to provision the same Blob store one again, you will receive an error.
use [WSS_Content_RBS] if not exists (select * from sys.symmetric_keys where name = N'##MS_DatabaseMasterKey##')create master key encryption by password = N'Admin Key Password !2#4' |
use [WSS_Content_RBS] if not exists (select groupname from sysfilegroups where groupname=N'RBSFilestreamProvider')alter database [WSS_Content_RBS] add filegroup RBSFilestreamProvider contains filestream |
use [WSS_Content_RBS] alter database [WSS_Content_RBS] add file (name = RBSFilestreamFile, filename = 'C:\Blobstore') to filegroup RBSFilestreamProvider |
- At the end you should receive the following message : "Command(s) completed successfully." and should find a new folder under C:\ partition.

3.3 Install the RBS provider binaries on the SQL server and each Web Front End
Deployment order : SQL Server (1st) --> SharePoin WFEs (2nd)
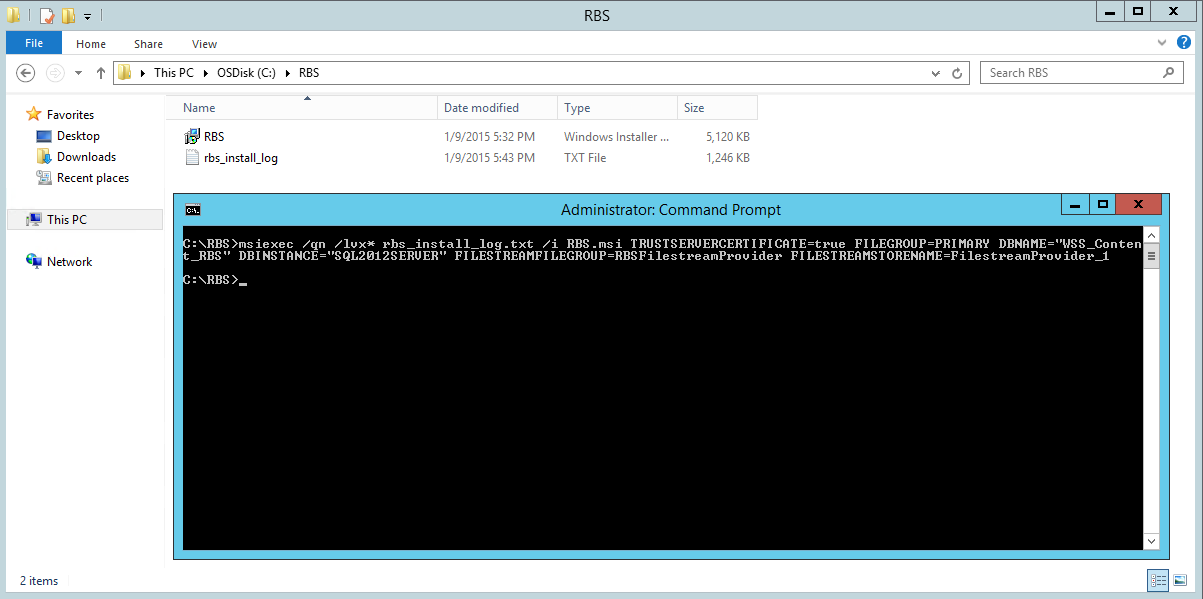
3.3.1 Install RBS on the SQL server
- Download the RBS.msi from SQL Server 2012 Feature Pack
- Run command prompt as Administrator and switch to the directory to the folder where the RBS.msi is saved (e.g.: c:\RBS\)
- Run the following statement into the command prompt window and note the changes you have to set-up:
msiexec /qn /lvx* rbs_install_log.txt /i RBS.msi TRUSTSERVERCERTIFICATE=true FILEGROUP=PRIMARY DBNAME="WSS_Content_RBS" DBINSTANCE="SQL2012SERVER" FILESTREAMFILEGROUP=RBSFilestreamProvider FILESTREAMSTORENAME=FilestreamProvider_1 |
- In the same folder you should find a file: "rbs_install_log.txt" with the RBS installation log.
- The log file size should be higher than 1 MB (mine was 1,246 KB)
- The operation is not instantaneous and requires you to wait for it to end successfully.
- If the log is smaller and you find more error messages, you may have miss-typed the cmd prompt install string.
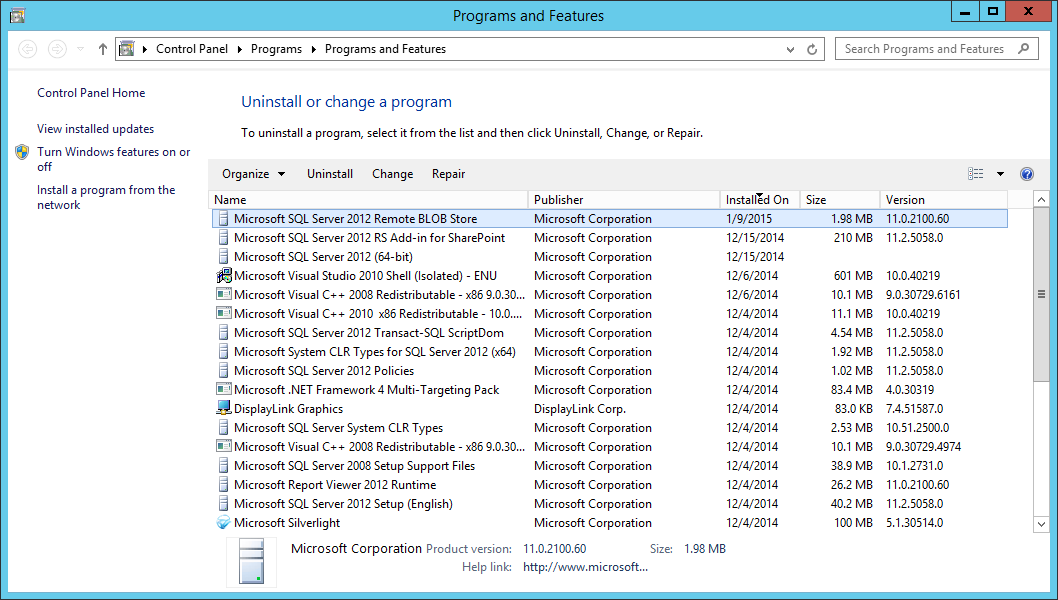
- Verify if everything went fine:
- Check in the "Programs and Features".
- You should find installed: "Microsoft SQL Server 2012 Remote BLOB Store"
- Check in the "Programs and Features".
-
- Check the log bottom-up:
- At the end of it you should find a string : "Product: Microsoft SQL Server 2012 Remote BLOB Store -- Installation completed successfully."
- Search up for : "error" and you should find : "Installation success or error status: 0." No other relevant information should be found.
- Check the database "WSS_Content_RBS"
- Open Microsoft SQL Server Management Studio
- Connect to the SQL Service instance (if already connected, refresh the connection)
- Expand the "WSS_Content_RBS" database -> Tables -> scroll down
- Find about (less than) 20 tables starting with "mssqlrbs*" name
- Check the log bottom-up:

3.3.2 Install RBS on the SharePoint Web Front Ends
- Download the same RBS.msi from SQL Server 2012 Feature Pack
- Run command prompt as Administrator and switch to the directory to the folder where the RBS.msi is saved (e.g.: c:\RBS\)
- Run the following statement into the command prompt window and note the changes you have to set-up:
msiexec /qn /lvx* rbs_install_log.txt /i RBS.msi DBNAME="WSS_Content_RBS" DBINSTANCE="SQL2012SERVER" ADDLOCAL="Client,Docs,Maintainer,ServerScript,FilestreamClient,FilestreamServer" |
- In the same folder you should find a file: "rbs_install_log.txt" with the RBS installation log.
- The log file size should be smaller than 1 MB, but bigger than 500KB.
- The operation is not instantaneous and requires you to wait for it to end successfully.
- Find any error messages if any. They may appear if you have miss-typed the cmd prompt install string.

- Repeat the operation for each Web Front End using the same install statement as above and verify the install log and in "Programs and Features" as well.
Here ends the installation part.
4. Configure SharePoint 2013 to use RBS
4.1 Configure SharePoint WebApp to use RBS
- Open as administrator: SharePoint 2013 Management Shell
- Run the following cmdlets and change the name of the Web Application Accordingly:
| $cdb = Get-SPContentDatabase –WebApplication https://V15SP1:8888$rbss = $cdb.RemoteBlobStorageSettings$rbss.Installed()$rbss.Enable()$rbss.SetActiveProviderName($rbss.GetProviderNames()[0]) |
4.2 Test for proper installation on all Web Front Ends
- Below is an example of bad installation. The RBS install log is ~50 KB

- Executing $rbss.Installed() should return true, if false this may be due to the reason that RBS is not installed properly or RBS is not installed on other Web servers. Verify the RBS installation log on all the servers. If you think something is wrong uninstall RBS from "Programs and Features", restart the machine and then re-install using step 3.3.2.
Comments
- Anonymous
September 16, 2015
Thank you Ahmed, I corrected it.