Note
Access to this page requires authorization. You can try signing in or changing directories.
Access to this page requires authorization. You can try changing directories.
What about to provisioning a Docker environment in Azure in only one command line ?
One week ago the Cloud Show released an interesting video about the Azure driver in Docker.
So, now it’s possible thanks to the Azure driver included in the docker-machine tool to provisioning an docker environment in one command line !!
Let me introduce you how it works.
As a prerequisites, you need to have the docker toolbox installed in your local machine.
Provisioning a docker environment in Azure
The first command that you can run is : docker-machine --create azure --help 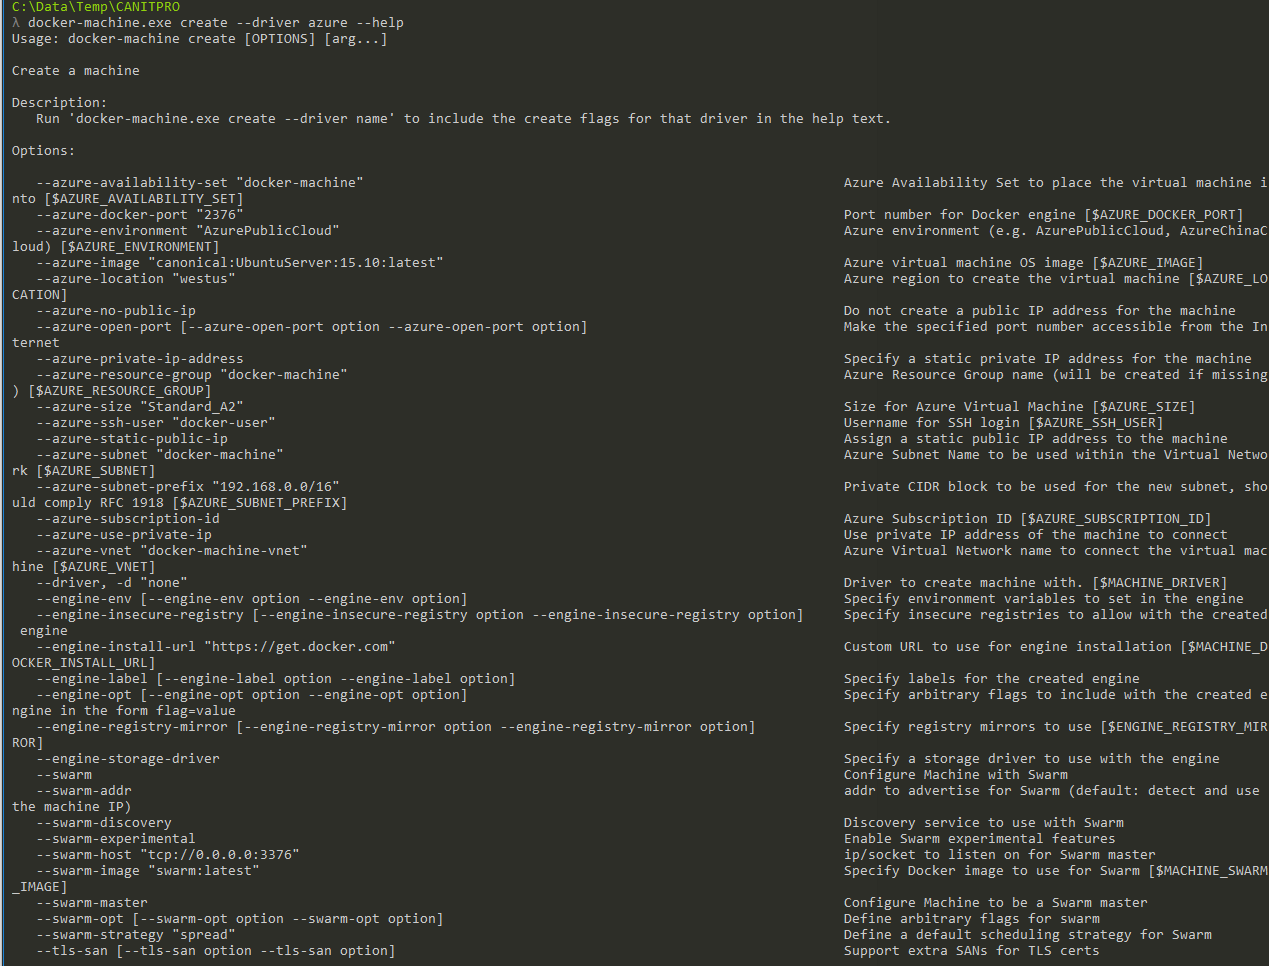
You can see as the output of this command a lot of options with description like
• --azure-image
• --azure-size
• --azure-subscription-id
• …
The idea is to use this command: docker-machine --create azure + options + nameEnvironment to create one docker environment.
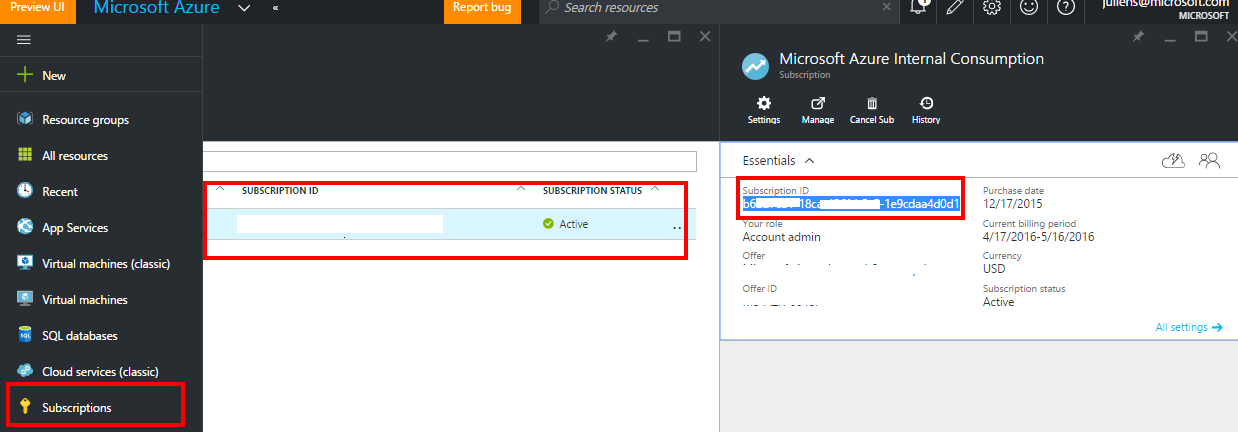
The only prerequisite that we will need it’s the Azure subscription id where we want to deploy our environment.
You can have this information in the portal in the subscription section :
Let’s do an example with the following command :
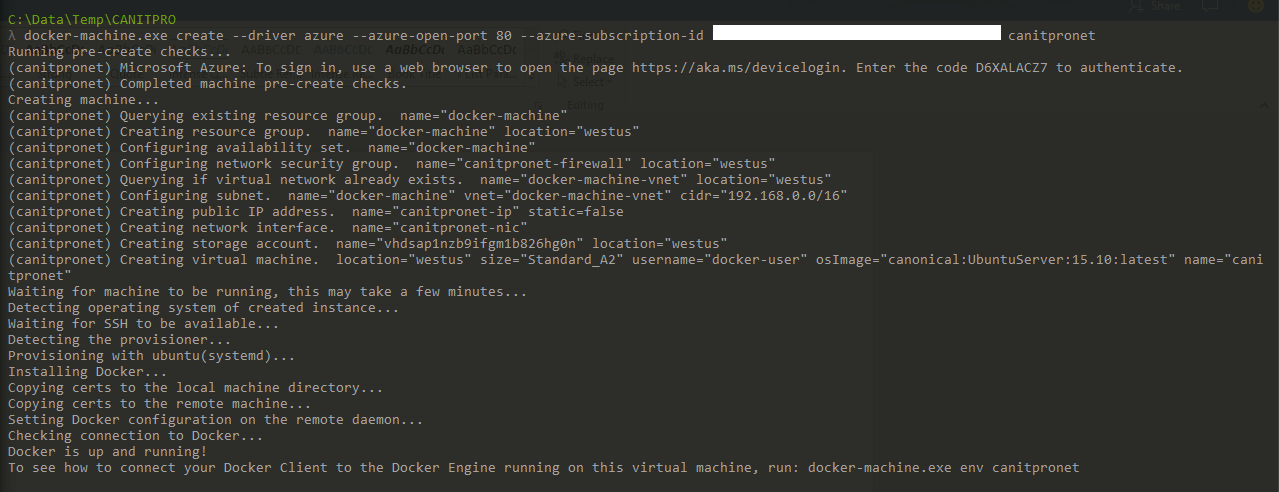
docker-machine create --driver azure --azure-open-port 80 --azure-subscription-id XXXXXXXX-XXXX-XXXX-XXXX-XXXXXXXXXXX canitpronet 
Thanks to this command, we will ask Azure to create a virtual machine with docker installed on it, and also open the port 80 to reach our containers from outside to the subscription with the id XXXX-XXXX[...] with the name canitpronet.
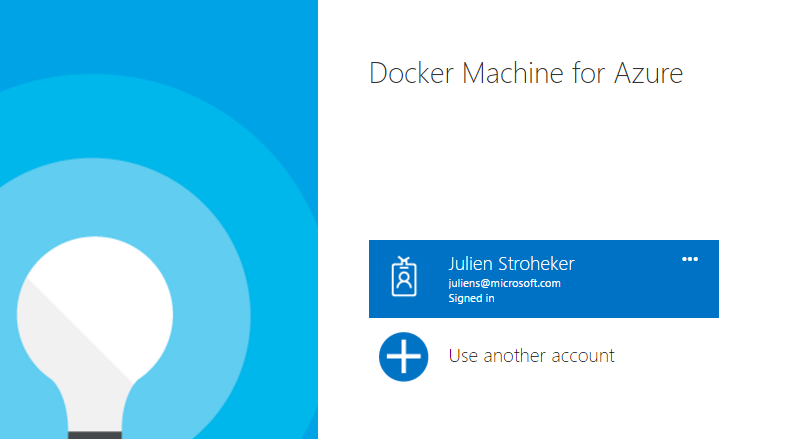
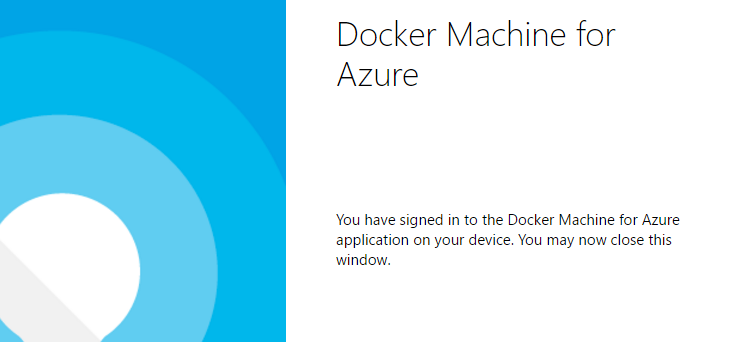
As you can see, the command line ask us to open the page https://aka.ms/devicelogin and insert the following code described in the console :

After few minutes you should have this results in your command line :
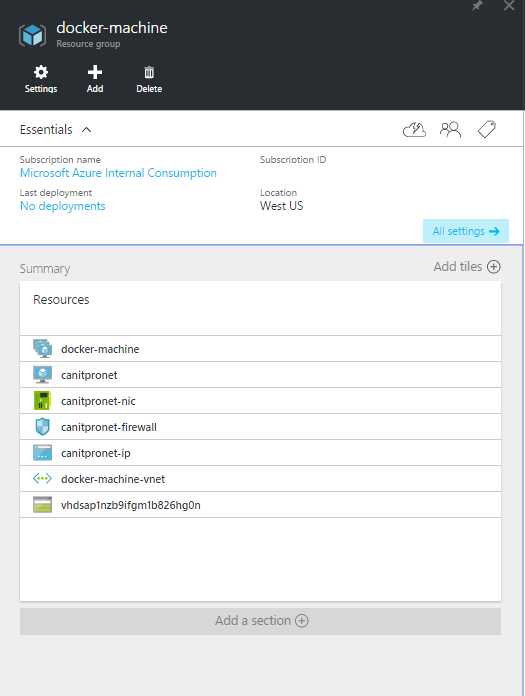
We can check behind the scene if everything is correct on Azure :
The next step will be to run the following command : docker-machine env nameEnvironmnent
In our example it will be : docker-machine env canitpronet 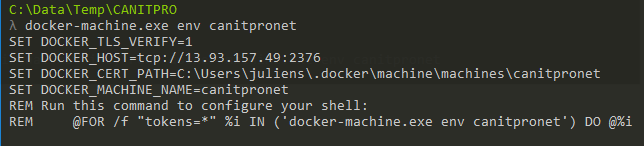
After that, we have to run one command to configure our shell :

The last command that we can run to check if everythin is correct in our environment is : docker-machine ls : 
Our new environment should appear in the list with the public to reach it.
Deploy a container in this environment
Now that we have a new fresh environment we can run command from our local computer to this remote enviromnent.
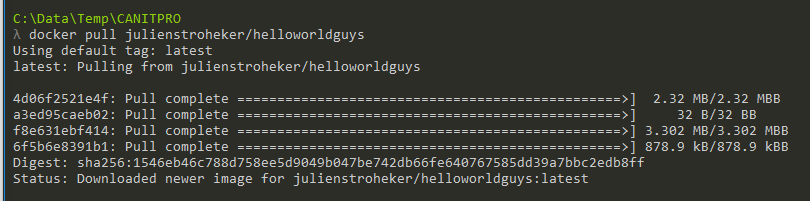
So let's pull an container from docker hub and run it to see if everything works well !
Let's run : docker pull julienstroheker/helloworldguys
This container is a light one that I did to test if my web environment works well :)
The next step will be to run this container on the port 80 with the name canitprocontainer with the following command : docker run -it --name canitprocontainer -d -p 80:80 julienstroheker/helloworldguys 
At this point, our container should now running in our remote environment freshly deployed and reachable through the virtual IP of the virtual machine.
To check the ip assigned to our environment you can run the following command : docker-machine ip canitpronet 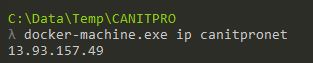
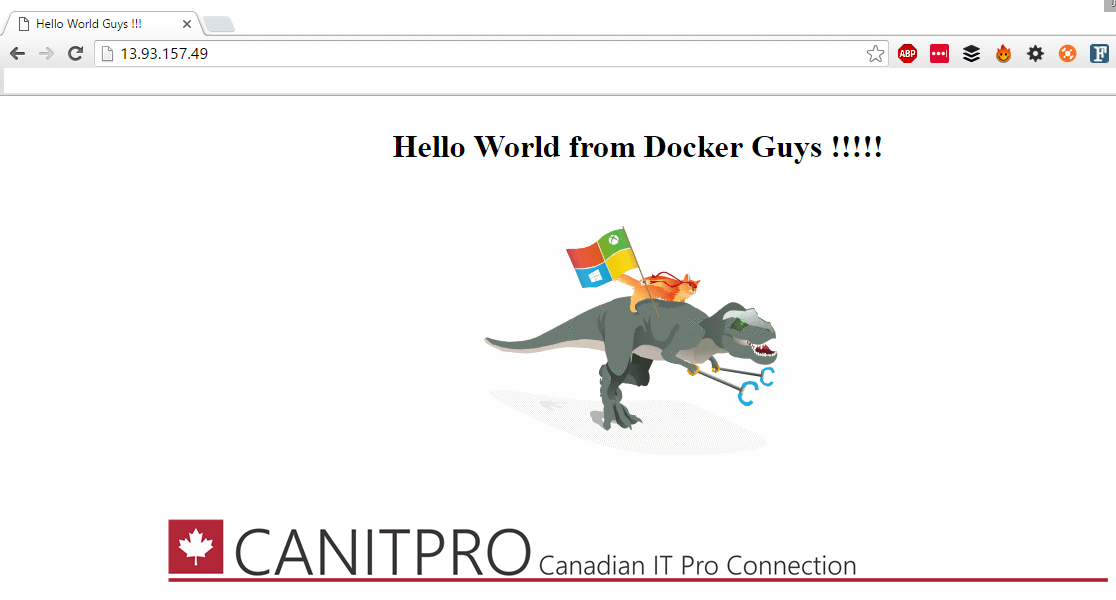
So in my case my ip is 13.93.157.49, so let's check in my browser the result :
Remove our environment
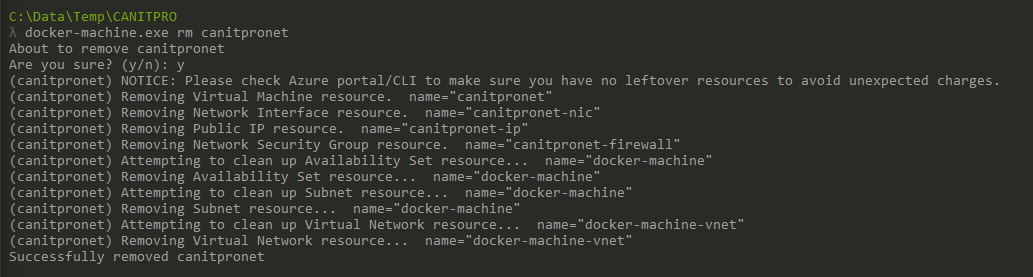
To remove all you environment you can run the following command : docker-machine rm canitpronet
It will ask you to confirm the operation and few minutes later everything should gone.
Let's check our environment.

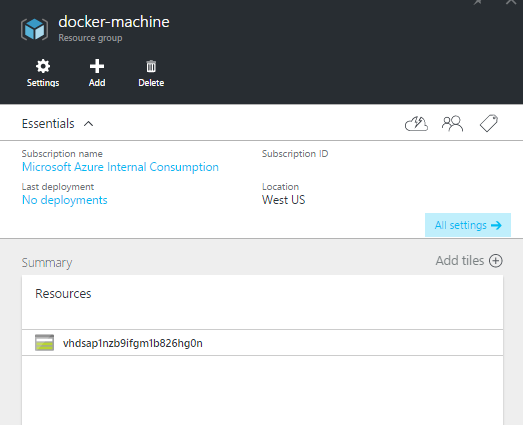
My recommandations is to double check on Azure if everything worked well, in my case I had to remove the resource group manually :
As you can see, thanks to this concept, you can command remotely your Docker-Azure environment from your local machine and easily provision and remove some environments in one command line !!
Enjoy ;)
@Ju_Stroh