Step-By-Step: Adding a Windows Server 2012 Domain Controller to an Existing Windows Server 2003 network

Sharing knowledge amidst social media is a passion of mine. I challenge myself to try and spark a conversation via any of the most widely used social media avenues available. So when a request for a Step-By-Step post on Active Directory migration following the previous Step-By-Step post on DHCP Migration, Pierre and I were only too happy to oblige. Before detailing Active Directory migration, we felt it pertinent to showcase how to add a Windows Server 2012 Domain Controller to an existing network first. Migration of Active Directory from Windows Server 2003 to 2012 would be the next step once this Step-By-Step has been completed successfully.
Prerequisites
- Download Windows Server 2012 R2. If you plan on completing this Step-By-Step in a virtual lab, it is recommended to download the FREE Hyper-V Server 2012 R2 first.
- Check to ensure the Domain Functional Level is currently setup to at least Windows 2003 mode. This is the lowest required Domain Functional Level that would allow a Windows Server 2012 Domain Controller installation. Windows NT / 2000 Domain Controllers are not supported via this process.
Via the Active Directory Users and Computers console, select the domain via the right mouse button on it.
Select Raise Domain Functional Level and review the Current domain functional level reported
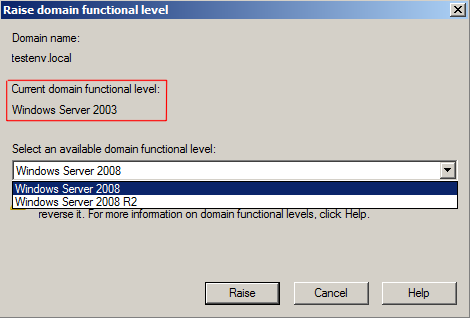 The Domain Functional Level does not need to be raised if the Current domain functional level is reporting Windows Server 2003.
NOTE: Should a lower domain be showcased (i.e., Windows Server 2000), please keep in mind that raising Domain Functional Level is a one time action and cannot be reverted. Remember Windows NT / 2000 Domain Controllers are not supported via this process.
Ensure your profile is a member of the Enterprise Admins group.
Getting Started
- Setup and install your Windows Server 2012 machine
- Configure the new server's IP address to correspond to the target domain and ensure the existing Domain Controllers, where DNS is installed and configured, are visible by your new Windows Server 2012 install.
Setting Up Domain Controller Fuctionality
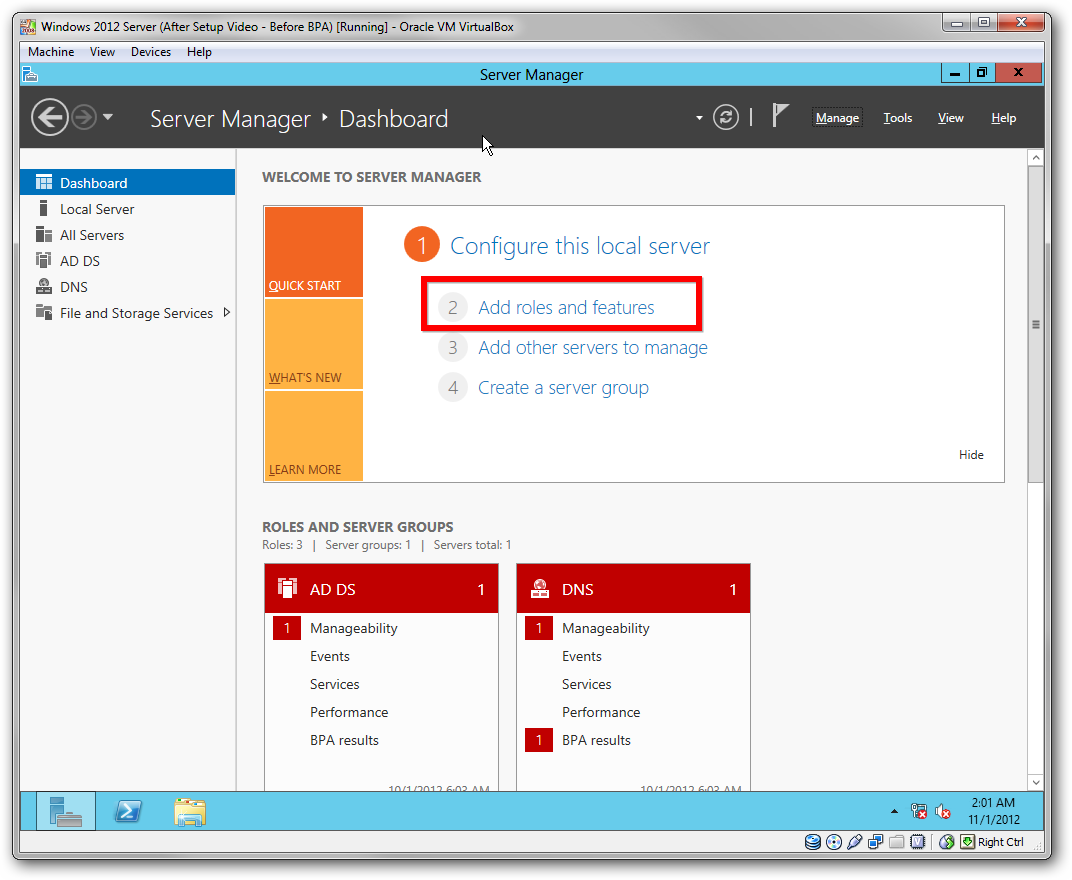
- Open the Server Manager console and click on Add roles and features
- Select Role-based of featured-based installation and select Next.

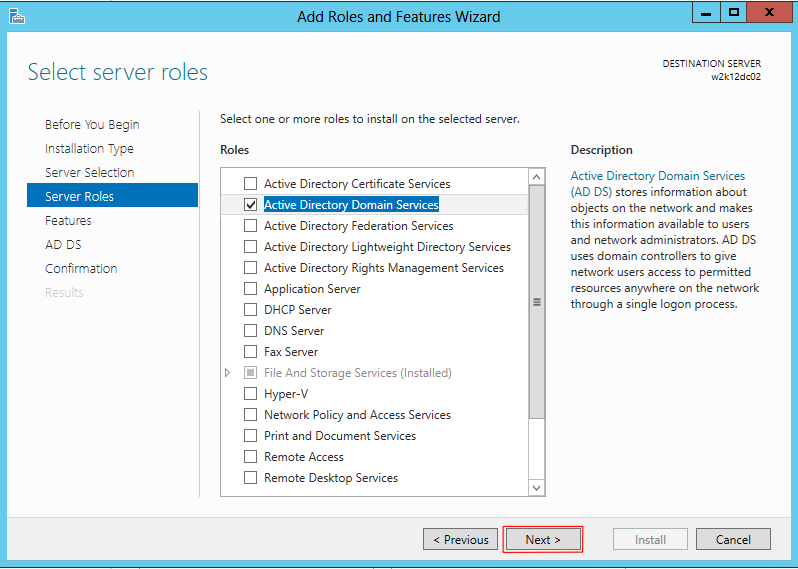
- Select the Active Directory Directory Services role.
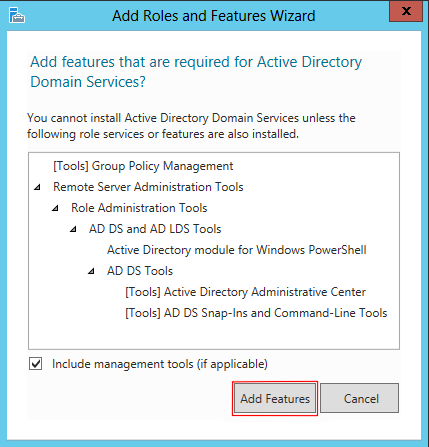
- Accept the default features required by clicking the Add Features button.
- On the Features screen click the Next button.
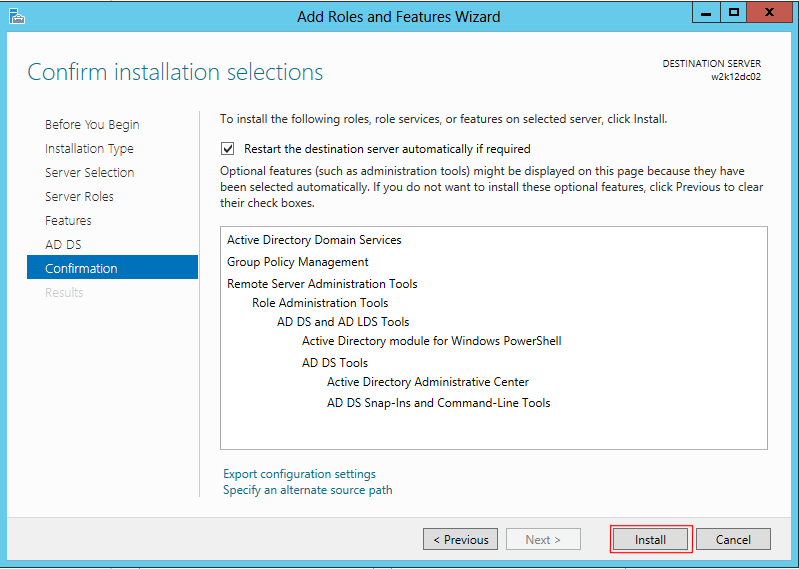
- On the Confirm installation selections screen click the Install button.NOTE: Check off the Restart the destination server automatically if required box to expedite the install should you be able to reset the target server automatically.
- Click the Close button once the installation has been completed.
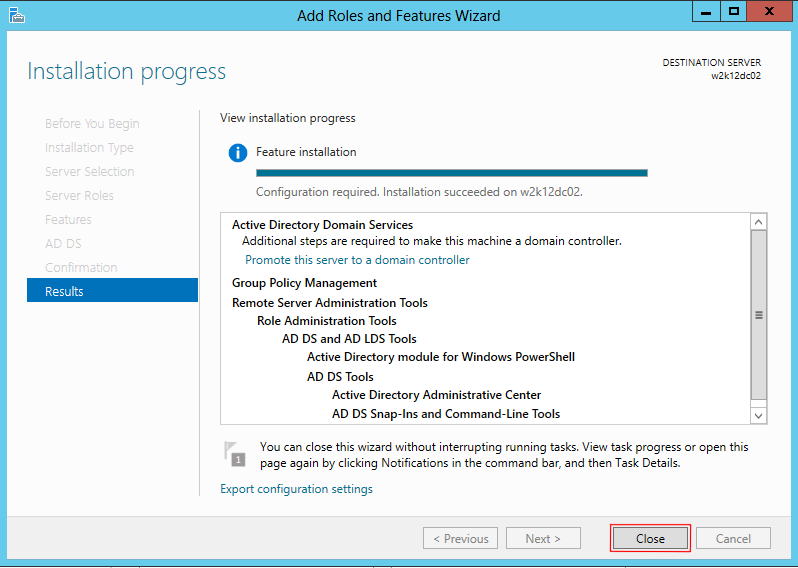
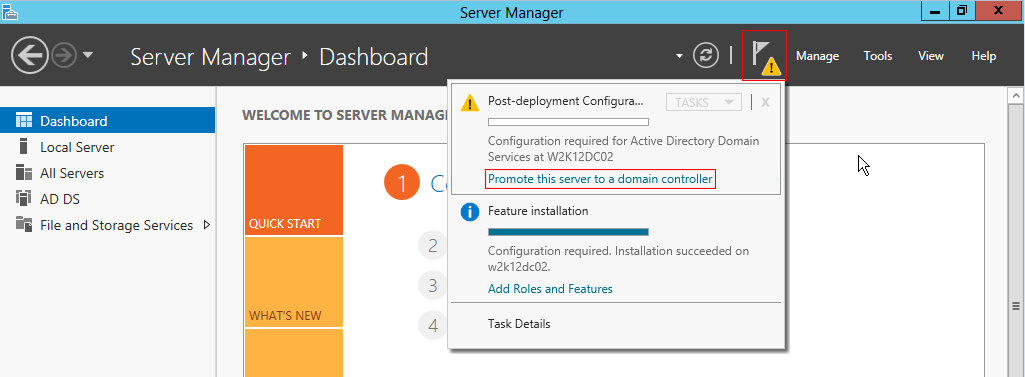
- Once completed, notification is made available on the dashboard highlighted by an exclamation mark. Select it and amidst the drop down menu select Promote this server to a domain controller.
- Select add a Domain Controller into existing domain
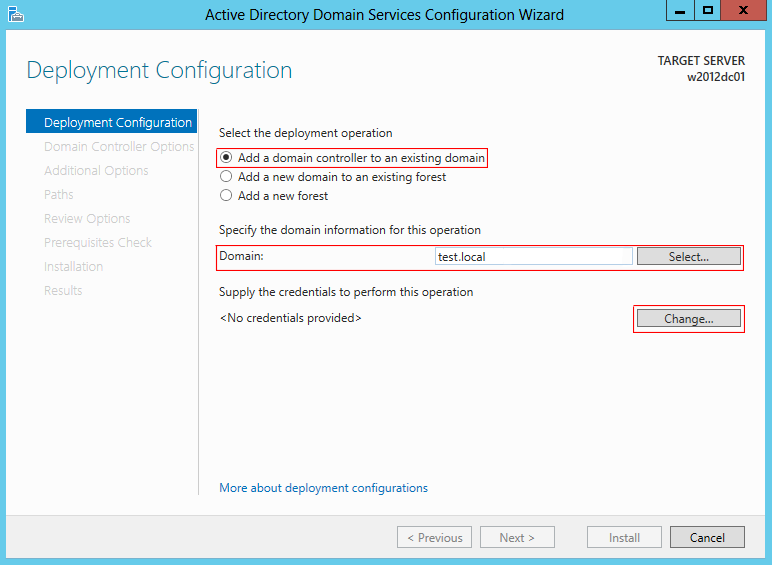
- Ensure the target domain is specified. If it is not, please either Select the proper domain or enter the proper domain in the field provided.
- Click Change, provide the required Enterprise Administrator credentials and click the Next button.
- Define if server should be a Domain Name System DNS server and Global Catalog (GC) . Select the Site to which this DC belongs to and define Directory Services Restoration Mode (DSRM) password for this DC
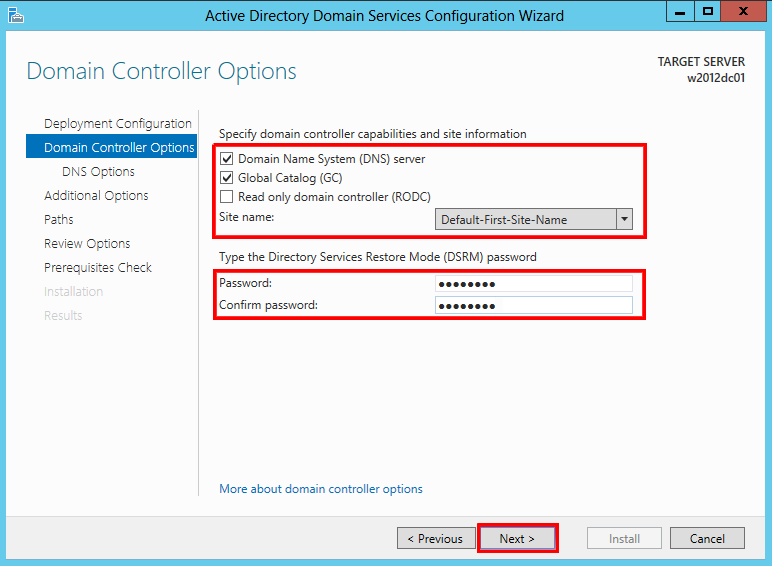
- Click the Next button on the DNS options screen.
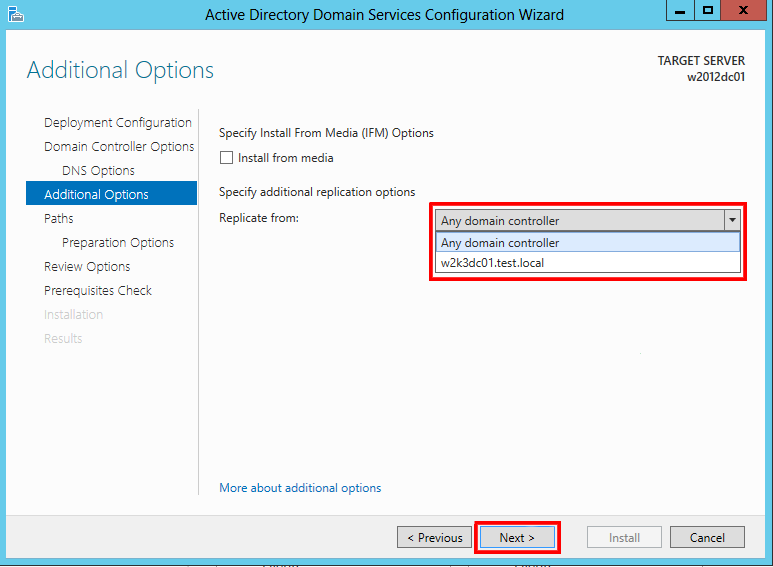
- In the Additional Options screen you are provided with the option to install the Domain Controller from Install From Media (IFM). Additionally you are provided the option to select the point from which DC replication should be completed. The server will choose the best location for AD database replication if not specified. Click the Next button once completed.
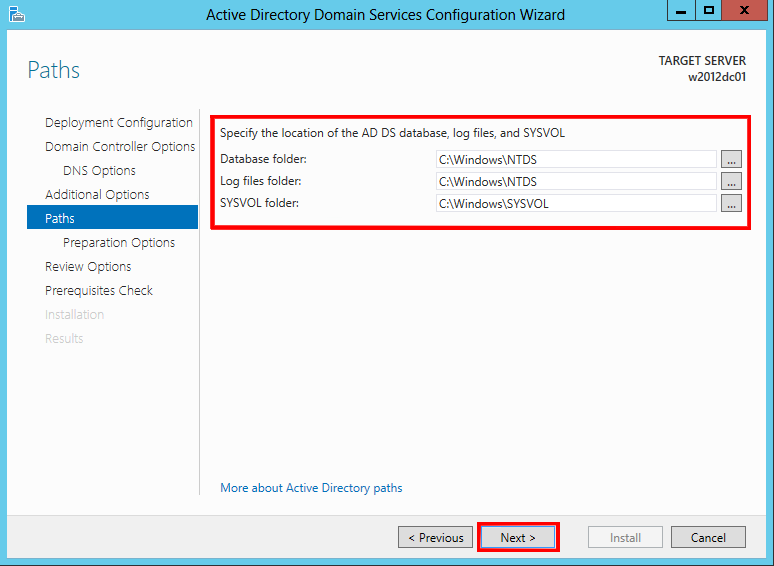
- Specify location for AD database and SYSVOL and Click the Next button.
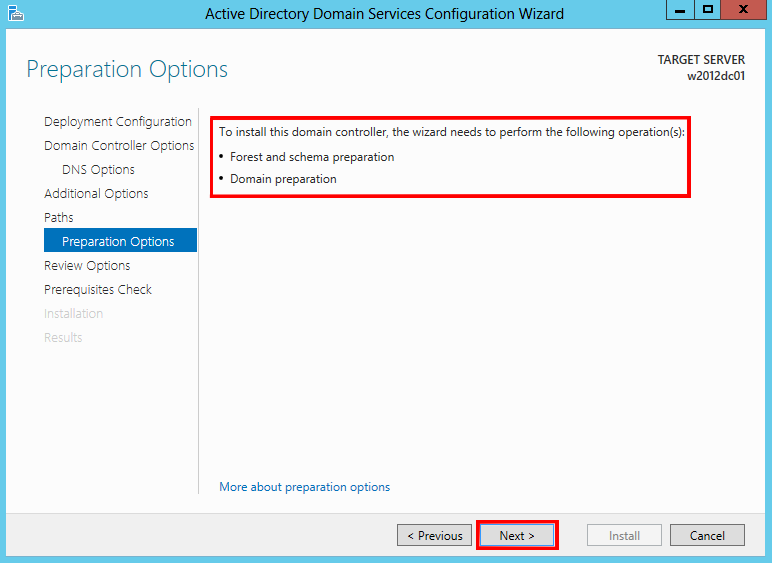
- Next up is the Schema and Domain preparation. Alternately, one could run Adprep prior to commencing these steps, Regardless, if Adprep is not detected, it will automatically be completed on your behalf.
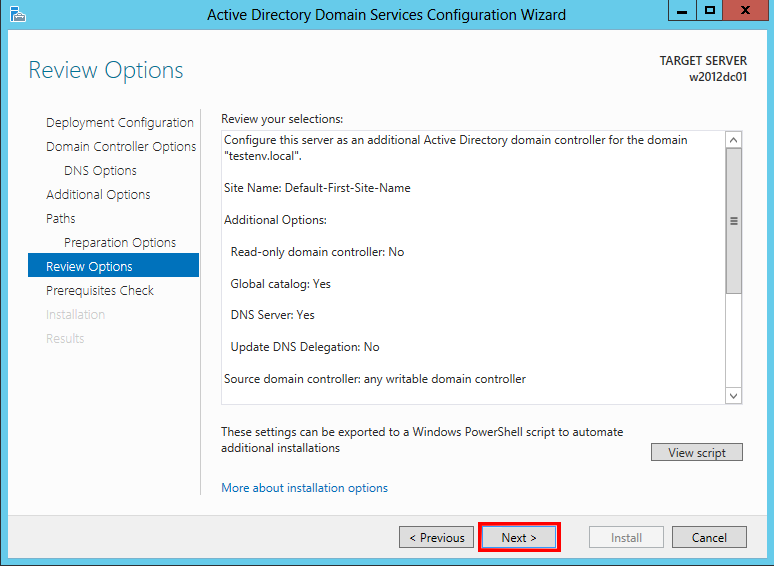
- Finally, the Review Options screen provides a summary of all of the selected options for server promotion. As an added bonus, when clicking View Script button you are provided with the PowerShell script to automate future installations. To click the Next button to continue.
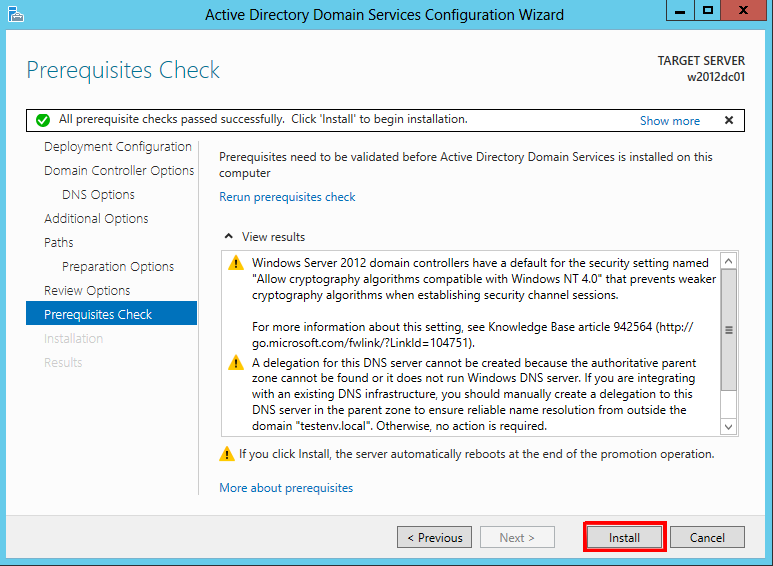
- Should all the prerequisites pass, click the Install button to start the installation.
- After it completes the required tasks and the server restarts, the new Windows Server 2012 Domain Controller setup is completed.
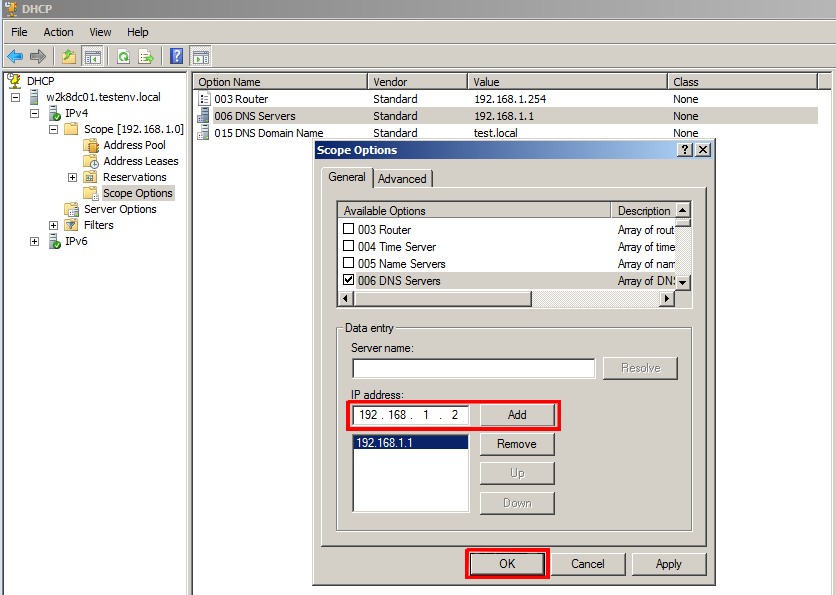
- Lastly, on each server/workstation within the target domain require a NIC properties configuration update to point to the new Domain Controller. Open the DHCP management console, select Option no. 006 and under server/scope options and add the IP address of your new Domain Controller as DNS server.
Should you see one of our #CANITPRO Step-By-Step posts in any social media venue, feel free to contribute thoughts and additional ideas. Additionally, feel free to connect with us on any topic you would like to see covered. We are always happy to oblige.
Comments
- Anonymous
June 21, 2016
One thing I noticed: you must also raise the FOREST functional level to 2003 or higher. - Anonymous
July 23, 2016
Nice one - Anonymous
August 04, 2016
The comment has been removed - Anonymous
August 12, 2016
a very great job done. you have really helped me to complete my assignment, keep up the good work I would love to learn more from you - Anonymous
August 22, 2016
The comment has been removed - Anonymous
September 15, 2016
1st of thanks for post this..but i can't add my client to my server 2012 its getting error is " the specified domain either does not exist or could not be contacted" but changing time ask server username and password .. i dont know what is the problem - Anonymous
September 29, 2016
I'd like to know if doing any of the above will affect the existing DC? - Anonymous
October 04, 2016
this is very helpful. good job!can you also do a step-by-step in intaling CA server and how it is being implement? thanks in advance - Anonymous
October 31, 2016
The comment has been removed - Anonymous
November 07, 2016
Where does the MMC snapin for DHCP management console come from? - Anonymous
November 14, 2016
nice - Anonymous
December 07, 2016
Nice - Anonymous
December 26, 2016
Thank you very much for this to Torio I actually used it to convert a Windows 2008 server to a 2012. Everything work the same way - Anonymous
January 05, 2017
Good Instructions very useful, keep it up - Anonymous
January 08, 2017
nice one - Anonymous
February 18, 2017
Really Good..this article more helpfull me,,,Nice one...Thank u - Anonymous
September 03, 2017
This is awesome..Thanks.