Step-By-Step: Changing a Public VPN to Private in Windows 10
Have a need to hide your VPN connections from public view? Here is a quick and easy way to change the visibility of your VPN connection in Windows 10 from public to private.
It will require a registry edit and as such best practice would dictate that making a backup of said registry before proceeding would be a good idea.
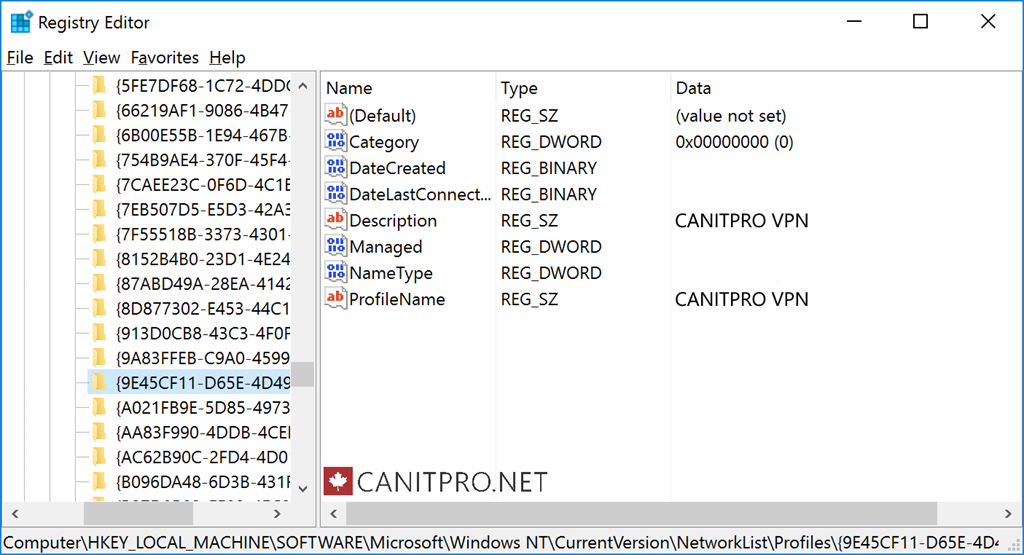
1. Run RegEdit and navigate to: HKEY_LOCAL_MACHINE\SOFTWARE\Microsoft\Windows NT\CurrentVersion\NetworkList\Profiles
2. Click through the list of profiles presented to find the desired VPN name detailed under ProfileName within the right pane

3. Double click Category once the correct profile has been found and change the value data to 1
4. Reboot the computer
Once completed, the VPN connection will no longer be visible. These steps will work with Windows 10 Home as well as Windows 10 Pro.