Step-By-Step: Customizing An Office 2013 Installation
With the introduction of Office 365, the requirement to run Microsoft’s office productivity suite on premise has lessened. It is however still very necessary in some scenarios as per the requirements of some organizations. Office 2013 was introduced to address this need and has been received well by system administrators alike.
To further enable IT professionals and to shield them from entering a required key on every computer one-by-one, Microsoft introduced the Microsoft Office Customization Tool. This tool enables administrators to create a .MSP file, which when attached to a Pro version of Office 2103 and a volume license makes an Office 2013 deployment much more appealing.
This Step-By-Step will walk you through creating said .MSP file and steps to enable an automated Office 2013 deployment.
Prerequisites
The following are required to complete this lab:
- Office 2013 Professional Media
- Office volume license or KMS license
Step 1: Creating the .MSP file
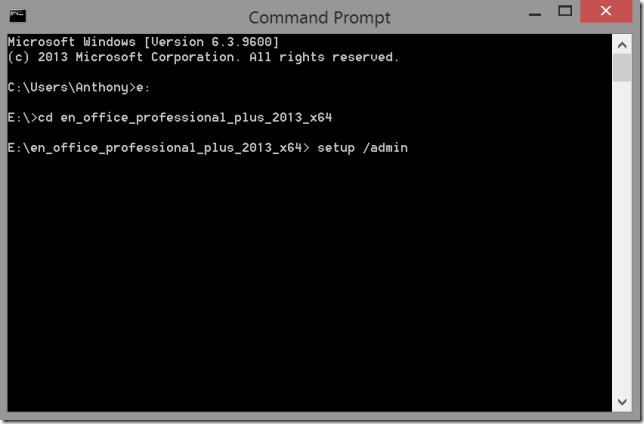
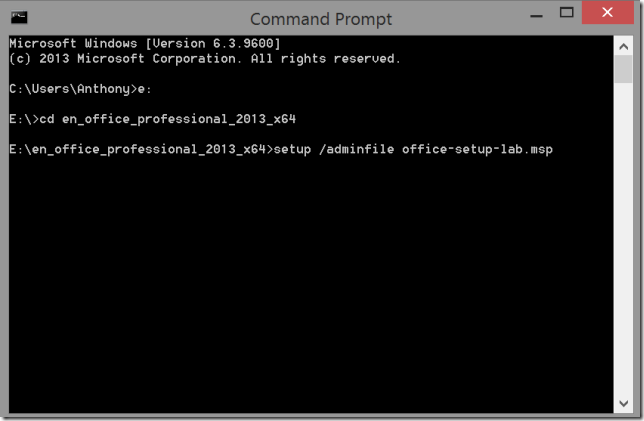
Open a Command Prompt
Navigate to the root directory of the Office 2013 Professional Media (DVD, USB, Network drive)
Type setup /admin and press enter
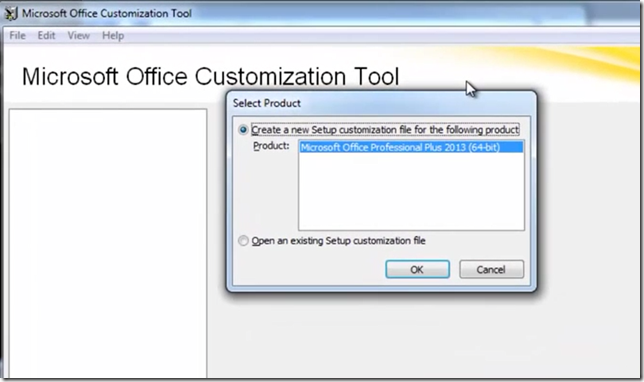
Click OK when prompted to run the installer
In the Office 2013 Customization Tool, select the appropriate version of Office 2013 Professional
Note: There is a plethora of options available to allow for a great deal of customization in regards to you Office 2013 Professional deployment. It is encouraged to explore to learn which options best suit your organization’s needs.
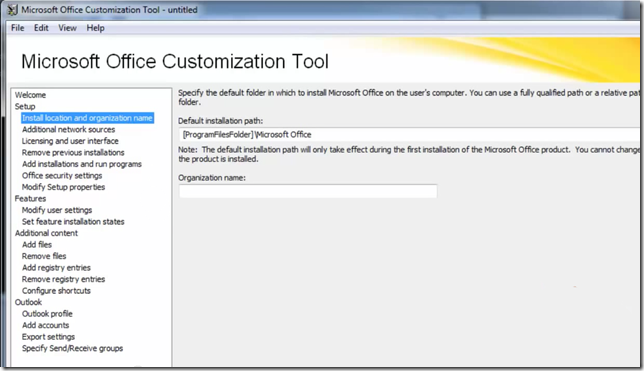
In the right side menu select Install location and organizational name
Enter the directory you wish to allow Office 2013 to install to. Do not change it should you wish to have it install to the default directory
Enter the your Organization’s Name in the box provided. This enables all documents that are created with this installation to be tagged with your organization’s name
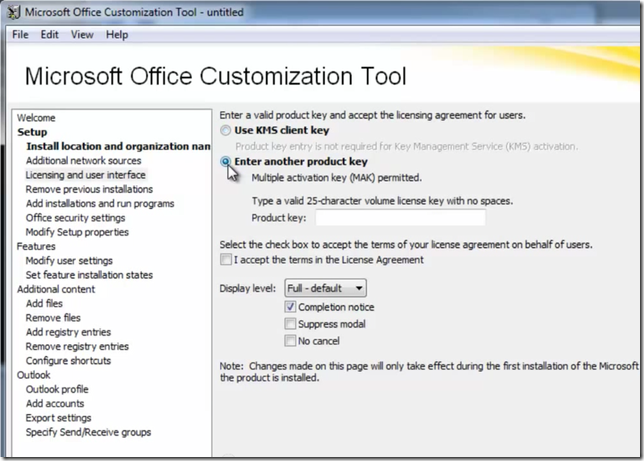
In the right side menu select Licensing and user interface
Select Enter another product key and enter your 25-character volume license key in the space provided
Click the checkmark box to accept the terms in the license agreement on behalf of your users
Note: This example will highlight a silent installation which will not require any input from the end user. As mentioned, there are various customization capabilities available and you are encouraged to test them all
Change the Display Level to None
Click the checkmark box to remove the checkmark for Completion notice
Click the checkmark box to enable Suppress model
Click the checkmark box to enable No cancel
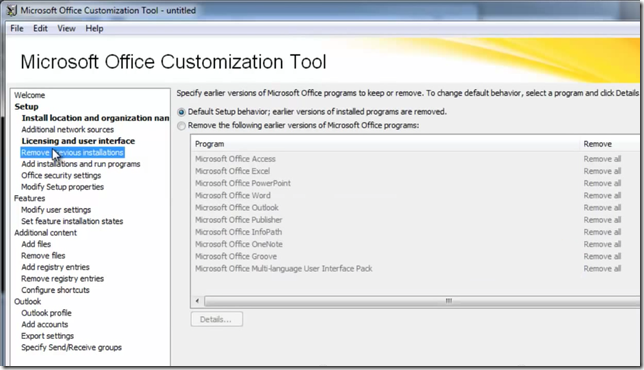
In the right side menu select Remove previous installations
Note: You have the ability to leave existing installations of older versions of Office should it be required.
<Optional> Select Remove the following earlier versions of Microsoft Office programs and select which older Office products you’d like to allow
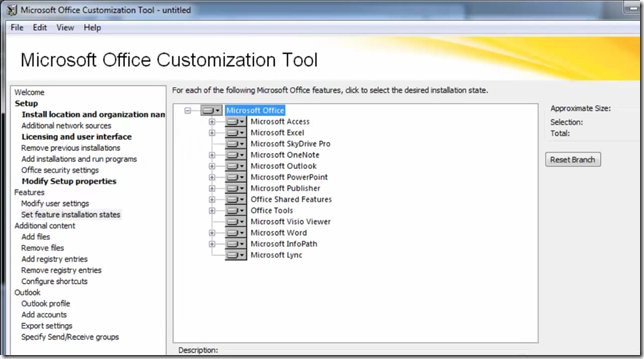
In the right side menu select Modify Setup Properties
Select which options you would like included with your installation
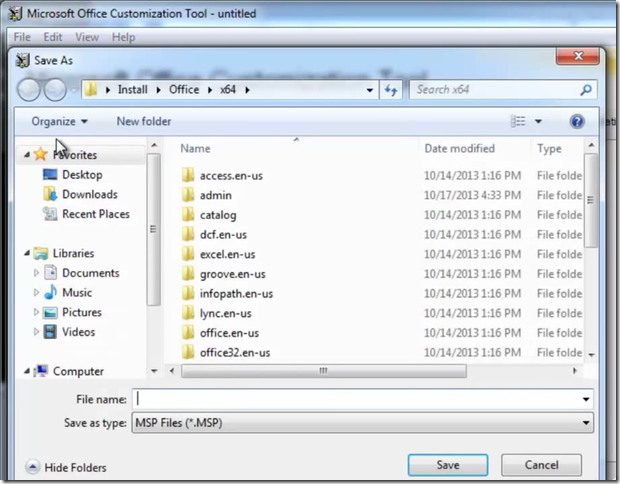
Select File > Save As located at the top of the Microsoft Office Customization Tool windows
Ensure you are saving the file in the same directory as the provided Office 2013 setup file
In the File Name box enter office-setup-lab
Note: The name of the setup file can be changed to whatever you wish and multiple files can also be createdClick Save
Step 2: Deploying the .MSP file
This will then install Office 2013 silently and can be used in many implementations to deploy remotely. Learn additional functionality around what Microsoft Office can offer by visiting Microsoft Virtual Academy and completing the Office Guides: Introduction to Office 365 course.

