Step-by-Step: Prevent, Detect, and Respond to Threats in an Azure Environment
Hello Folks,
Almost every conversations i have with ITPROs regarding cloud adoption includes a discussion about their security concerns. How do I ensure that my cloud infrastructure is secure? How do I get visibility in regards to the threats against my environment.
Well, we have made available a dashboard that will help you prevent, detect, and respond to those threats across your subscription and verify that the appropriate security controls are in place and configured correctly. The solution is currently in preview, and Security Center is enabled with your subscription.
Please listen to the following 12 minute video with Scott Hanselman and Sara Fender to get an overview.
Access & Configure the Security Center
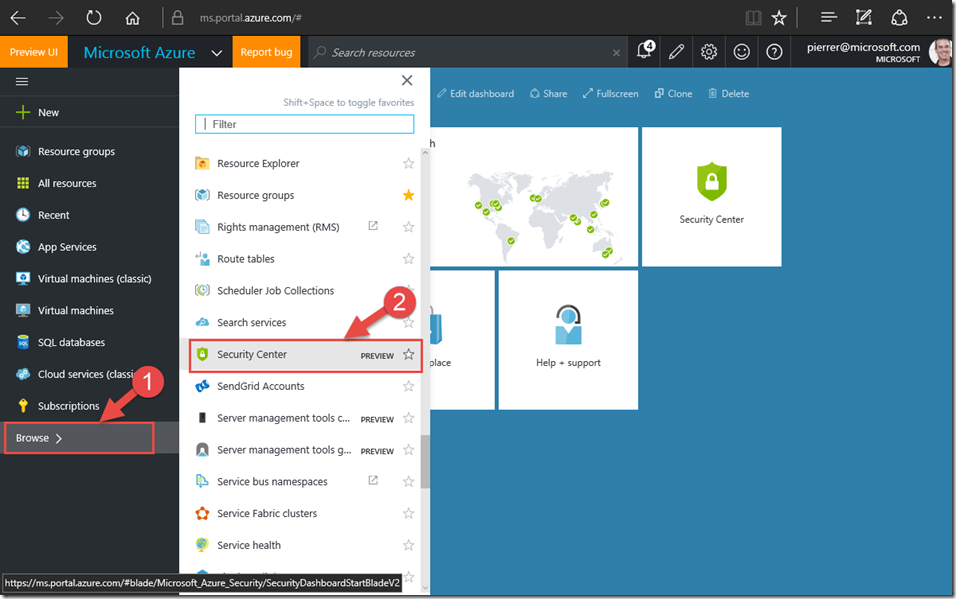
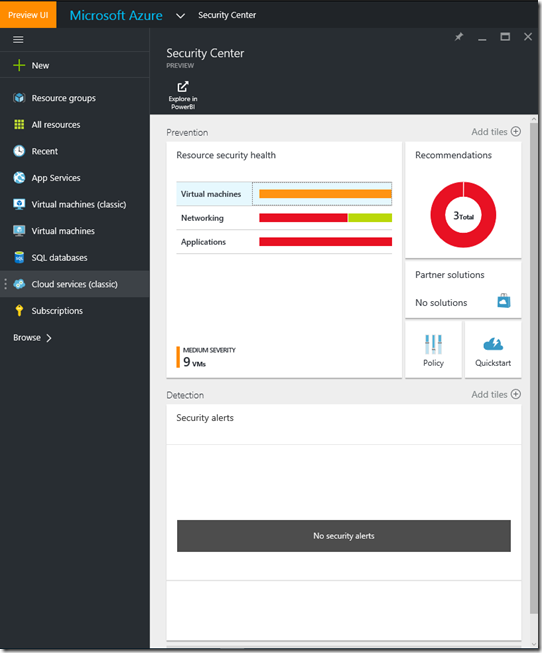
To access the Security Center in your subscription simply Select Browse from the portal and then scroll to the Security Center. This will opens the Security Center blade.
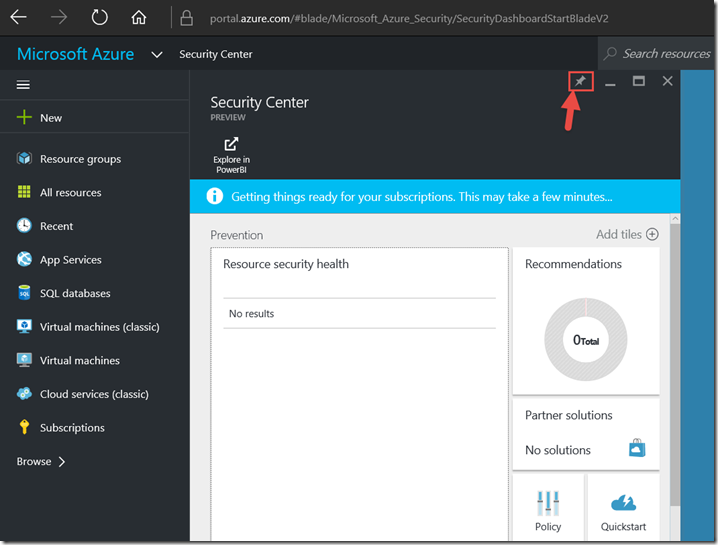
You can also pin it to your portal dashboard to have easy access going forward.
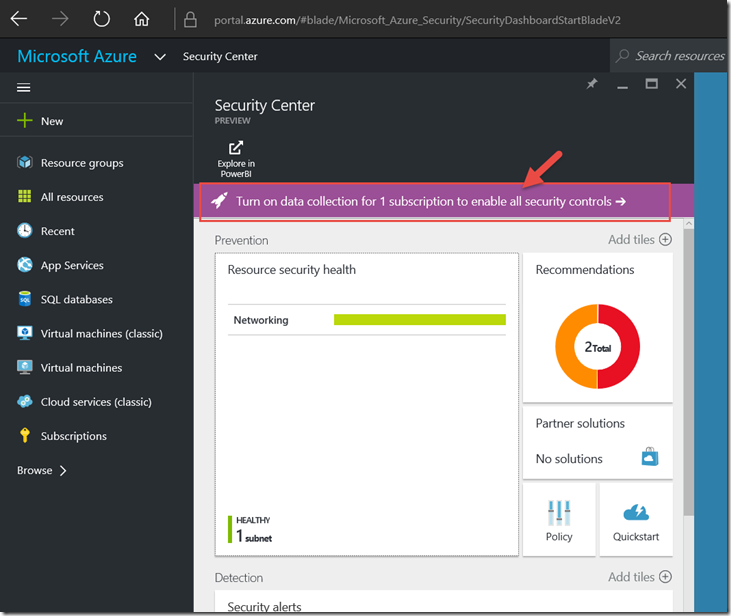
The first time you access the security center it will take a few minutes to set things up. Following that you need to turn on data collection for your subscription to allow the Security Center to start collecting and analyzing your environment.
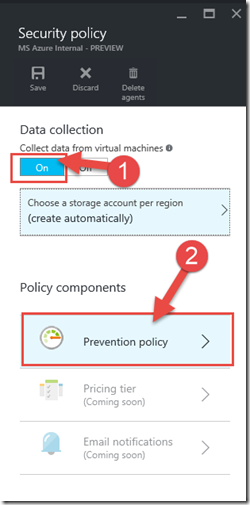
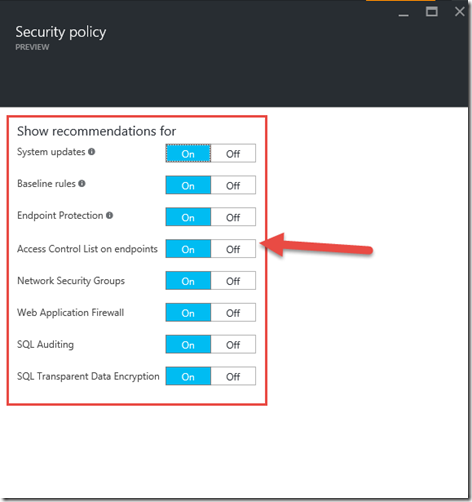
On the Security policy blade, (1) Turn On the Data collection.
The Choose a storage account per region you to choose a storage account where data collected from those virtual machines will be stored. If you do not choose a storage account for each region, it will be created for you. The data that's collected is logically isolated from other customers’ data for security reasons.
and (2) click Prevention Policy to select Recommendations you’d like to see as part of your security policy. For example, turning on System updates will scan all supported virtual machines for missing OS updates.
Turning on Baseline rules will scan all supported virtual machines to identify any OS configurations that could make the virtual machine more vulnerable to attack.
Turning on Data collection will also provision the monitoring extension on all current and new VMs in your subscription.
View the health and security state of your resources
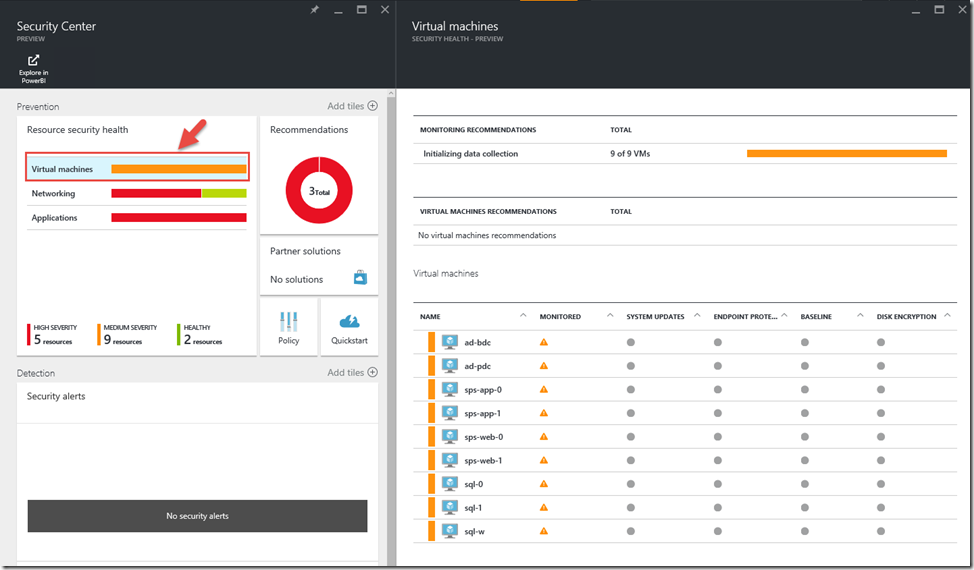
Return to the Security Center blade and in the Resources security health section you will find indicators of the security state for Virtual machines, Networking, SQL, and Applications.
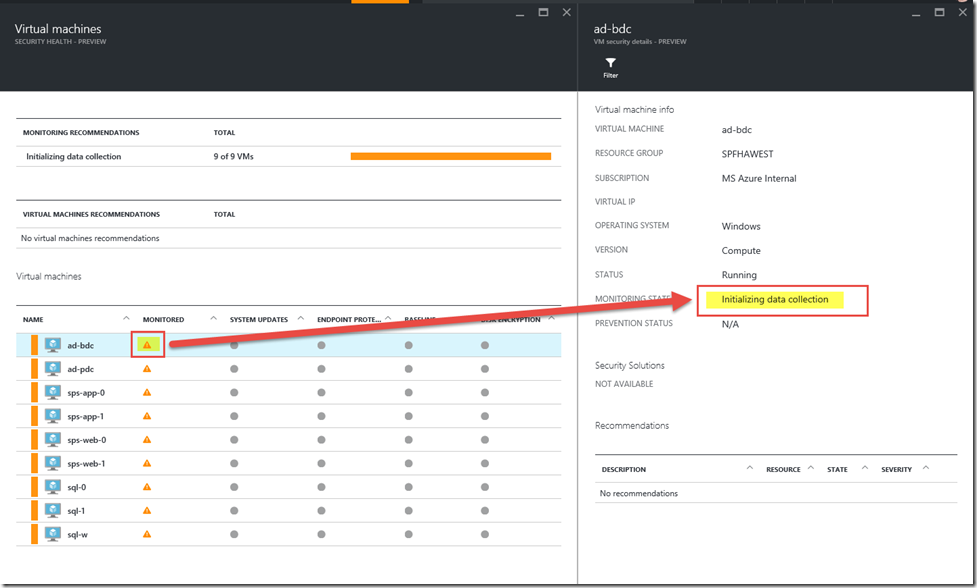
Select Virtual machines to view more information. (Please note that it may take a little while for the agent to be installed and for the data to be collected and analyzed – see second screen shot below.) The Virtual machines blade displays a status summary that shows the status of antimalware programs, system updates, restarts, and the baseline rules of your virtual machines.
Select an item under VIRTUAL MACHINE RECOMMENDATIONS to view more information and/or to take action to configure necessary controls. You can drill down to view additional information for specific VMs.
Address Security alerts
In the Security Center blade, select the Security alerts. A list of alerts will be displayed if any exist. The alerts are generated by the Security Center analysis of your security logs and network activity. (note that this screenshot is NOT from my own subscription since at the time or writing this post, the Security Center analysis of my security logs and network activity had not completed)
Select an alert to view additional information.
This is just the tip of the iceberg, Security Center also lets you monitor at a glance the health status of your partner solutions integrated with your Azure subscription. (Again, this is a sample screenshot – Since I don’t have any partner solution from the marketplace integrated in my test environment)
Take it for a test drive and get the insight in your environment you need in order to be secure.
I hope this helps.
Cheers!
Pierre Roman
@pierreroman
