Note
Access to this page requires authorization. You can try signing in or changing directories.
Access to this page requires authorization. You can try changing directories.
In the previous tutorials we learned how to use Azure to create at web site without any coding. Now, you have a website you can show to your friends. In the next tutorial you will learn how to create a new web site from scratch! But, for now let’s look at a few other tools you can try in Azure for building websites.
Orchard CMS
Orchard CMS is a full-featured content management system. That means you can use Orchard CMS not only for blogging, but to create any web site. You have more flexibility in the structure of the website you build. You could create a website that tells everyone about your hobby, or a business. There are stores that use Orchard CMS to build their company web sites.
When you create a new website in Azure, you search the Marketplace for Orchard CMS. When you create the web site, you have to go to the website to set up the login, password and storage configuration:

Because you don’t have access to any external databases, select built-in data storage to store all your data on the same disk as your web site.
Once you provide all the parameters, to edit the website, you can navigate to your site and add Admin to the site url: https://<site name>/Admin. Adding Admin to the url gives you access to the admin panel where you can create new pages, select site schemas, add widgets to pages and so on.

Create a new page and experiment with the editor. You can drag and drop to create your page layout. Just like in BlogEngine you can also add widgets with the Widgets menu item
Composite C1 .NET CMS
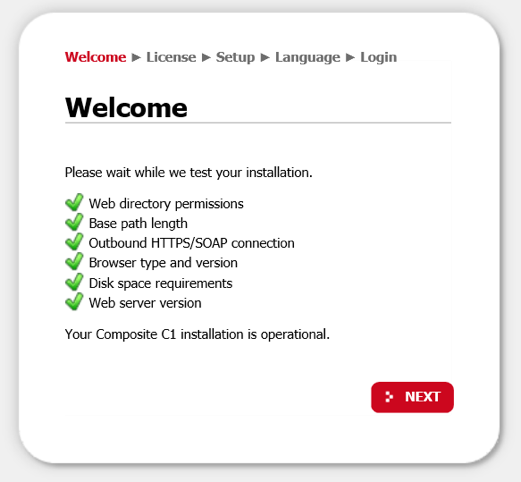
Another content management system in the Marketplace is Composite C1 .NET CMS. Just like the other tools you create a new website on Azure, and select it from the Marketplace. After you create the site, go to the web page to finish setup. When you see this page, everything is set. Click the Next button:
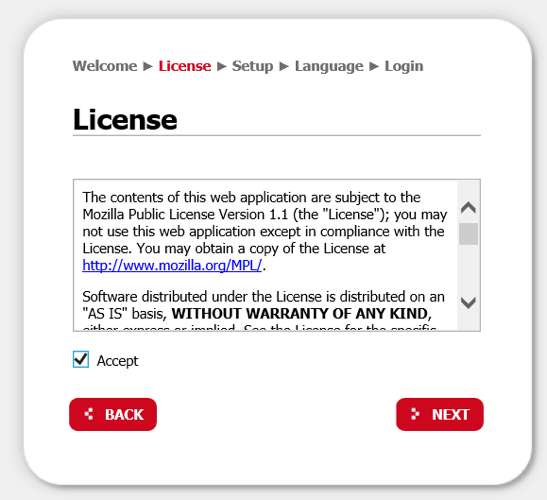
Next you need to accept the licensing agreement, then click NEXT
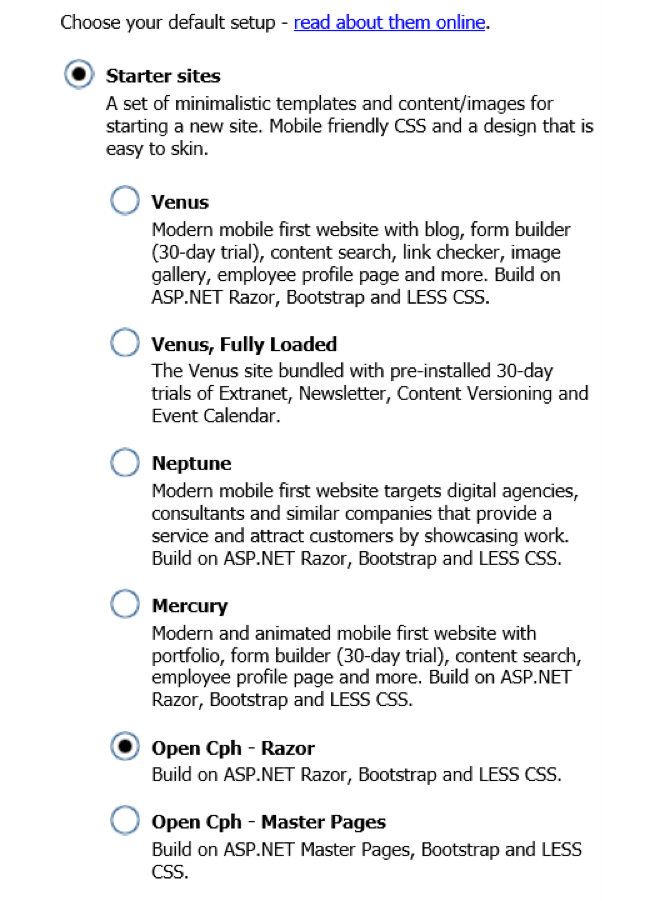
The CMS supports several templates. Some of these templates are free, but others require payment. You can usually get a free trial. In this example I selected the Open Cph template.
You will be asked to provide a login and password
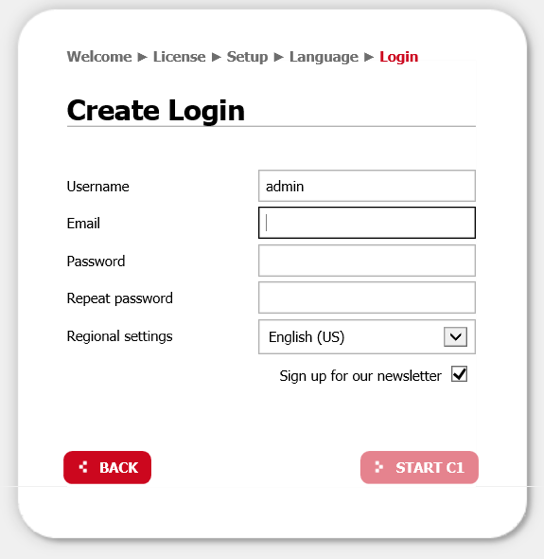
The Composite C1 management system looks very professional

You can easily manage your website content using the separate management portal instead of editing content directly on web pages as we did in the systems we explored earlier.
As you can see there are lots of options for setting up a blog or website. Azure doesn’t limit your choices.
It is important to note that your free DreamSpark/Azure subscription does not give you access to all the features of Azure. For now you can access only the following Azure features:
- Web Applications – using this feature we can create hosting space on Microsoft servers. We used this feature to create our first web site
- Application Insight – this is a special component that allows you to collect data from your site or application and get information about your site such as the performance of the application, usage, and diagnostic data. We will use this component in our advanced tutorials.
- MySQL database – You can create a database based on the popular engine called MySQL. But there are some restrictions: The maximum amount of data you can store is 20 Mb data in total and you cannot have more than 4 connections to the database at the same time.
- Visual Studio Online – this is tool you can use when you start writing code. This tool allows you to store your code on Microsoft servers, grant access to your friends so you can work as a team to develop something together
Azure can do a lot more, but DreamSpark/Azure does not give you access to all the features or all the Azure website templates. Generally, you can use any website template that doesn’t require a database or that uses a free instance of the MySQL database.
Before you start our next tutorial, check out the HTML and CSS for beginners course and a tutorial on JavaScript. These two technologies are the fundamental technologies used for all web sites and it will make it easier for you to try the next tutorial. We will show you a few HTML elements as we do the tutorial, but you can do much more if you take the time to explore some of these technologies first. Good luck and happy blogging!