Note
Access to this page requires authorization. You can try signing in or changing directories.
Access to this page requires authorization. You can try changing directories.
The Email Phishing Protection Guide is a multi-part blog series written to walk you through the setup of many security focused features you may already own in Microsoft Windows, Microsoft Office 365, and Microsoft Azure. By implementing some or all of these items, an organization will increase their security posture against phishing email attacks designed to steal user identities. This guide is written for system administrators with skills ranging from beginner to expert.
Introduction: Email Phishing Protection Guide - Enhancing Your Organization's Security Posture Part 1: Customize the Office 365 Logon Portal Part 2: Training Users with the Office 365 Attack Simulator Part 3: Deploy Multi Factor Authentication (MFA) Part 4: Deploy Windows Hello Part 5: Define Country and Region Logon Restrictions for Office 365 and Azure Services Part 6: Deploy Outlook Plug-in to Report Suspicious Emails Part 7: Deploy ATP Anti-Phishing Policies Part 8: Deploy ATP Safe Link Policies Part 9: Deploy ATP Safe Attachment Policies Part 10: Deploy and Enforce Smart Screen for Microsoft Edge, Microsoft Internet Explorer and Google Chrome Part 11: Monitor Phishing and SPAM Attacks in Office 365 Part 12: Discover Who is Attacking Your Office 365 User Identities Part 13: Update Your User Identity Password Strategy Part 14: Prevent Brute Force and Spray Attacks in Office 365 Part 15: Implement the Microsoft Azure AD Password Protection Service (for On-Premises too!) Part 16: Disable Office 365 Legacy Email Authentication Protocols Part 17: Control Application Consent Registrations in Microsoft Office 365 and Microsoft Azure Part 18: Increase Security with Microsoft Secure Score Part 19: Email Phishing Protection Security Checklist Part 20: Recommended Security and Anti-Phishing Training from Microsoft Ignite 2018
Part 16: Disable Office 365 Legacy Email Authentication Protocols
In an earlier blog, I wrote about password spray and brute force password attacks. As talked about at Microsoft Ignite 2018, almost all of the password spray attacks Microsoft identifies are using legacy authentication protocols. This blog provides background on legacy and modern authentication applications as well as how to define conditional access policies to block this popular attack vector. A new conditional access policy to block this attack was released in June 2018 and has been implemented by thousands of cloud tenants already.
Before you get started, a note of caution. Before designing and applying a Conditional Access policy, be sure you fully understand the design and impact. I always recommend doing this in a test environment first and/or using the WhatIf feature in the Conditional Policy design area.
Newer Office based applications are enabled for Modern Authentication using Active Directory Authentication Library (ADAL) sign-ins. These and other Modern Authentication enabled clients utilize more secure sign-in options such as Multi-Factor Authentication (MFA), smart card, or certificate based authentication. Modern Authentication has been available for several years in applications many organizations have already transitioned to. However, the capability to use Legacy Authentication methods remain available and should be disabled to further secure an environment.
With this authentication method still enabled, an attacker can use a username and password combination to attempt to gain access to your environment. With this access, the attacker can send and receive email as the user whose account has been breached and launch a reconnaissance process in your network. Before taking any action to block access to legacy authentication, you must first discover if there are any users and applications using legacy authentication protocols for email. Examples of applications using legacy authentication protocols are Outlook 2007, Outlook 2010, multi-function printers and copy systems, as well as perhaps business critical applications that have been in place for years. Do not disable legacy authentication until you know who or what application is using it. For more information on the differences between legacy and modern authentication application, see this article.
Below are instructions to view sign-in information in the Microsoft Azure Portal to search for legacy client authentications as well as how to setup a Conditional Access policy to block the legacy authentications. Additionally, as demonstrated at Microsoft Ignite 2018, a new report called the SMTP Auth Client Report is being released in the future. This report will show how many emails were sent using the Legacy Authentication methods. Below are instructions about how to block legacy authentication protocols.
Search for Clients Using Legacy Authentication
- Logon to the Microsoft Azure portal at https://portal.azure.com (you should have MFA enabled by now!)
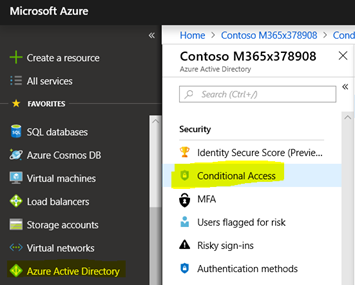
- Select Azure Active Directory

- Click anywhere on the Sign-Ins activity graph to view detailed information.
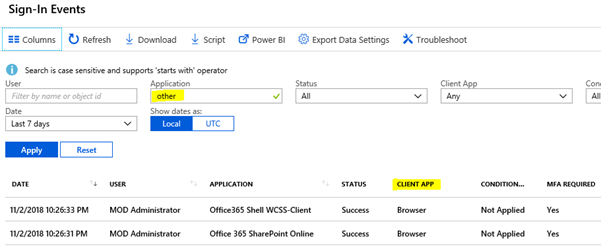
- By default, a column called Client App is not displayed in the Sign-In information. This data is what we are searching for. To add the Client App column, follow these steps:
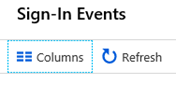
Click on the Columns option
Place a check next to Client Apps in the columns option area.

Click OK when complete.
Note: Additional information in this list is also valuable to review such as source IP addresses that identity attacks are originating from.
- In the Application search field, enter the word Other as highlighted below.
- Click Apply to search the logs.
- If there are any legacy authentication applications in use, it will appear under the Client App column and called Other Clients.
- If legacy authentication clients are found, usernames and IP addresses may be used to locate and migrate the applications to one with a modern authentication method.
Conditional Access Policy to Block Legacy Client Authentication Methods
Logon to your Azure portal at https://portal.azure.com
Select Azure Active Directory. Then click on Conditional Access.
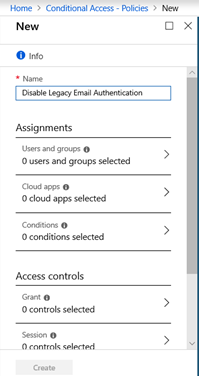
Click on New Policy
Name the new policy. For this example, I named the policy "Disable Legacy Email Authentication." This is also known as Legacy Auth.
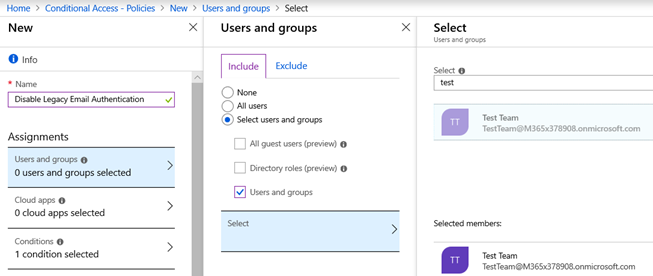
Use caution when enabling any type of conditional access policy. A misconfiguration could prevent a critical business application from working or even worse, lock you as the administrator and everyone out from the environment. With this caution in mind, test this policy first in a lab environment and then on test accounts as a pilot. Below are the steps to limit the policy to only select users or a group of users.
- Select Users and Groups
- Select the option for Select Users and Groups
- Select Users and Groups
- Click Select
- In the Select area, I have a predefined Test Group in this demonstration environment that is now selected. This will limit this new policy to only users who are part of this group.
Once done with testing and piloting of this new conditional access policy, plan a gradual roll-out process.
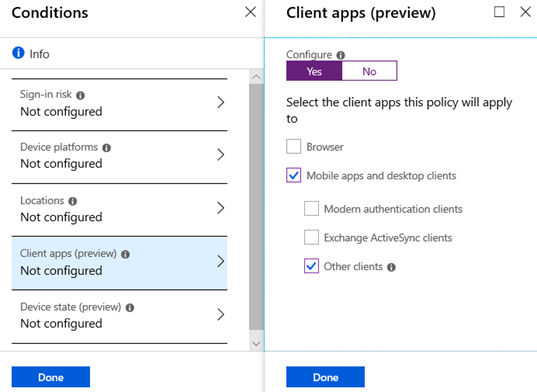
Next, select Conditions. Then select Client apps (preview) .

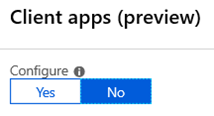
As a default setting, this policy is NOT configured.
Select Yes to enable the policy and then edit it.
Within the policy, check only the option for Mobile apps and desktop clients. Then select Other clients in the sub-category. Do not select the other policies available in this configuration area. In the next section, we will create another policy to define options for the other categories.

To see additional information about what the Other Clients are, click on the information option. The screen below appears:

With the settings now defined, click Done in the Client apps (preview) blade and then Done in the Conditions blade.
It is now time to define the block action for Other Clients. While still in the New Policy configuration area, select Access Controls and then Grant. In the new blade, select Block Access.

With Block Access defined, click Select.
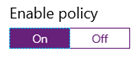
To complete this action, the policy must now be enabled. Click the Enable Policy option to On.
Then select Create to complete the policy setup.

The policy is now created and enabled. It will block older Microsoft Office clients and protocols including POP, IMAP, SMTP and others that includes ACS.
Note: the policy may take 24 hours to activate.