Note
Access to this page requires authorization. You can try signing in or changing directories.
Access to this page requires authorization. You can try changing directories.
CodeInjector
CodeInjector is a tool that validates various language service features on arbitrary code. The tool is extremely easy to set up and it uses idle cycles on your machine to do testing. It is a fault injection tool that inserts, removes, and replaces tokens in C# files, checks for errors during injection and also builds and checks for internal compiler errors. It has the ability to trap all exceptions in VS and Command Line Compiler csc. The tool is fully automated and has fault tolerant capabilities. Whenever the tool finds an issue (i.e. a product crash), it saves a minidump with heap, and it resumes running the tests after the dump is saved.
We have been finding a good amount of bugs using this tool. It helps to stabilize our product faster and to test more efficiently. The types of the bugs the tool found are the ones we wouldn’t catch with regression tests.
When installing the tool, after setup is launched, you will get a dialog like the following:
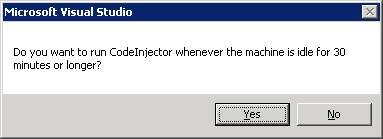
If you select Yes, the test will start whenever the logon user to a machine has been idle for 30 minutes or more and the test will stop when you come back to your machine. So it will utilize the time to automatically run the tests whenever you are away from your computer 30 minutes or more. You can select No if you don’t want this option. If No is selected, test would only run when you start it explicitly (from CodeInjector context menu “Start Testing”, see below for details).
CodeInjector Menu Options:
After CodeInjector starts, a notify icon (with the name CI inside the icon) will be displayed in your system tray area. Right click the icon gives you the following menu options:
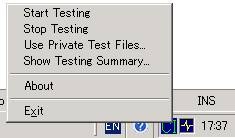
· Start Testing – gives you the flexibility to start testing explicitly if you want to.
· Stop Testing – gives you the flexibility to stop testing if testing was started explicitly.
· Use Private Test File – CodeInjector is configured to use test sources from the Compiler QA source directory. But you can select this menu to use your own private test files. Clicking this menu brings up the following dialog:
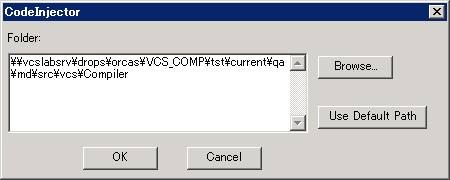
- Click “Browse…” will bring up a folder selection dialog to select the folder where your private test files are. And the folder path you select will be displayed in the text box to the left of the browse button.
- “Use Default Path” button will reset the test sources folder to the default one CodeInjector is configured to use.
· Show Testing Summary – Click this menu will pop up a message box telling you how many test files have been processed, how many issues (failures) have been hit , and the mean time to find a failure.

· About – Click this menu shows a dialog about CodeInjector such as version, CopyRight information, and description of CodeInjector etc.
· Exit – This exits CodeInjector.
Some features of the tool:
· Easy to set up
· Tests automatically start when your machine is idle for 30 minutes or more.
· Tests automatically stop when you are back to your machine.
· The tool gives you the flexibility to also explicitly start and stop testing.
· The tool has been deployed through ClickOnce. So if there is an update, the update will be picked up next time you restart the tool.
Test source files:
The tool currently is using code files from the Compiler QA source directory. You don’t need to have these source files on your local machine. CodeInjector is configured to look for these files from a specified location. You do have the option to specify your own sources though. You can do this by clicking the menu “Use Private Test File”.
Comments
- Anonymous
June 11, 2008
PingBack from http://blog.a-foton.ru/2008/06/12/an-effective-test-tool-codeinjector/ - Anonymous
July 11, 2008
Normal 0 false false false EN-US X-NONE X-NONE MicrosoftInternetExplorer4 /* Style Definitions */ table.MsoNormalTable - Anonymous
July 21, 2008
Is this tool available for download anywhere? Am I being special not being able to find it?Cheers,Mat - Anonymous
August 02, 2008
No, I'm afraid it's internal at the moment. We don't think it makes a lot of sense to release it publicly for now - however please let us know if you think you might find it useful. - Anonymous
March 01, 2010
Hi, I wonder if the tool has become available. I would like to use it in a research project.Thanks!Iman