Enable SCUP in ConfigMgr 2012 R2 with WSUS 4.1
System Center Updates Publisher 2011 and Windows Server 2012
R2 has some known limitations which are documented on the System Center Configuration Team Blog
This guide assumes you already have WSUS installed for Configuration Manager 2012 R2
- Follow the steps shown here to allow local administrators to publish updates from Updates Publisher to Windows Server 2012 – performed on the server that has WSUS 4.1 installed
- Follow this blog guide on creating Publisher Signing Certificate Requirements & Step-by-step guide.
- When you are on step 3 of the blog “Deploy the Signing Certificate through Group Policy also add the following:
- Administrative Templates / Windows Components / Windows Update: “Allow signed updates from an
intranet Microsoft updates service location”: Enabled.
- Administrative Templates / Windows Components / Windows Update: “Allow signed updates from an
- When you are on step 3 of the blog “Deploy the Signing Certificate through Group Policy also add the following:
- When you are on step 4 of the blog “Using the Signing Certificate in System Center Update Publisher you use the “Browse” button to select the exported certificate.pfx, then you use the “Create” button.
Setup on Publisher 2011
Setup Options within Publisher by clicking in the upper left hand side:

Verify the Update server configuration:

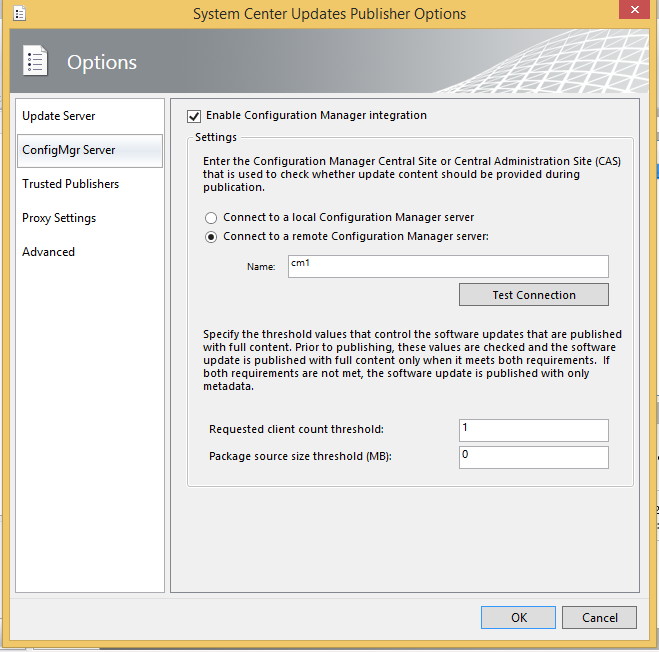
Setup the Configuration Manager options and test the connection
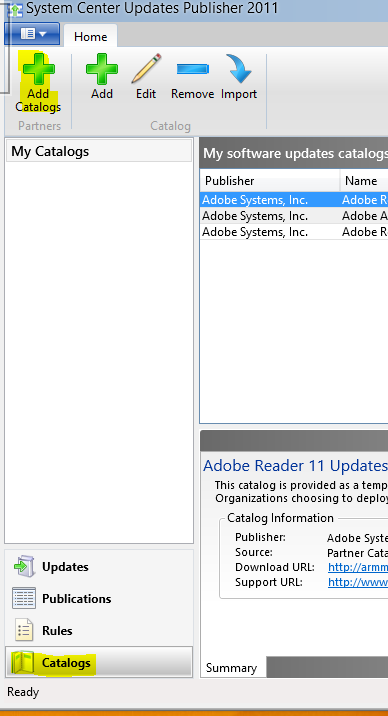
Click 'OK' to close the options tab, Select the 'Catalog workspace on the left then select 'Add Catalogs'
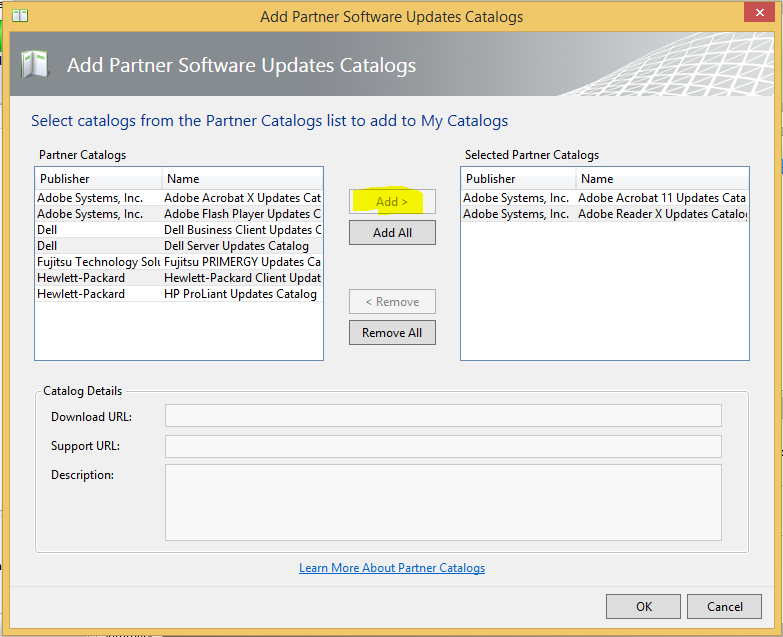
Select any of the Partner Catalog and click 'add'
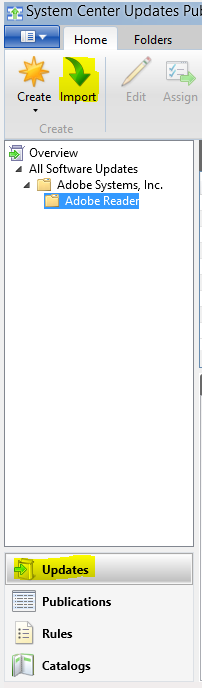
Click on the 'Updates' workspace, then click the 'Import' button
From the ‘Import Type’ wizard select the Catalogs you added previously, then click ‘Next’, ‘Next’, when a Security Warning popup occurs you can select ‘Always accept content from “%manufacturer”’, then click ‘Accept’


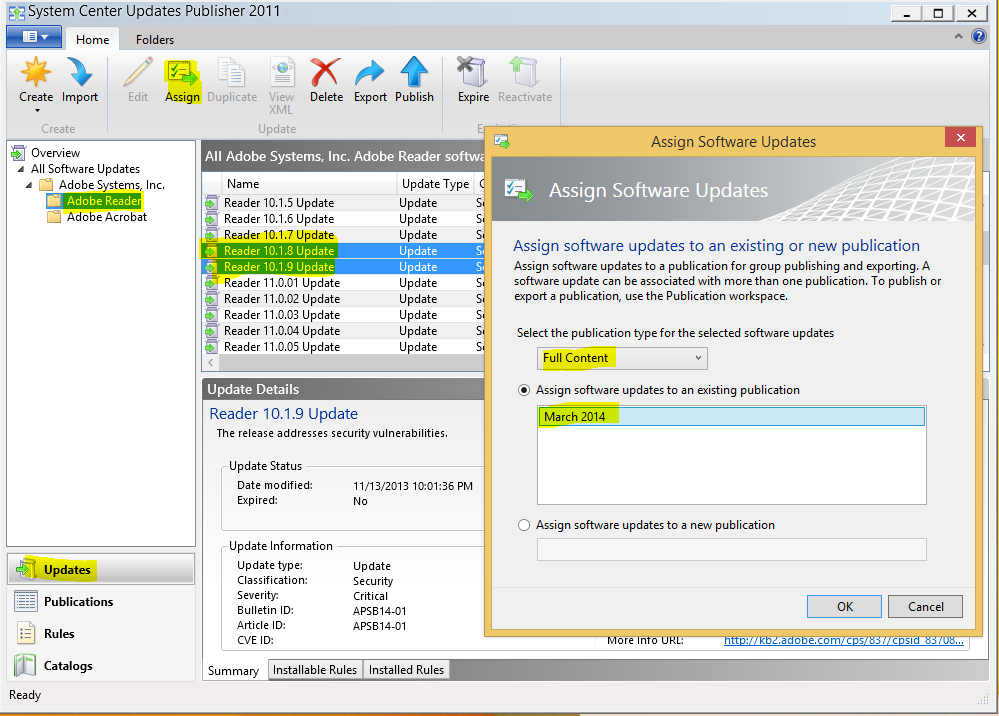
From the ‘Updates’ workspace find the updates you want to show up in ConfigMgr and Select ‘Assign’. The Assign Software Update window will show
up, I chose the drop-down for Full Content, and assigned the updates to a previously created publication of ‘March 2014’, or you can create a new
publication below.
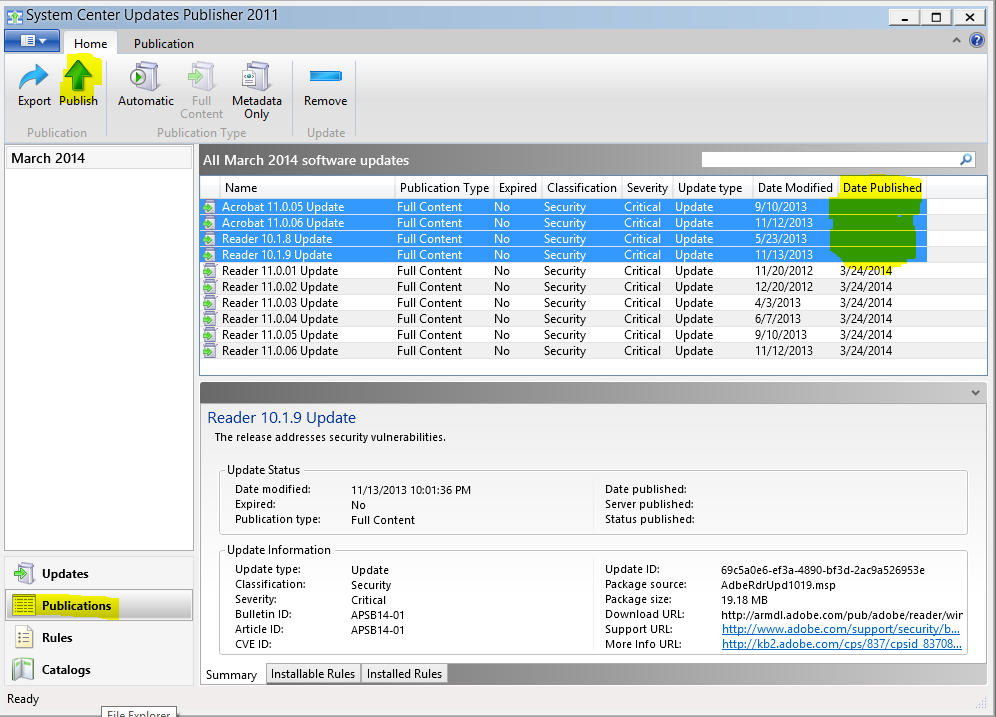
Select the ‘Publication’ workspace, then on the right-side you can select the updates that haven’t been published yet and click
‘Publish’
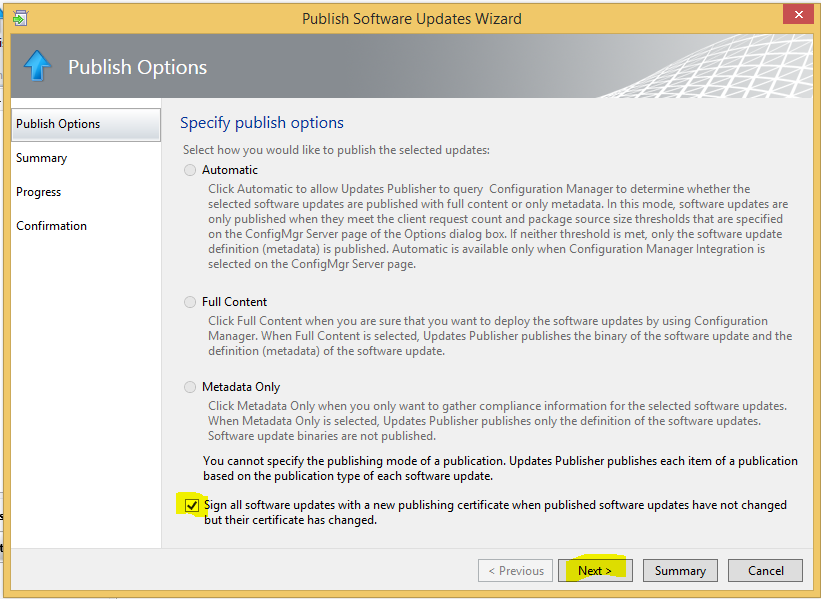
Select the ‘Sign all software updates’ checkbox and click ‘Next’, ‘Next’, then 'Finish'
Setup on Configuration Manager
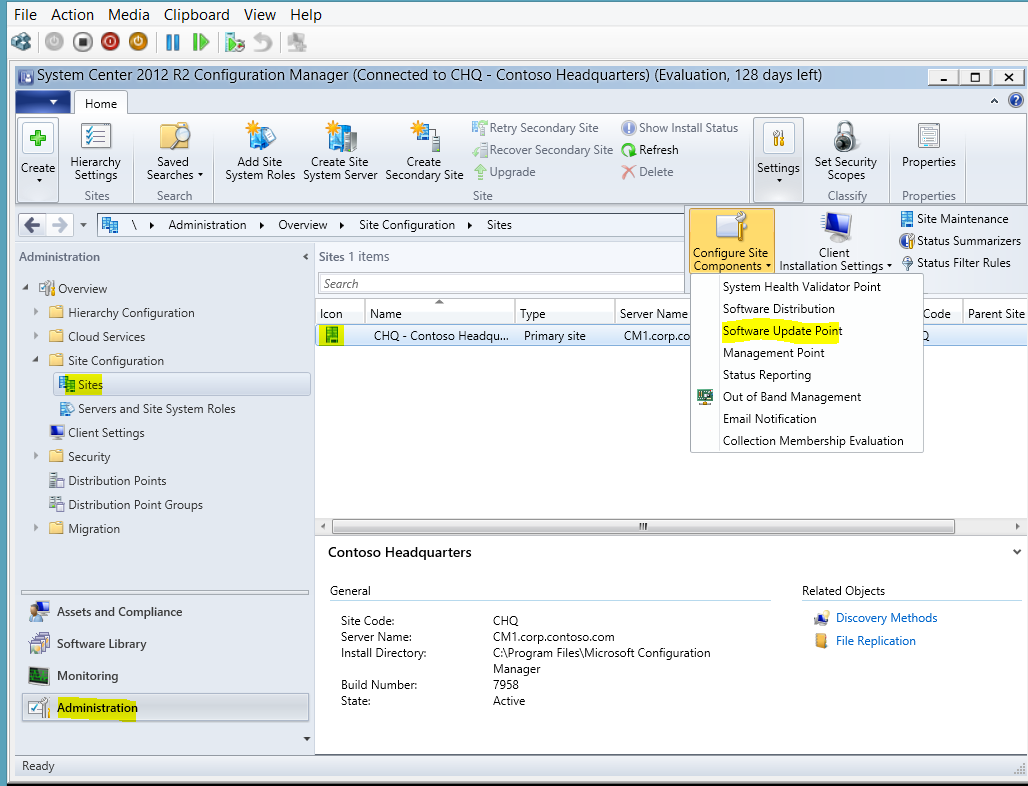
Select the Administration workspace on the left, then select Site Configuration > Sites, select your site that you want to configured Software Update Point, then select Configure Site Components, then select Software Update Point.
On the Products tab select the products that SCUP will be synchronizing, such as Adobe Reader

Click on the workspace Software Library on the left, expand Software Updates > All Software Updates, Run the Synchronize Software Update and validate it completed from the monitoring workspace. Once it is completed you should be able to see your updates using the filter.
