Running automated UI Tests in App Center
App Center is the mission control platform for your mobile applications. You can build, test, distribute, and monitor your mobile apps, and also implement push notifications.
In this post, you can learn how to run an automated test after a build is completed. For this scenario, we are going to use a post-build script as part of the build configuration in App Center. To start you can log in with your Microsoft, GitHub, Google or Facebook account. You can also sign up with an email, username, and password.
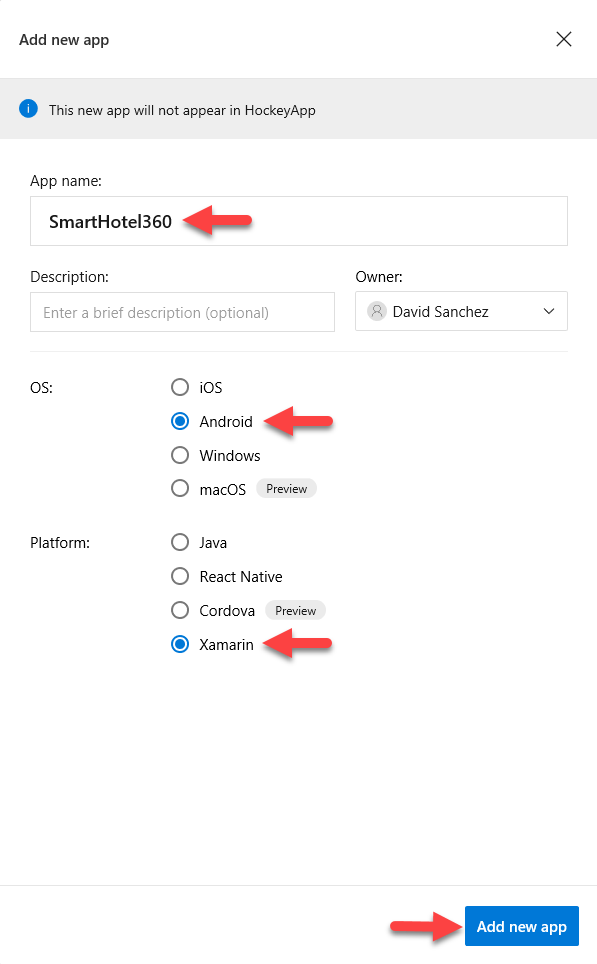
We are going to use the SmartHotel360 mobile demo app available in the following GitHub repo: https://github.com/Microsoft/SmartHotel360-mobile-desktop-apps.

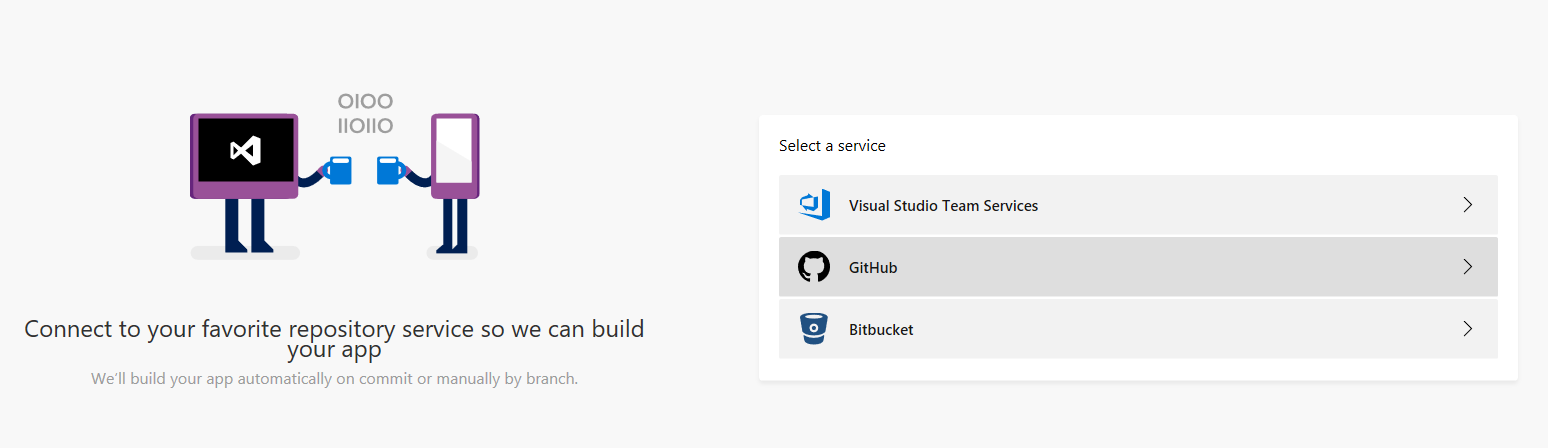
The first step is to set up the build configuration, App Center allows to connect to different services such as Visual Studio Team Service, GitHub or Bitbucket. In this case, we are going to select GitHub, you can clone the repo and connect to it. Once you connect to the repo you need to specify for which branch you want to configure the build, in my case I selected the master branch.
Once you link the GitHub repo with your AppCenter account you will see the different branches available in the repo. In this case, I will configure the build for the master branch.
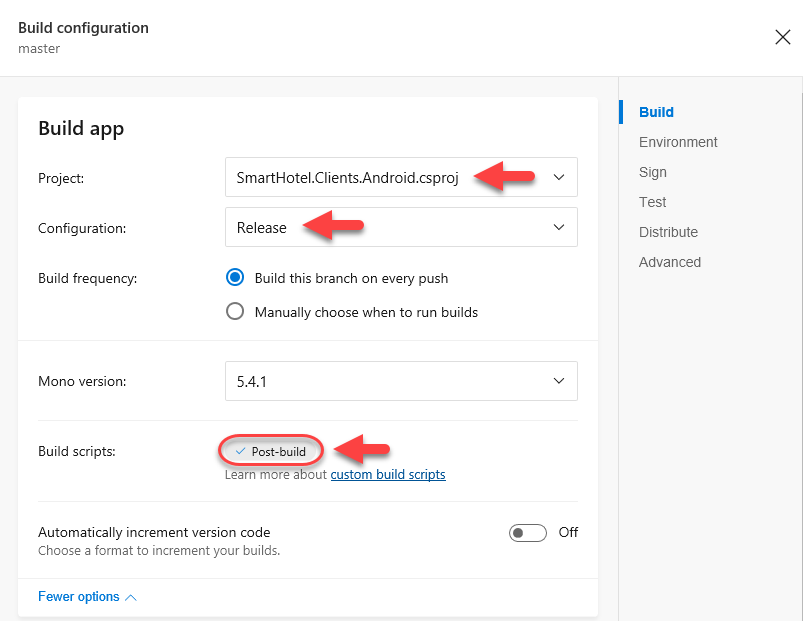
The first step you need to do is to select the project you would like to build, in this case, we are going to build the Android project of the SmartHotel360 app, then we need to select the configuration of the build since it is for real device testing I selected the Release configuration. Since the post-build script is already part of the repo, App Center automatically detect the script as part of the build process.
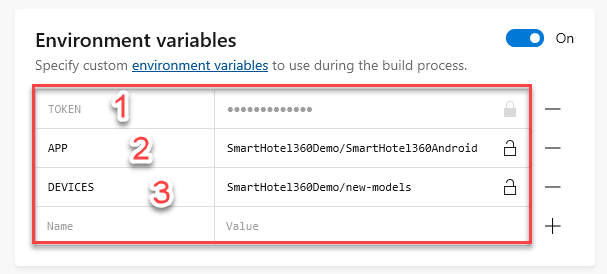
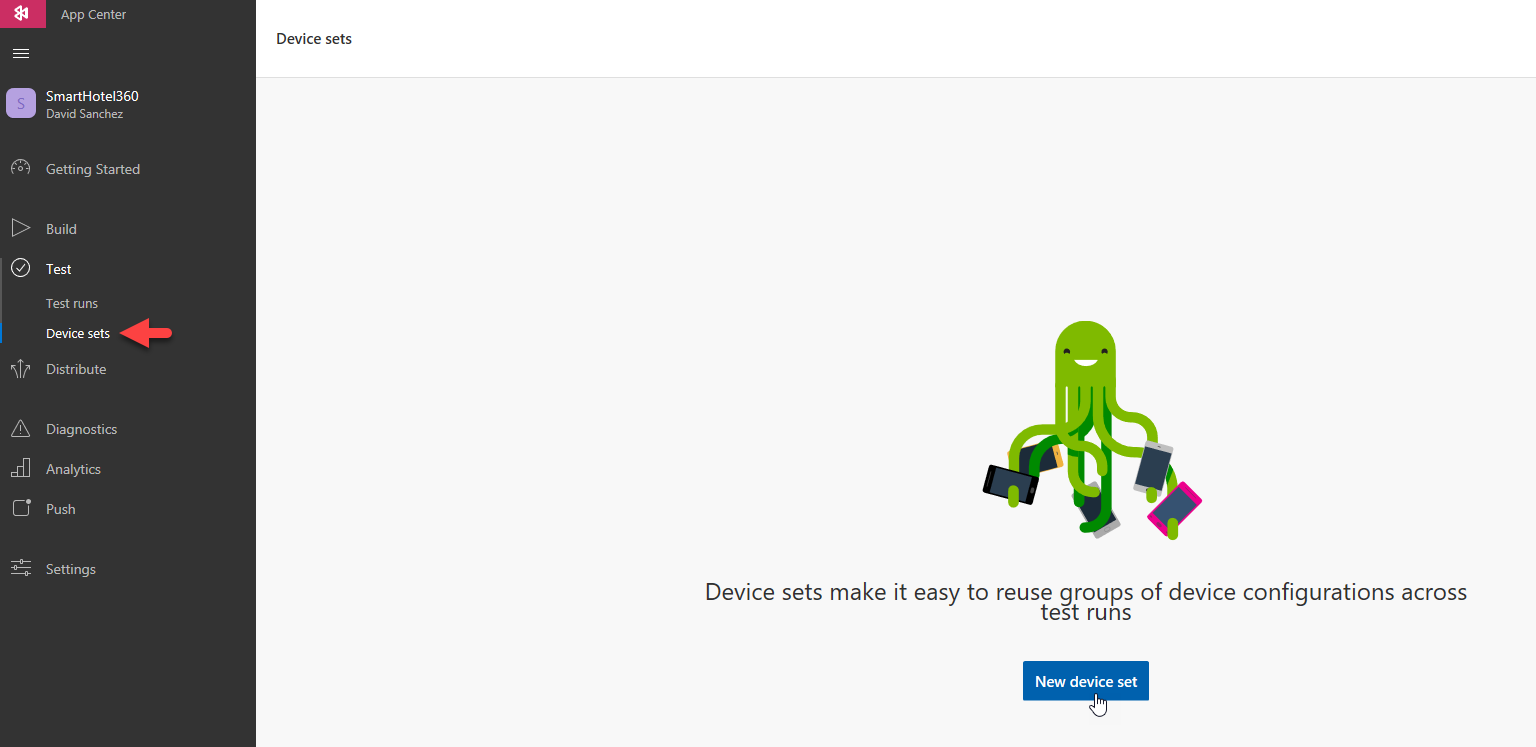
There are three variables you will need to set up to run the script. The first is the API Token of your App Center subscription, you can create one here. The second variable is the app identifier, the name of the app that was created, in my case I created an organization called SmartHotel360Demo and inside there are all the apps (Android, iOS, Windows, etc), that's why my app identifier is "SmartHotel360Demo/SmartHotel360Android". The last variable is for the device(s) you want to run the test, in my case I created a device set and added new models to that set.
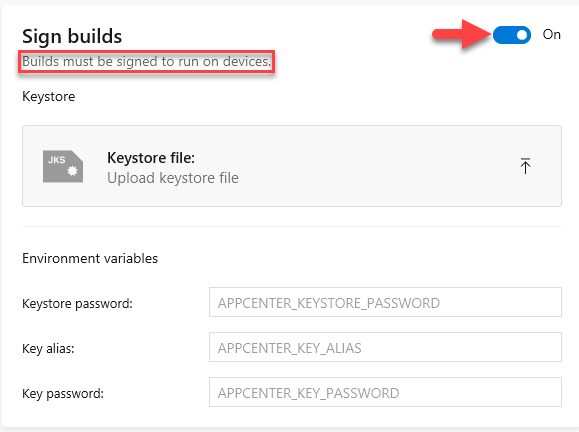
Since your test will be running on real devices you will need to sign your build for this you will need to create a Keystore file, you can follow this documentation to do that. You will need to have the Alias and password along with the keystore file.
Once everything is set you can save and run the build process you just configured. 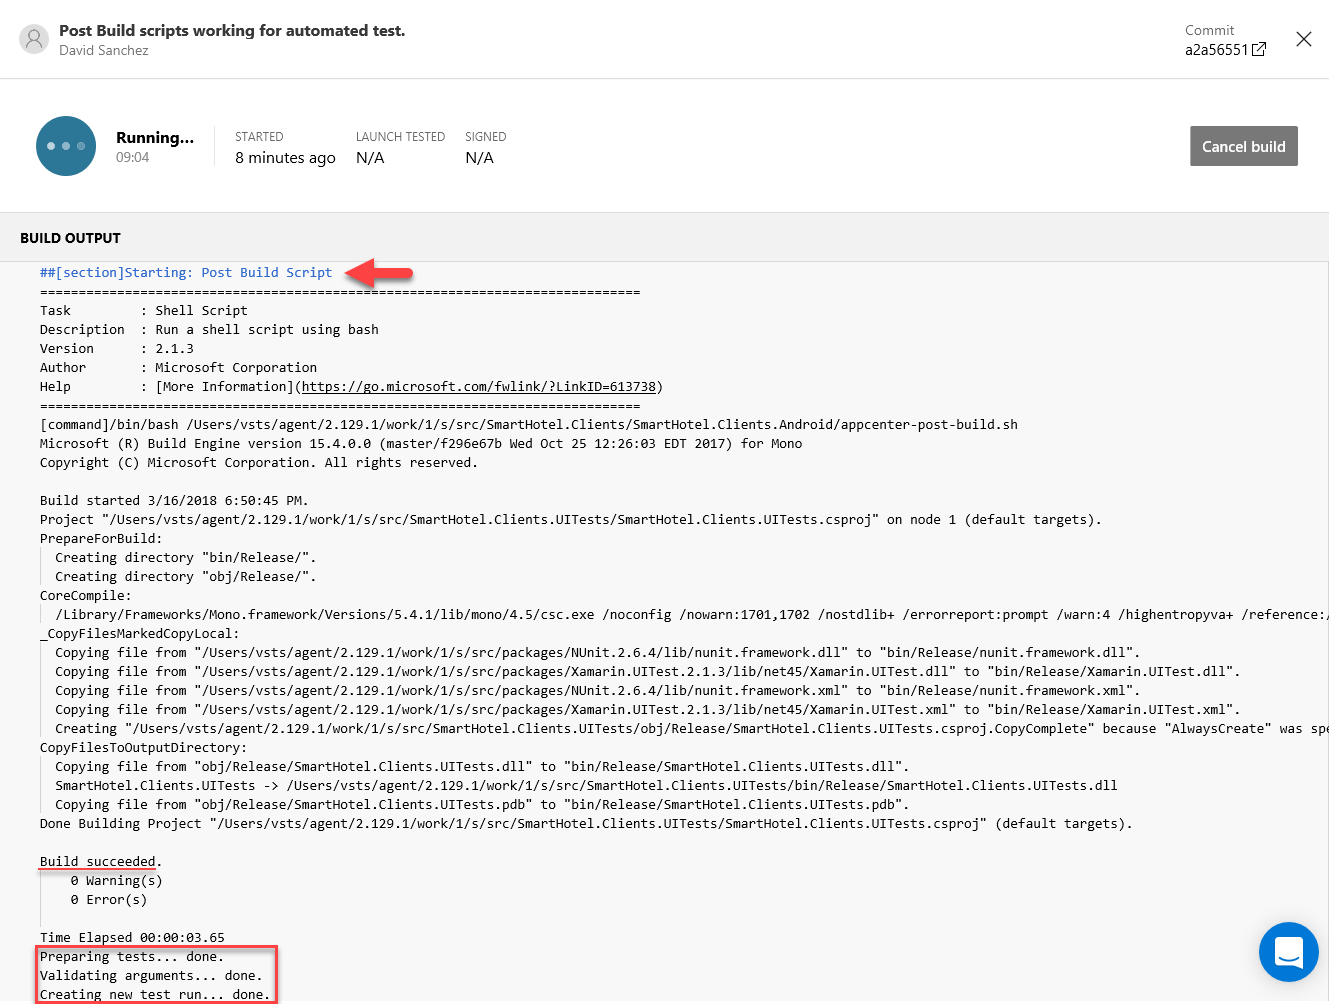
Once the test will be running you can check in the Test tab of App Center.

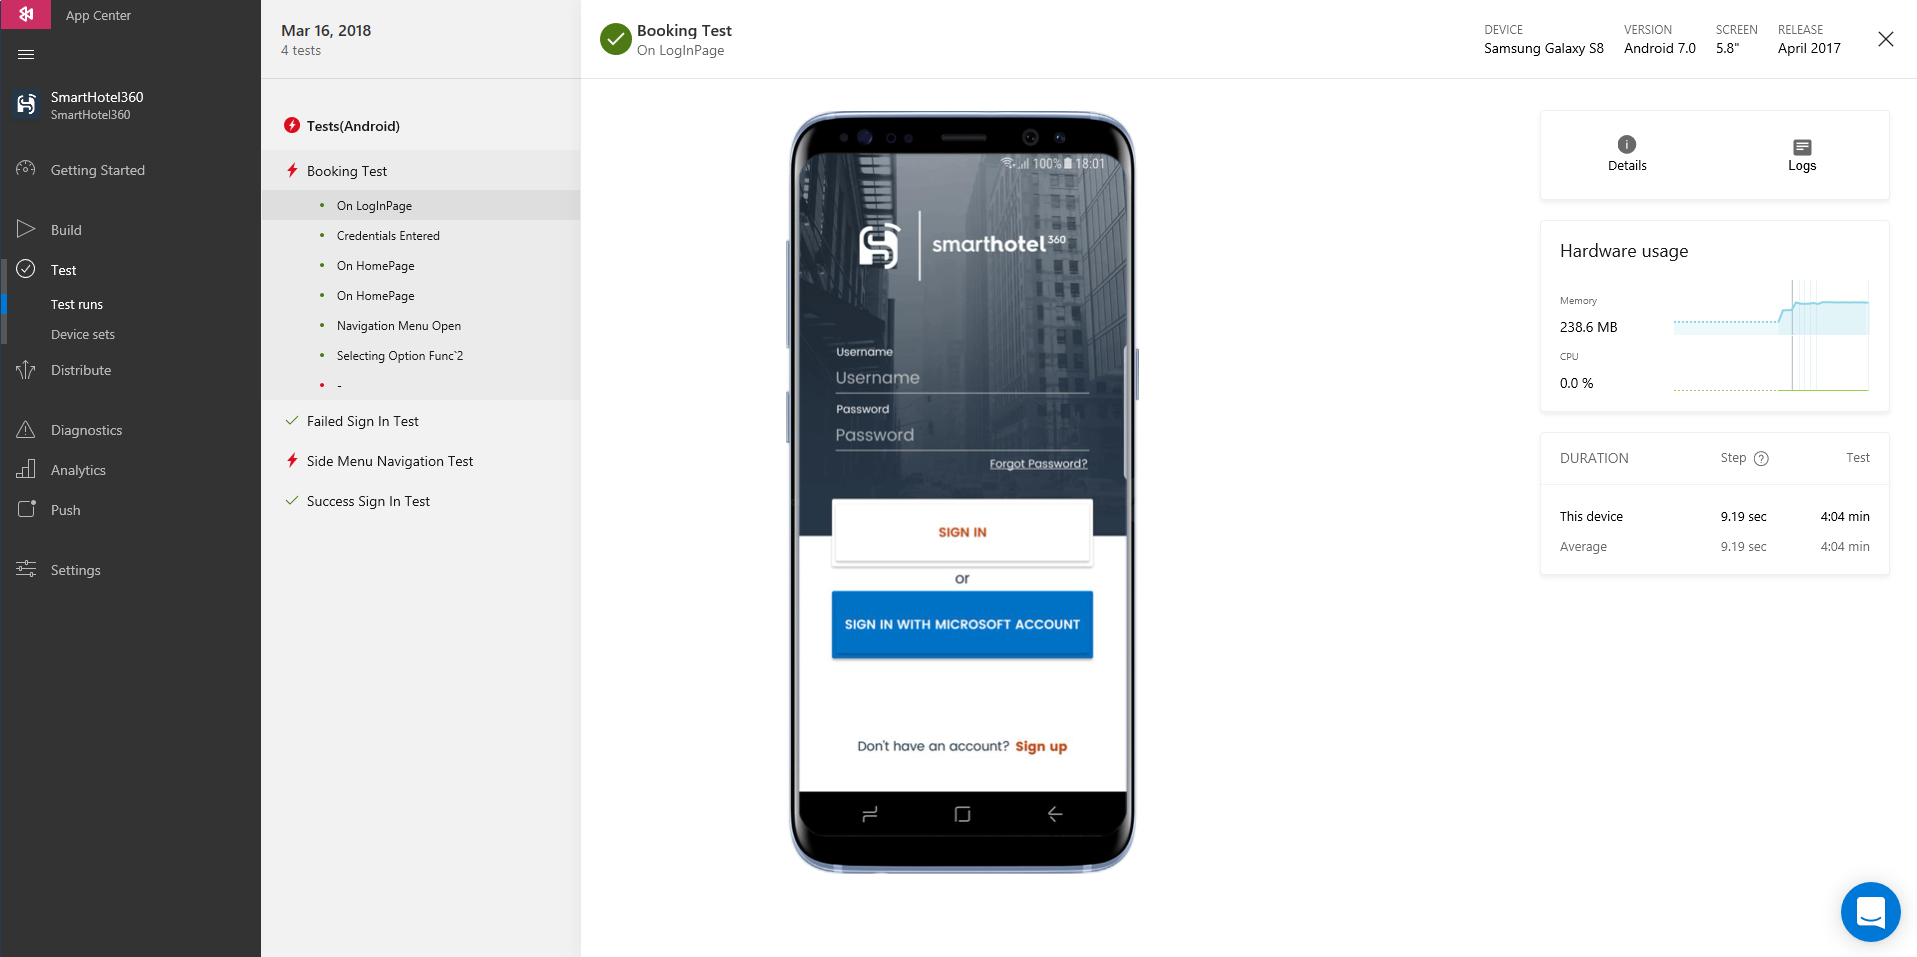
After it completed the test run you will be able to see the report and the logs of the device and test.
Update:
The Build service has a time limit of 30 minutes for the free tier and 60 minutes for the paying users. To avoid timeouts it is important to consider the number of devices you will run the test. If you still need to run it on multiple devices, it is recommended to set a plan that supports concurrent devices. More info about pricing plans: /appcenter/general/pricing
If you do not want to wait for the test result and just want to trigger the run as part of the build you can use the "--async" parameter, just take in consideration in case the test results fail, the build will be successful. For the SmartHotel360 repo, we have added this parameter to the post-build script.
Special thanks to Villars Gimm for the feedback on this blog post.