Note
Access to this page requires authorization. You can try signing in or changing directories.
Access to this page requires authorization. You can try changing directories.
In my last post I described how to set up a Docker Swarm Cluster smoothly using Azure Container Services and Bash running on Windows. Now let’s deploy something into this infrastructure. While you can of course use the local commandline as shown in my last post, I will focus on deployment from Visual Studio Team Services in this post.
If you don’t know Visual Studio Team Services: I consider Visual Studio Team Services as the heart of a developer team – it offers a bunch of tools out of the box like planning tools and source control but also build and deployment support. Even more important it serves as an integration platform where you can integrate pretty much every other tool you might already be using to get a smooth end-to-end workflow starting from a planned item to a shipped product to customer feedback back to planning and so on.
Configure a Release
As I said one part of the chain is deployment so let’s dig into this a little and see how we can make a container run on a swarm cluster running in Azure Container Services. This can be configured in the Build & Release tab in VSTS. (I enable the new UI – it might be called “Release” if you haven’t)
So the first step is to create a new Release Definition and to add a new Release Environment.
Just a little recap: a Release Environment is an infrastructure you are targeting while releasing. Typically you have more than one infrastructer, e.g one for the internal developer department, one for manual testing, one for beta tests and finally the production environment. Ideally they have a lot in common (like hardware specs and installed frameworks) but of course you have different machines for all of those tasks and you typically deploy subsequently to those environments. With multiple Release Environments you can make sure your software reaches the next stage only after an automatic or manual approval based on preconditions you defined, e.q. Quality Gates.
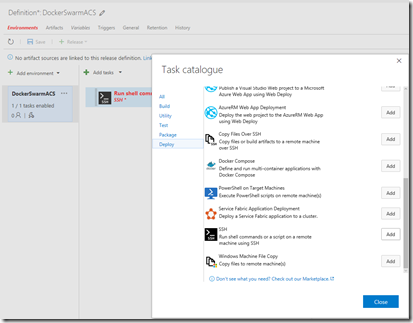
I call my Release Environment DockerSwarmACS. Now I define what is supposed to happen during the release. Therefore I can pick one or more tasks from the Task Catalogue.
As you can see there are specific tasks for Docker environments. However I found that the easiest way to set things up is using the SSH task. In my opinion it’s priceless to be able to pick commandline, powershell and ssh tasks. Because this really allows you to do anything during release. So commandline & ssh tasks are basically the equivalent to Gaffertape in your toolbox. ![]()
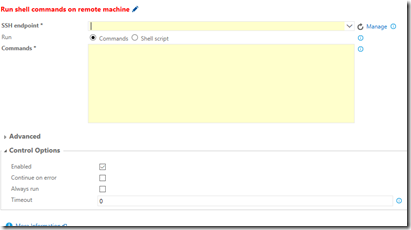
Now let’s configure this task.
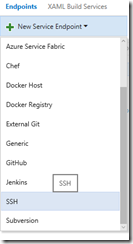
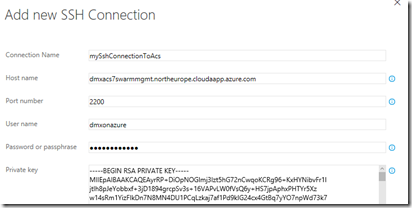
First you need an ssh endpoint. To set up this endpoint click “Manage” and add a new ssh service endpoint.
You’ll be asked for several entries. If you followed my previous blogpost to set up container services, it will be pretty straight forward.
1. A name to identify this endpoint later. Pick something you remember.
2. Hostname: This is the server you’re connecting to. In our case we connect to the Swarm Master. So I pick the DNS name of Swarm Master found in Azure Portal. In my case it’s dmxacs42swarmagents.northeurope.cloudapp.azure.com

3. Port Number: The portnumber for ssh connections to the Swarm Master is not the ssh default 22 but 2200.
4. User Name: This is the username you specified when you set up your Azure Container Service. You provided this username in the following dialog earlier.
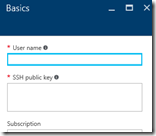
5. Password or Passphrase: This is the passphrase you used when you created your keys. See previous blogpost.
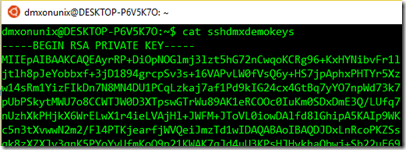
6. Private key: This is the content of your private key you created before. You can get it running “cat nameofprivatekeyfile” on Bash on Windows. When in doubt also see previous blogpost. It looks like the following picture. Copy & paste the full content into the private key field.
It should look like this now:
Now save this and choose this connection for your Release Environment.
Specify Commands for SSH connection
Next let’s specify the commands. We are doing pretty much the same as we did locally before, so we are just firing Docker commands.
However keep in mind: We are now running on the Swarm Master. This is a little dangerous. We don’t want to run containers directly on the Swarm Master, even if we could. Instead we want to run them on agents and we mant to make sure we talk to the Swarm Manager to run them on agents for us. So we have to make sure we talk to the right Docker Host. When we did this locally in our previous post, I set up a port forwarding.
This time we’ll do it differently. We simply specify the –H flag in our Docker command to make sure we talk to the right deamon. Just to clarify: With –H :2375 we advice the docker command to target localhost on port 2375. As we are running this on our Docker Swarm Master, we automatically target the swarm manager.
Don’t get confused
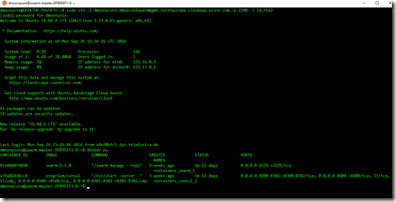
Ok, this might be the moment in time where your head is going to explode. Let’s figure this out again on the command line. You can open up a ssh connection directly to your Swarm Master using a command like this:
ssh -l yourUserName yourDnsNameOfYourSwarmMaster -p 2200 -i yourPrivateKeyFileName
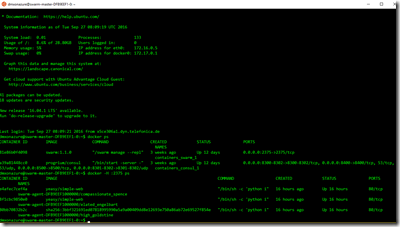
You can then run “docker ps” to view the containers running on the master locally. One of the containers is the swarm manager. You can see that port 2375 of the swarm manager running in the container is forwarded to the local port 2375 of the container host which is the Swarm Master. So if we are targeting port 2375 of the Swarm Master we are ultimately talking to the swarm manager. And that’s what we want.
We can also try this on command line. Let’s just fire this command:
“docker –H :2375 ps”
This will ask Swarm Manager (listening on port 2375) to show all running containers. In my case some containers are running here already. In your case no container might be running. It’s just important that you get a different result here than when running
“docker ps”
which will show you just two containers running directly on Swarm Master (one of them being the swarm manager)
With this knowledge, everything else is pretty easy. To configure the ssh release task to run a certain image on ACS, we simply run two commands.
First tell the swarm manager to pull a container image from the gallery, like this:
docker -H :2375 pull yeasy/simple-web
Then tell the swarm manager to run the container, like this:
docker -H :2375 run -d yeasy/simple-web
Now if you trigger your release definition, the container will be started in your Docker Swarm Cluster provided by Azure Container Service. Of course we didn’t really use the scaling power of Docker Swarm and Azure here, but I think this might be helpful to set things up initially.
If you look at this from an end-to-end story, it is very compelling. You are now able to deploy container images to a Docker Swarm Cluster based on a Check-In of source code, if you configure Visual Studio Team Services for Continuous Integration. And all it takes is just an SSH call in your release defnition. Pretty awesome, I guess.
