Sending out email registration forms using Microsoft Dynamics Marketing (MDM)
Marketing teams use marketing in different ways. One of the request that I recent got while working with a Partner on MDM is this: We usually find it easier to send out forms (registration form and the like) in the email itself. We have seen that it works better than sharing a link and getting the customer to click on the link to fill up the form. How do we handle such situations using MDM?
This essentially means that the marketing team wants to include registration forms in the email body itself rather than the usual method of including a registration link in the email expecting the prospect to click on the link to enter his/her info in the new page. I realized that this is possible in MDM and thought of sharing my experiment on how this could be achieved. I hope this serves as a ready reckoner for others who get similar questions from their Customers and Partners.
MDM has two different types of email editors – the blank email editor and the blank email with html editor. The blank editor is for users who are not well-versed with html, while the html editor gives a lot of flexibility to use html code in the email editor directly. This might come in handy for users who work with external agencies where they get a ready-to-use html code from their agencies or the users can directly input html code into the editor if they are comfortable with html themselves. It also needs to be noted that in MDM, even when you are using a blank email editor, you still have the flexibility of adding an html code block in the editor, which I will be covering towards the end of this blog.

Adding a form within the emails is not very difficult to achieve because a 'form' is essentially an html with some actions (like the Submit button). So to add a form in the email, the idea is to add it as an html code in email editor.
Step1: Let's start with a basic html code for a form. Since it's a basic code, I found the html code for a contact form here: www.freecontactform.com/html_form.php.
<form name="htmlform" method="post" action="html_form_send.php">
<table width="450px">
</tr>
<tr>
<td valign="top">
<label for="first_name">First Name *</label>
</td>
<td valign="top">
<input type="text" name="first_name" maxlength="50" size="30">
</td>
</tr>
<tr>
<td valign="top"">
<label for="last_name">Last Name *</label>
</td>
<td valign="top">
<input type="text" name="last_name" maxlength="50" size="30">
</td>
</tr>
<tr>
<td valign="top">
<label for="email">Email Address *</label>
</td>
<td valign="top">
<input type="text" name="email" maxlength="80" size="30">
</td>
</tr>
<tr>
<td valign="top">
<label for="telephone">Telephone Number</label>
</td>
<td valign="top">
<input type="text" name="telephone" maxlength="30" size="30">
</td>
</tr>
<tr>
<td valign="top">
<label for="comments">Comments *</label>
</td>
<td valign="top">
<textarea name="comments" maxlength="1000" cols="25" rows="6"></textarea>
</td>
</tr>
<tr>
<td colspan="2" style="text-align:center">
<input type="submit" value="Submit"> ( <a href="<www.freecontactform.com/html_form.php>">HTML Form</a> )
</td>
</tr>
</table>
</form>
Step2. Now, to add the code in our email and to make it look good, let's go back to our email editor. Let's start with a blank email with html editor. This is what the email page would look like:

Enter all the mandatory fields, select the subscription center and forward to a friend (if needed). Now we can go to the editor screen (the middle button among the 3 button below the text 'New'). Enter the basic html code and insert the mandatory plug-ins like the 'Subscription Center', 'Sender Address' using the insert plug-in drop down at the top.

Once the basic framework is done, we are ready to copy-paste the html code for the form. If you are well-versed in html, you could also play around with the placement of the form and design of the email.

Click on the validate option at the top to ensure that everything is as expected.

Once the validation is successful, you could click on the 'Test Send' option at the top to ensure that everything looks good. You could send it to your own email id to test it out.

The email would look something like this:
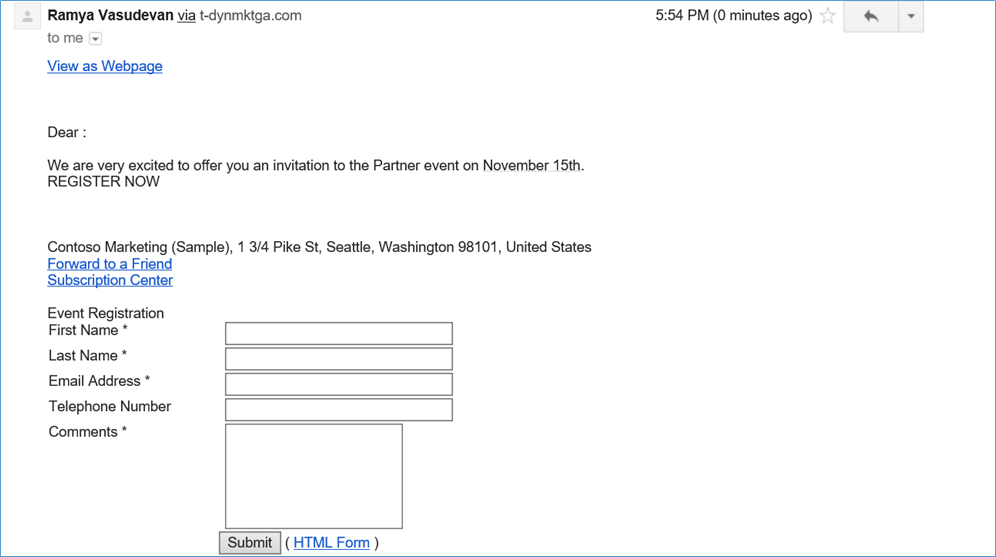
Hurray! The email and the form gets sent to the prospect. Please note that the name is not getting populated after 'Dear' because we used a manual 'Test Send' option. In Campaign automation, the name should get dynamically picked up from the marketing list.
Step3: If you want to use the blank email editor instead of the html editor, the process would look something like this:

Now select the email editor (the second button below the text 'New'. A blank email form will open. You can drag and drop the Layout first, followed by the content blocks.

After the initial layout design, the email would look like this. To add a form, the idea is to drag and drop an html content block and add the code for the form there. Note that I have added an image at the top, a text block and an html block in the middle layer and a text block at the bottom. Let me enter the relevant information in these blocks. Remember to add a 'Subject' for the email

Remember to copy-paste the html code for the form in the html block. The final email design would look like this:

Let's do a Validation and do a Test Send.


And the email would look like this:

Obviously you can play around with the layout and come up with something good. But essentially, the point is that it is possible to send emails with forms in them using Microsoft Dynamics Marketing (MDM).