Note
Access to this page requires authorization. You can try signing in or changing directories.
Access to this page requires authorization. You can try changing directories.
Databases sometimes need to be moved to different SQL Servers for a variety of reason: faster performance, scale out among different SQL Instances/Servers, disaster recovery, etc.
The procedure below describes how to move BizTalk ESB databases to another SQL location (Server or instance). Note: The same basic procedure can also be used to move the BizTalk ESB databases from a local SQL Server to a remote SQL Server or to a SQL Server cluster.
ESB Toolkit Configuration Files
On every computer where ESB Toolkit is configured, navigate to C:\Program Files (x86)\Microsoft BizTalk ESB Toolkit 2.0, and make a backup of the file esb.config before any modification.
Open the esb.config file for editing.
Under ConnectionString node, change the Data Source attribute to point to the new Database cluster:
<connectionStrings><add name="ItineraryDb" connectionString="Data Source=NEWDBSERVER;Initial Catalog=EsbItineraryDb;Integrated Security=True"providerName="System.Data.SqlClient" />...</connectionStrings>
Save the edited file.
On every computer running BizTalk Server, navigate to C:\Program Files (x86)\Microsoft BizTalk ESB Toolkit 2.0\Bin, and make a backup of the file “ESBConfigurationTool.exe.Config” before any modification.
Open the ESBConfigurationTool.exe.Config file for editing.
Change below keys to point to the new SQL Cluster:
<add key="ItineraryServerInstance" value="NEWDBSERVER" />
<add key="ServerInstance" value="NEWDBSERVER" />
Save the edited file.
ESB Portal Configuration Files
- On every computer where ESB Portal is configured, navigate to C:\inetpub\wwwroot\esb.portal make a backup of the file Web.config before any modification
- Open the Web.config file for editing.
- Under connectionStrings node, change the Data Source attribute to point to the new Database cluster<connectionStrings>...<add name="AdminDatabaseServer" connectionString="Network Library=dbmssocn;Data Source=NEWDBSERVER;Integrated Security=True;Initial Catalog=ESBAdmin;" providerName="System.Data.SqlClient"/>...</connectionStrings>
- Save the edited file.
- Repeat Step 1-4 for the file C:\inetpub\wwwroot\esb.portalONO\Web.config
UDDI Services Registry Information
On every computer where UDDI service is configured, modify below Registry Key to point to the new SQL Cluster
-
- HKEY_LOCAL_MACHINE\SOFTWARE\Microsoft\UDDI\Database\ReaderConnectionString
- HKEY_LOCAL_MACHINE\SOFTWARE\Microsoft\UDDI\Database\WriterConnectionString
- HKEY_LOCAL_MACHINE\SOFTWARE\Microsoft\UDDI\Setup\WebServer\databaseName
Custom Configurations files
On every computer where Custom application is installed (BizTalk Servers), modify existing connection Strings in configuration files to point to new SQL Server:
- Make a backup of * .config before any modification
- Edit each configuration file and modify “Data Source” attribute to point to the new SQL Cluster. Note: The easy way to accomplish this is replacing all occurrences of ‘OLDDBServer’ by ‘NEWDBSERVER’ .
- Save the edited file
Folders containing configuration files with connection strings pointing to old SQL Cluster:
- C:\program files (x86)\Microsoft BizTalk Server\
- C:\Program Files (x86)\Microsoft BizTalk Server\Tracking
- C:\Program Files (x86)\Microsoft BizTalk Server\BAMPortal\BAMManagementService
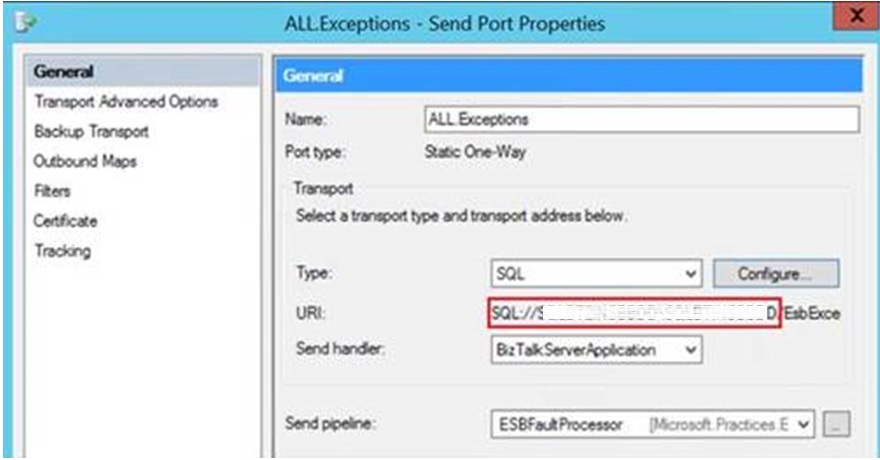
ESB Send Ports
Modify “ALL.Exceptions” Send Port (under “Microsoft.Practices.ESB” BizTalk Application) to point to the new SQL Cluster “NEWDBSERVER”
