Note
Access to this page requires authorization. You can try signing in or changing directories.
Access to this page requires authorization. You can try changing directories.
If you haven't read part 1 of the Search in NAV 2009, you should do so before continuing.
In this section we will create a small Winforms application, which uses the Web Service we just created in part 1.
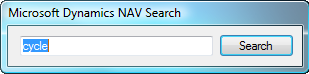
Our application will be visible as a System Tray Icon, it will have a global Windows Hotkey with which we can activate search and when you activate the Search application it will popup and look like this
In part 3 we will create a Windows Vista Gadget version of the same app.
Visual Studio
I assume that you have worked with Visual Studio and C# before (this is not a C# tutorial - though you can of course play around with the code if you want to learn) and I will be using Visual Studio 2008 (incl. SP1) for my samples, and I won't go into details about every function in the solution - I will however try to explain how things works and show a couple of the functions (you can download the full sample and play around with it).
In Program.cs (main program), we create an instance of the SearchForm. We do not give the form to Application.Run() - this would show the Search Form immediately and we don't want that.
The Form has a NotifyIcon (an Icon in the System Tray) and a context menu for that Icon - all of that is setup in the Visual Studio Forms Designer and you will find event handlers for the menu items and for when the user is clicking the NotifyIcon in the code.
The application has a reference to the Search Web Service from part 1 - and currently this is pointing to
https://localhost:7047/DynamicsNAV/WS/CRONUS_International_Ltd/Codeunit/Search
If you need to change that, you do not need to recompile and change the application - you can do this by modifying the .config file, which gets deployed next to the .exe file (named the same as the .exe file with .config behind - standard .net thingy).
The NAVSearch.exe.config contains a setting for the reference, that looks like this:
<setting name="NAVsearch_SearchReference_Search" serializeAs="String">
<value>https://localhost:7047/DynamicsNAV/WS/CRONUS_International_Ltd/Codeunit/Search</value>
</setting>
The "main" code is the Event Handler for the Search Button Click event. I will let the code and the comments speak for itself.
/// <summary>
/// Event Handler for Click on the Search Button
/// </summary>
private void bSearch_Click(object sender, EventArgs e)
{
// Create the Service proxy class
SearchReference.Search searchService = new NAVsearch.SearchReference.Search();
searchService.UseDefaultCredentials = true;
// Invoke the DoSearch method
string result = "";
searchService.DoSearch(this.eSearch.Text.ToUpper(), ref result);
// Did we get a result back?
if (!string.IsNullOrEmpty(result))
{
// Load the result into an XML Document
XmlDocument xmlDoc = new XmlDocument();
xmlDoc.LoadXml(result);
// Load the XSLT Transformation document
XslCompiledTransform xslTrans = new XslCompiledTransform() ;
xslTrans.Load(Path.GetDirectoryName(Application.ExecutablePath) + @"\SearchResultToHTML.xslt");
// Perform the transformation in memory
StringBuilder sb = new StringBuilder();
StringWriter sw = new StringWriter(sb);
xslTrans.Transform(xmlDoc, null, sw);
// Hide the Search form
HideSearchForm();
// Set local image path
string html = sb.ToString().Replace("#path#", "file://" + Path.GetDirectoryName(Application.ExecutablePath) + @"\");
// Show the Search Results form
resultsForm = SearchResultsForm.ShowHTML(html);
}
}
The result returned from WebServices was a BigText, which is a string in C# - we simply take that string and load it in an XML Document (if it isn't empty of course).
The stylesheet needed for transforming the XML into HTML (SearchResultToHTML xslt) is also included in the project, and it also includes the images used by the HTML. In the XSLT all the images are preceded with a path identifier #path#, which we replace with the application directory in order to show the HTML proper.
I won't go into detail about how XSLT works, there are a ton of resources on the Internet explaining this, I use it for getting from the XML I get from the Search Codeunit to the HTML - and it works for the purpose.
ShowHTML is a static function on the Search Result Form, which opens the Search Result form and displays the HTML in a webbrowser control inside the form.
/// <summary>
/// Open the search result form and show an HTML document
/// </summary>
/// <param name="html">HTML document to show</param>
/// <returns>The Search Result Form</returns>
public static SearchResultsForm ShowHTML(string html)
{
SearchResultsForm form = new SearchResultsForm();
form.webBrowser1.DocumentText = html;
form.Show();
form.Activate();
return form;
}
There are a number of small functions in the application to control the behavior of the application.
Windows Key + Z opens up the Search Form - is controlled by the statements
User32.RegisterHotKey(this.Handle, this.GetType().GetHashCode(), (int)Modifiers.MOD_WIN, (int)Keys.Z);
in the constructor and the following method
/// <summary>
/// Event Handler for Windows Messages
/// </summary>
protected override void WndProc(ref Message m)
{
// Only react on WM_HOTKEY
if (m.Msg == (int)Msgs.WM_HOTKEY)
{
// Show the Search Form
this.ShowSearchForm();
}
// Invoke default Message Handler
base.WndProc(ref m);
}
Of course the global hotkey is destroyed in OnClosed - when exiting the application.
When the form is deactivated - we want to hide the form, that is achieved by
/// <summary>
/// Event handler for Deactivate form
/// Hide the SearchForm when it gets deactivated
/// </summary>
private void SearchForm_Deactivate(object sender, EventArgs e)
{
HideSearchForm();
}
and whenever the form is shown, there is some housekeeping to make sure that the Search Result form is closed, it opens up in the right location and it is activated and ready to type in.
/// <summary>
/// Show the Search Form
/// </summary>
private void ShowSearchForm()
{
// If the result Form is open - close it
if (resultsForm != null)
{
resultsForm.Close();
resultsForm = null;
}
// Set the location of the searchform to the lower right corner
this.Location = new Point(System.Windows.Forms.Screen.GetWorkingArea(this).Width - this.Size.Width,
System.Windows.Forms.Screen.GetWorkingArea(this).Height - this.Size.Height);
// SearchForm is topmost
this.TopMost = true;
// Show the Search Form
this.Show();
// Activate it
this.Activate();
// Select the text in the Search TextBox and put focus in the control
this.eSearch.SelectAll();
this.eSearch.Focus();
}
The original demo scenario was a user sitting in Word, wanting to find information about an item in his NAV. The user hits Windows+Z, types in what he is looking for and hits ENTER. The Search Result Form opens with focus and the user can use TAB to select the area in which we wants to look at results or the user can move directly to the search result he is looking for and press ENTER (or use the mouse of course).
When the user presses ESC in the Task Page opened from the Search Result Form the user will return to the Search Result Form and when the user presses ESC again the user is back in the Search Form - and one more ESC will bring him back into Word and the user can continue his work.
You can download the solution for NAV Search here https://www.freddy.dk/Search - Part 2.zip. Note that this download cannot stand alone - you need the NAV piece of this, which you can find in Part 1.
Enjoy
Freddy Kristiansen PM Architect
Microsoft Dynamics NAV