Azure Logic App with simple API App with inputs and outputs
Logic Apps is a new service offered by Microsoft Azure. It allows users to easily create and manage a flow of triggers and actions. Triggers start when an event happens, it can be periodic triggers or triggers based on an arrival of an Email, etc… when a trigger kicks in, the actions specified in the Logic App are invoked. All triggers and actions are API Apps, for more details about Logic Apps please visit this documentation and for API Apps, you can find documentation here
Here I will go through the creation of a simple API App that takes an input and does some processing and has an output. I chose my operation to be ToUpper, it takes a string and converts all characters to upper case. To do that I used Visual studio to create and publish the API App, and then Azure portal to create and manage the Logic App.
Let’s start by creating a new API App. To do that I had Visual studio 2013 and I had to install Azure SDK 2.5 for visual studio 2013. (I installed it using Web Platform Installer, search for visual studio azure SDK). Open visual studio, create new project -> visual C# -> Web -> ASP.NET Web Application, you will see these options:
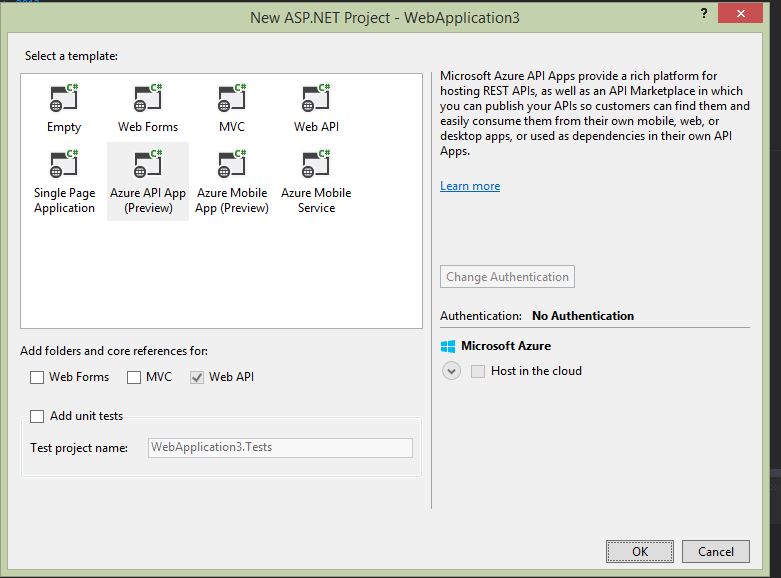
Choose Azure API App and ok.
This will create a new project and then will add 2 main components
- Web API: Microsoft Framework to create web services based on ASP.NET for more info please visit https://www.asp.net/web-api
- Swashbuckle: a utility that helps create swagger api definitions for your web api for more info please visit https://github.com/domaindrivendev/Swashbuckle
The new project will have ValuesController I will just rename the controller to ToUpperController, make sure you change the controller name and the file name too to ToUpperController.cs. And this is how my controller looks like
 public class ToUpperController : ApiController
 {
 // GET api/values
 public string Get(string toConvert)
 {
 return toConvert.ToUpper();
 }
 }
In the project go to App_Start, SwaggerConfig class and enable the UI by uncommenting this
  /*
 })
 .EnableSwaggerUi(c =>
 {
 */
Run your site and go to {localhost:port}/swagger you will see this UI:
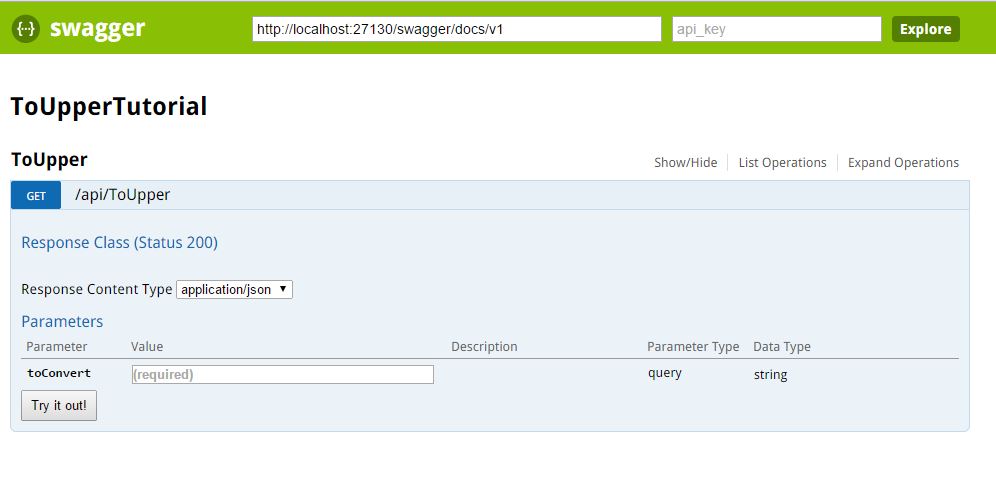
And you can pass in any string and “try it out!” you see that the body will have the string you sent in capitalized letters. If you browse to {localhost:port}/swagger/docs/v1, you will get the swagger API definition file
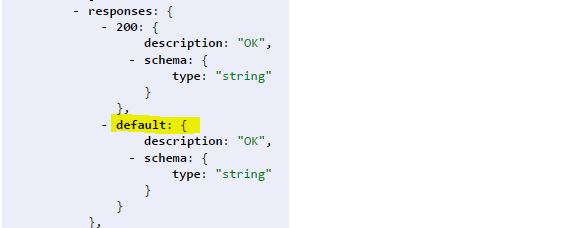
Now here is the trick that took me some time to figure out, Logic apps only work with the default response and not the 200 response defined in the swagger JSON

So to add default response to all your APIs here is what you need to do is to go to SwaggerConfig.cs and do the following
Uncomment
c.OperationFilter<AddDefaultResponse>();Add the following class
 public class AddDefaultResponse: IOperationFilter
 {
 public void Apply(Operation operation, SchemaRegistry schemaRegistry, ApiDescription apiDescription)
 {
 if (!operation.responses.ContainsKey("default") && operation.responses.ContainsKey("200"))
 {
 operation.responses.Add("default", operation.responses["200"]);
 }
 }
 }
And that is how the swagger response will look like:
Now we are ready to publish to a live API App, right click on the project then hit publish. To do that you need to be signed in to Azure and you need a subscription. Documentation on how to publish API App here
Ok now let’s play with the new API App that we created, go to the portal and create a new twitter API app, just search Azure marketplace and install the package “Twitter Connector”.
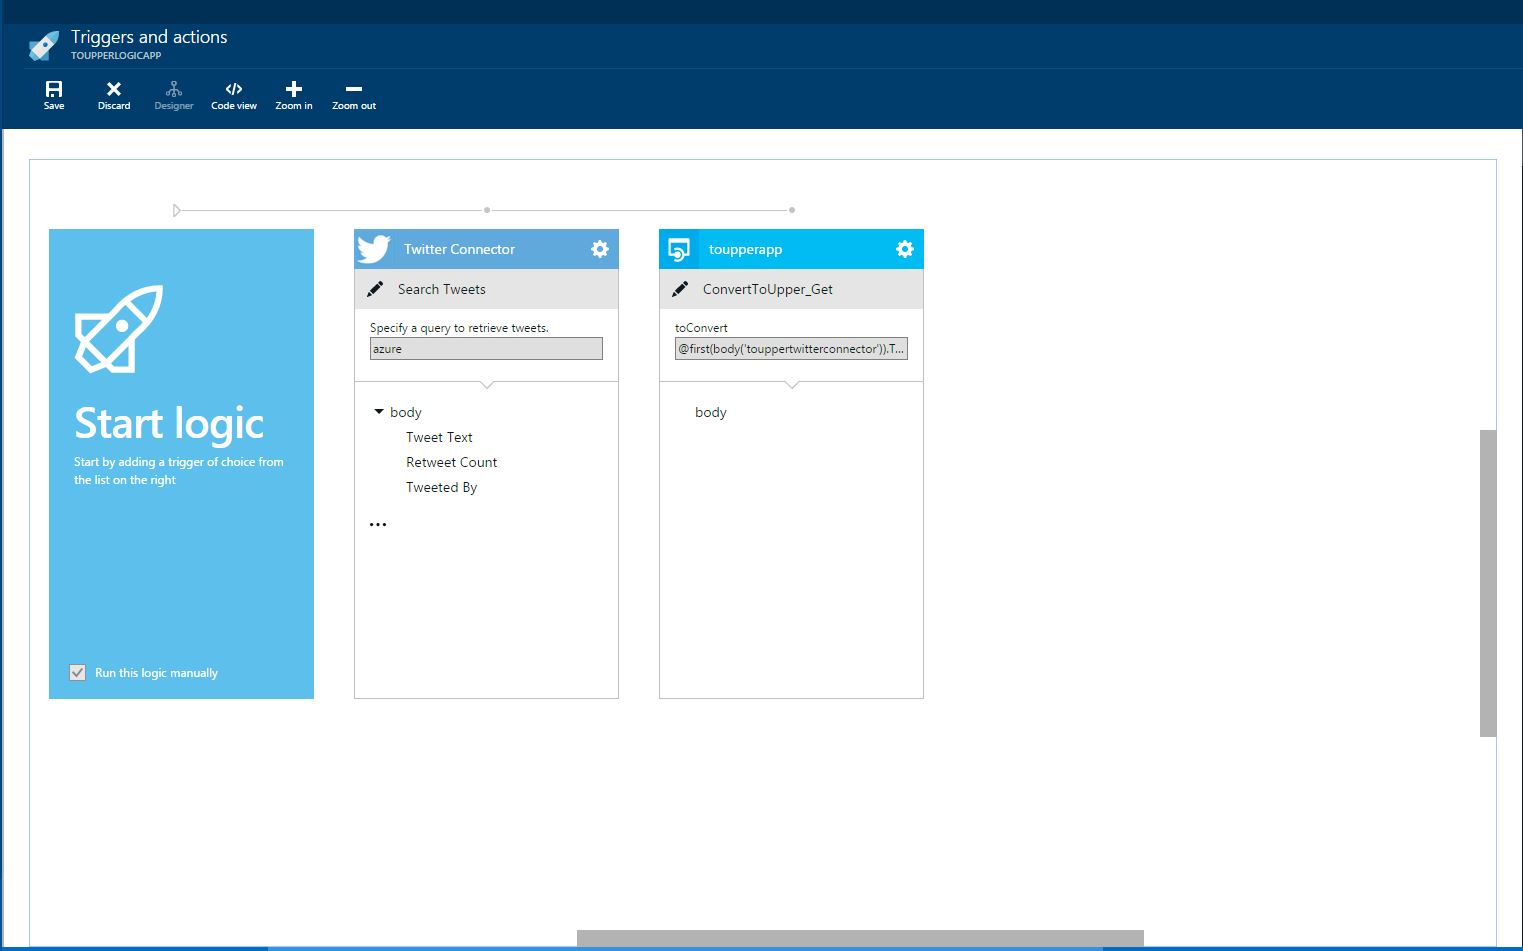
Once you have all deployed, create a new Logic app, go the designer by clicking triggers and actions.
In my scenario I will trigger this flow manually so I will check the box “Run this Logic Manually”, now it will ask to drop in an action, from the right list drop in twitterconnector, I will choose search tweets action, and I will search for Azure. Now drop in your API App in and choose the only action you got now “ConverToUpper_Get” it will ask for input called “toConvert” let’s click on the “…” button to get a list or parameters that we can get from the previous action. I will choose Search Tweets Tweeted By as input. Notice here it only shows the “variables” that are of type string, because we specified that our input to the API is string. This is how the design will look after you are done
Now save your changes, close the designer and go back to the Logic App blade and click “Run Now” you will see in the operation part a new run shows up, if you click on that you can get to the results of the run
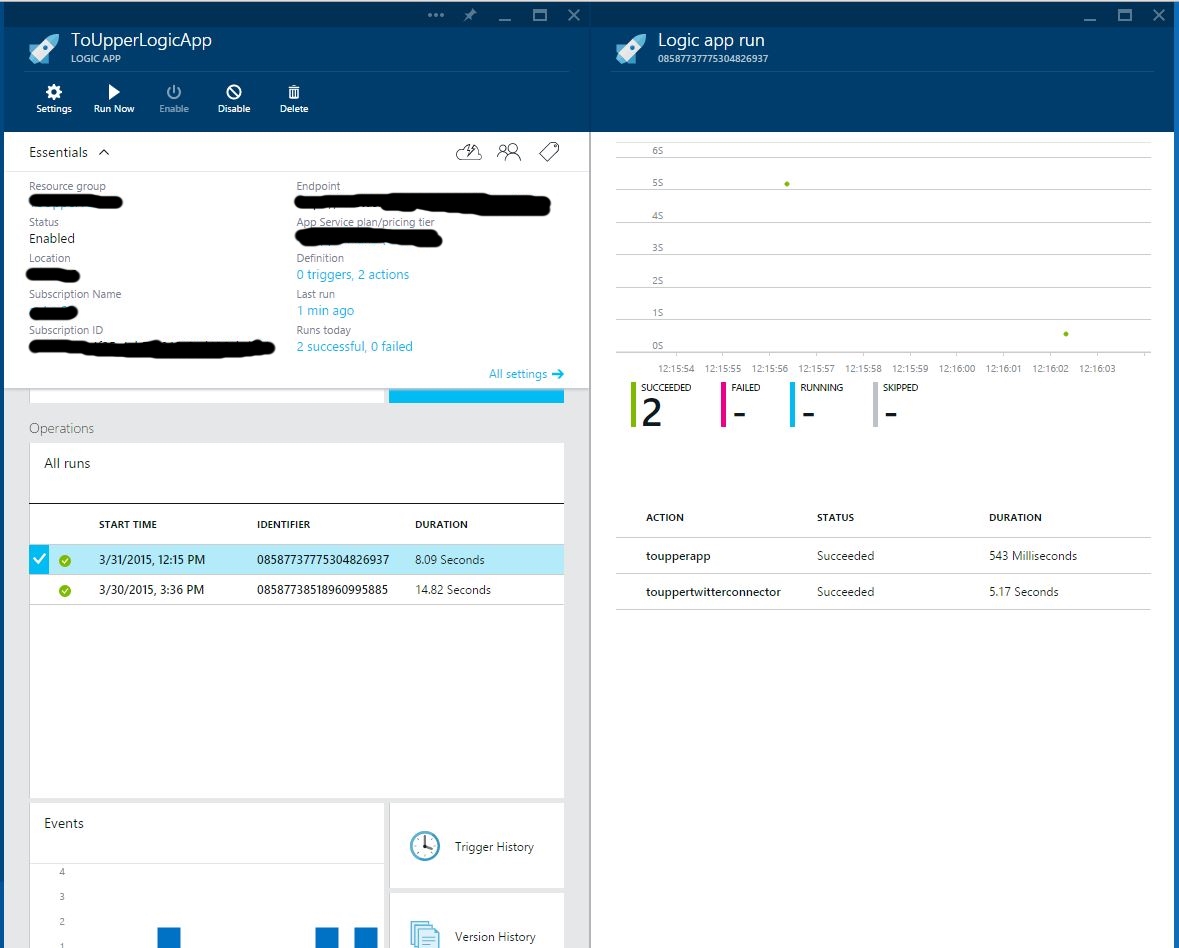
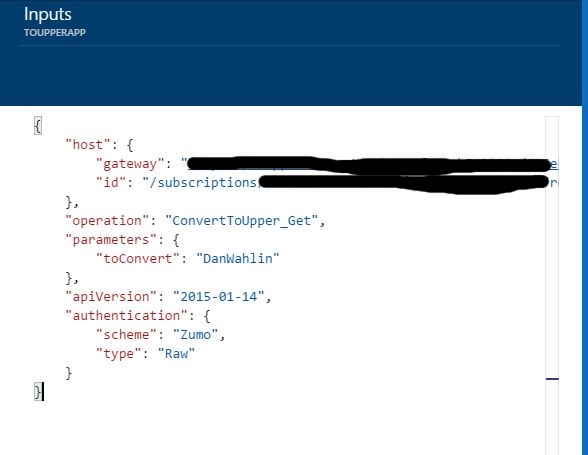
Now if you open the logs for each action you will see 2 links “INPUTS LINK” and “OUTPUTS LINK” each will open JSON data files that contain the information. If you go to your ToUpperApp input links you will see something similar to this:
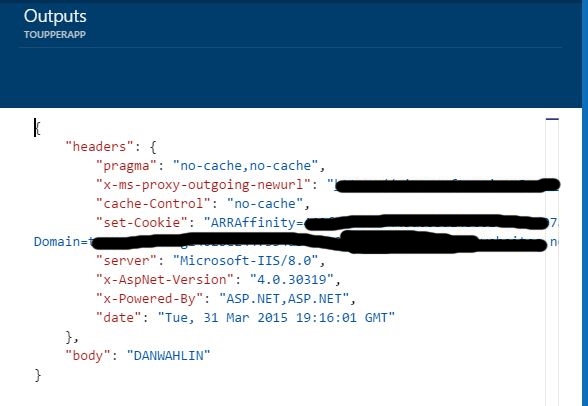
And to outputs link you will see that the name DanWahlin was transformed to Capital letters and is sent back in the body.
Now you have created the API App from scratch and it can take in parameters and send back ouputs. That opens up the gate for lots of innovative Logic apps you can easily and rapidly develop.
Comments
Anonymous
April 01, 2015
Thanks for this Hosam! I was stuck with my API apps return values not being available in the logic app but setting the default response fixed that. That part should really be in the Getting Started tutorial. Now we just need more info on how to create triggers, and things like authentication and how to use package settings.Anonymous
April 03, 2015
Thanks Jared, I will ask around about trigger creation and will get back to you with information., about authentication, could you take a look at this part of the documentation azure.microsoft.com/.../app-service-api-dotnet-add-authentication I think it has what you need :). if that is not what you want please tell me more what is the specific scenario and I will try to help.Anonymous
April 08, 2015
Thanks Hosam for the trick to be able to use the responses in my API app.Anonymous
April 08, 2015
Super helpful - thanks. I too found the default response was needed by looking at swagger for MSFT provided connectors. Swagger.config should have all the necessary code to make AppService compatible swagger metadata. Why have they not published the swagger requirements? Docs on the expression syntax for logic apps would be nice as well.Anonymous
April 11, 2015
Thanks Hosam. BTW, it seems the DropBox connector doesn't support non-English characters.Anonymous
May 01, 2015
@Jared, I found an article describing how to create a custom trigger please go this page to see more azure.microsoft.com/.../app-service-api-dotnet-triggersAnonymous
June 09, 2015
Excellent tutorialAnonymous
August 11, 2015
The comment has been removedAnonymous
January 06, 2016
Hi, Thank you for the tutorial. However, I'm currently stuck in the following step: "Now drop in your API App in and choose the only action you got now “ConverToUpper_Get”". The API app does not appear in the list of "API's" in my Logic App. When I go to "App Services", I can see that the API has been deployed (and it's working correctly). Any idea what the reason could be? Thanks in advance.- Anonymous
May 17, 2016
go to all setting > CORS > "provide url which can access your api"or simply put * in there youi will be able to use it in logic apps
- Anonymous