Hybrid Cloud Identity Part 1: AD and Azure AD
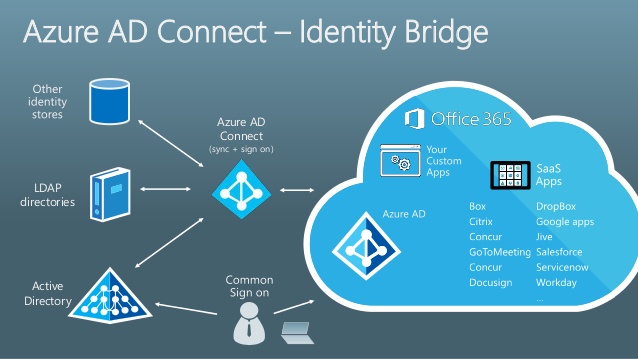
Identity is the important part of cloud era. To show how it reflects on Hybrid Cloud story, I will show you how to integrate Active Directory Domain Services with Azure Active Directory using Azure AD Connect and ADFS. Our goal is to build an integrated identity environment, that will be a security core of a hybrid cloud.
This post is a part of the Hybrid Cloud Identity series:
Part 1 - Integration of On-Premise AD and Azure AD using Azure AD Connect and ADFS (you are here) Part 2 - Hybrid Exchange Part 3 - Azure Multi-factor Authentication Part 4 - Azure AD Connect Health
Previously I've already described how to integrate a network across On-premise LAN, Azure Pack vNet in Service Provider datacenter and Azure vNet. In the end of the exercise we've deployed a domain controller in the service provider datacenter and integrated our on-premise AD and DNS with service provider cloud and Microsoft Azure.
Next step is to integrate our Active Directory with Azure Active Directory. The main benefit of such activity is that corporate end-users will be able to seamlessly sign-on to external systems using their On-premise AD credentials, including:
- Microsoft Online Services for business - Office 365, Dynamics CRM Online, Azure RMS, Azure management portal etc.
- External services, integrated with Azure AD - Facebook, Salesforce, E-Commerce systems etc.
For example, corporate end-users will be able to unlock their domain-joined PC using their On-Premise AD credentials and then go to corporate portal on SharePoint Online, sales dashboard on Dynamics CRM Online or even to corporate page on Facebook - without any prompt to authenticate 2nd time. This is a very smooth user experience, and you don't need to manage several sets of identity - your On-premise AD is the single source of credentials and right management.
How we'll achieve that:
- Integrate Active Directory Domain Services among On-premise environment and Service Provider cloud (based on Azure Pack) - I've already did it on a previous step
- Deploy Azure AD Connect in Service Provider cloud (it will also automatically deploy required ADFS environment) - this post
- Configure Hybrid Mode for On-Premise Microsoft Exchange Server
- Configure Azure AD Connect Health to monitor the status of AD<->AzureAD integration
- Deploy Azure Multi-factor Authentication Server and enable Azure Multi-factor Authentication (MFA)
- Integrate cloud services with Azure AD, integrate on-premise services with On-premise AD and ADFS.
Requirements:
- SSL certificate for ADFS (HTTPS), issued by a public trusted authority
- 4 Windows Server 2012 R2 VMs (AD Connect, ADFS, Web Application Proxy as ADFS Proxy, MFA Server) - 1vCPU 2GB RAM is OK, but consider bigger VMs for larger environments. For companies with 1000+ users it is recommended to use highly available ADFS Farm (+1 ADFS for highly available ADFS Farm and +1 ADFS Proxy for Load Balancing with Failover).
- Office 365 Subscription, any plan (if integration with Office 365 is needed)
- Azure AD Premium Subscription (if MFA and AD Connect Health is needed)
Here is the description of the environment that I will use as example:
- Public domain - kotlyarenko.com (provided by Infobox, DNS Management through Odin Service Automation panel)
- SSL certificate federation.corp.kotlyarenko.com issued by Digicert. Also you can use free 90-day certificate from Comodo.
- On-premise Active Directory domain: corp.kotlyarenko.com; NetBIOS name: CORP
- Service Provider environment - InfoboxCloud Azure Pack Infrastructure
- 2 Azure Pack vNets are used - one for internal VMs (integrated with On-Premise LAN through Site-to-Site VPN), another is DMZ (for ADFS Proxy, based on Windows Server 2012 R2 Web Application Proxy).
- Exchange 2016 Server, deployed on Azure Pack in Service Provider environment
- Azure AD and Microsoft Online tenant name: kotlyarenko.onmicrosoft.com
- Office 365 Enterprise E3 Subscription (purchased through CSP, but the following guide will work for DirectOpenEA too)
- Microsoft Azure Subscription (purchased through CSP) - we'll need it in the next part
- Enterprise Mobility Suite (EMS) Subscription (includes Azure AD Premium, purchased through CSP) - we'll need it in the next part.

Configure externally routable domain
OK, let’s start from the basics. By default Azure AD uses domains like companyname.onmicrosoft.com. On-premise AD usually use domain names like companyname.local or local.companyname.com. To integrate them together, Azure AD and On-premise AD should use the same externally routable domain. In my case Azure AD default domain is kotlyarenko.onmicrosoft.com, and On-Premise AD domain name is corp.kotlyarenko.com. I will add externally routable domain kotlyarenko.com both to Azure AD and to On-Premise AD to integrate them together.
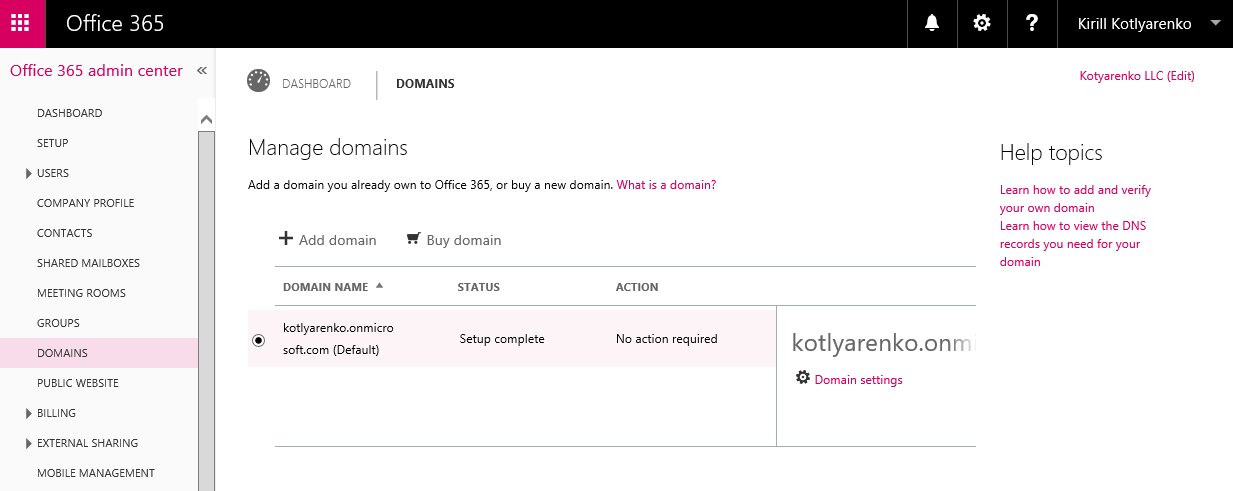
To add your externally routable domain to Azure AD, you can use Azure Management Portal or Office 365 Admin Portal. I will use Office 365 Admin Portal. Logon using Azure AD Global Administrator (it can be admin@companyname.onmicrosoft.com in CSP), go to "Domains" menu and click "Add Domain".
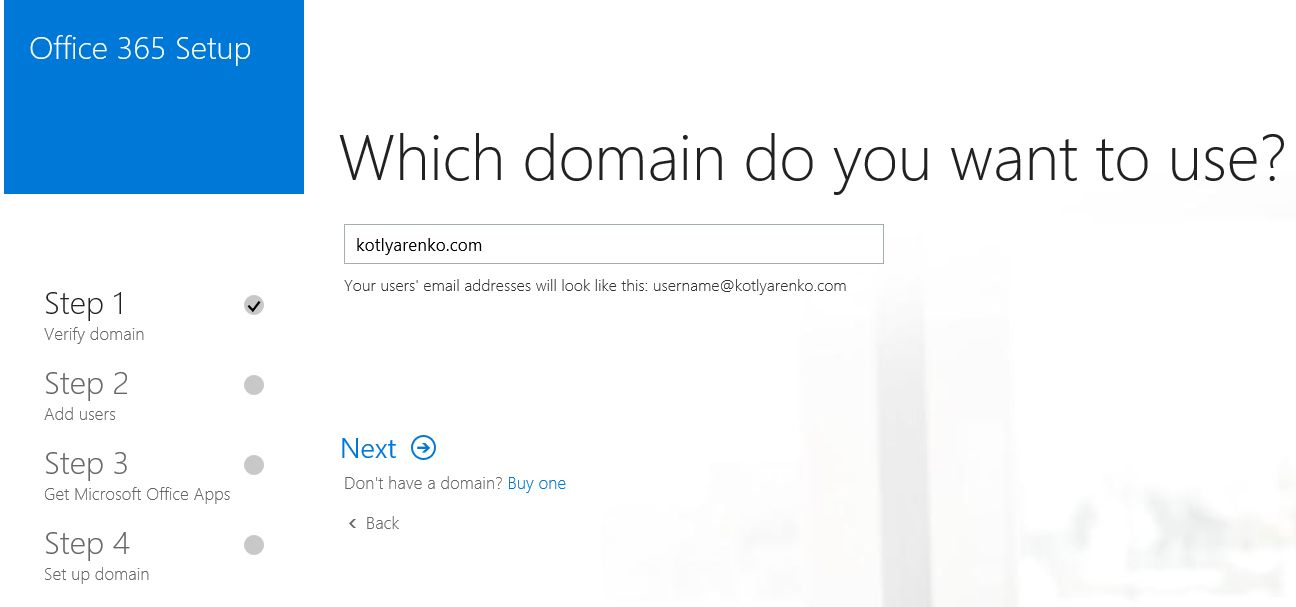
"Add a new Domain Wizard" will be launched. Specify the domain name (in my case - kotlyarenko.com). If this domain name is not configured for any other Azure AD or Office 365 tenant, you will be able to add it to your Azure AD.
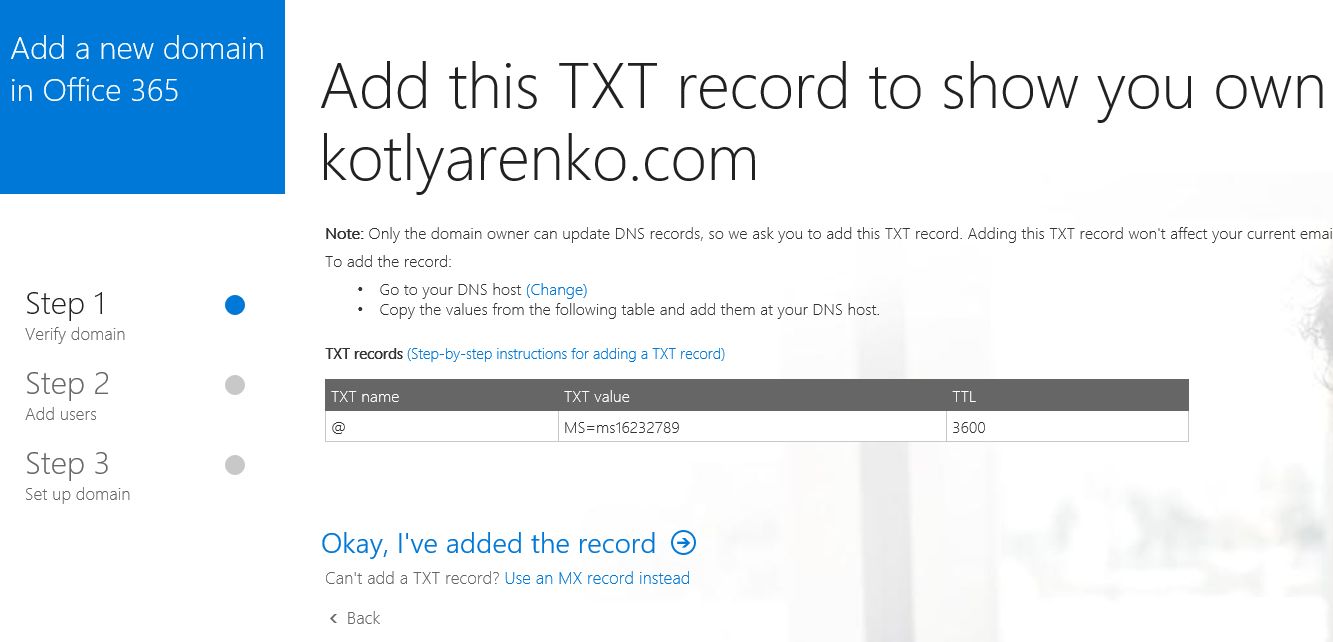
To prove that you own this domain, you will be asked to add a new DNS record of TXT type to your domain. Do that and wait for an hour until this change will be replicated.
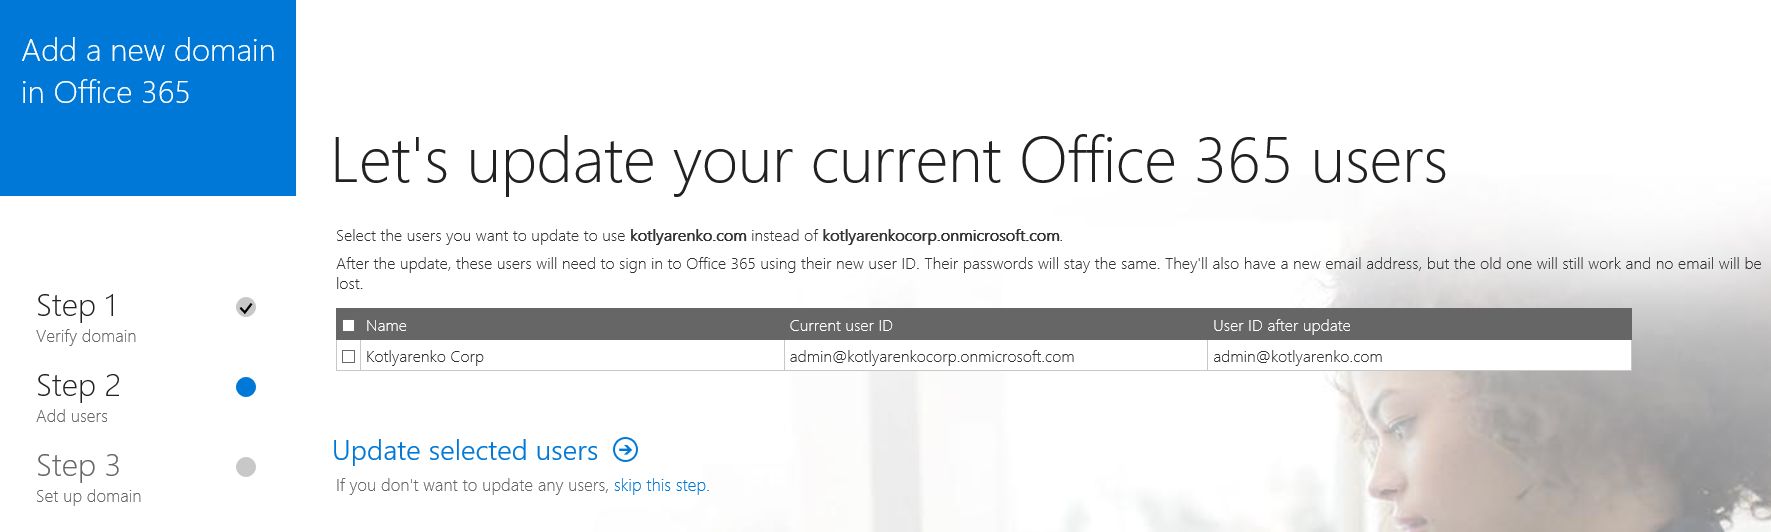
On the next step you can rename existing user accounts, but I will skip this.
On the next step you will have 2 options:
- Use Microsoft name servers for your domain
- Use existing name servers and add new DNS records for Office 365.
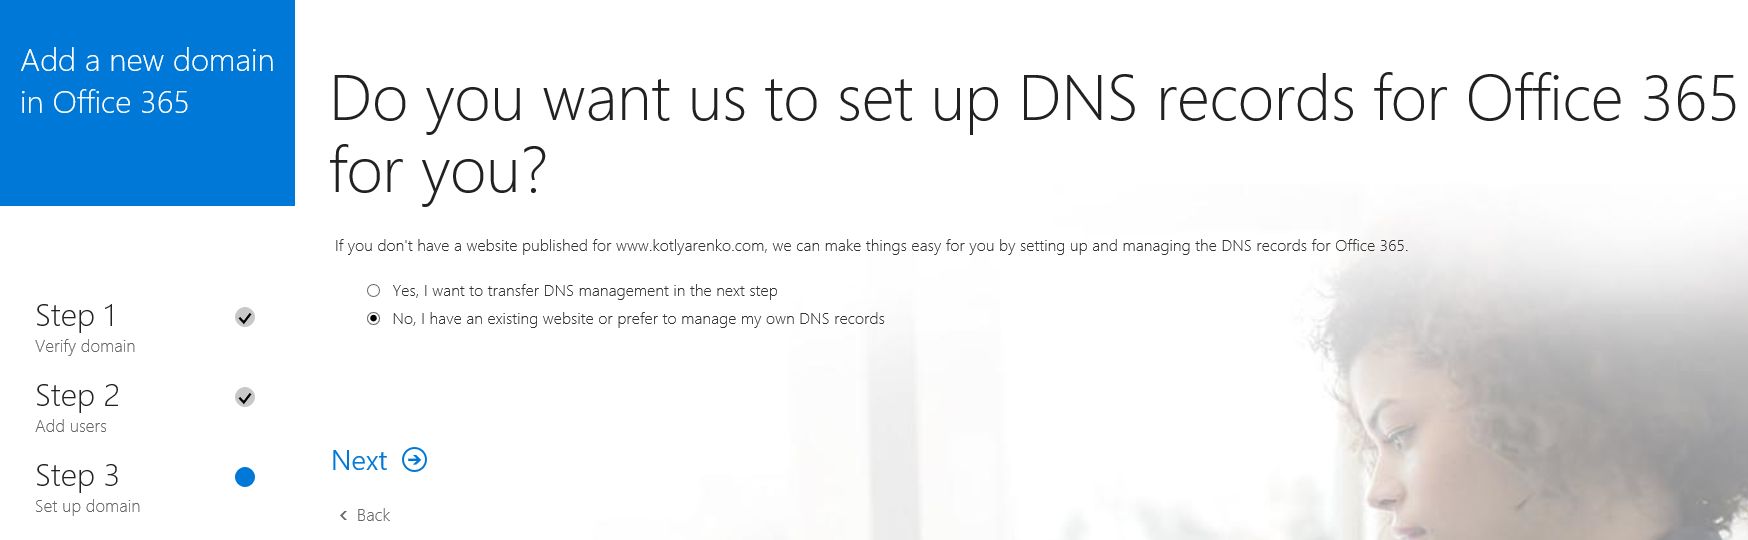
I will prefer option #2, I want to manage my domain name by myself. Check the services, that you wish to use in Office 365. I will check all of them.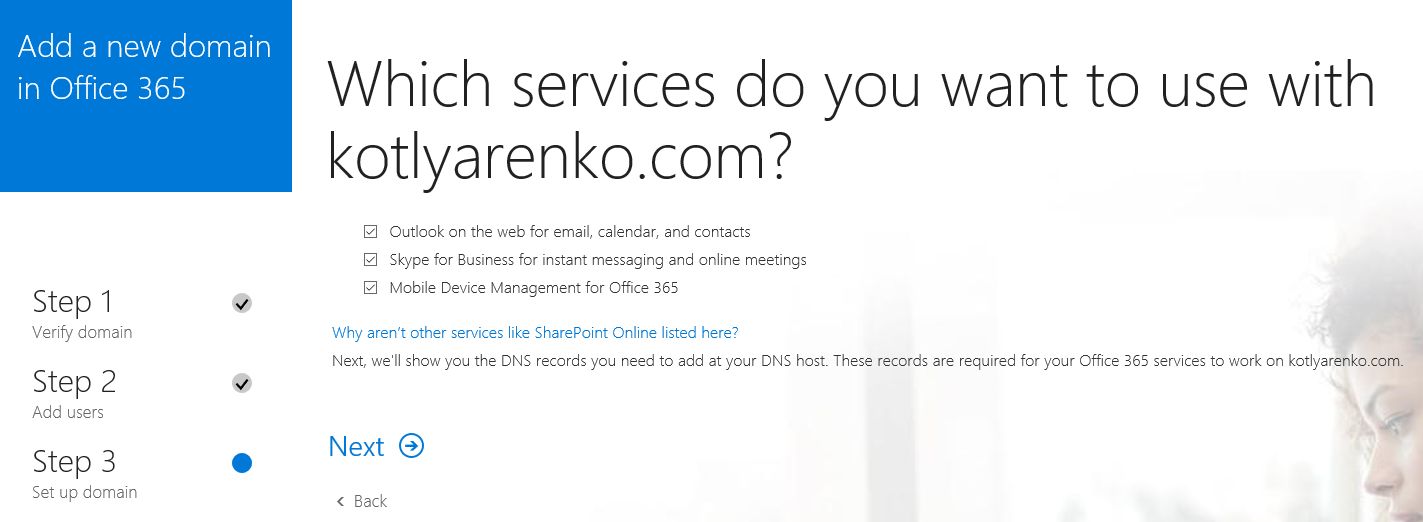
After that wizard will show you which DNS records you need to create in your domain name for Office 365.

Create all specified records and wait for an hour until all the changes replicate.

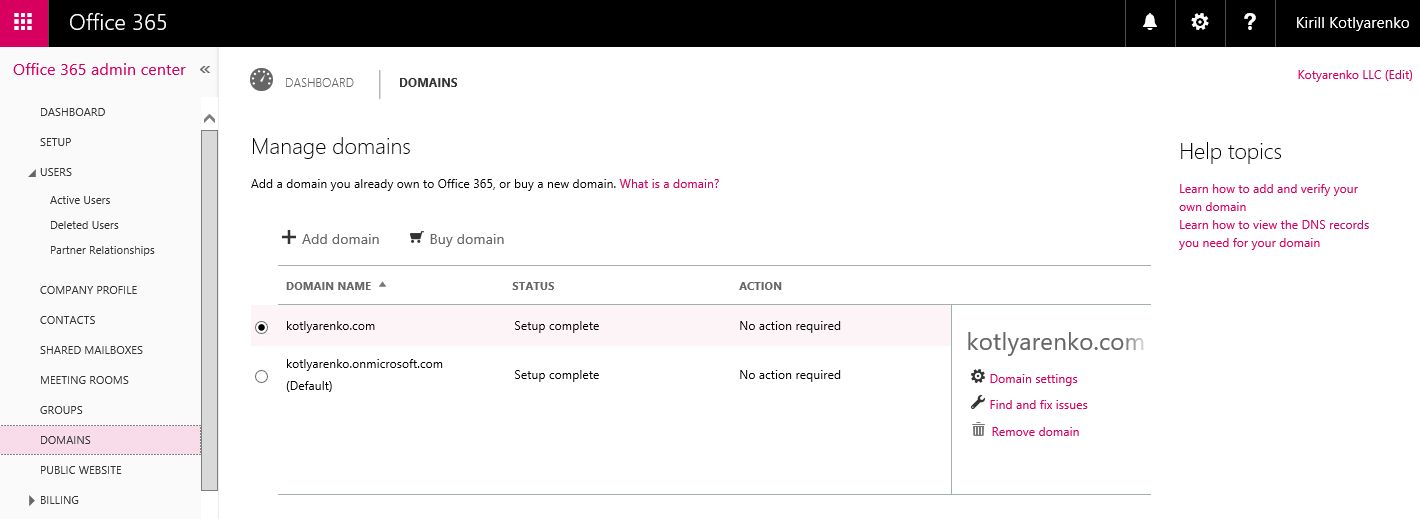
If everything is OK, you will see a confirmation and your public domain will be added to Office 365 Admin Portal and your Azure AD:
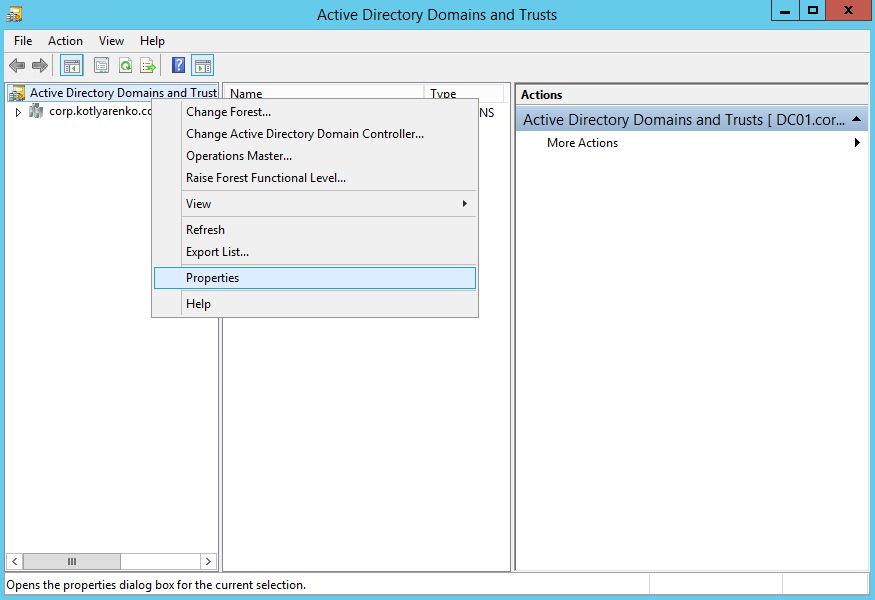
To add this domain to your On-Premise Active Directory domain, just open Active Directory Domains and Trusts console with Enterprise Admin credentials and click "Properties".
Add your public domain to the list of Alternative UPN Suffixes:
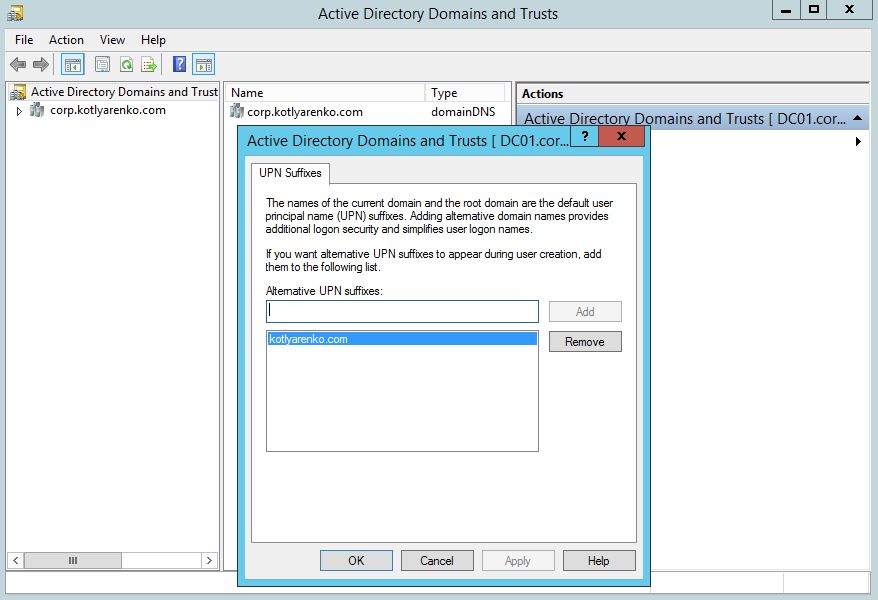
After that you will need to change the UPN suffix for all users in On-Premise AD to the new one. This can be done by a simple PowerShell script. Users still will be able to logon using NetBIOS domain name (e.g. CORPusername), but now they also will be able to use their e-mail (e.g. kirill@kotlyarenko.com) as a logon name. 
Install Azure AD Connect with ADFS
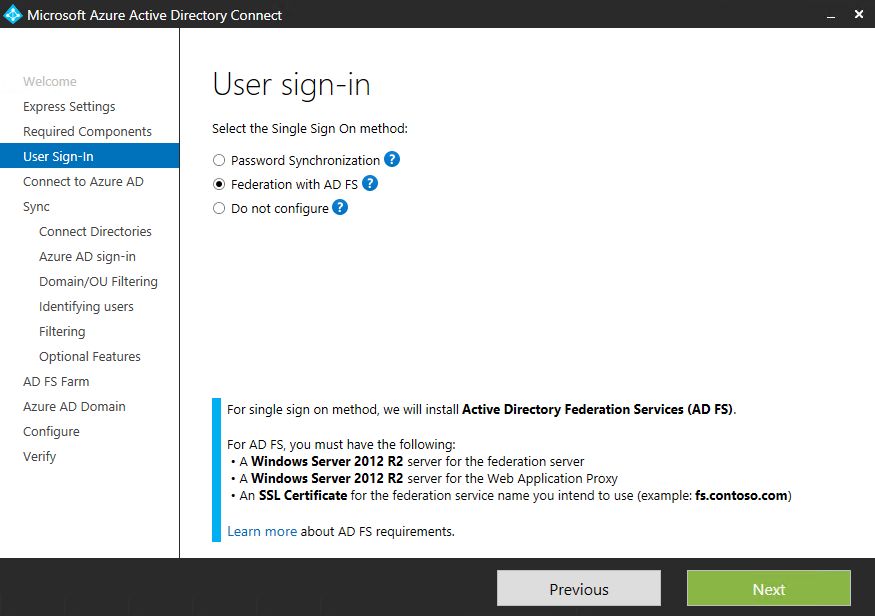
Azure AD Connect provides 2 method for Single Sign On (SSO):
- Password Synchronization - sync of On-premise AD and Azure AD user identities and passwords.
- Federation with ADFS - users sign in to Azure AD using On-premise ADFS environment (claim-based authentication)
I prefer 2nd option. Here are pros and cons of "Federation with ADFS" method comparing to "Password Synchronization".
Pros:
- Your On-premise AD is a single origin of identities, the first copy of personal data is collected and stored locally (for example, this is required by Russian PII laws)
- True Single Sign On experience, because user accounts in On-premise AD and Azure AD have the same SID. Users are not prompted to re-type their password for authentication in Azure AD
- More secure, because user passwords don’t leave On-Premise AD perimeter (they are not stored in Azure AD)
- You can integrate the authentication on On-Premise services through the same ADFS (=On-Premise AD is your authentication hub for both types of services - On-Premise and cloud-based)
- You can add multi-factor authentication to ADFS - Azure MFA or 3rd party authentication providers. It will increase the overall security of external logons.
Cons:
- More complex deployment (but Azure AD Connect installation wizard simplifies it a lot, and it looks complex only for the 1st time)
- You need SSL certificate (but it is just $100-200 per year, which is nothing comparing to Office 365 price for Enterprise organization)
- You need at least 2 extra VMs for ADFS Server and ADFS Proxy.
Preparation steps
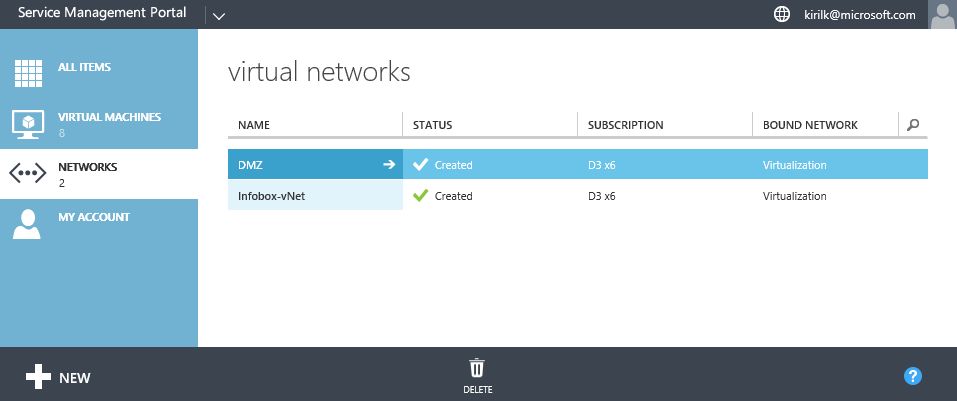
We will need 2 virtual networks for the proper deployment of Azure AD Connect with ADFS:
- Internal vNet - for internal VM communication. In my case this vNet is called Infobox-vNet, it is connected to Office LAN and Azure vNet using 2 Site-to-Site VPN tunnels.
- DMZ vNet - to publish ADFS Proxy (based on Windows Server 2012 R2 Web Application Proxy).
Create 4 VMs with Windows Server 2012 R2:
- VM for Azure AD Connect service (e.g. ADCON01). Connect it to Internal vNet, after that add a second network adapter and connect it to DMZ vNet. Join it to On-Premise Active Directory domain.
- VM for ADFS Sever (e.g. ADFS01). Connect it to Internal vNet, after that add a second network adapter and connect it to DMZ vNet. Join it to On-Premise Active Directory domain.
- VM for ADFS Proxy (I called it ADFSGW which stands for "Gateway", but this is a little bit wrong, because it is a Proxy, not a Gateway). Connect it to DMZ vNet. Leave it joined to Workgroup.
I will use federation.corp.kotlyarenko.com as the URL of my ADFS environment. This is very important step - externally this URL should point to ADFS Proxy IP address, but internally it should point to the ADFS Server. I will do the following:
- Create a new external DNS record (type A) in my public domain - federation.corp.kotlyarenko.com - and point it to the external IP address of DMZ vNet.
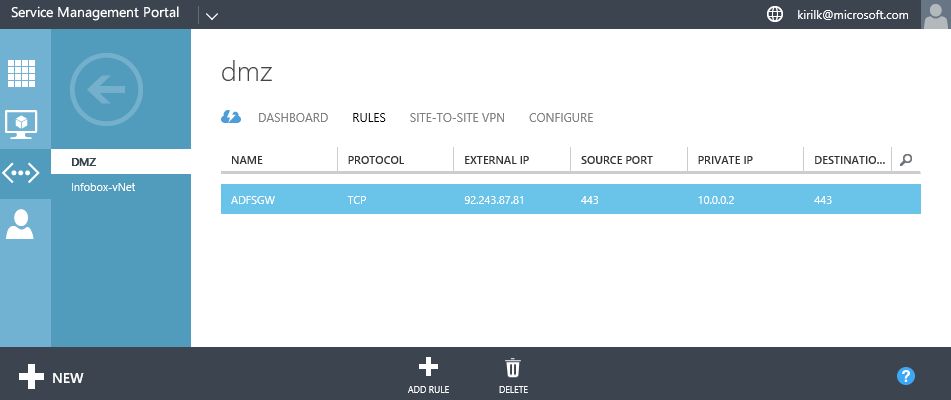
- Create a NAT rule in DMZ vNet that will point external port 443 to internal port 443 on ADFSGW VM.
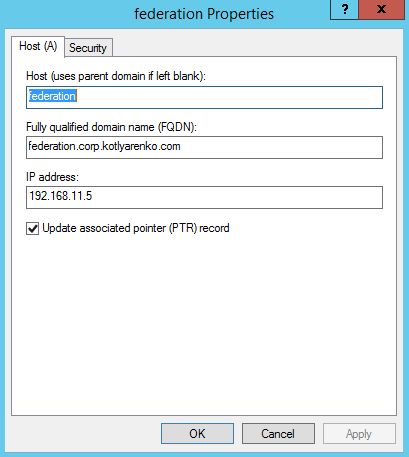
- Create a new DNS record (type A) in my On-Premise Active Directory DNS - federation.corp.kotlyarenko.com - and point it to the internal IP address of ADFS01 VM.
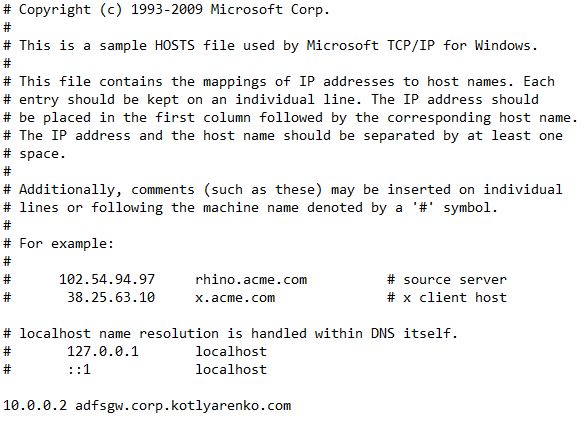
- Create a record in hosts file on ADCON01 and ADFS01 VMs - adfsgw.corp.kotlyarenko.com - and point it to the internal IP address of ADFSGW VM in DMZ vNet.
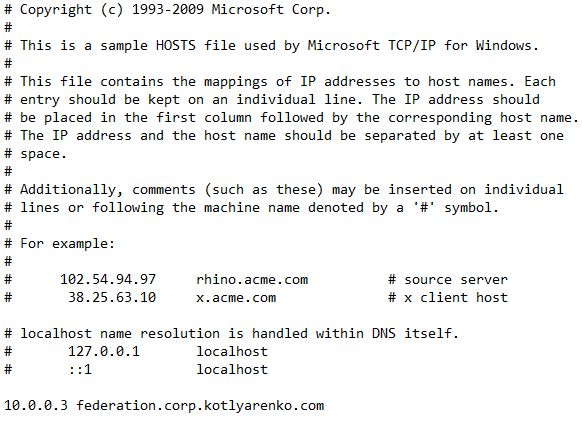
- Create a record in hosts file on ADFSGW VM - federation.corp.kotlyarenko.com - and point it to the internal IP address of ADFS01 VM in DMZ vNet.
- Ping federation.corp.kotlyarenko.com from Internet and from Intranet. Check that ADFS Proxy external IP is resolved externally, and internal ADFS Server IP is resolved internally.


Also you need to run 2 commands to configure remote management of ADFS Proxy from Azure AD Connect:
- Run this command in elevated PowerShell window on ADFS Proxy VM:
Enable-PSRemoting -force - Run this command in elevated PowerShell window on AD Connect VM (specify the value that you've wrote in hosts file for your ADFS Proxy instead of my adfsgw.corp.kotlyarenko.com):
Set-Item WSMan:localhostClientTrustedHosts –Value adfsgw.corp.kotlyarenko.com -Force -Concatenate
OK, now we are ready to proceed to the Azure AD Connect installation. You can also check other prerequisites in the official guide.
Install Azure AD Connect
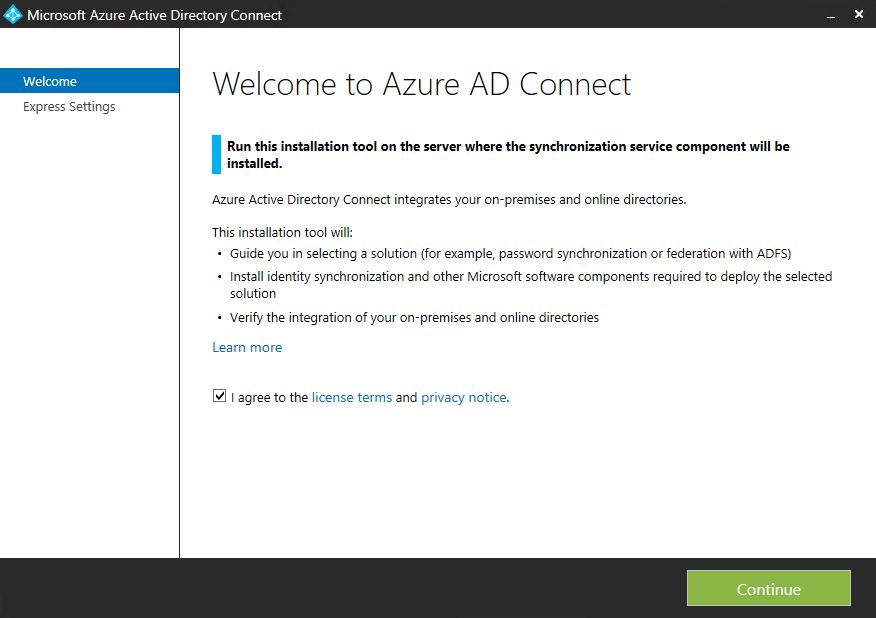
Logon to Azure AD Connect VM with a user, who has Enterprise Admin and Domain Admin rights in your On-Premise AD. Download Azure AD Connect from here and start the installation.

Choose "Federation with AD FS" method.
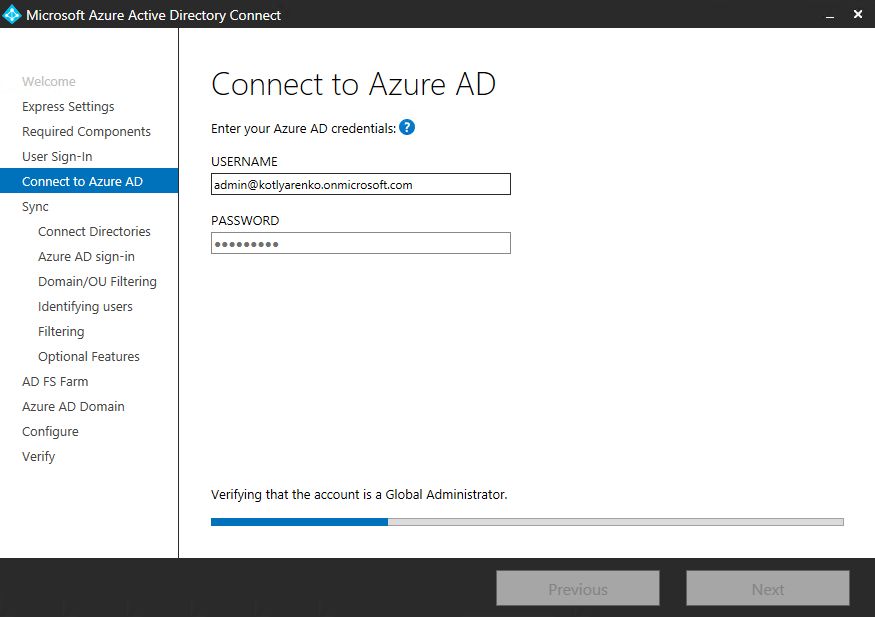
Specify your Azure AD Global Admin user credentials. If you are using Office 365, purchased through CSP, then you can use admin@tenantname.onmicrosoft.com.
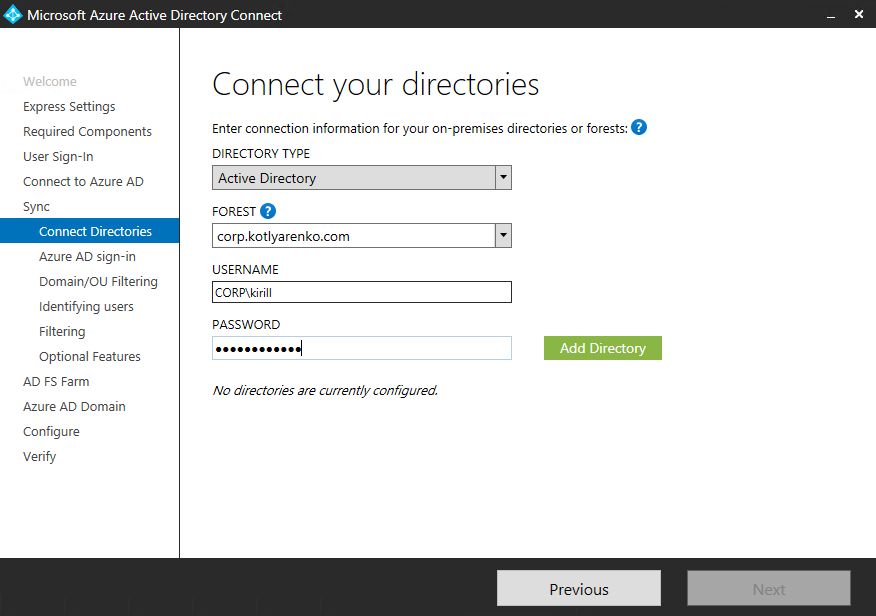
Add current On-Premise Active Directory and specify your Enterprise Admin user credentials (I assume you've already logged on under such user).
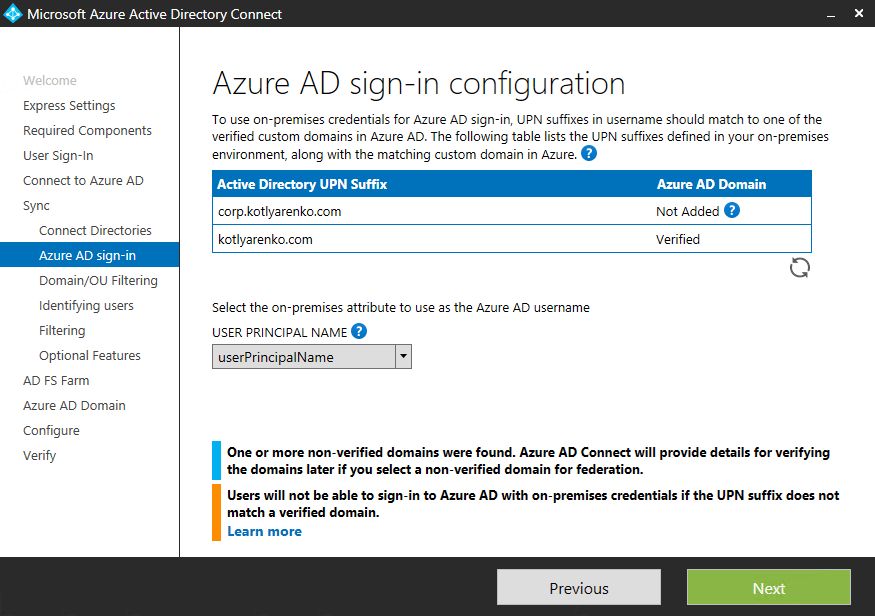
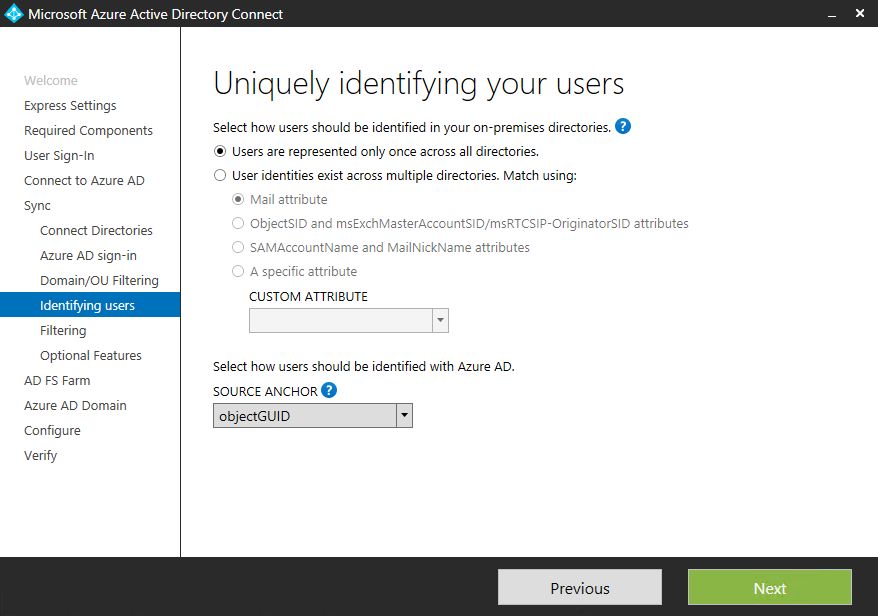
I will leave the default attribute as Azure AD username - "userPrincipalName". UPNs are unique inside my On-Premise AD.
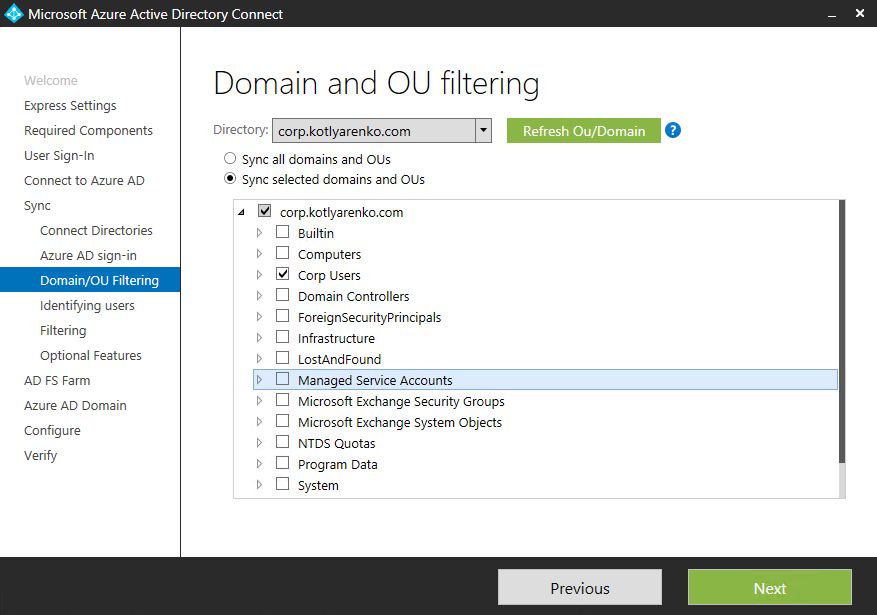
Choose OUs that you wish to sync with Azure AD. I will choose only the OU, where my corporate user accounts are stored. Also I recommend to sync OU, which stored Security and Distribution groups to sync Group membership of user accounts.
I will use default source anchor - "objectGUID".
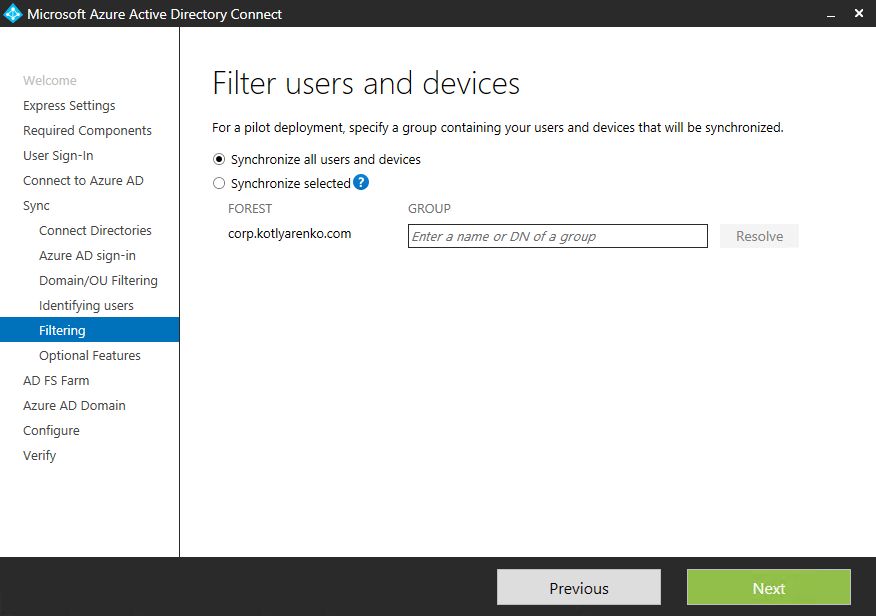
I won't apply any additional filters (except OU filtering, that I've used on previous steps).
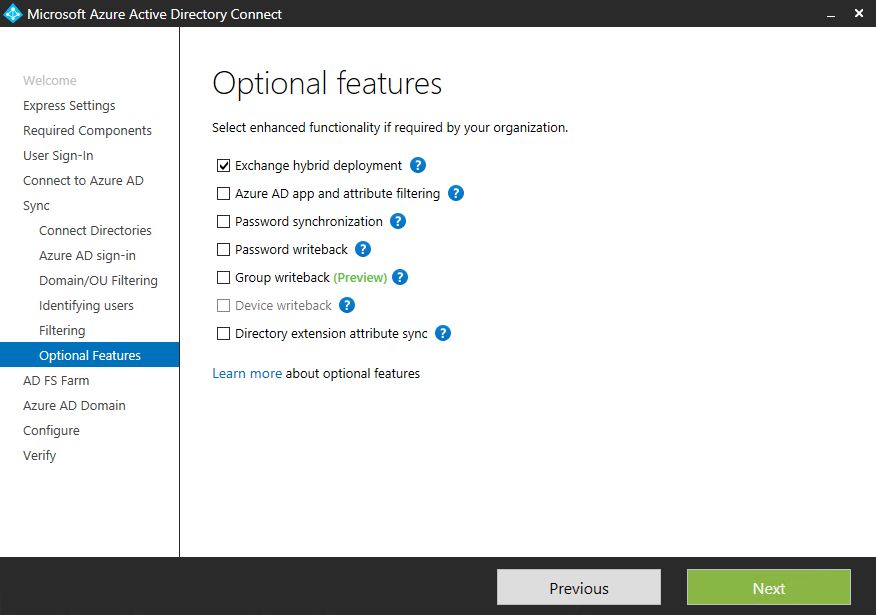
Azure AD Connect detects Exchange Server in your On-Premise AD. Check "Exchange Hybrid Deployment" if you have Exchange Server deployed. I won't choose password sync or password/group writeback to leave my On-Premise AD the only source of identity.
Choose the PFX file, that stores your SSL certificate with a private key (in my case it is federation.corp.kotlyarenko.com certificate).
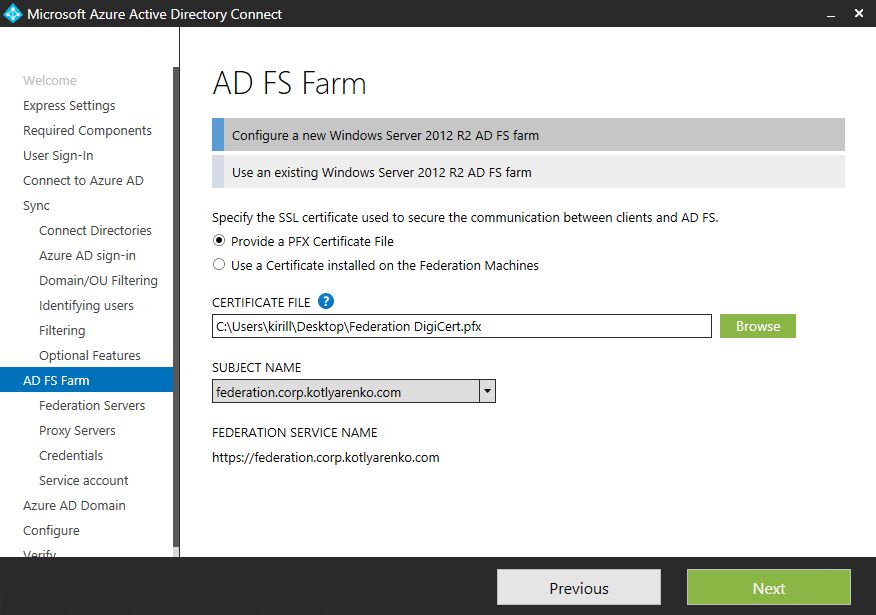
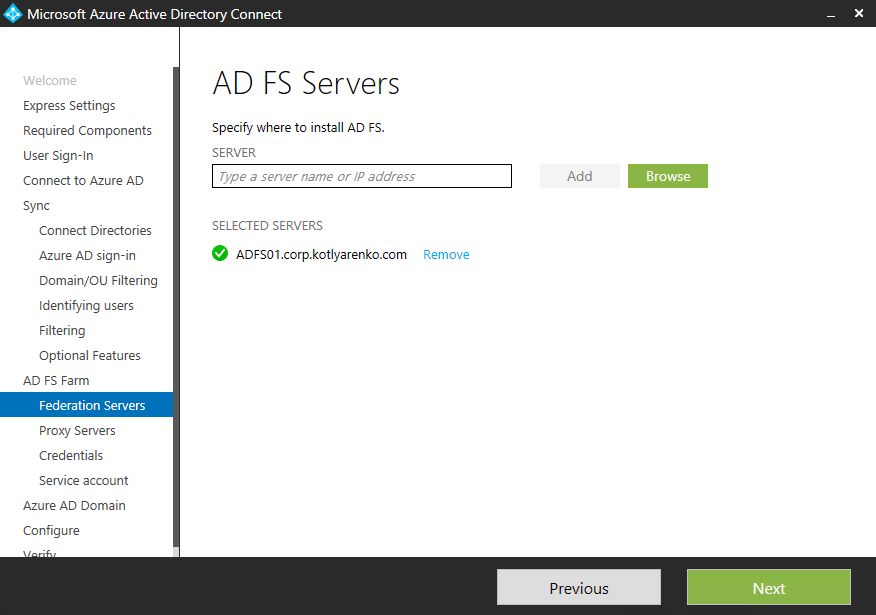
Specify the name of server, where AD Connect should install ADFS role. It will check the requirements after you click "Add".
Specify the name of server, where AD Connect should install ADFS Proxy (Web Application Proxy role). Provide admin credentials since this server is not domain-joined. It will check the requirements after you click "Add". If you receive a message that ADFS Proxy cannot be accessed, then it probably means that you skipped the trusted hosts configuration, that I've mentioned earlier in the post (2 PowerShell commands).

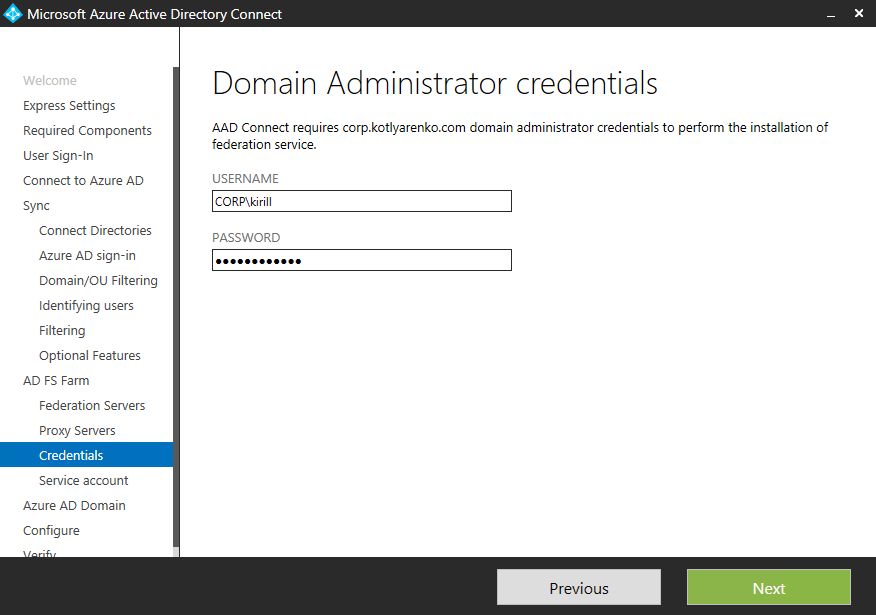
Specify Domain Admin credentials to install ADFS (I assume that you've already logged in using such credentials).
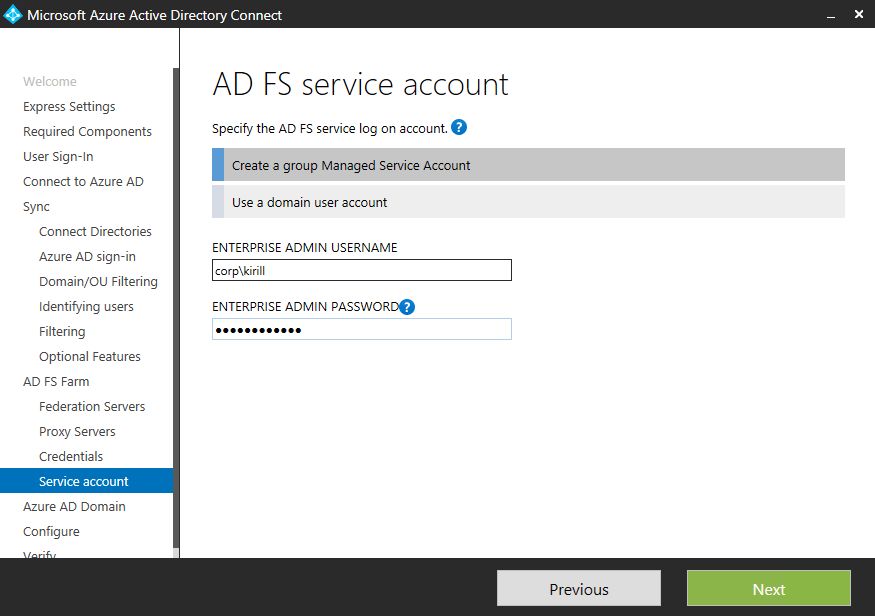
Specify Enterprise Admin credentials (again) to create group Managed Service Account (gMSA). AD Connect will also configure your domain for gMSA use.
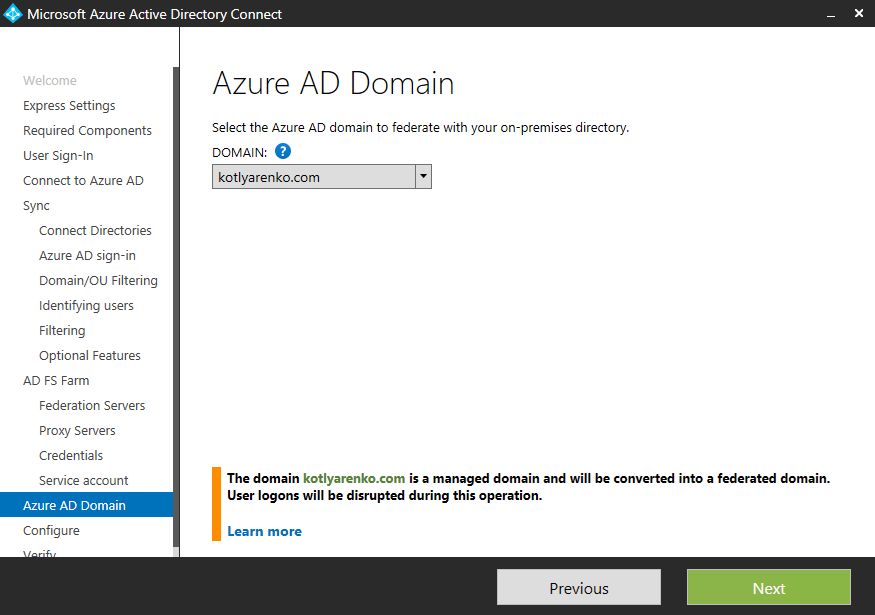
Select the Azure AD domain which you wish to federate with this ADFS environment.
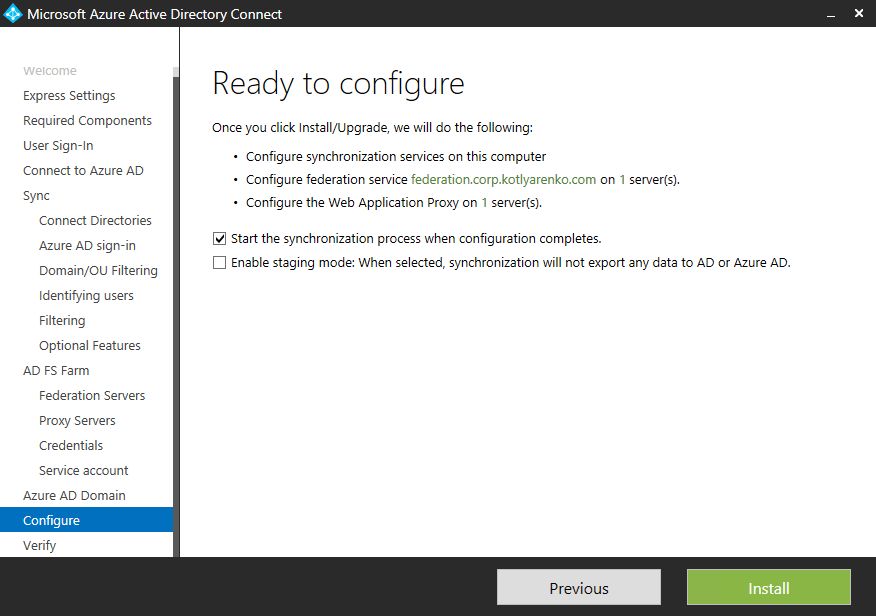
Start the installation and wait until it finishes.
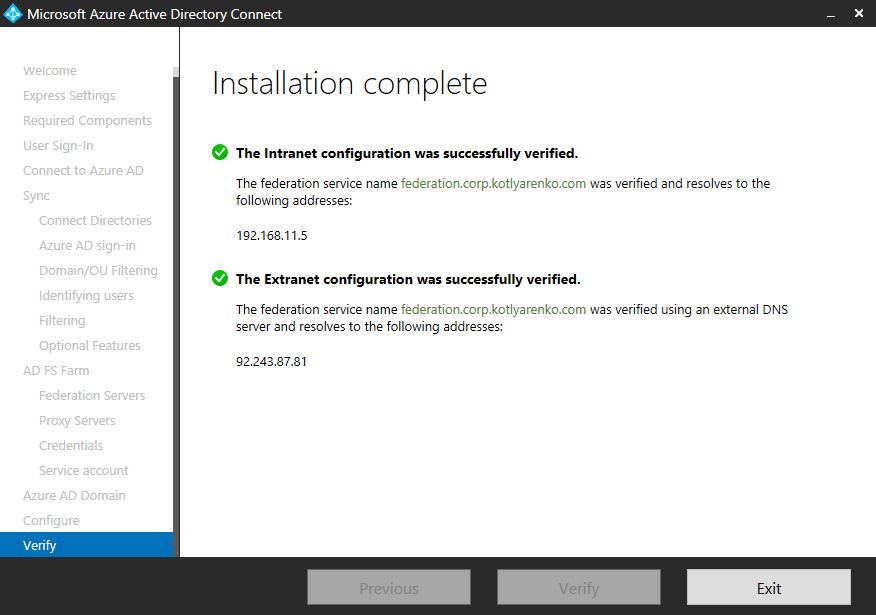
Click Verify to check that external and internal DNS records for ADFS environment can be resolved correctly.

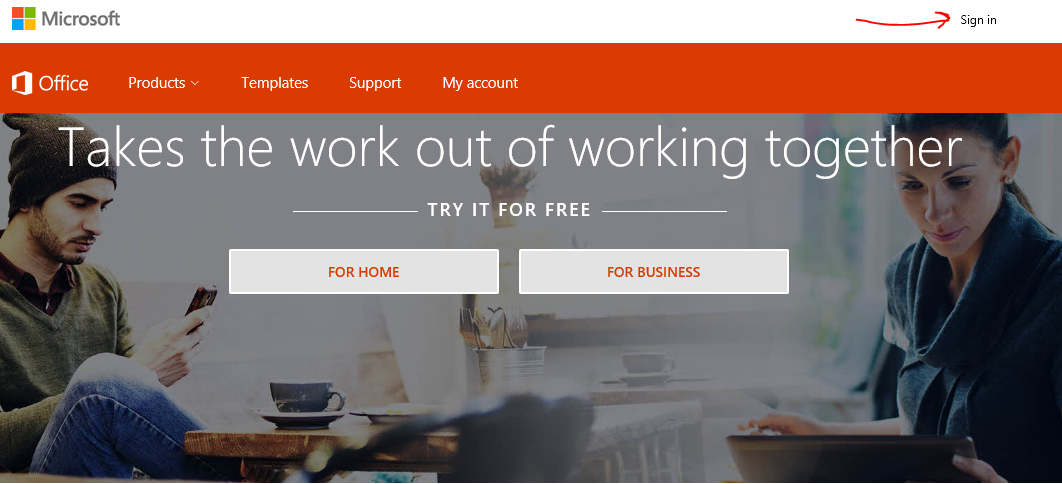
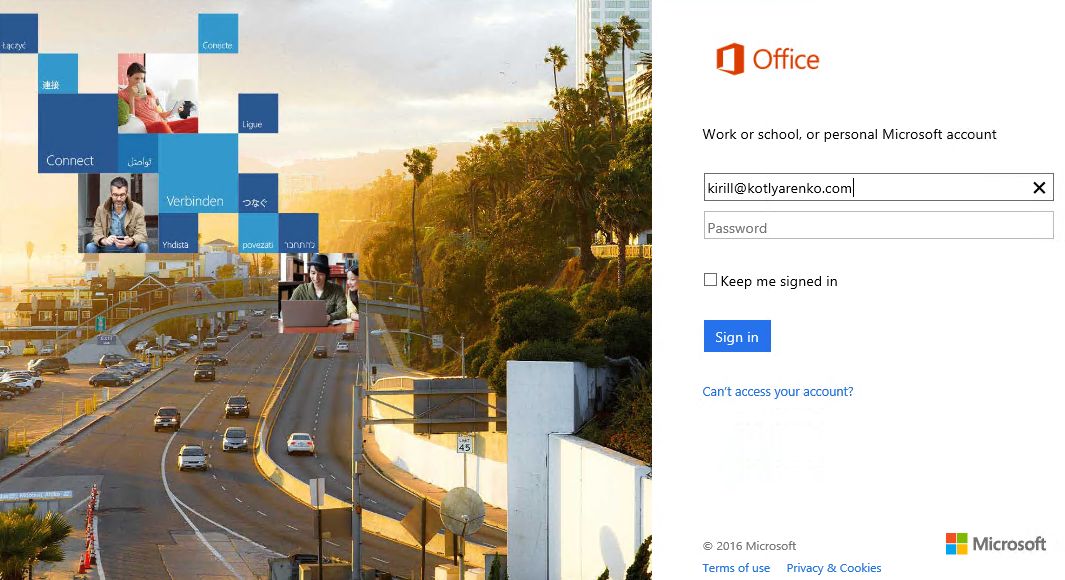
Open https://www.office.com/ and click "Sign in".
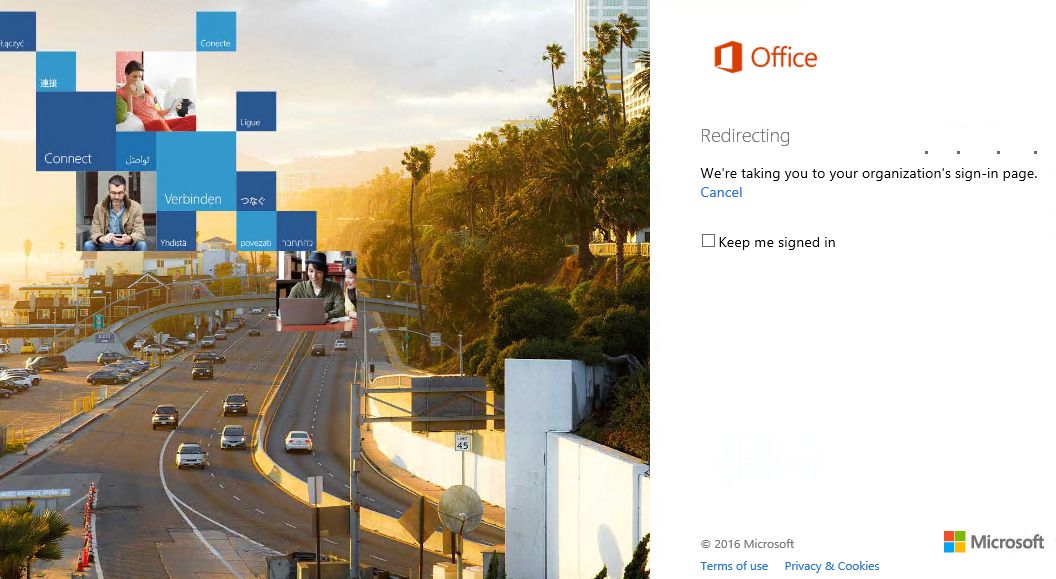
After specifying your On-Premise user account (e.g. kirill@kotlyarenko.com) you will be redirected to ADFS for the authentication. In Intranet you will see Windows Authentication popup, from Extranet - Form Authentication page. You can even try it now with @kotlyarenko.com domain, because what I'm showing you is live :)
Improving SSO UX
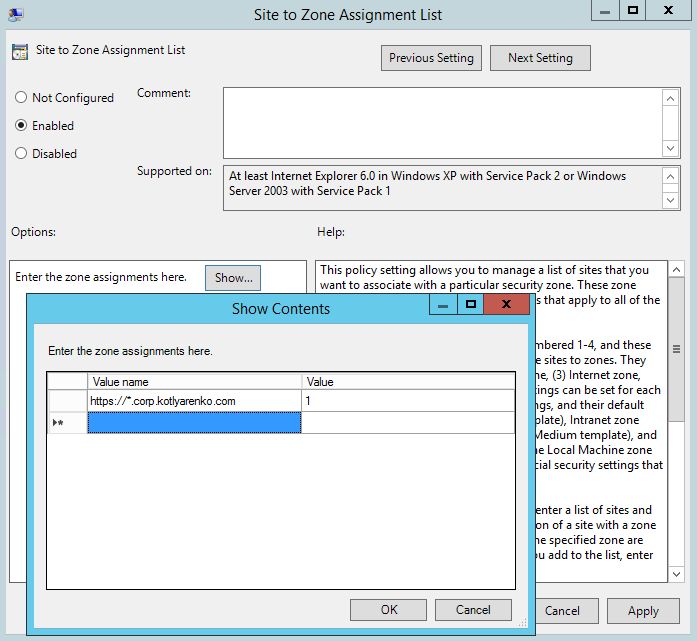
Some end-users will be confused when they will see the ADFS popup window with authentication prompt on their domain-joined machines when they will try to logon to Office 365 or other external system. To avoid this, create a simple group policy, that will add your https://*.internaldomainname.domain.com URL to Intranet security zone.
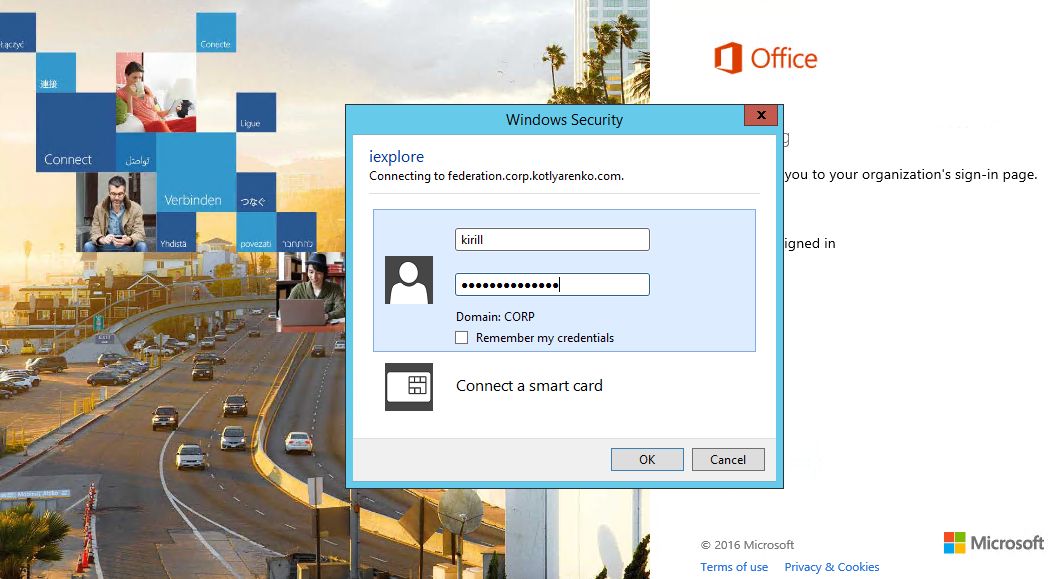
Create a new GPO, then go to User Settings -> Administrative Templates -> Windows Components -> Internet Explorer -> Internet Control Panel -> Security Page. Select policy "Site to Zone Assignment List", click Enabled and specify your zone URL. Put "1" into the Value field, it stands for "Intranet Zone". After that all web pages with URL like https://*.corp.kotlyarenko.com won't prompt for the Windows Authentication popup, users will be seamlessly signed on under the user account that is logged on to the domain-joined PC. 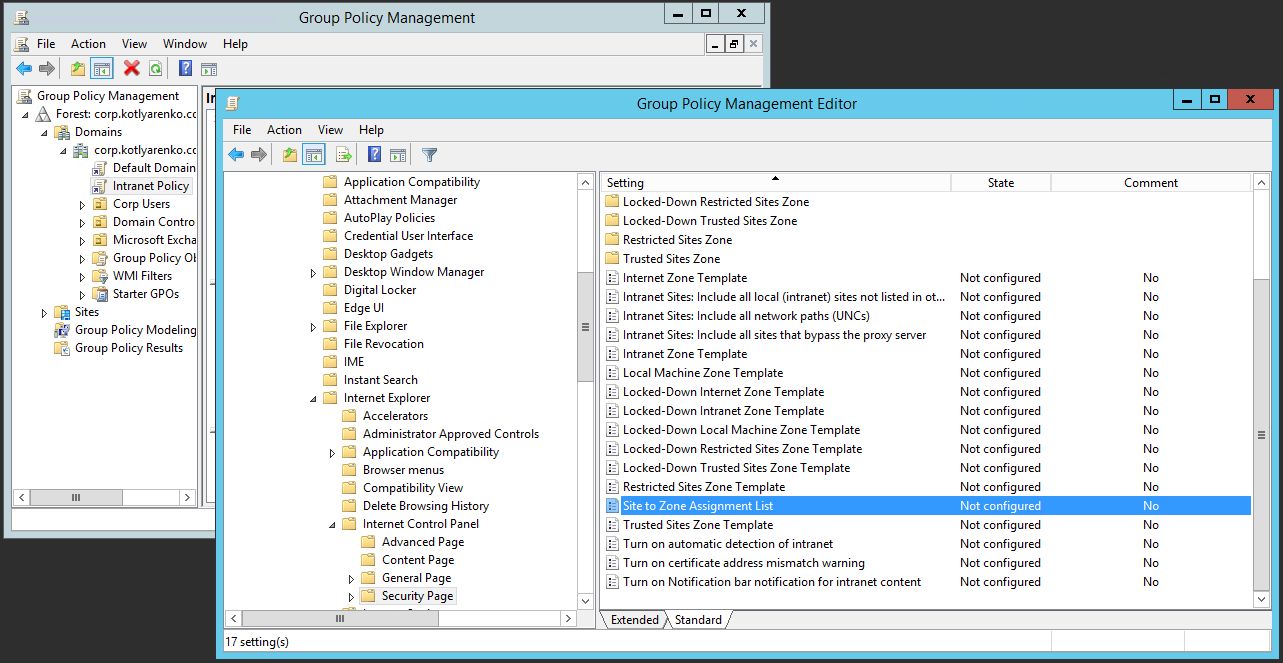
Wait until the group policy applies for the user, re-logon and check the Sign-in experience for www.office.com. There should be no more popups with an authentication prompt, user will be seamlessly signed on.
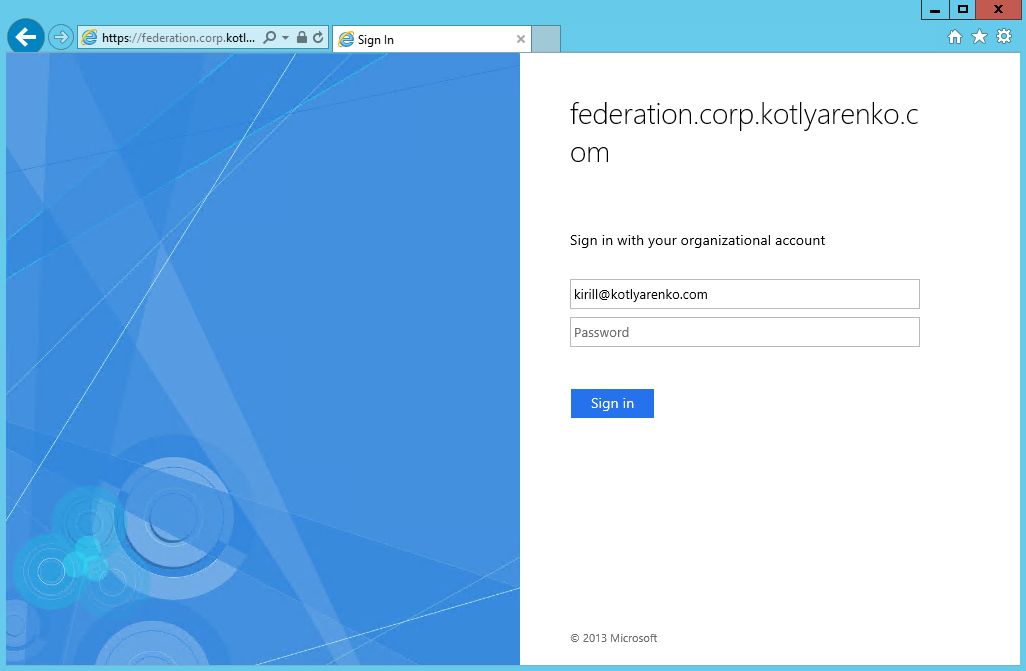
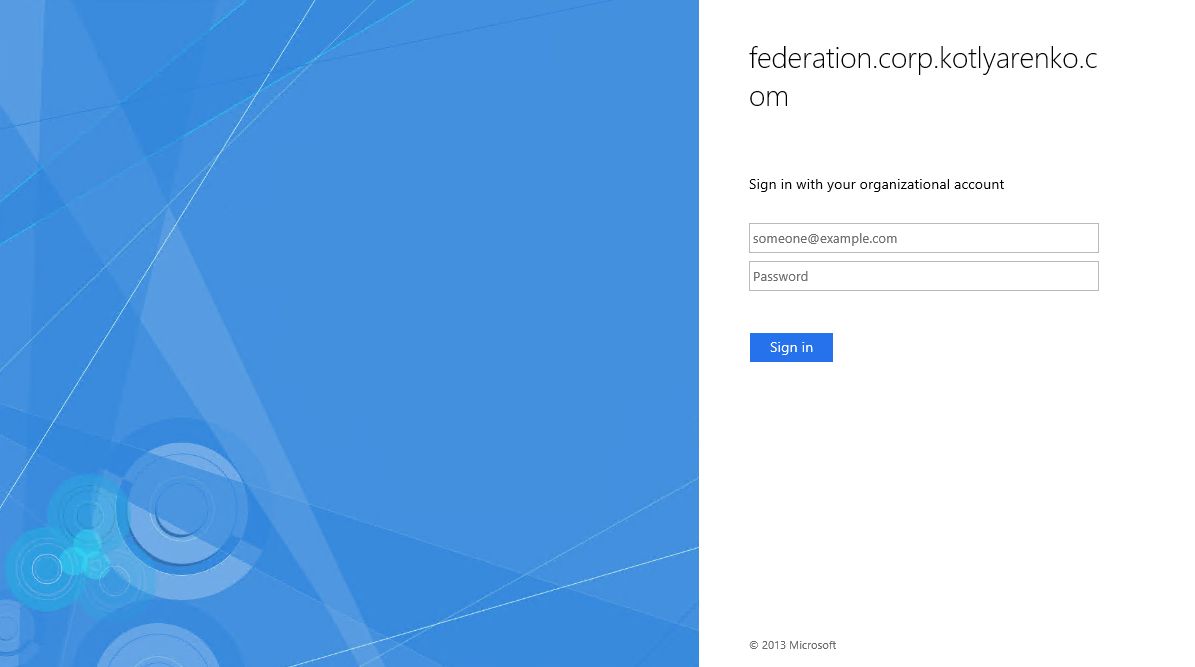
Customization of ADFS Authentication web page
By default ADFS Web Authentication page in Windows Server 2012 R2 looks like this:
You can customize some elements of the page including:
- Company name and logo (260x35px)
- Picture in the left part of the window (1420x1080px)
- Sign-in page description
- Helpdesk and Privacy links
- Error page and more.
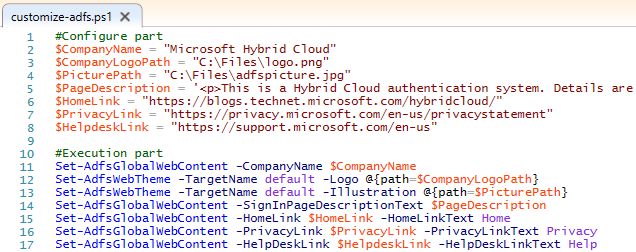
Here is the script that changes the basic parts of ADFS Authentication page, that you should run on ADFS Server:
#Configure part
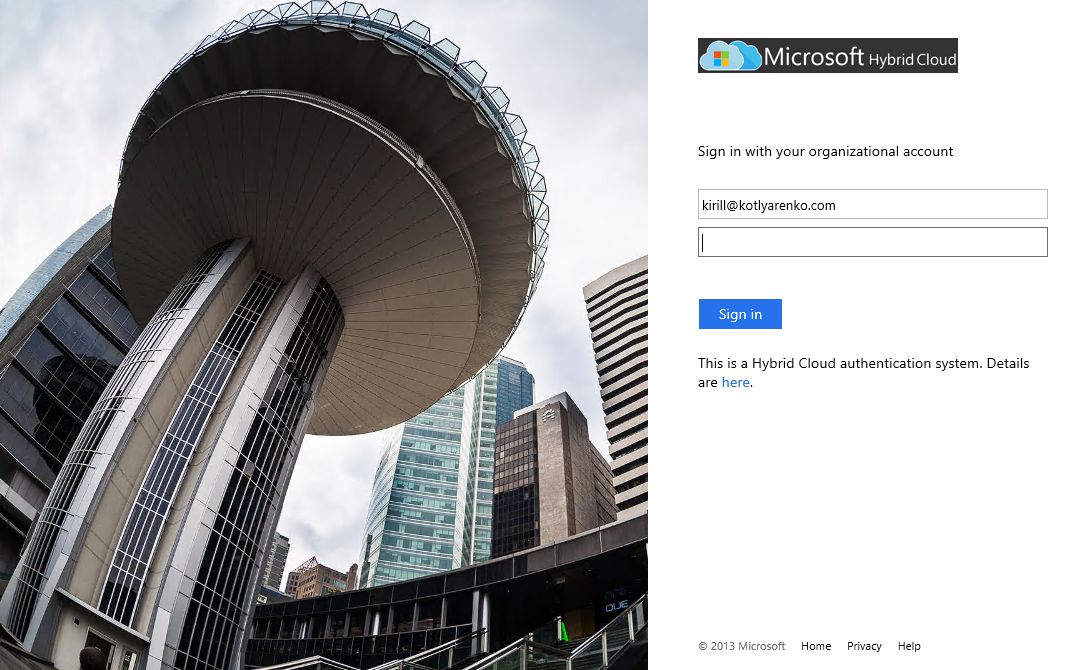
$CompanyName = "Microsoft Hybrid Cloud"
$CompanyLogoPath = "C:Fileslogo.png"
$PicturePath = "C:Filesadfspicture.jpg"
*$PageDescription = ' <p>This is a Hybrid Cloud authentication system. Details are <a href=" https://blogs.technet.microsoft.com/hybridcloud/2016/07/04/new-series-building-a-hybrid-cloud ">here</a>.</p> '$HomeLink = "**https://blogs.technet.microsoft.com/hybridcloud**"$PrivacyLink = "**https://privacy.microsoft.com/en-us/privacystatement**"$HelpdeskLink = "*https://support.microsoft.com/en-us**"
#Execution part
Set-AdfsGlobalWebContent -CompanyName $CompanyName
Set-AdfsWebTheme -TargetName default -Logo @{path=$CompanyLogoPath}Set-AdfsWebTheme -TargetName default -Illustration @{path=$PicturePath}
Set-AdfsGlobalWebContent -SignInPageDescriptionText $PageDescription
Set-AdfsGlobalWebContent -HomeLink $HomeLink -HomeLinkText Home
Set-AdfsGlobalWebContent -PrivacyLink $PrivacyLink -PrivacyLinkText Privacy
Set-AdfsGlobalWebContent -HelpDeskLink $HelpdeskLink -HelpDeskLinkText Help
And here is my ADFS logon page after the customization:
This is the end of the first part. In the next parts I will show you how to configure Hybrid deployment of Exchange Server, how to use Azure AD Connect Health and how to integrate ADFS with Azure Multi-factor Authentication system. Stay tuned, this is only the beginning :)
This post is a part of the Hybrid Cloud Identity series:
Part 1 - Integration of On-Premise AD and Azure AD using Azure AD Connect and ADFS (you are here) Part 2 - Hybrid Exchange Part 3 - Azure Multi-factor Authentication Part 4 - Azure AD Connect Health