Note
Access to this page requires authorization. You can try signing in or changing directories.
Access to this page requires authorization. You can try changing directories.
This is about using the templates for a new project.
First of all you need to download the templates and install them from the links below.
Download the ZIP-File containing sources and built binaries here.
See the post on how to install the binaries or build the sources here.
Let's start setting up our new project:
- Create a new root folder for your solution (e.g. C:\temp\DemoClient\).
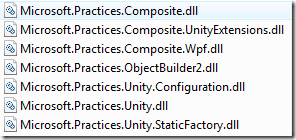
- Within the root folder create a Libraries (or other named) folder for the P&P assemblies, like Unity and Composite App Library.
- Copy the necessary assemblies to the Libraries folder (build the Composite Application Guidance projects to get them):
- Now open Visual Studio choose "File - New Project" and select "Composite WPF Solution" from "Visual C# > Composite App Guidance".
![image_thumb[1][1]](https://msdntnarchive.z22.web.core.windows.net/media/TNBlogsFS/BlogFileStorage/blogs_msdn/knom/WindowsLiveWriter/UsingtheVSTemplatesforCompositeWPFGuidan_F583/image_thumb%5B1%5D%5B1%5D_1.png)
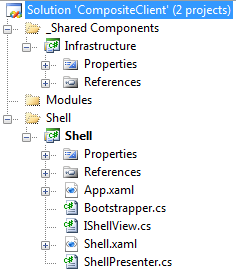
- Enter the name of your overall solution (like "CompositeClient") and specify the root folder created before.
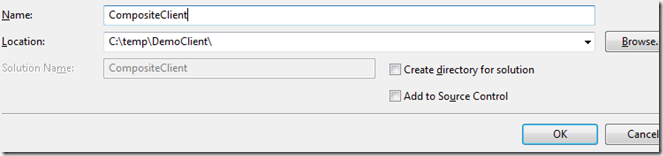
Important: "Create directory for solution" should be unchecked, to automatically insert references later. Press "OK" then. - A new wizard pops up:
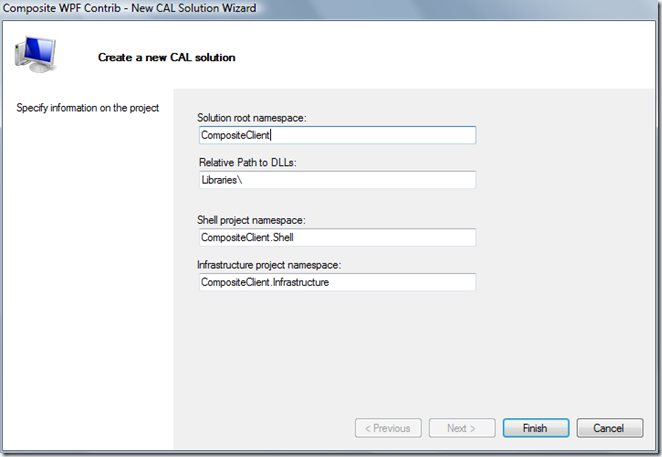
You can now change your root namespace or the namespaces for the shell and infrastructure project.
It's important to specify the relative path to the Library folder (starting from the specified root folder). In this case it's Libraries. After that, the new solution is going to be created.
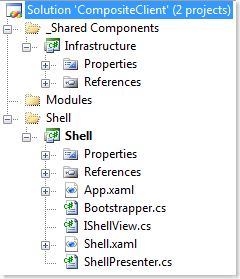
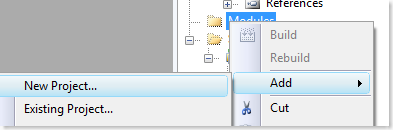
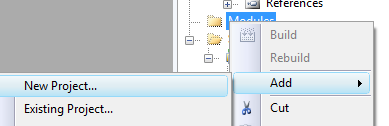
- Select "Add New Project" on the Modules folder.
- Choose "Composite WPF Module" and enter the Modules path of the solution as the location
(e.g. C:\temp\DemoClient\CompositeClient\Modules\).
Enter a name for the module (e.g. CompositeClient.Modules.Foo) . - The New Module Wizard pops up.

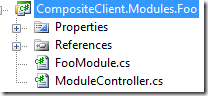
Press Finish (or change the IModule class name or module namespace). - A new project is created, containing an IModule implementation and a module controller class.
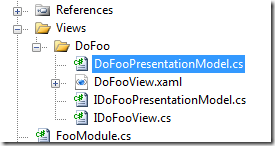
- When choosing Add-New Item,you can add a new Composite WPF View and Presentation Model to the module.
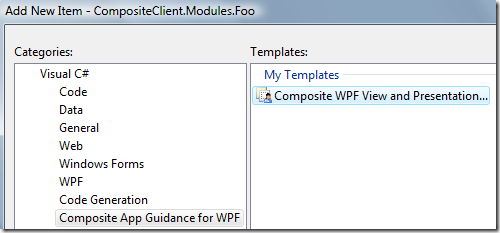
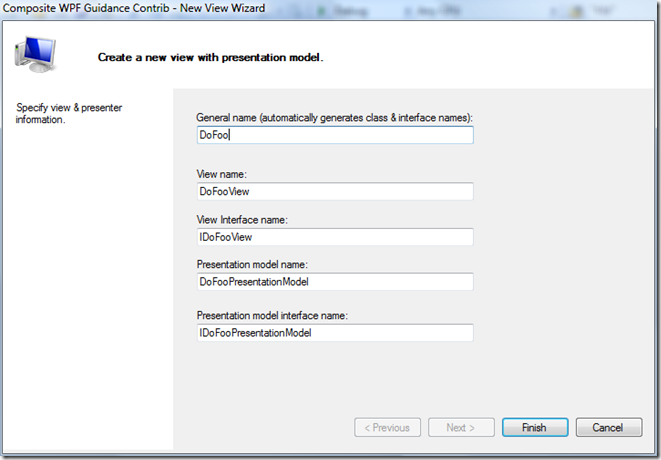
Enter a name for the new items (not containing "View" or any other types). Just use "DoFoo" for instance. - The New View Wizard pops up, letting you choose the names for view, presentation model and interfaces.
- Choose Finish.
- A new subfolder is created, containing the files necessary for the view.


Note 1: When using the item template for the first time, you might get a dialog requesting to trust the template. Press trust there!
Note 2: The wizards say "Composite WPF Guidance Contrib", as I hope to get into the Contrib project with this ;-)
Comments
Anonymous
October 22, 2008
PingBack from http://blogs.msdn.com/knom/archive/2008/10/22/visual-studio-templates-composite-wpf-guidance-installation.aspxAnonymous
October 22, 2008
The comment has been removed