Note
Access to this page requires authorization. You can try signing in or changing directories.
Access to this page requires authorization. You can try changing directories.
This post is co-authored by Gopi Kumar at Microsoft and Sergey Ermolin at Intel.
Introduction
BigDL is a distributed deep learning library for Apache Spark. It has both Python and Scala interfaces and takes advantage of Spark-enabled distributed compute infrastructure, allowing users to write Deep Learning applications in a familiar native Spark context format. The Microsoft Data Science Virtual Machine (DSVM) is a customized VM image on Azure built specifically for doing data science and deep learning. It has many popular AI and data science tools pre-installed and pre-configured, helping jump-start the process of building intelligent apps that use predictive analytics and deep learning. DSVM is available on Windows Server 2012 and on Linux in both Ubuntu and CentOS7 editions.
This post shows how BigDL can be easily integrated into DSVM for Linux, and provides an example with LeNet5 character recognition implementation in Python. We first provide manual setup steps and then an automated mechanism to deploy BigDL on the DSVM with just a few clicks or commands.
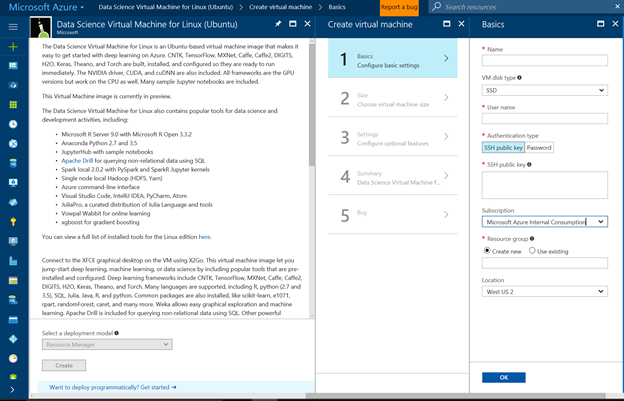
Provisioning DSVM
Before you start, you need to provision DSVM for Linux (Ubuntu) by visiting the product detail page and following the directions in the VM creation wizard:
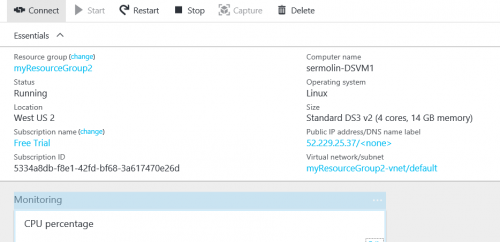
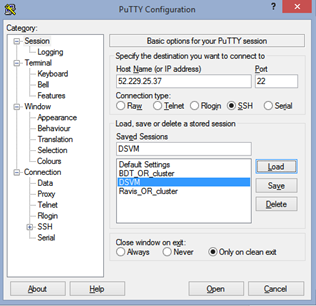
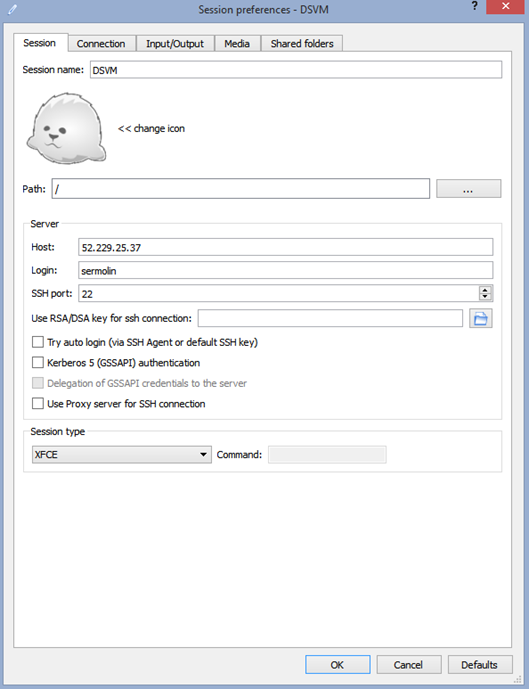
When DSVM is configured, please make a note of its public IP address OR DNS name – you will need this to connect to DSVM via your connect tool of choice. The recommended tool for text interface is SSH or Putty. For a graphical interface, Microsoft recommends an X Client called X2GO.
NOTE: You may need to set up the proxy correctly if your network administrators require all connections to go through your network proxy. The only session type supported by default on DSVM is XFCE.
PuTTY Config
X2GO Config
Building BigDL
Invoke 'sudo' root privileges and clone BigDL from GitHub:
sudo -s
cd /opt
git clone https://github.com/intel-analytics/BigDL.git
Build BigDL with Spark 2.0:
$ cd BigDL
$ bash make-dist.sh -P spark_2.0
In the end, you should see these messages:

Note: The above screenshot shows BIgDL installed in a user's home directory. Installation in /opt would look the same.
Running a BigDL Example
DSVM Configuration Steps to Run BigDL Examples
Switch to Python-2.7
$ source /anaconda/bin/activate root
Confirm python version
$ python - - version

Install Python Packages
$ /anaconda/bin/pip install wordcloud
$ /anaconda/bin/pip install tensorboard
Creating script files to run Jupyter notebook and TensorBoard
In the directory where you cloned BigDL library (/opt/BigDL or ~/BigDL, depending on your choice), create a script, run_notebook.sh with the following content:
#begin run_notebook.sh
#!/bin/bash
#setup paths
BigDL_HOME=~/BigDL
#this is needed for MSFT DSVM
export PYTHONPATH=${BigDL_HOME}/pyspark/dl:${PYTHONPATH}
#end MSFT DSVM-specific config
#use local mode or cluster mode
#MASTER=spark://xxxx:7077
MASTER="local[4]"
PYTHON_API_ZIP_PATH=${BigDL_HOME}/dist/lib/bigdl-0.1.0-python-api.zip
BigDL_JAR_PATH=${BigDL_HOME}/dist/lib/bigdl-0.1.0-jar-with-dependencies.jar
export PYTHONPATH=${PYTHON_API_ZIP_PATH}:${PYTHONPATH}
export PYSPARK_DRIVER_PYTHON=jupyter
export PYSPARK_DRIVER_PYTHON_OPTS="notebook --notebook-dir=~/notebooks --ip=* "
source ${BigDL_HOME}/dist/bin/bigdl.sh
${SPARK_HOME}/bin/pyspark \
--master ${MASTER} \
--driver-cores 5 \
--driver-memory 10g \
--total-executor-cores 8 \
--executor-cores 1 \
--executor-memory 10g \
--conf spark.akka.frameSize=64 \
--properties-file ${BigDL_HOME}/dist/conf/spark-bigdl.conf \
--py-files ${PYTHON_API_ZIP_PATH} \
--jars ${BigDL_JAR_PATH} \
--conf spark.driver.extraClassPath=${BigDL_JAR_PATH} \
--conf spark.executor.extraClassPath=bigdl-0.1.0--jar-with-dependencies.jar
# end of create_notebook.sh
chmod +x run_notebook.sh
In the same BigDL directory, create start_tensorboard.sh with the following content:
#begin start_tensorboard.sh
PYTHONPATH=/anaconda/lib/python2.7/site-packages:$PYTHONPATH
/anaconda/lib/python2.7/site-packages/tensorboard/tensorboard -
logdir=/tmp/bigdl_summaries
#end start_tensorboard.sh
Please, note that '/anaconda/lib/python2.7/site-packages/' is installation-dependent and may change in future releases of DSVM. Thus, if these instructions do not work out-of-the-box for you, you may need to update this path.

Note the URL printed out at the end of the log: "https://10.0.2.4:6006" and open your DSVM browser with it to see the TensorBoard pane.
Launching a Text Classification Example
Execute run_notebook.sh and start_tensorboard.sh via bash commands from different terminals:
$bash run_notebook.sh
$bash start_tensorboard.sh
Open two browser tabs, one for text_classification.ipynb and another for TensorBoard.
Navigate to text_classification example:
https://localhost:YOUR_NOTEBOOK_PORT_NUMBER/notebooks/pyspark/dl/example/tutorial/simple_text_classification/text_classfication.ipynb#
Run the notebook. Will take a few minutes and in the end, you will see a loss graph like this:

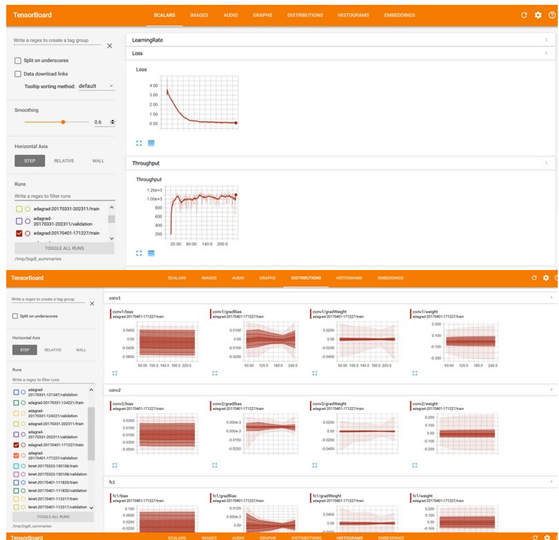
Here's what your TensorBoard may look like, for the Text Classification example:
Automating the Installation of BigDL on DSVM
Azure Virtual Machines provide a mechanism to automatically run a script during the post provisioning when using Azure Resource Manager (ARM) templates. We have published the ARM template and the script to install BigDL on the DSVM for Linux (Ubuntu) when creating the VM on Azure at this GitHub location. On the same GitHub directory, there is also a "Deploy to Azure" button that will take the user to the Azure portal wizard and them through VM creation, automatically executing the above script to install/configure BigDL, so it's ready for use right after the VM is successfully provisioned.

The user can directly run /opt/BigDL/run_notebooks.sh to start a Jupyter notebook server to execute the samples.
Conclusion
In this post, we demonstrated that, with just a few small steps, one can leverage the Apache Spark BigDL library to run deep learning jobs on the Microsoft Data Science Virtual Machine.
BigDL continues to evolve and enjoys a solid support from open-source community as well as from Intel's dedicated software engineering team.
Gopi & Sergey
Additional Resources
- Learn more about Data Science Virtual Machine for Linux on Azure
- BigDL portal at Intel.com
- Intel's article on running BigDL on Azure Data Science VM
- Artificial Intelligence Software and Hardware at Intel
- BigDL introductory video
- If you have any questions for BigDL, you can raise your questions in BigDL Google Group.
Appendix
Installing and configuring Spark-1.6 for legacy code implementation:
install Spark 1.6.1 WITH spark-2.0
Install spark 1.6.1: https://spark.apache.org/downloads.html
Select 1.6.1.
Download
cd Downloads
tar -xzf spark-1.6.1-bin-hadoop2.6.tgz
Move the directory from download location to where Spark is stored on the system.

To switch back to python 3.5 environment:
$source activate py35 (for Python 3.5)
To install Python packages Python 3.5 environment:
$sudo /anaconda/envs/py35/bin/conda install xxxx (for Python 3.5 env)
(Same for pip installs too)
Installing BigDL on Data Science Virtual Machine for Linux (CentOS):
We need to install Maven on the DSVM for Linux (CentOS) before compiling BigDL.
Installing Maven:
Note that on Cent-OS based Linux instead of Ubuntu's "apt-get" , you need to use "yum" to install new packages:

DSVM's default JAVA_HOME environmental variable points to an empty directory "/usr/lib/jvm/java-1.8.0-openjdk-1.8.0.111-1.b15.el7_2.x86_64"
You need to change it to another one (already existing) that contains Java 8 installation:
export JAVA_HOME="/usr/lib/jvm/java-1.8.0-openjdk-1.8.0.121-0.b13.el7_3.x86_64"
Check that maven is installed correctly:
$ mvn –v

After this, you should be able to run a build on BigDL following the steps in the main section above.