System Center Service Manager 2012 R2 - UR8 - Deploy the New Self-Service Portal – My Experience
Deploy the New Self-Service Portal – My Experience
The Self-Service Portal provides web-based access to the features of Service Manager. In this manual I will go through Update Rollup 8 Installation in my lab environment.
All content can be found on https://support.microsoft.com/en-us/kb/3096383
Download UR8 from https://www.microsoft.com/en-in/download/details.aspx?id=49556
Important Note: hotfix (build 7.5.3079.523) is available for the System Center 2012 R2 Service Manager Self-Service Portal
Before we start:
The following need to be checked and verified before starting Update Rollup 8 Installation:
In order to deploy the new Self Service Portal, you must have System Center 2012 R2 Service Manager Update Roll-Up 7or later installed. This update is not cumulative and required UR7 to be installed prior to installation of UR8.
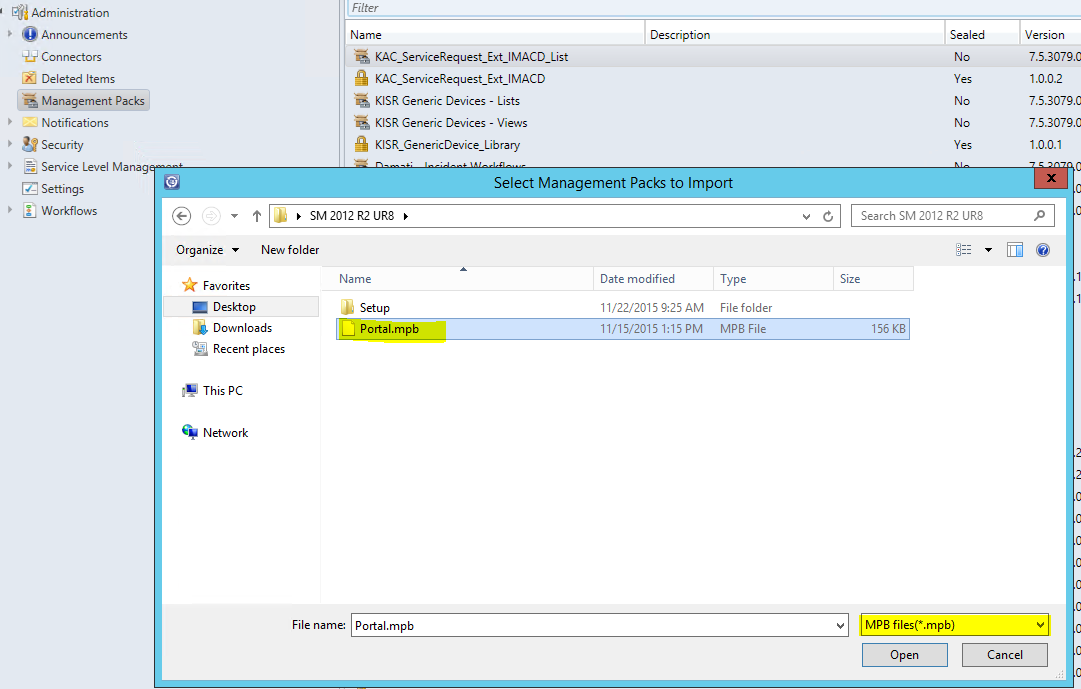
Import Portal.mpb Management Pack to Service Manager as without it, the web pages won’t load any item.
In order to import, login to Service Manager Console with SM Admin rights, open Administration Tab and click on Management Packs.
Right Click and select Import Management Pack
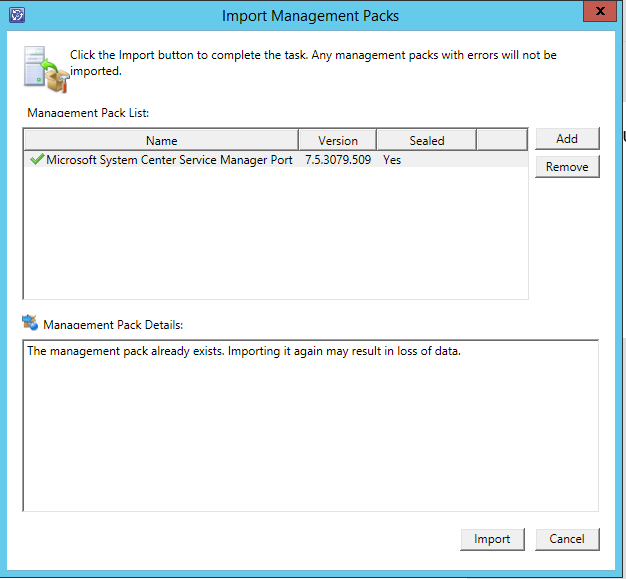
Click import to finish importing the Management Pack
3. Set up web Server
Self Service Portal should be installed on Windows 2012 R2 Server joined to domain where Service Manager SDK Service is running such as Primary or Secondary Management Servers.
Installing on previous SSP Server does not start the setup with error that SSP already installed.
Enable IIS Role and ASP.NET 4.5 on the server
1- Enable IIS Role

2- Enable .NET 3.5 Framework Features
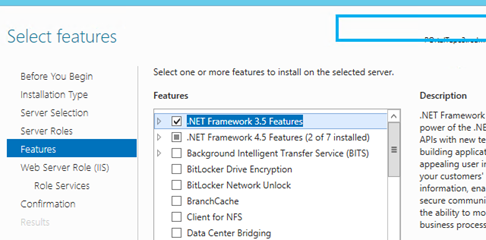
Enable ASP.NET 4.5 under .NET 4.5 Framework Features
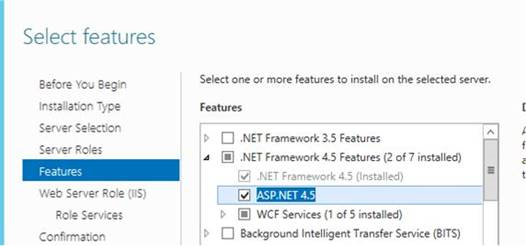
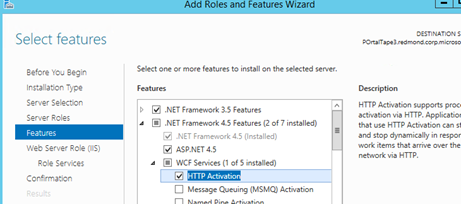
Enable HTTP Activation under .NET 4.5 Framework Features à WCF Services
Under Role Services, enable the following role services on the Web Server Role (IIS) page.
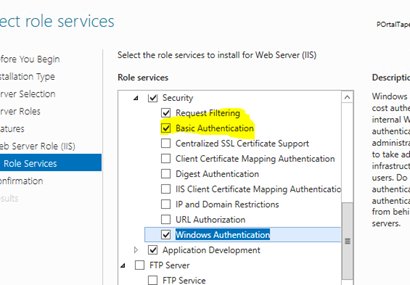
Security à Basic Authentication
Security à Windows Authentication
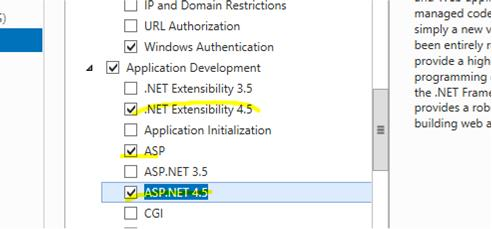
Application Development à .NET Extensibility 4.5,
Application Development à ASP
Application Development à ASP.NET 4.5.
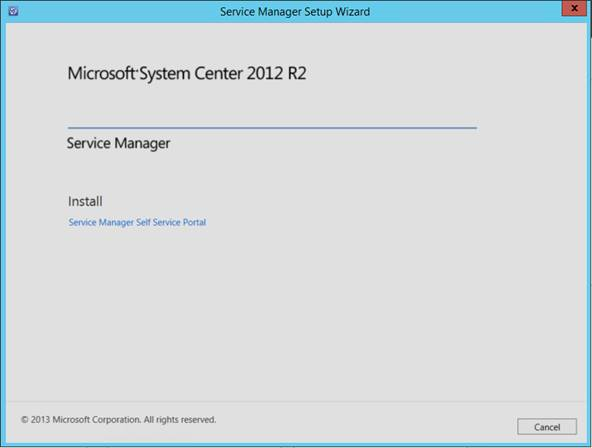
Self Service Portal Installation
Follow the procedure below in order to install Self Service Portal WebApp.
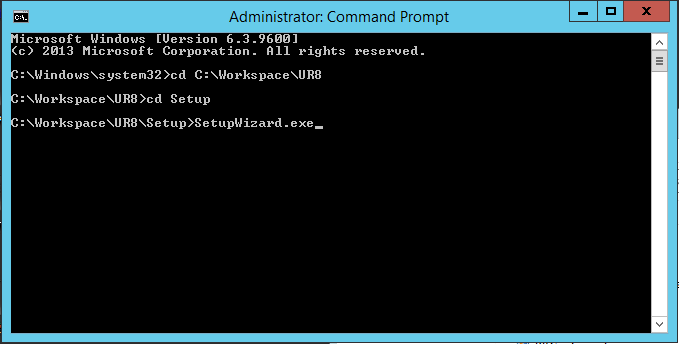
- Run CMD as Administrator, change directory to UR8 Directory inside Setup folder.
-
- Run SetupWizard.exe in the Setup folder to start the Service Manager Setup Wizard. Under Install, click Service Manager Self Service Portal.
-
- Accept the EULA.

-
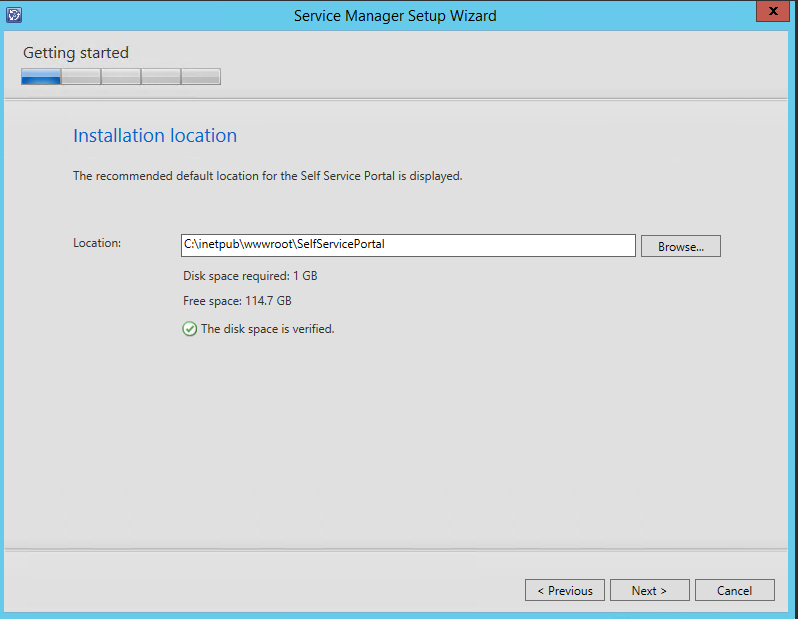
- Choose your installation location.
-
- Review the System check results.

-
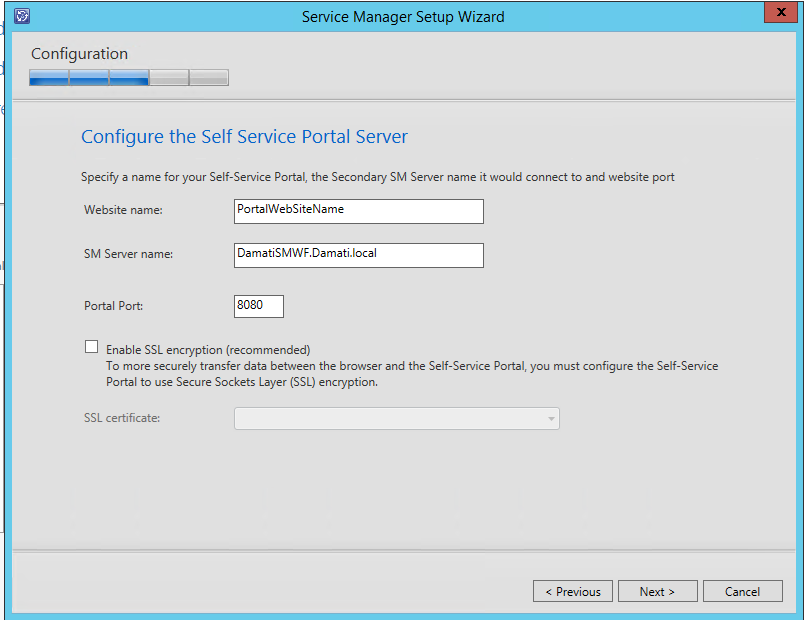
- Configure the Self Service Portal server and type configuration details for your server.
-
-
- WebSite Name : The name of the website to display in the IIS Management console.
-
-
-
- SM Server name: You can provide a fully-qualified domain name or the NetBIOS name of the server running the Service Manager SDK service. We recommend that you use a dedicated secondary Service Manager management server to communicate with the portal.
-
-
-
- Portal Port: The port number that the website will use.
-
-
-
- SSL Certificate: (Optional) The SSL certificate to configure the website in secure mode (https://). This is the recommended setting if you are using Basic Authentication. The default is Windows Authentication.
-
-
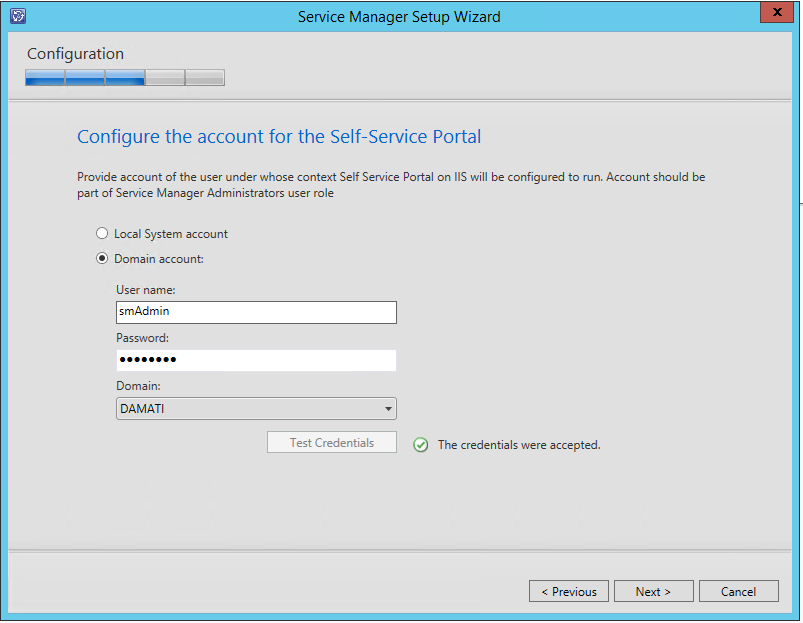
- Configure the account for the Self Service Portal. This is the account that the IIS instance will run under. This account should have the Service Manger Admin role.
-
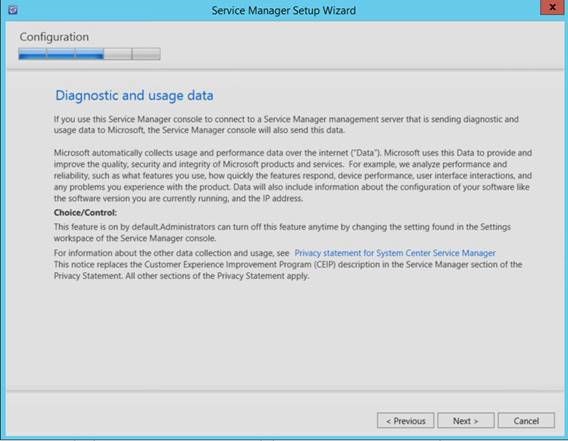
- The Diagnostic and usage data notification information is displayed, informing you that data is sent to Microsoft by default. You can change this setting in the Service Manager console. Click Next.
-
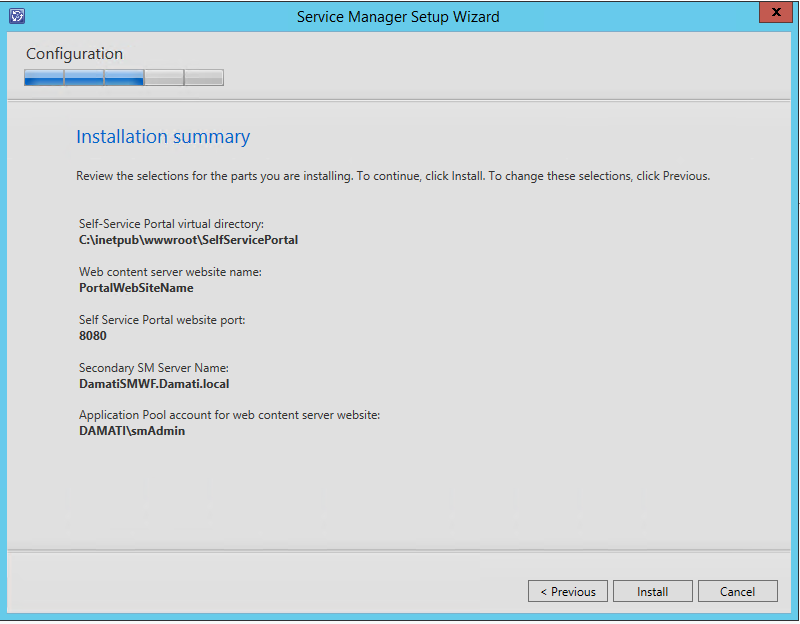
- Review Installation summary, then click Install
-
- Wait for installation to complete.
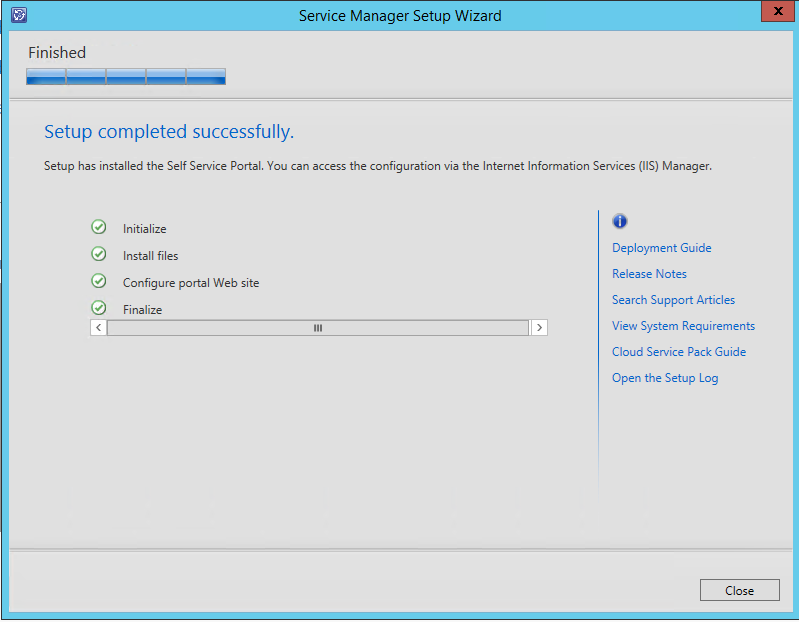
Complete the Installation
Use the following step to complete your installation.
Restart IIS using IISRESET command in evaluated CMD
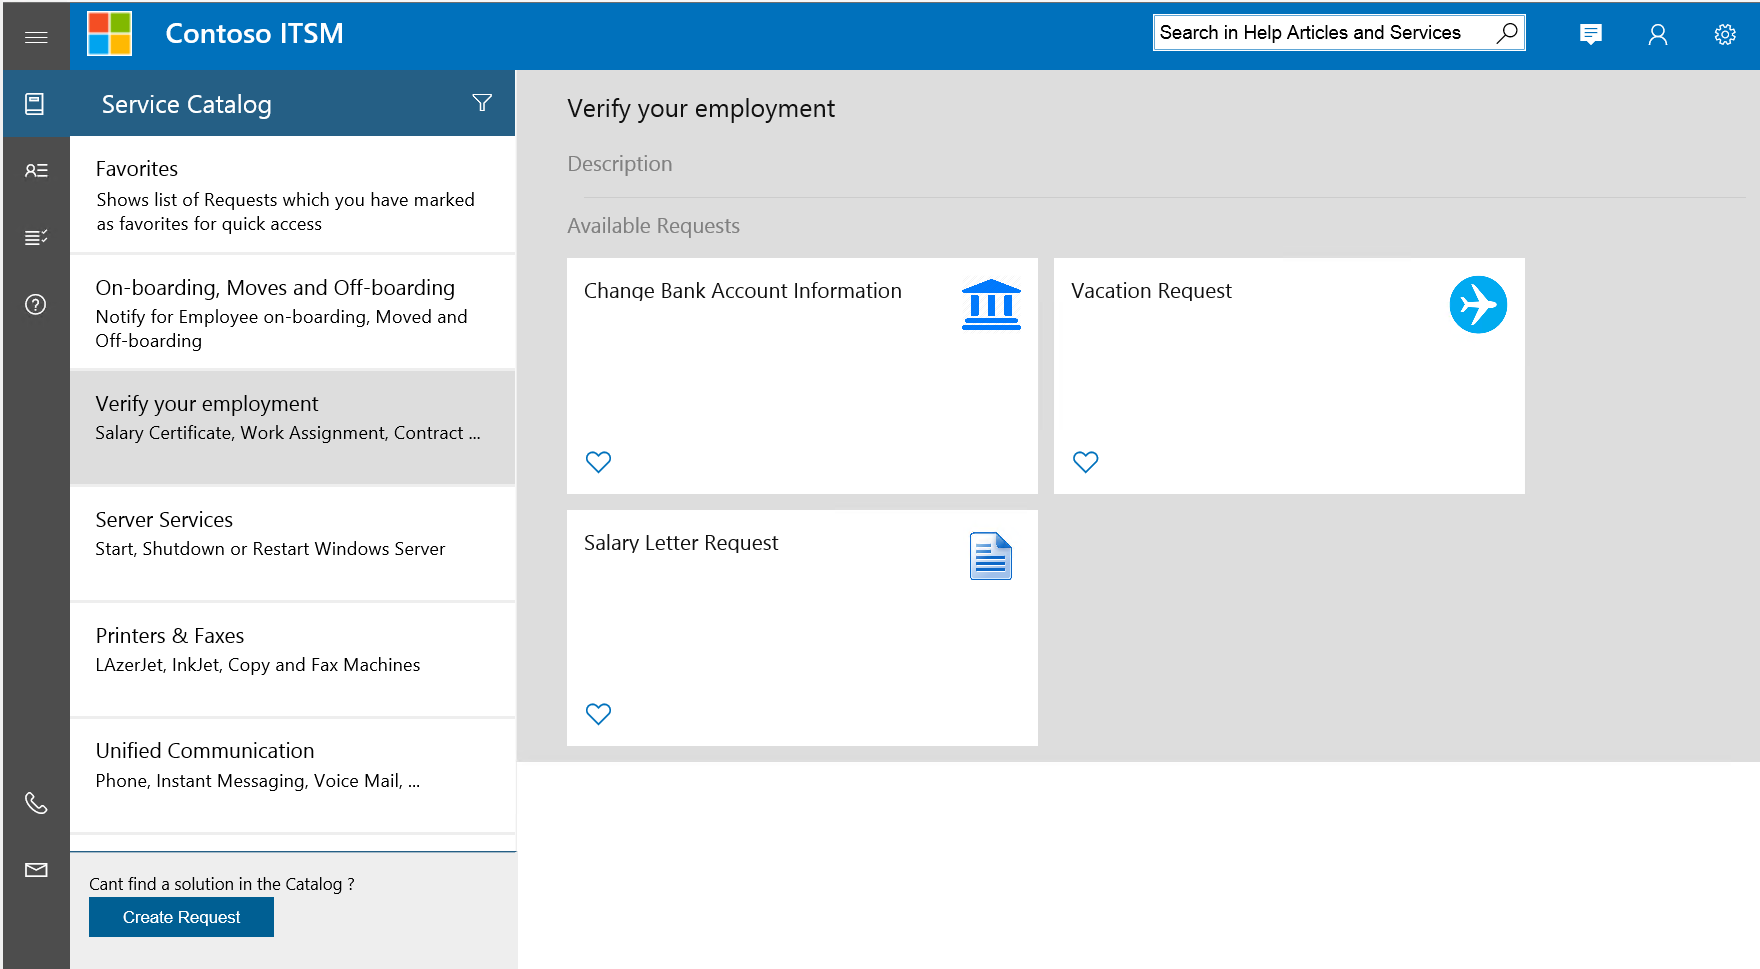
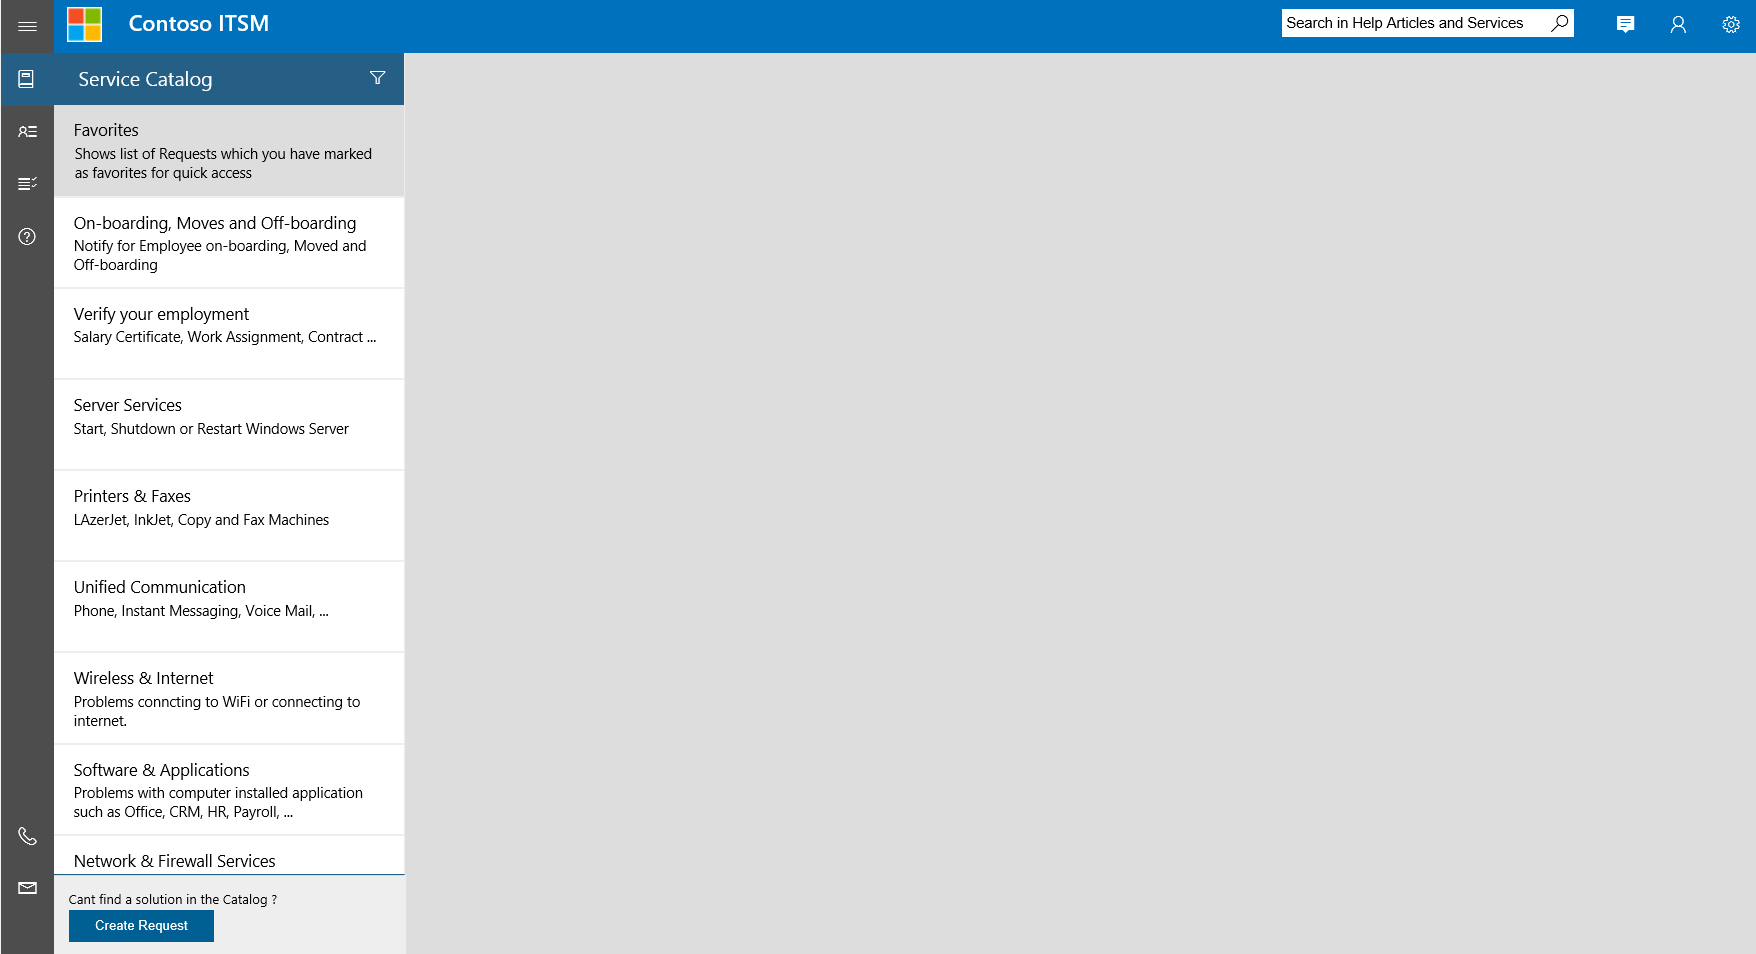
Access the Web App (https://yourwebsite:port) in your browser. It will resemble the following image.
Good Luck :)
DamatiMan