The way cool Azure Automation PowerShell ISE add-on
Summary: Ed Wilson talks about downloading, installing, and using the new Azure Automation PowerShell ISE add-on to create runbooks.
Good morning everyone, Ed Wilson here, and today I want to talk about a way cool and powerful new Windows PowerShell Integrated Scripting Environment (ISE) add-on from the OMS Automation team. Joe Levy, from the Microsoft Operations Management Team, has actually written about this new add-on in a recent blog posting. But, after my presentation with him the other day, I couldn’t wait to download it and give it a spin.
Download, install -- it's that easy
It’s easy to download and to install the Azure Automation add-on because it resides in the PowerShell Gallery. This means that with Windows PowerShell 5.0 on my Windows 10 laptop, it’s a cinch. The only thing is that the name is a bit ambiguous on Windows PowerShell Gallery, and so finding it can be a bit iffy. For the record, the name is AzureAutomationAuthoringToolkit, which it really is, but it doesn’t seem to have anything to do with the ISE or even PowerShell.
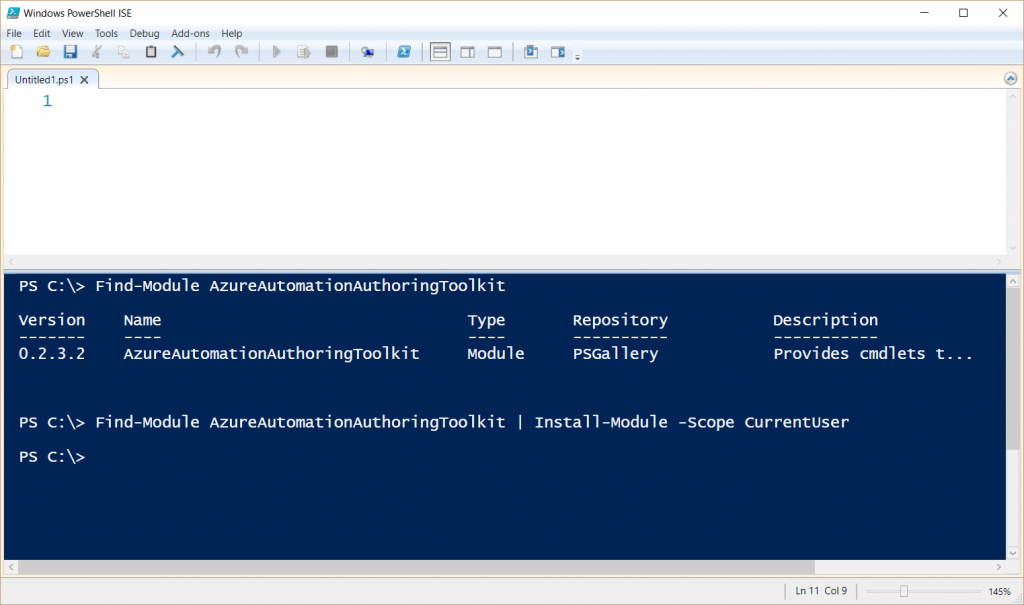
So, I use the following two commands:
Find-Module AzureAutomationAuthoringToolkit
This command helps me find the module. Then I decide to install it. Here is the command I use:
Find-Module AzureAutomationAuthoringToolkit | Install-Module -Scope CurrentUser
These two commands appear in the following figure:
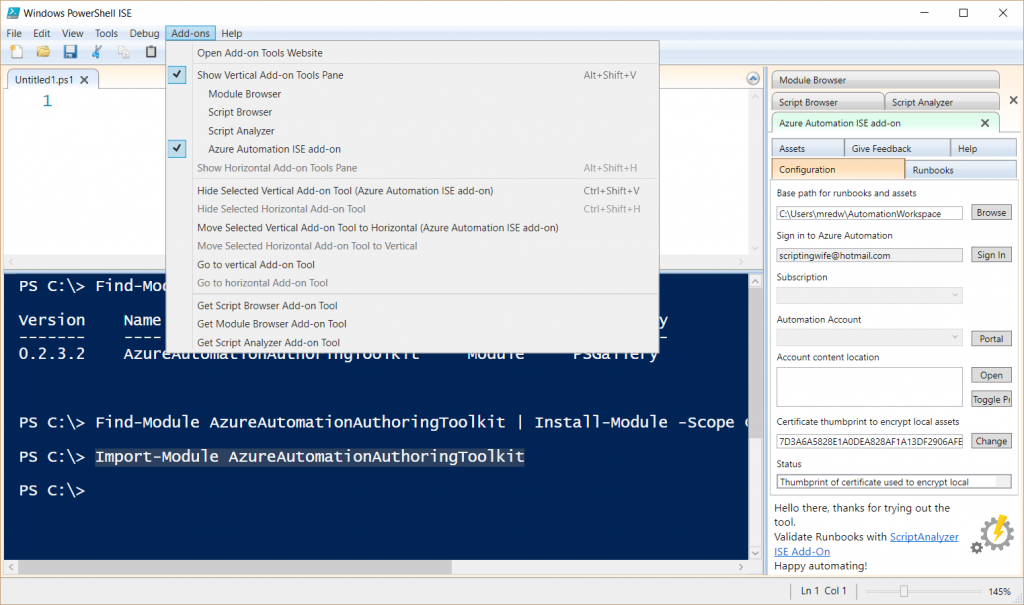
Now that I have the module installed, here’s how I load the module.
Import-Module AzureAutomationAuthoringToolkit
After I have loaded the module, nothing seems to happen. To make the Azure Automation ISE add-on appear, I go to the Add-ons menu, select the add-on, and then it appears. The menu appears here:
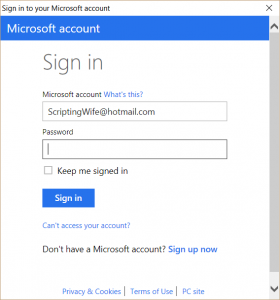
Now, the first thing I need to do is to sign in via the Configuration tab. After I click the Sign in button, the following dialog box appears:
I fill it out, and then a little wheel spins at the bottom and automatically the subscription, automation account, certificate thumbprint information, and everything else automatically populates. Anyone who has done much OMS Automation knows that finding this information and plugging it into the right places is a large part of the battle. The user forums are replete with questions about these very things. And here it is automatically put in the correct place. Not only that, but now a workspace gets set up in my profile so that everything I do can be saved locally, as well as published to the cloud. Not only that, but it remembers stuff from session to session.
If I do not want to load the module automatically (for example putting it into my Windows PowerShell profile). all I need to do is to simply use import-module in the command pane of my Windows PowerShell ISE, and load it manually.
Editing and testing an existing runbook
After I am signed in, the Azure Automation ISE add-on loads all of my runbooks and makes them visible. It also tells me the status -- in the cloud or local. I can select a runbook, and it will download to my local system. After it is downloaded, I select Open to open the runbook. I can edit it, and then upload my draft to the cloud. Then I test my draft to see if I like it. If everything is cool, then I publish my draft, and I never have to open up my Azure Automation portal. The big advantage is that I get all of the IntelliSense of my Windows PowerShell ISE, as well as syntax highlighting, and all of that. Here is a quick demo that illustrates going through these steps.
[video width="812" height="480" mp4="https://msdnshared.blob.core.windows.net/media/2016/04/DemoISEAddon.mp4"][/video]
That is all I have for you today. Join me next week when we will be talking about more cool stuff.
I invite you to follow me on Twitter and the Microsoft OMS Facebook site. If you want to learn more about Windows PowerShell, visit the Hey, Scripting Guy Blog. If you have any questions, send email to me at scripter@microsoft.com. I wish you a wonderful day, and I’ll see you tomorrow.
Ed Wilson
Microsoft Operations Management Team
Comments
- Anonymous
April 12, 2016
This addon borked my PS ISE sessions. It took like 2 minutes for it to load every time I started the ISE. I uninstalled it.Dude, this was not cool... - Anonymous
April 13, 2016
@Dusty Yeah, it does take a little but that is because it goes off and makes your connection into Azure and that takes a bit of time. I do not load the module in my ISE profile because it does talk a bit of time loading (this is the same thing with the Active Directory module that makes the connection into AD and creates the AD drive). Instead I load the module only when I am going to use it. So I use IPMO azure it comes up and I press enter and wait for the connection to take place. The value it offers is worth the load time when I am going to actually use it. But yeah, you are right, I would not load it via my profile for the exact reason you mention. - Anonymous
April 25, 2016
Cool Stuff.


