Setting up the Oculus Rift DK1
This post is for people who literally just got their hands on an Oculus Rift and are just starting out. I will outline my experience setting up and integrating the Oculus Rift Developer Kit 1, as that is what I have.
Setting up the Headset
- Remove the headset from the box. It comes with an around-the-head strap already, but you may want to add on the over-the-head strap that it comes with too. Most people do this, as it stays on better that way. Make the necessary adjustments to the strap so that it sits comfortably on your noggin.
- You can adjust the distances of the lenses and screen from your face by using a coin to turn the screws on the side. They don't recommend wearing glasses with the Oculus, since it might scratch the lenses. So if you have miserable eyesight like I do, you will probably have to wear contacts when using the Oculus
(or just remain in a state of doubt about whether it is the quality of your game that sucks, or your eyes.) - Three different pairs of lenses come with the development kit. The A cups are for those blessed with 20/20 perfect vision, or farsighted vision. If you are going to be using contact lenses with the Oculus, you should use the A cups. The B cups are kind of a happy medium and a safe bet to go with if you are going to be letting random people use your headset to play your game. I go with the C cups (if I am not wearing contacts) as those are for the very nearsighted.
Setting up the Control Box
- The control box is that square that is attached to the cord coming out of your Oculus Rift. The are four connectors on the control box:
-HDMI
-DVI
-USB
-Power - Connect the USB to the control box and your computer
- Pick ONE of the two video cable options (DVI or HDMI)
- Plug the power cord into an outlet, and the other end into the control box
- There are some buttons on the top of the control box to adjust brightness and contrast of the headset display. I didn't really mess with these.
- There is also a power button on the control box. Turn it on!
Setting up your computer with the Oculus
Go to Oculus VR Developer Center: https://developer.oculus.com/
Sign up for a developer account. It bugged out when I tried to make an account as an individual, so I ended up making an organizational one. You may have to describe the project you are working on.
Go to the 'Downloads' tab (the one to the right of Dashboard..) where you will need 3 things:
-Oculus Runtime for Windows
-Oculus SDK for Windows
-Unity Integration
-(Optional) Oculus Unity Tuscany Demo
[if you're a Mac user, then fine, get those ones…]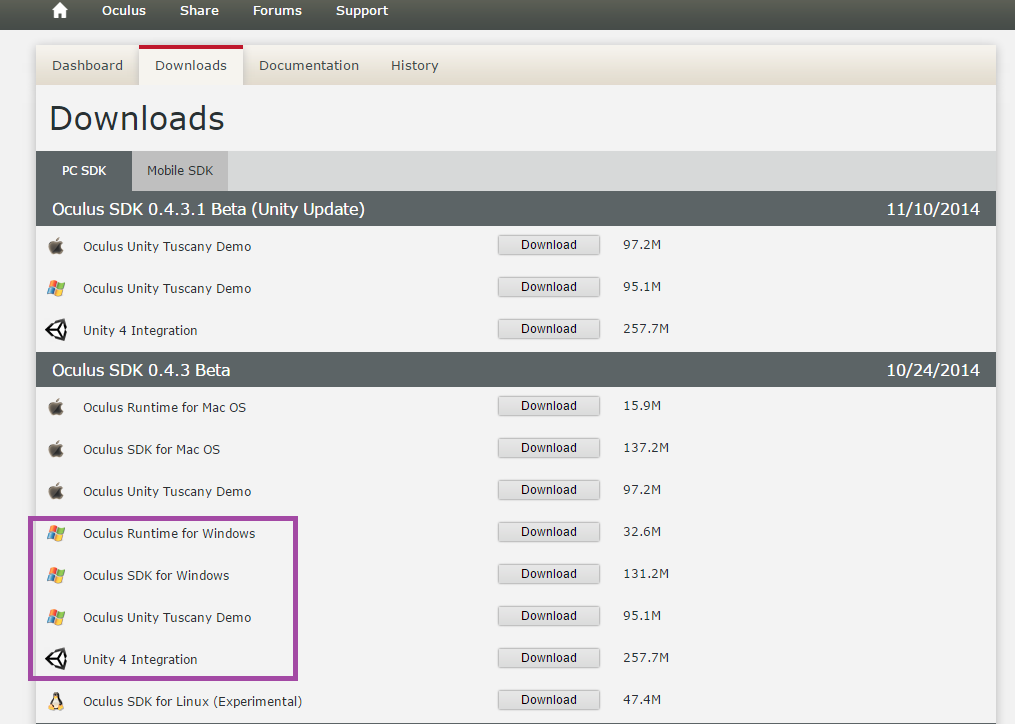
Go through the installs for those
Go into your Display Settings. You will want to set the Oculus up like you would a second monitor and extend the displays (note that the set up is totally different for the DK2, so I was serious about this just being for the DK1)
Then open OculusConfigUtil (it came with the download). If you've done everything right up till this point, your Oculus should be detected and you can open the demo scene and also go ahead and configure your profile. If your headset isn't being detected, you may want to double checked that you plugged things in properly, or that you really downloaded the Runtime and the SDK.
Once you've seen the demo scene and set up your profile, you will be ready to hop on over to Unity! Stay tuned for my next post: Integrating the Oculus Rift with your Unity game. *cliffhanger*
Comments
Anonymous
November 17, 2014
Hallo Nathalie, Very nice post. Simple and easy to understand. Thank you very much for a job well done!Anonymous
December 22, 2014
Hey there, thanks for this! After watching lengthy video after lengthy video ALL DAY and getting nowhere, I found your blog and completed the setup within minutes! Do you have time to answer a question about using the dk1 with Surgeon Simulator? Or do you wish for comments only on this page? Either way, thanks again for the easy, straightforward instructions!Anonymous
January 16, 2015
Hi Monica, Sure send me an email at nalivorn@microsoft.com Glad you found it helpful! NathalieAnonymous
April 09, 2015
where can I get a copy of 0.4.3.1 as I can not get the 0.5 working with my dk1Anonymous
October 13, 2015
qual versao devo baixar para oculos dk1?Anonymous
December 23, 2015
The comment has been removed