System Center Orchestrator – Real Time Reporting and Runbook Summary Email Examples.
Continuing on with the automated SQL Cluster patching process, let’s examine some creative ways in which we can provide real time and summary feedback. At a high level we will see how to write data from the orchestrated process into an external database, and then use this data for reporting purposes. With a basic understanding of how to extrapolate and manage this data, these concepts can then be translated into any number of orchestration / data reporting needs. This post will contain quite a bit of explanation, and a large amount of screen shots. I encourage you watch the included video to see a concise demonstration of the full solution in action.
Scenario / Use Case:
As the automation engineer for Contoso Inc. you have been asked to create a method by which the software update self-service portal (created in my last post) can also provide real time feedback into the progress of the software updating process start to finish. Management has asked for a view that will show status on each step in the process with particular detail on any reboot activities. Management would also like to see an email sent to the specified application owner that will summarize the execution steps with time completed for each node during the actual update process.
Goals for this blog:
- Extend the custom interface (created in my last post) to include real time status updates detailing the cluster patching process.
- Craft an email which will summarize the execution of the automated cluster patching process.
Solution Overview:
We will start by quickly re-visiting the SQL Update process and Runbooks created during an earlier blog posting. If you recall the solution consisted of eight Runbooks –
- 1.0: Cluster Updates – this is the launch pad Runbook which controls the execution of all subsequent Runbooks allowing us to return and pass data through all involved Runbooks.
- 1.1: Configure Updates – Creates a collection and Software Update Management in Configuration Manager
- 1.2: Detect Cluster State – Determines active and non-active nodes from the specified cluster.
- 1.3: Update Node – adds each node to the update collection and controls the update and reboot experience.
- 1.4: Move cluster - once the passive nodes have been updated and rebooted, moves cluster activity from the active node to the passive.
- 1.5: Clean Up – Once all nodes have been updated this Runbook deletes the Configuration Manager collection and sends an email notification indicating that the process has been completed.
- SCOM Start and Stop: - We also utilized two Runbook to put the nodes into maintenance mode before the updating process starts, and then pull them back out once updates and reboots have completed.
Example of 1.1 Configure Updates:
Example of 1.3 Update Nodes:

In order to meet the requirements set forth in this post we will report on this series of Runbooks from two vantage points –
- Progress of all Runbooks – this will show the progress of all runbooks included in the solution.
- Progress of the 1.3 Update Node Runbook – this will show the progress of each specific SQL node as it is updated. This will report specifics about the reboot process, providing validation that all SQL nodes have been successfully rebooted.
External Database:
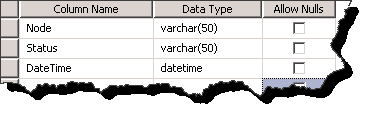
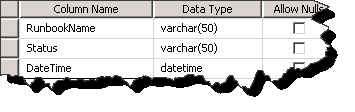
Before getting started with the orchestration, we will need a data base in which to store the progress data. I have created a single database named ClusterPatch consisting of two tables RunbookStatus, and ClusterUpdateStatus. I will refer to this database in this article as the 'reporting database'.
RunbookStatus:

ClusterUpdateStatus:
Progress of All Runbooks:
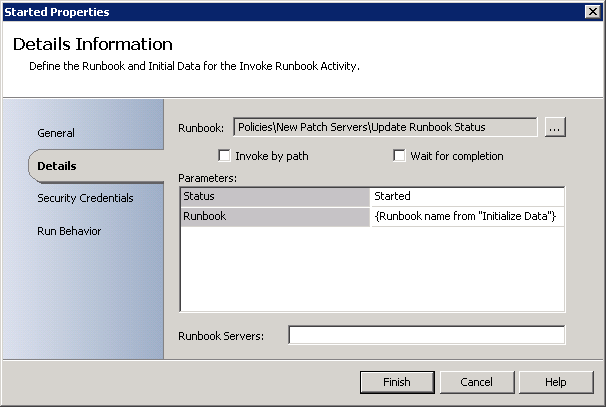
We will focus first on the Progress of All Runbooks . For this we want to populate the RunbookStatus table with the Runbook name, Status (Started or Finished), and then the time at which the status activity happened. Considering this data will be identical (Started or Finished) for each individual Runbook in the solution, we can create an additional new Runbook that will handle the data population. We can then use an Invoke Runbook activity each time we want to populate Runbook status into the reporting database. Observe in the screen shot below the two Invoke Runbook activities (Started and Finished). These activities will trigger the new 'Progress Runbook', placing data in the reporting database each time a Runbook or step in in this automated patching solution has started or completed.
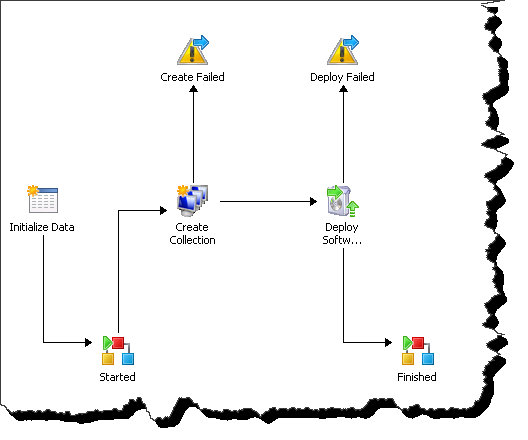
Example of 1.1 Configure Updates with reporting Invoke Runbook Activities. Compare this with the screen shot of the same Runbook earlier in this post.

Example of the Started and Finished Invoke Runbook activities:

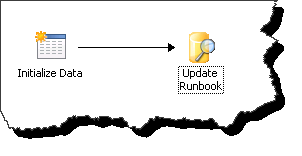
Example of the newly created Update Runbook Status Runbook:

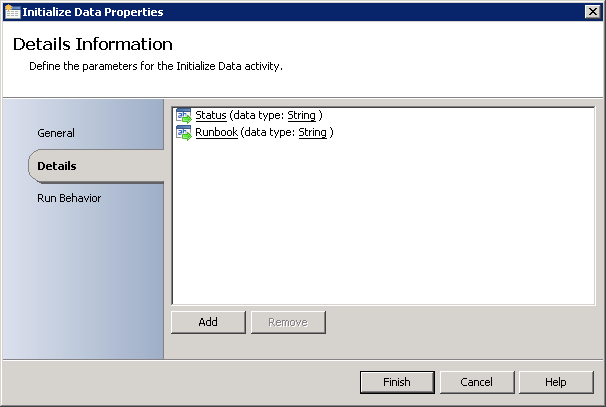
Initialize Data Activity:
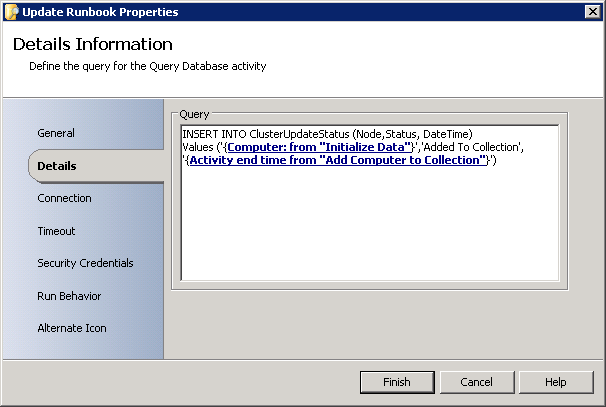
Here we see the query database activity which places the Runbook status data into the reporting database for later consumption.
Update Runbook Properties – Query Database Activity:
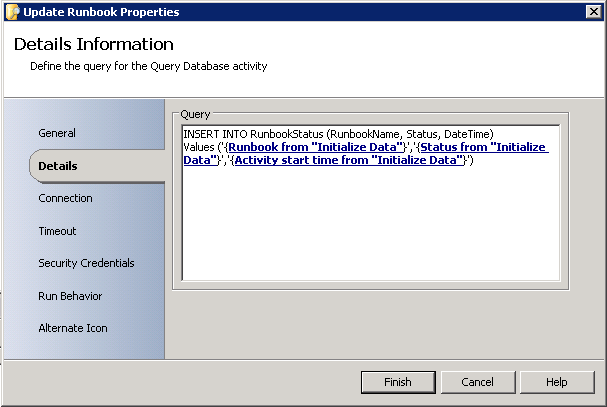
To reiterate, this activity will execute at the start and finish of each Runbook in the SQL Cluster Updating series of Runbooks. The net effect will be a real-time update of the solution progress start to finish.
Progress of the 1.3 Update Node Runbook:
With the overall progress taken care of, lets now focus on how to provide reporting data specific to the patching status for each node. For this data gathering activity, rather than create a separate Runbook that will be triggered at each appropriate time, I’ve decided to use multiple Query Database activities inside of the 1.3 – Update Nodes Runbook.
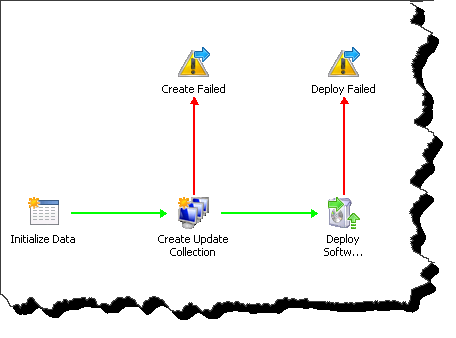
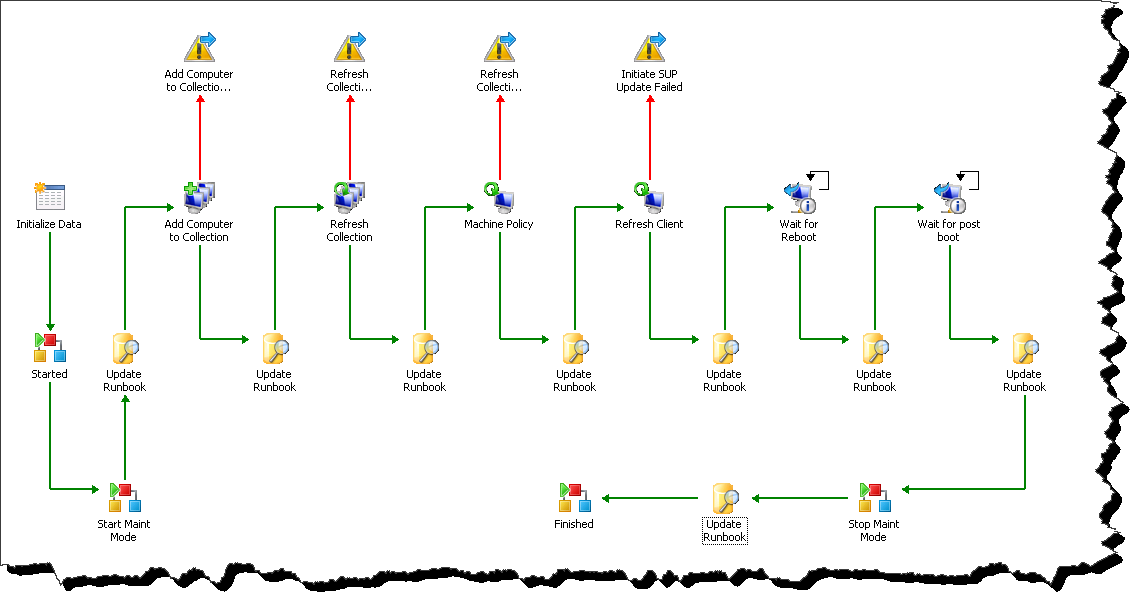
Notice in the screen shot that not only do we have the addition of the Start and Finished Invoke Runbook activities which were discussed in the last section of this article; we also have eight query database object, one after each significant activity. These query database objects will insert data specific to the 1.3 – Update Node Runbook, or the actual software updates application process, into the ClusterUpdateStatus table in the reporting database for later consumption.
Example of the 1.3 – Update Nodes Runbook with Query Database Activities. Compare this with the screen shot of the same Runbook earlier in this post.
Example of one Update Runbook Query Database Activity:
Displaying the Data in real time:
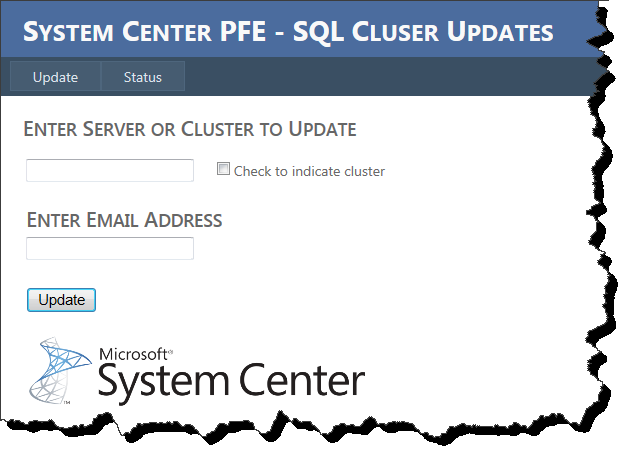
Once our Runbooks have been wired up to populate data into the reporting database, we need to consider how to display the data. Any conventional reporting method will work, however in this demonstration I am going to use GridView contolls in the existing update portal. Recall from the last posting in this series, our custom portal contains input controls allowing us to specify the name of the cluster to be patched and an email address to which the completion email will be sent. Here I am extending this application working with the Status tab as seen below. On this status tab I have placed two GridView controlls each bound to either of the two tables in the reporting database. I will not detail how to configure GridView’s, however it is quite simple and requires no coding. Here is an article for further reading - https://msdn.microsoft.com/en-us/library/x26w5syb(v=VS.80).aspx.
Both Tabs from the application. Note the database is empty thus there is no displayed status.
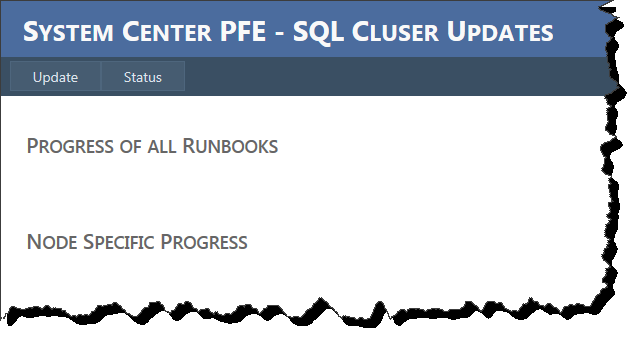
Status page after data has been entered into the database.

Quite simply, that is it. We have now stored data in the externally created database for consumption, and then returned the data using a GridView Control.
Configuring and sending a summary email:
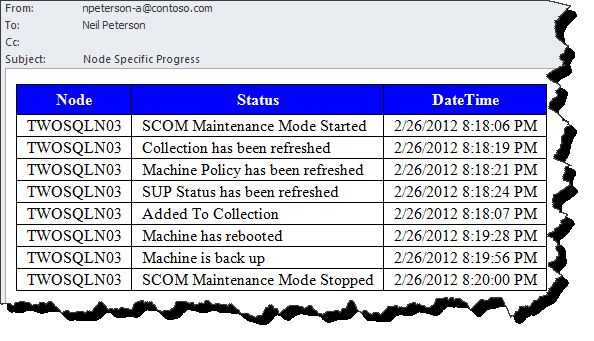
Our final task will be to create an email summarizing the update process. Here I am only going to focus on the Node Specific data. Of importance in this email would be when the node went down for the reboot, and also when the node had recovered, or come back up after the reboot.
After kicking this around with the native Orchestrator Send Email activity, I’ve decided I can get more desirable results relying only on PowerShell to handle both the email construction and also email delivery. The screen shot below shows the new 1.5 - Clean Up Runbook which will delete the Collection and Update Management from Configuration Manager, and then create and send the summarization email. The Initialize Data activity in this Runbook consumes the collection name (from and earlier Runbook) and the email address (passed in from the custom portal or initial Initialize Data Activity).
Example 1.5 - Clean Up with Send Summary Run .NET Script Activity
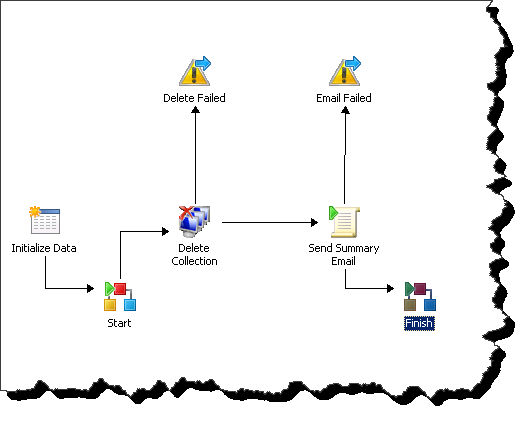
The PowerShell behind the ‘Send Summary Email’ is as follows. Be aware that anything in bold needs to be configured for each environemnt. Consider using Orchestrator Global Setting Variables or published data for these values. Additionally this code is assuming you are following this blog as an example and have used the same database name and table names.
$a = "<style>"
$a = $a + "TABLE{border-width: 1px;border-style: solid;border-color:black;}"
$a = $a + "Table{background-color:#FFFFFF;border-collapse: collapse;}"
$a = $a + "TH{border-width:1px;padding:5px;border-style:solid;border-color:black;background-color:#0000FF}"
$a = $a + "TD{border-width:1px;padding-left:10px;padding-right:10px;border-style:solid;border-color:black;}"
$a = $a + "</style>"
$SqlServer = "<SQLSERVER>"
$SqlCatalog = "ClusterPatch"
$SqlQuery = "Select * From ClusterUpdateStatus"
$SqlConnection = New-Object System.Data.SqlClient.SqlConnection
$SqlConnection.ConnectionString = "Server = $SqlServer; Database = $SqlCatalog; Integrated Security = True"
$SqlCmd = New-Object System.Data.SqlClient.SqlCommand
$SqlCmd.CommandText = $SqlQuery
$SqlCmd.Connection = $SqlConnection
$SqlAdapter = New-Object System.Data.SqlClient.SqlDataAdapter
$SqlAdapter.SelectCommand = $SqlCmd
$DataSet = New-Object System.Data.DataSet
$SqlAdapter.Fill($DataSet)
$SqlConnection.Close()
$emailbody = $DataSet.Tables[0] | Select-Object Node, Status, DateTime | ConvertTo-HTML -head $a
$smtpServer = "<SMTP SERVER>"
$smtpFrom = "<FROM Email Address>"
$smtpTo = "<TO Email Address>"
$messageSubject = "Node Specific Progress"
$message = New-Object System.Net.Mail.MailMessage $smtpfrom, $smtpTo
$message.Subject = $messageSubject
$message.Body = $emailbody
$message.IsBodyHTML = $true
$smtp = New-Object Net.Mail.SmtpClient($smtpServer)
$smtp.Send($message)
And here is a sample of the email output. We can see here that the node TWOSQLN03 was rebooted at 8:19:28 and recognized as back online at 8:19:56.
Example Summaary Email:
That was quite a bit of talk, moving pieces, and screen shots. Let’s take a look at a video demonstration which should tie this all together.
Video Demonstration:
[View:https://www.youtube.com/watch?v=jq0jwERnVug]