Configuring Live Writer with MSDN Blogs
After searching few blogs and forum, I figured out the way to configure our msdn blogs
[eg: https://blogs.msdn.com/b/nkhare] with Live writer after few glitches.
So the steps goes as follows:
- Create an MSDN Blog.
- Open the blog site and login with the configured window live ID
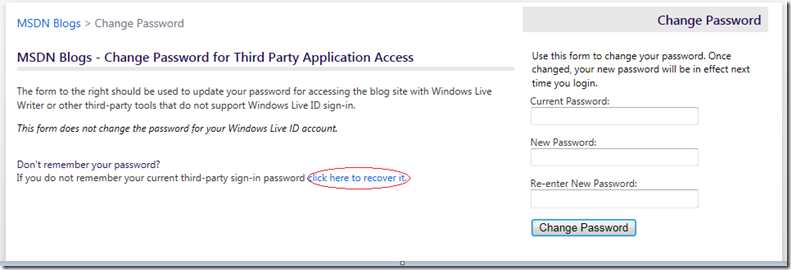
- Click on Settings and then Change Password link under Sign In Information Heading.
- On the Change Password page click on click here to recover it link
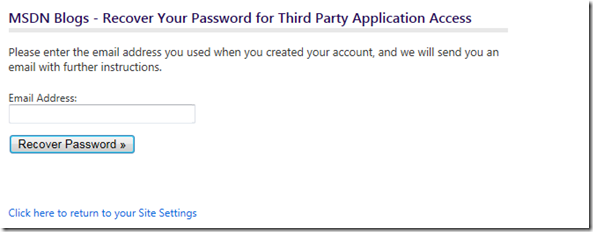
5. Mention your Microsoft email address and click Recover Password.
6. After you receive your mail from noreply@blogs.msdn.com click on create a new password online link.
7. Create a new password. Remember this is not the password for your live account. But, it will be required while configuring Live Writer.
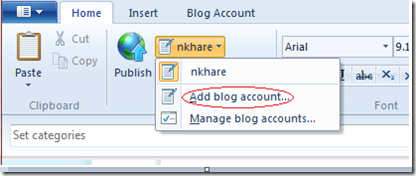
8. Now, as your new password is created you can start configuring to live writer. Open live writer, click on Add Blog account link. If you are opening live writer for first time, the dialog automatically appears.
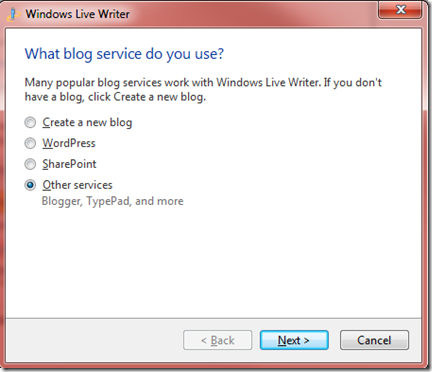
Select Other Services and click Next.
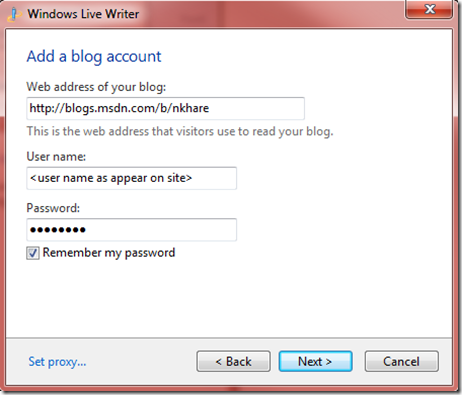
9. Enter the blog address, Username (as appears on the top left corner of the blog site. Note, it should not be the mail address live account or Microsoft ID.), Password (as created by Step 7).
10. Click Next and you are done. ![]()
Note: These are the steps which I followed to configure live writer with msdn blog. This may or may not be fully helpful to you.
.
