Note
Access to this page requires authorization. You can try signing in or changing directories.
Access to this page requires authorization. You can try changing directories.
Please note that this blog posts documents the steps (for quick reference) as covered by Trevor Sullivan in his original Channel9 video.
Step 1: Deploy a Linux Virtual Machine using Azure Quickstart Template
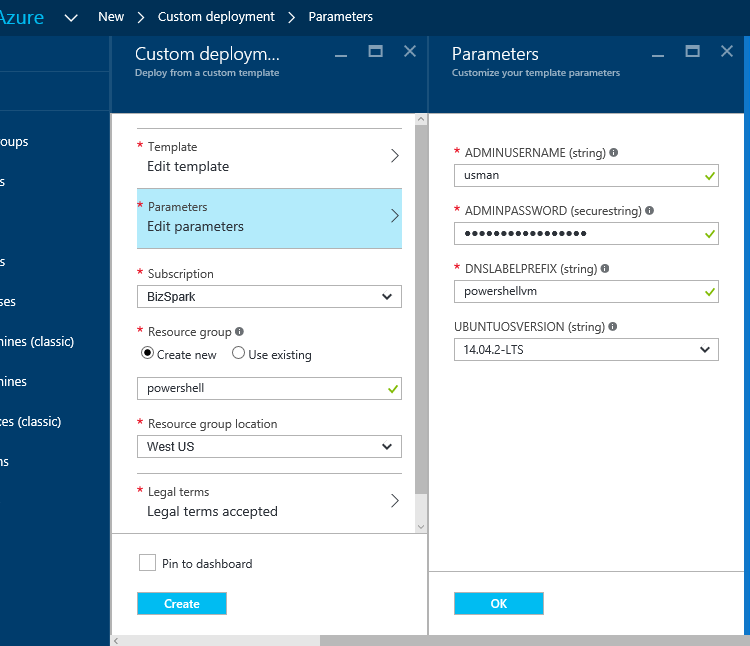
Visit the simple template at Github to deploy a Linux VM on Azure using ‘Deploy to Azure’ link.

Provide the required credentials and your VM would ideally be up and running in under a minute.
Step 2: Install Docker Engine (Daemon) on Linux VM
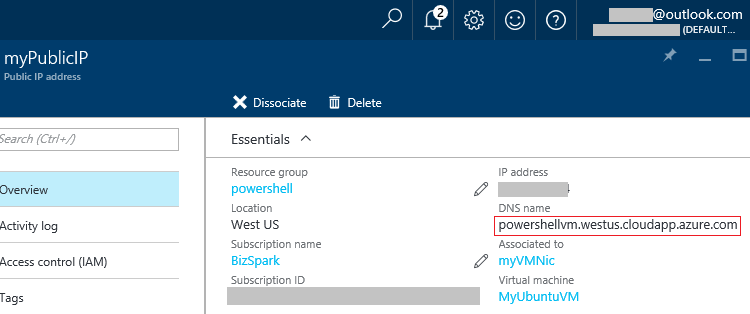
Connect with the newly created Linux VM using Putty. You can identify the hostname of VM from Azure portal,
Now run the curl command below that will fetch the latest Docker build and install it on our VM (the most updated command can be found at https://github.com/docker/docker/releases),
curl -fsSL https://get.docker.com/ | sh
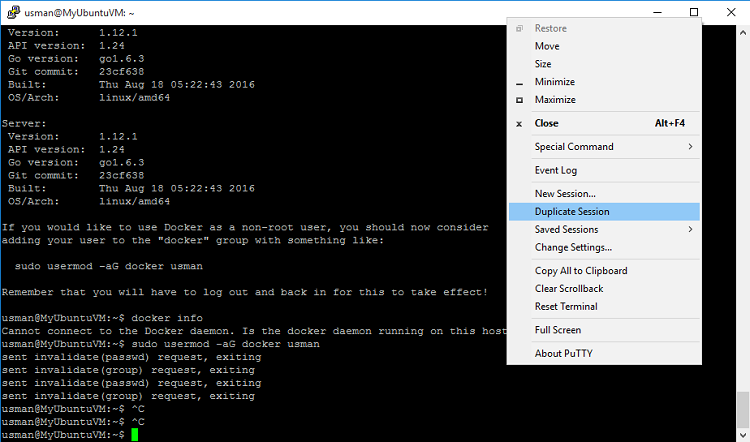
Once the curl process finishes installation of Docker engine, you’ll see instruction to use Docker as a non-root user, you should now consider adding your user to the "docker" group with something like:
sudo usermod -aG docker usman
Right click on Putty shell and choose ‘Duplicate Session’ for the above command to alleviate permissions to take affect (you can close the old session after the new shell is initiated),
Step 3: Build a custom Powershell image using DockerFile
Let’s create a new directory named PowerShell within which we’ll host the repo for building Powershell image using DockerFile,
usman@MyUbuntuVM:~$ mkdir PowerShell
usman@MyUbuntuVM:~$ cd PowerShell
usman@MyUbuntuVM:~/PowerShell$
Now create a new DockerFil inside the Powershell folder using Visual Editor (vi), paste the content from Dockerfile by right clicking in the editor (Esc :wq to write the file and exit editor)
Finally, let’s create the Powershell image by running docker build command,
usman@MyUbuntuVM:~/PowerShell$ docker build --tag powershell --no-cache .
You can optionally run docker images command to ensure that a PowerShell image and base Xenial Ubuntu image is created,
usman@MyUbuntuVM:~/PowerShell$ docker images
REPOSITORY TAG IMAGE ID CREATED SIZE
powershell latest 19caf902a0ec 2 minutes ago 530.8 MB
ubuntu xenial f8d79ba03c00 11 days ago 126.4 MB
usman@MyUbuntuVM:~/PowerShell$
Step 4: Run the Powershell container
Finally, we can run the PowerShell container with following command,
usman@MyUbuntuVM:~/PowerShell$ docker run -i -t –-rm powershell
This will start the PowerShell prompt as follows,
PowerShell
Copyright (C) 2016 Microsoft Corporation. All rights reserved.
PS /powershell>
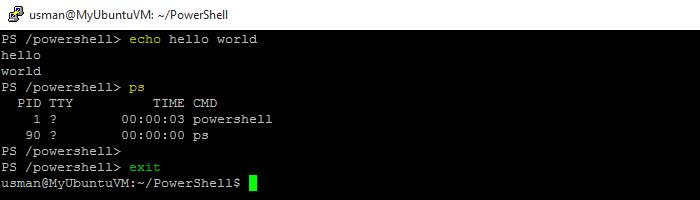
Congratulations. You’re now running PowerShell as a self-contained container on top of a Linux machine. To ensure this, simple type any PowerShell command and notice the syntax highlighting as a benefit of PowerShell,
In the run command executed above, note that,
- -i makes the PowerShell terminal interactive (so we can type commands and receive response back)
- -t creates a virtual container on the host
- --rm ensures that the container is deleted/removed as soon as it stops. i.e. container is stateless