Note
Access to this page requires authorization. You can try signing in or changing directories.
Access to this page requires authorization. You can try changing directories.
This blog is long overdue, and it is something that support has encountered from customers for some time. If you have tried to configure PerformancePoint Services to work in an HTTPS enabled site, you will probably have run into several error messages when attempting to create a data source connection to either a SharePoint list or an Excel Services data source.
The following are some of the error messages that you may have seen. One is specific to PerformancePoint, and the other has to do with SharePoint Foundation.
PerformancePoint Dashboard Error Message:
“PerformancePoint Services could not connect to the specified data source. Verify that either the current user or Unattended Service Account has read permissions to the data source, depending on your security configuration. Also verify that all required connection information is provided and correct.”
ULS Error messages:
“SharePoint Foundation | Topology | 8311 | Critical | An operation failed because the following certificate has validation errors:<<certificate path & certificate thumbprint>>\n\nErrors:\n\n The root of the certificate chain is not a trusted root authority..”
“PerformancePoint Service | PerformancePoint Services | ef8z | Critical | PerformancePoint Services could not connect to the specified data source. Verify that either the current user or Unattended Service Account has read permissions to the data source, depending on your security configuration. Also verify that all required connection information is provided and correct. System.Net.WebException: The underlying connection was closed: Could not establish trust relationship for the SSL/TLS secure…”
The most telling message is the SharePoint Foundation error message, since it indicates that the actual problem is a certificate-related issue. The PerformancePoint messages can be a little misleading since it may lead you down an authentication/authorization related troubleshooting path. While at its heart this is indeed the problem, there is only so many ways you can check to make sure the Unattended Service Account or the Service Account itself has all the appropriate permissions. That said, if it is a certificate issue, always look for the SharePoint Foundation critical ULS message, which is the dead giveaway for PerformancePoint certificate issues. If you have encountered these messages, try the following. Many customers have found success with the following solution.
Solution
Assumption: This assumes that the certificates have already been acquired and that the bindings have been configured in IIS for the SharePoint sites that you are working with. If this is configured successfully you will be able to browse your https sites without receiving any certificate errors. (Here is a blog post that provides a decent overview of the process as well as authoritative links to related documentation.)
Step 1: Extract Certificates to the SharePoint Server
Each certificate in the certificate path (Root, Intermediate and leaf) will need to be installed to the Local Computer’s Trusted Root Certification Authorities. In order to accomplish this, you will need to extract each certificate in the certificate path from the “bundled” certificate.
- Navigate to the Web Front End or Application Server.
- Open Internet Explorer and navigate to the site you will be using (https://site).
- View the Certificate associated with the site by looking at the URL security report.
- Select the pad-lock icon to the right of the URL

- Select View Certificates.
- Select the pad-lock icon to the right of the URL
- Select the Certificate Path tab.

- Select the root node in your certificate path and select “View Certificate.”
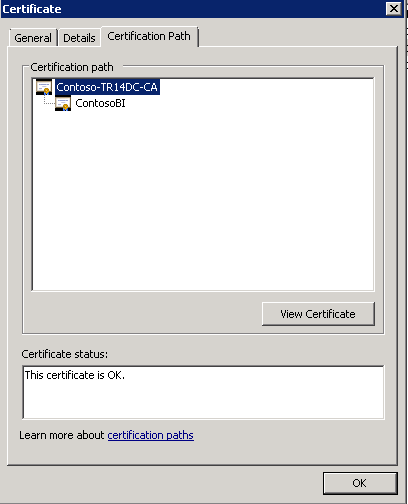
- In the Certificate Window that opens, select the Details tab
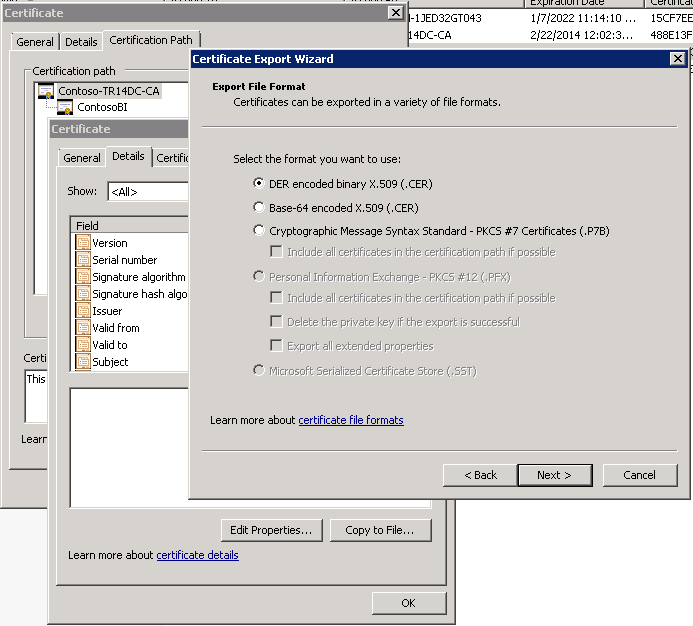
- Select the “Copy to File…” button
- The Certificate Export Wizard will open.
- Choose the default Certificate format “DER encoded binary X.509 (.CER)” and select Next.
- Specify a location to which you can save the file, and assign the file name “RootCertificate” (select Next).
- Specify a location first by clicking on the Browse button.
- Choose Desktop.
- Specify a name (e.g. “Root”).

- Select Finish.
- Repeat steps 4 – 10 for each certificate in your Certificate Path.
Step 2: Add each certificate to the Local Computer’s Trusted Root Certification Authority
Each certificate that was exported needs to be imported to the local computer’s Trusted Root Certification Authority on each server in the Farm.
- On each server in your farm, ensure that the certificates exported are added to the Local Computer, Trusted Root Certification Authorities (it is easiest to just copy the certificates to each server in the farm once you have exported the certificates on your first server).
- Launch the Local Certificate Manager.
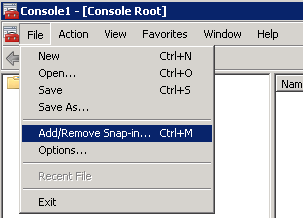
a. Start | Run | MMC
b. Select the File Menu | Add/Remove Snap-in
c. In the Add or Remove Snap-ins window, select Certificates and click the Add button.
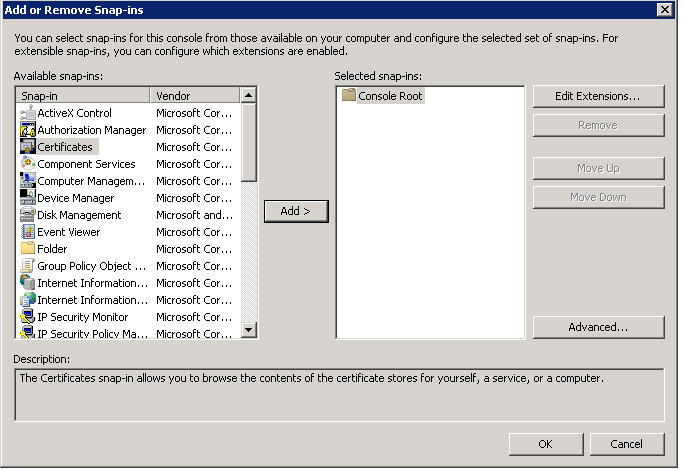
d. In the Certificates snap-in window select Computer account | Next.
e. Choose Local computer | Finish.
f. Back in the Add or Remove Snap-ins window select OK.g. Expand the Certificates (Local Computer) node in the Console window.
g. Expand the Certificates (Local Computer) node in the Console window.

h. Right-click Trusted Root Certification Authorities | All Tasks | Import.

i. Navigate to the root Certificate that you exported previously and select Next.
j. Choose the Defaults the rest of the way through, and select Finish. You should receive a message indicating that the import was successful.

Repeat steps h – i for each certificate in the Certification path
Step 3: Each certificate needs to be added to SharePoint’s Managed Trust
- Once the certificate is installed locally, it is necessary for the Certificate to be added to SharePoint’s managed trust. This will only need to be done from one of your servers, as the trust is recognized farm wide. Add each certificate to SharePoint’s Managed Trust.
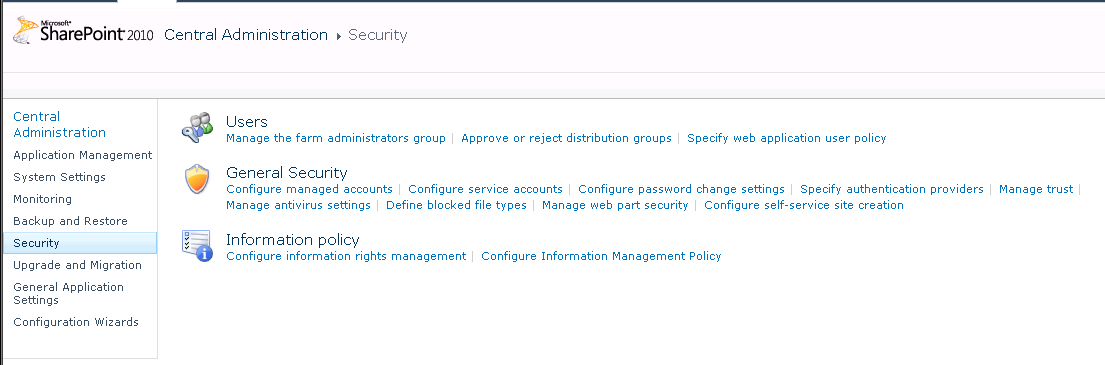
- Open SharePoint Central Administration and navigate to Security | Managed Trust.
- Open SharePoint Central Administration and navigate to Security | Managed Trust.
b. From the Trust Relationships ribbon, select New, the “Establish Trust Relationship” window will open.
c. For General settings, specify a name (i.e. RootCA, IntermediateLevel1 IntermediateLevel2).
d. For the Root Certificate for the trust relationship, select Browse, and select the certificate you created earlier.
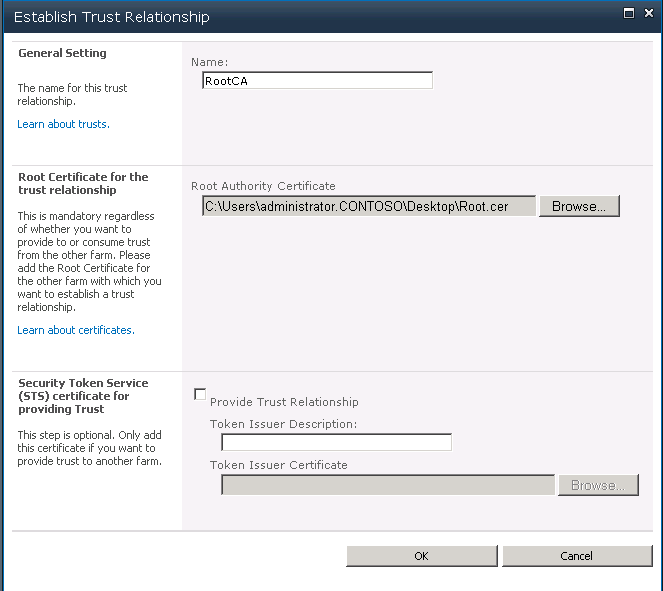
e. Click OK.
Repeat steps a – e for each certificate in your certificate path.
- On your SharePoint web front end, issue an IISReset
- Start | Run | cmd
- IISReset <enter>
- Test Dashboard Designer data source creation by creating a new SharePoint List data source as well as an Excel Services data source.
Appendix A: Checking for imported Certificates
At times it may be necessary to check to see if the certificates are imported correctly or conversely to validate that the certificates have been fully removed from the system. Several times, we have had stubborn certificates that will not remove completely from a system until removed from these certificate stores in the registry.
- Start Regedit
- Start menu
- Run
- Regedit
- Check both HKEY_LOCAL_MACHINE and HKEY_LOCAL_USER followed by SOFTWARE\Microsoft\SystemCertificates\My\Certificates
- Compare the Thumbprint value of the certificate with the nodes showing in the Certificates container.
Appendix B PowerShell Commands that may be useful
Checking for certificates with PowerShell
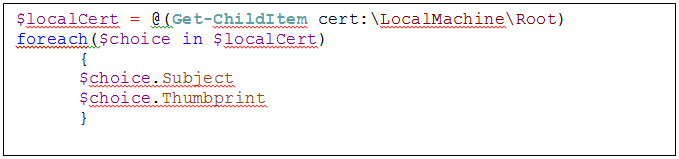
The Following script will export a list of the certificates installed to SharePoint’s Managed Trust with which you can then compare against the certificates added to your Local Certificates.

Checking for certificates added to the Local Certification Authority
That’s all there is to it! This isn’t particularly complicated, but there are a few steps to work through before it all works smoothly.
John Fulton
Microsoft Support Escalation Engineer
SharePoint, Office BI