Using MOSS Text filter linked to Scorecard to dynamically pass TI formula
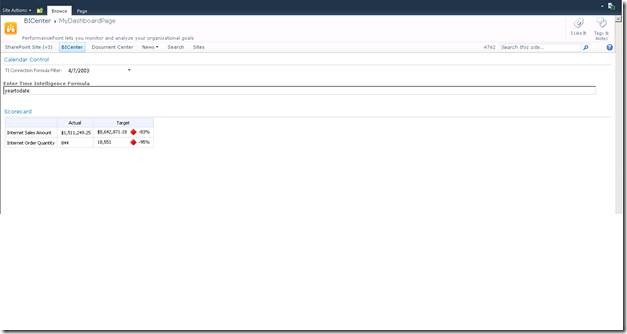
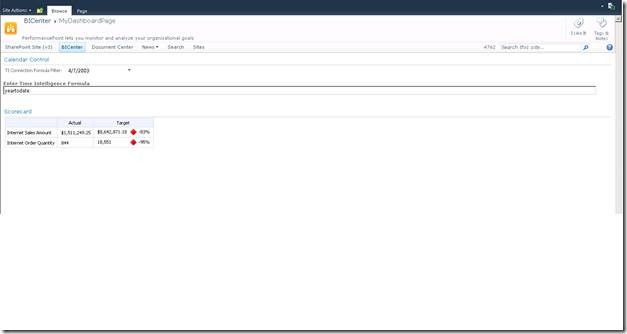
Time Intelligence (TI) Filters in PerformancePoint Services for SharePoint provides filtering on data-time values with respect to the current date-time. The limitation, however, is that the formulae need to be defined before the dashboard is published. This article explains how users can have ability to dynamically evaluate any formula after the dashboard is published on the SharePoint site. This will enable users viewing the dashboard to apply any valid TI formula when viewing the dashboard as shown below:
Prerequisites
Before adding the MOSS text filter, one must have the PPS dashboard items (like the Data source, Scorecard and the Time Intelligence Connection Formula Filter) created in the dashboard designer. Refer to this article in order to configure the datasource Time settings to use Time Intelligence. Once the datasource is ready, use this datasource to create Key Performance Indicators (KPIs) and the scorecard. If you’d like to use a calendar control to select the reference date, use this datasource to create a TI Connection Formula in the Dashboard Designer as well. Save these items on the server.
Creating MOSS Text Filter
Now that the prerequisite items have been created and saved on SharePoint, it is time to create the MOSS Text Filter and the MOSS Dashboard Page that will contain all these items linked together to analyze data. Note that the dashboard page can also be created in the dashboard designer and edited in the browser but it’s not a preferred way to create the dashboard page for this purpose. The reason we do not prefer this method is if for any reason the dashboard is redeployed in Designer, the editing done in MOSS will be lost.
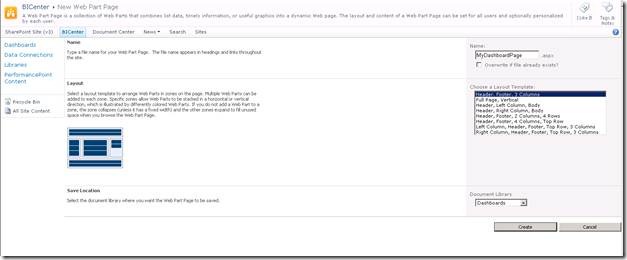
Let’s get started with creating the Dashboard Page. In the web browser, we navigate to the URL of the document library in SharePoint where we would like to create the dashboard. We click on the Documents link under Library Tools which presents us with the Ribbon and we select “Web Part Page” from the “New Document” menu.
This takes us to the page where we can give our new page a Name, select the layout and create the page with selected settings.
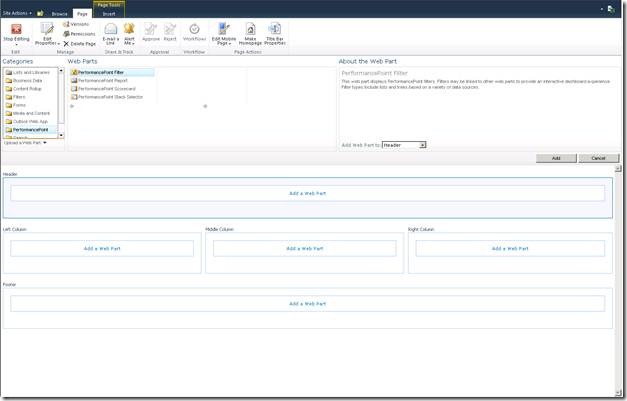
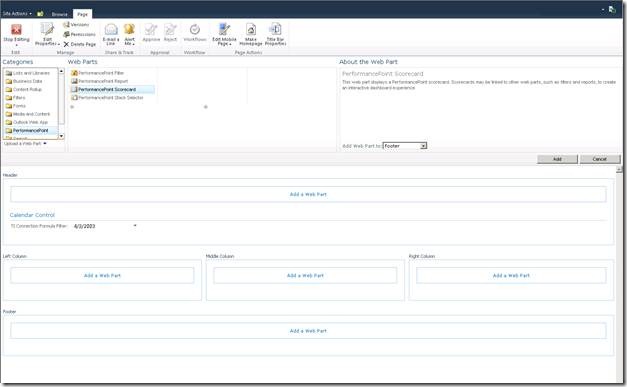
Once we have the dashboard page created, SharePoint takes us straight to editing mode where we can add our web part to the page. Here we go ahead and start adding the items we created earlier. In the desired zone where we want our webpart to be on the page, we click on “Add a Web Part” link. To add the PerformancePoint items we have created earlier, select PerformancePoint from the Categories and under “Webpart” select “PerformancePoint Filter” for adding the TI connection formula Filter we have created. Click the Add button.
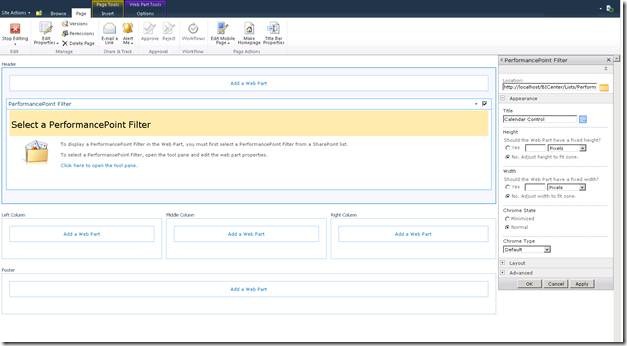
Now we must select which filter we want to be displayed here. In the PerformancePointFilter click the link “Click here to open the tool pane.” This will open the tool pane and we can select the location where we saved the calendar filter and change any other settings if we want to. We set everything and then click OK button.
As we added the TI Connection formula here, we go ahead and add the scorecard using the same steps but only select “PerformancePoint Filter” under “Webpart” this time.
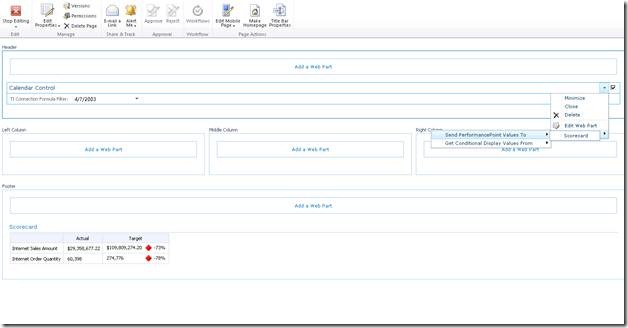
Now that we have the Scorecard and Calendar control added to the dashboard page, lets link the two. We click on the dropdown arrow in the header of calendar control and select Connections->Send PerformancePoint Values To->Scorecard.
In the Choose Connection Webpage Dialog that pops up, we select the Connection Type as “Get Parameter Values From” and in the Configure Connection Tab, we Add Connection and Choose Source Value and Connect to value as shown below.
The next step is to create a MOSS text filter where users of the dashboard can directly enter the formula rather than choosing something from the predefined sets of formulae in the filter. In the desired zone we will again click the “Add a Web Part” link. From the Categories list we choose Filters and then from the Web Parts list we choose a Text Filter, then we click the Add button.
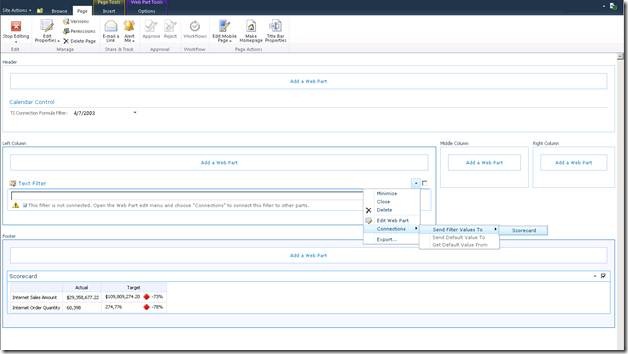
Now that we added the filter is added we will connect it to the scorecard. We open the context menu by clicking the arrow in the right corner of the web part header and select Connections->Send Filter Values To-> Scorecard.
In the popup dialog we make the following selections and click Finish.
And Voila! We are all set and now we can select stop editing button in the ribbon. The user can enter a valid Time Intelligence Formula in the Textbox and select the date in the calendar control and the scorecard will filter the data accordingly!
Note that if there is an invalid formula entered in the textbox, the scorecard may not work correctly and is not supported. This type of connections should only be use when the users know the Time Intelligence Syntax and want more dynamic filters.
Priyam Chawla
Software Development Engineer in Test
Microsoft SharePoint BI
