Walkthrough: Configuring a Remote Desktop Services Lab on Windows Azure (Part 2)
(Post courtesy Partner Solution Consultant Michael Biver)
In this post, we continue the walkthrough of configuring a Remote Desktop Services lab hosted on Windows Azure. Part 1 can be found here.
Adding the Gateway and License Server
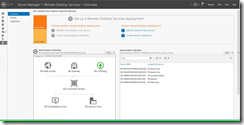
Once that was successfully created I brought up the Remote Desktop Services Overview from the Server Manager screen and added both the RD Gateway and the Licensing role to the deployment, making sure to put them on the Gateway VM. For my POC I’m just using self-signed certs and will add a wildcard cert to the deployment later on. I did make sure to use the FQDN of my public CNAME record though.
Step 1: Click on "Remote Desktop Services " in "Server Manager"
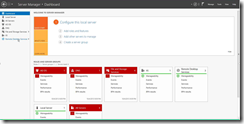
Step 2: Click on the add an RD Gateway circle in the "Server Manager" window
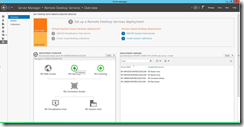
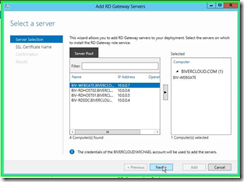
Step 3: Select the server you’d like to add and then click on "Add Selected Computers (button)" in "Add RD Gateway Servers"
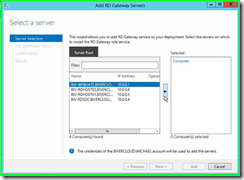
Step 4: Click on "Next" in "Add RD Gateway Servers"
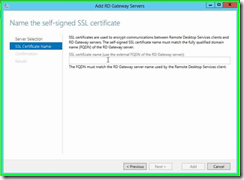
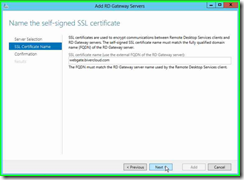
Step 5: Click on "SSL Certificate Name" in "Add RD Gateway Servers" and enter in the External FQDN of the RD Gateway. For me this is a custom name of “webgate.bivercloud.com”.
Step 6: Once you have your FQDN entered, click on "Next" in "Add RD Gateway Servers"
Step 7: Click on "Add " in "Add RD Gateway Servers”
Step 8: Click close in "Add RD Gateway Servers"
Step 9: Click on the add "RD Licensing” circle in "Server Manager"
Step 10: Select the server you’d like to add as a licensing server and click on "Add Selected Computers (button)" in "Add RD Licensing Servers"
Step 11: Click on "Next" in "Add RD Licensing Servers"
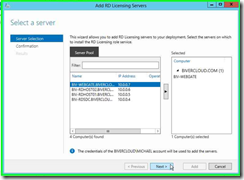
Step 12: Click on "Add " in "Add RD Licensing Servers"
Step 13: Click on "Close" in "Add RD Licensing Servers"
Configuring RDS Certificates
A Remote Desktop Services deployment requires certificates for server authentication, single sign-on, and establishing secure connections.
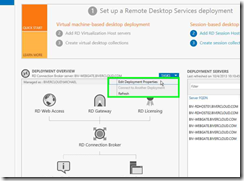
To configure the certs for all servers I went to the RDS overview>>tasks>>edit deployment properties>>certificates. I created a self-signed cert with the custom FQDN I’m using for the gateway (for example mygate.yourdomain.com). I stored it on a share and applied it to the first role.
Step 1: Click on "TASKS " in "Server Manager"
Step 2: Click on "Edit Deployment Properties (menu item)"
Step 3: Click on "Certificates " in "Deployment Properties"
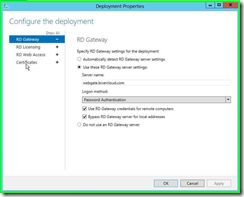
Step 4: Click on "Create new certificate... " in "Deployment Properties"
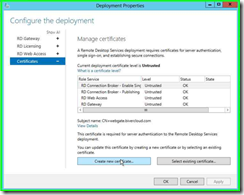
Step 5: Enter in your information for the Certificate name, password, and location to store it. Check off the selected boxes and click on "OK (button)" in "Create New Certificate"
Step 6: Click on "Apply " in "Deployment Properties"
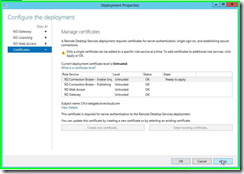
I then applied the same cert to all the other roles in the certificate management screen.
Step 1: Click on "RD Connection Broker - Publishing " in "Deployment Properties"
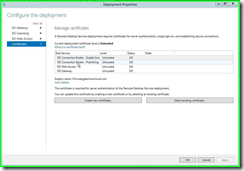
Step 2: Click on "Select existing certificate... (button)" in "Deployment Properties"
Step 3: Click on "Choose a different certificate (radio button)" in "Select Existing Certificate"
Step 4: Enter in your info and click on "OK (button)" in "Select Existing Certificate"
Step 5: Click on "Apply " in "Deployment Properties"
Repeat the above steps for the RD Web Access and RD Gateway roles.
Import Certificate to Trusted Root on Clients
In order to test the scenario we’ll also need to import our certificate into any client that tries to connect to the gateway. Typically this will be done with the assistance of a GPO in the case of a certificate from an internal PKI. If you use a certificate from a trusted public PKI then Windows will trust the certificate already. Just for testing, you can place it in the local machine, trusted root certification authority store. Otherwise you’ll get an error that the gateway is not trusted.
Step 1: Copy your certificate to the client you’ll be testing from, find and select your certificate file

Step 2: Right click on the file and select "Install PFX (menu item)”
Step 3: Click on "Local Machine (radio button)" in "Certificate Import Wizard"
Step 4/5: Click on "Next (button)" in "Certificate Import Wizard" (twice)
Step 6: Enter in your password
Step 7: Click on "Mark this key as exportable. This will allow you to back up or transport your keys at a later time. (check box)" in "Certificate Import Wizard"
Step 8: Click on "Next (button)" in "Certificate Import Wizard"
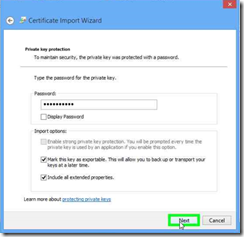
Step 9: Click on "Place all certificates in the following store (radio button)" in "Certificate Import Wizard"
Step 10: Click on "Browse... (button)" in "Certificate Import Wizard"
Step 11: Click on "Trusted Root Certification Authorities (tree item)" in "Select Certificate Store"
Step 12: Click on "OK (button)" in "Select Certificate Store"
Step 13: Click on "Next (button)" in "Certificate Import Wizard"
Step 14: Click on "Finish (button)" in "Certificate Import Wizard"
Creating Security Group and Test User
I created a security group named ‘vdiusers’ on my DC and added a test account to it named “michael2”.
Step 1: Go to your Active Directory Users and computers snap in and right click on the "Users (tree item)" in "Active Directory Users and Computers"
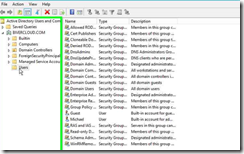
Step 2: Click on "New (menu item)"
Step 3: Click on "Group (menu item)"
Step 4: Enter in the name of your group, in this case “vdiusers”
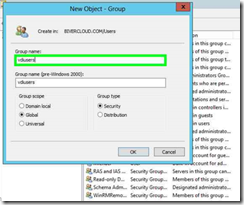
Step 5: Click on "OK (button)" in "New Object - Group
Now let’s create the user and add it to the security group
Step 1: User right click on "Users (tree item)" in "Active Directory Users and Computers"
Step 2: Click on "New (menu item)"
Step 3: Click on "User (menu item)"
Step 4: Enter in the information for your new VDI user and click on "Next > (button)" in "New Object - User"
Step 5: Enter in the password info and click on "Next > (button)" in "New Object - User"
Step 6: Click on "Finish (button)" in "New Object - User"
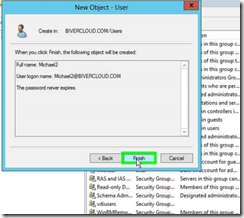
Step 7: To add the user to the previously created group, right click on "Michael2 (edit)" in "Active Directory Users and Computers"
Step 8: User left click on "Add to a group... (menu item)"
Step 9: Enter in the name of the group
Step 10: If you hit “check names”, it should resolve
Step 11: Click on "OK (button)" in "Select Groups"
Step 12: Click on "OK (button)" in "Active Directory Domain Services"
Creating the Collections
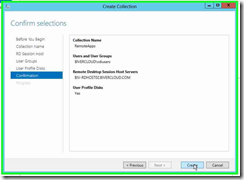
In order to have something for the user to connect to, though, I need to create a couple of collections. Back on the RDS management screen on my Gateway server I selected “collections” on the left and then under “tasks” I selected “create session collection”. I created 2 collections, one for the full session and one for RemoteApp only, making sure to grant the “vdiusers” security group I’d created earlier access to the collections.
Step 1: Click on "Collections " in "Server Manager"
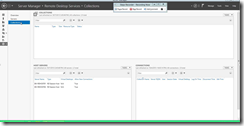
Step 2: Click on "TASKS " in "Server Manager"
Step 3: Click on "Create Session _Collection "
Step 4: Click on "Next > " in "Create Collection"
Step 5: Give the collection a name and description and click on "Next > " in "Create Collection"
Step 6: Add the servers you’d like to be part of this collection and click on "Next > " in "Create Collection"
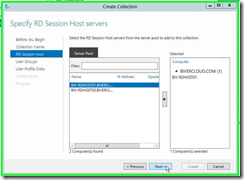
Step 7: Add the user group you’d like to have access and click on "Next > " in "Create Collection"
Step 8: Configure your user profile disk settings for this collection and click on "Next > " in "Create Collection"
Step 9: Click on "Create " in "Create Collection"
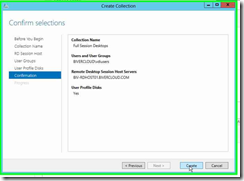
Step 10: Click on "Close (button)" in "Create Collection"
Follow the same process above (using your second RDS host) to create the RemoteApps collection.
Connecting to the RD Web Page
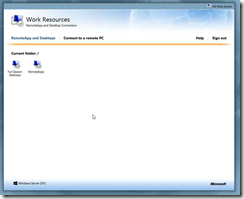
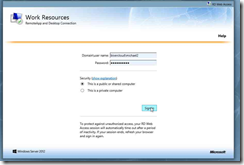
I now logged into the RD Web Access site at ‘https://mygate.yourdomain.com/rdweb’ using my test account and could see my two collections.
Step 1: Click in "RD Web Access - Windows Internet Explorer"

Step 2: Enter your credentials and click Sign In
Double Checking the RD Gateway Settings
At this point, double check in the Server Manager>>Remote Desktop Services>>Overview>>tasks>>edit deployment section that you’ve placed the proper server name needed for the RD Gateway. I’m using a custom name to hit my gateway with a cname. So for example, “mygate.yourdomain.com” would be what you would place there. And you would register a cname with your DNS provider to direct “mygate.yourdomain.com” to the public address of your Azure VM.
Step 1: Click on "Remote Desktop Services " in "Server Manager"
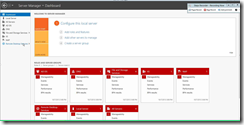
Step 2: Click on "Tile Tasks (button)" in "Server Manager"
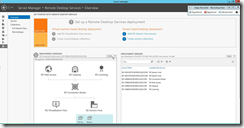
Step 3: Click on "Edit Deployment Properties (menu item)"
Step 4: Click on "Server name: (edit)" in "Deployment Properties" and just double check that it’s correct. This is going to be the public FQDN of your Gateway server which could be a virtual name of some NLB Gateway Servers.
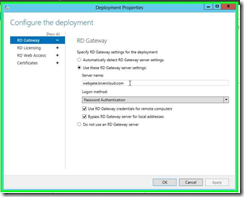
Step 5: Click on "OK (button)" in "Deployment Properties" if everything is correct.
Connecting to your Collections
Step 1: Go back to your RD Web page and select the icon for the collection you’d like to connect to.
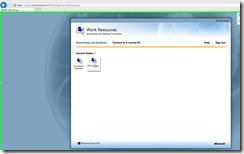
Step 2: Click on "Connect (button)" in "Remote Desktop Connection"
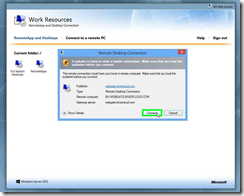
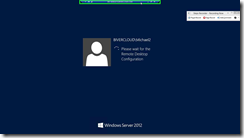
Step 3: And the connection should begin
Step 4: Click on "Yes (button)" in "Remote Desktop Connection"
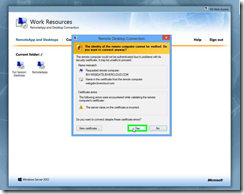
Once the session connects, bring up the system properties and verify that you are connected to one of your Session Hosts through the gateway.
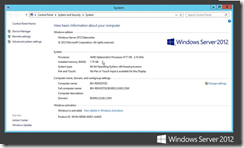
And there you have it, your first RDS Lab running on Windows Azure!!
