Note
Access to this page requires authorization. You can try signing in or changing directories.
Access to this page requires authorization. You can try changing directories.
Azure Resource Manager is a powerful way of automating almost anything in Azure. In this blog I will talk about how we use the ARM based PowerShell CmdLets to automate common tasks for managing / maintaining WebApps in Azure App Service.
First of all, I want to mention that there are two modes for writing PowerShell scripts to automate Azure. When you install Azure PowerShell two sets of modules get installed namely Azure Service Management (ASM) and Azure Resource Management(ARM). Both of these had different powershell commands to achieve the same result. In this blog post, I will talk about the ARM way of automating Azure Resources because ARM is the preferred way going forward and ARM is what the latest Azure portal (https://portal.azure.com) uses and is more promising from a feature set.
Installing Azure PowerShell
The easiest way to install Azure PowerShell is through Web Platform Installer (WEB PI). If you do not have Web Platform Installer, install it first from https://www.microsoft.com/web/downloads/platform.aspx. Once Web Platform installer is installed, launch it by going to Start and typing Web Platform Installer. Once WEB PI launches, search for Azure PowerShell and choose Microsoft PowerShell from the list below and click Add and then Install to install Azure PowerShell
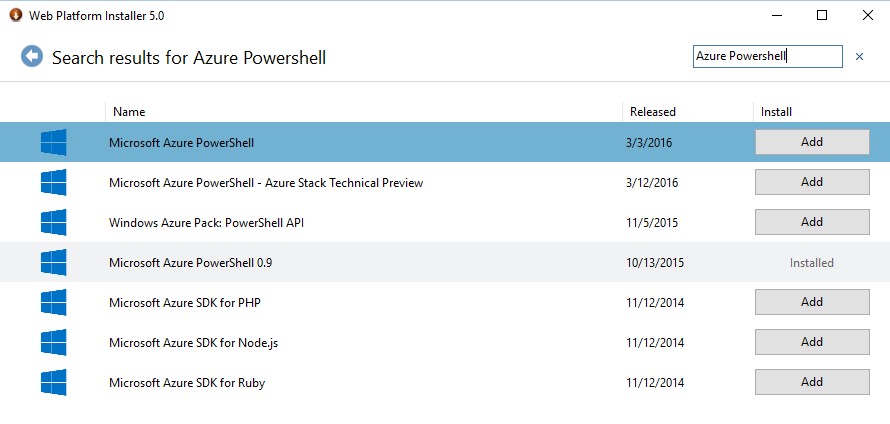
The download for Azure PowerShell is roughly 30 MB so shouldn’t take long to install. Once installed, you can just type Windows PowerShell in the Start Menu and the PowerShell Command window will open which will allow you to run the Azure PowerShell Commands. I prefer using the Windows PowerShell ISE to write my PowerShell scripts just because it provides you intellisense, color coding and lets you easily view details of the CmdLets that are available in PowerShell modules so if you choose AzureRM.Websites in the Modules dropdown, you can see the list of available cmdlets for WebApps like this.
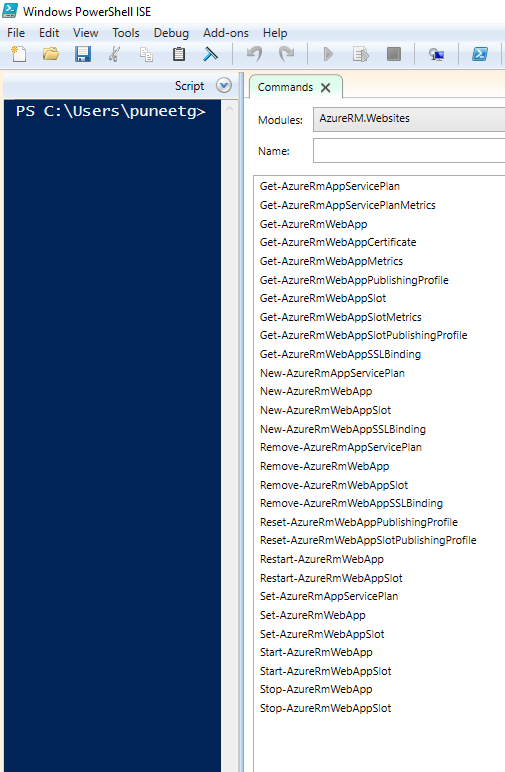
All these commands are documented in detailed in MSDN @ https://msdn.microsoft.com/en-us/library/mt619237.aspx and I won’t spend too much time talking about each command as the names are self-explanatory.
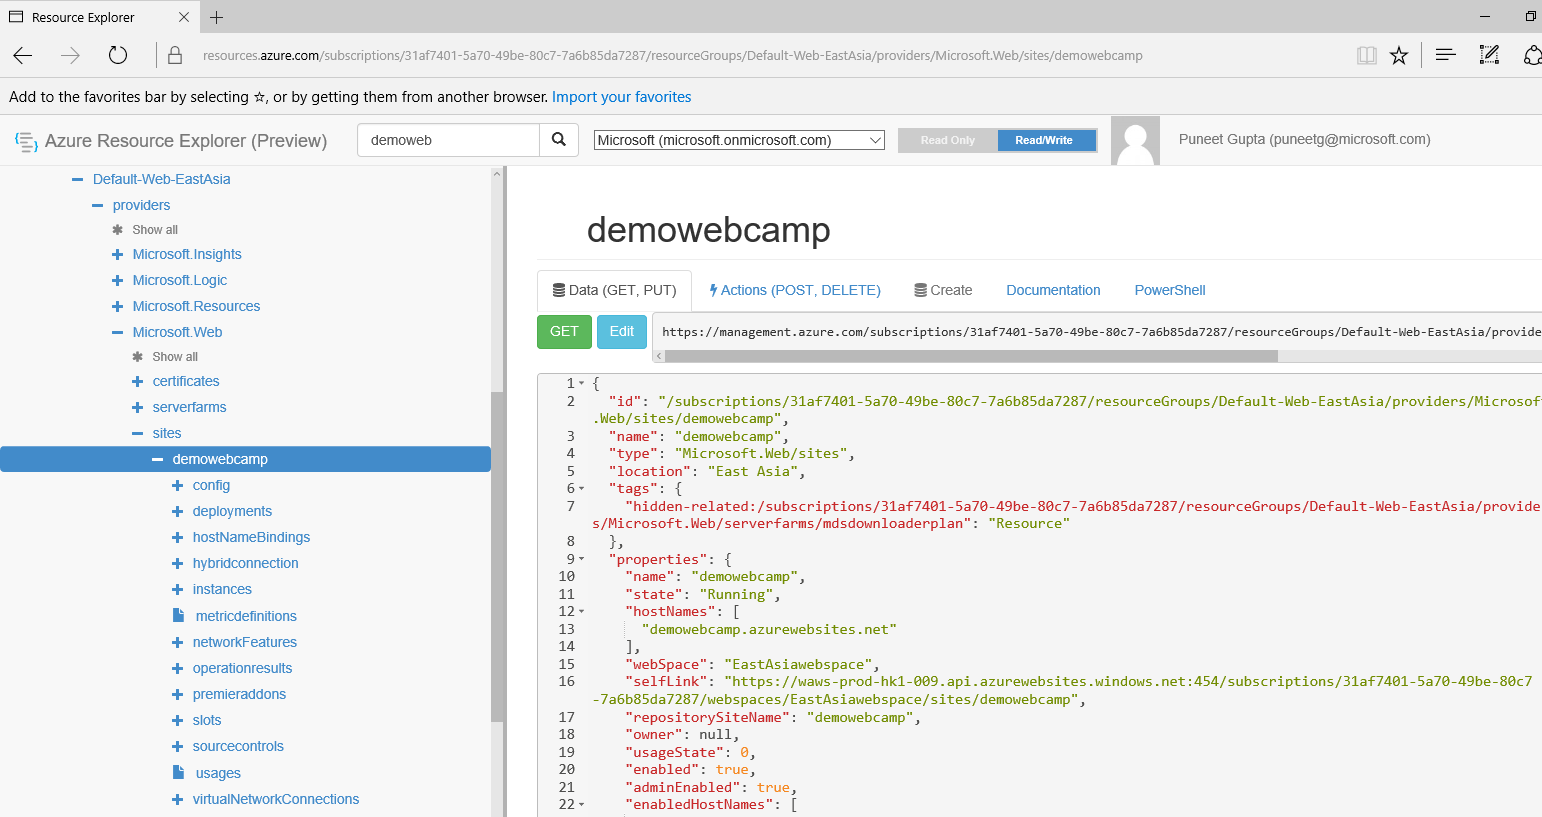
One last thing that I want to talk about before diving in the code is Azure Resource Manager Explorer which is basically an online tool that gives you a tree-view of all your resources in Azure. If you are often involved in writing PowerShell scripts for Azure then knowing about this tool is a must. You can watch a small video @ https://azure.microsoft.com/en-us/documentation/videos/azure-resource-manager-explorer-with-david-ebbo/ to get a quick understanding of how this works and this tool is what I have used in most of the scripts that I created. What is even more cool is that the ARM Explorer is open source and available at https://github.com/projectkudu/ARMExplorer. To access Azure Resource Manager Explorer, you browse to https://resources.azure.com and sign in with the same credentials that you use to sign-in to the Azure Portal and the ARM Explorer shows you all your resources in a tree view. You can search for a resource name and see more details of a particular resource. So in the below screenshot, I searched for one my existing sites called demowebcamp and I see the following
So here you can see all he configurations for your WebApp. What is even cool is if you click on the last tab (PowerShell), it shows you same powershell commands that you can use to create \ modify \ delete your resource like this
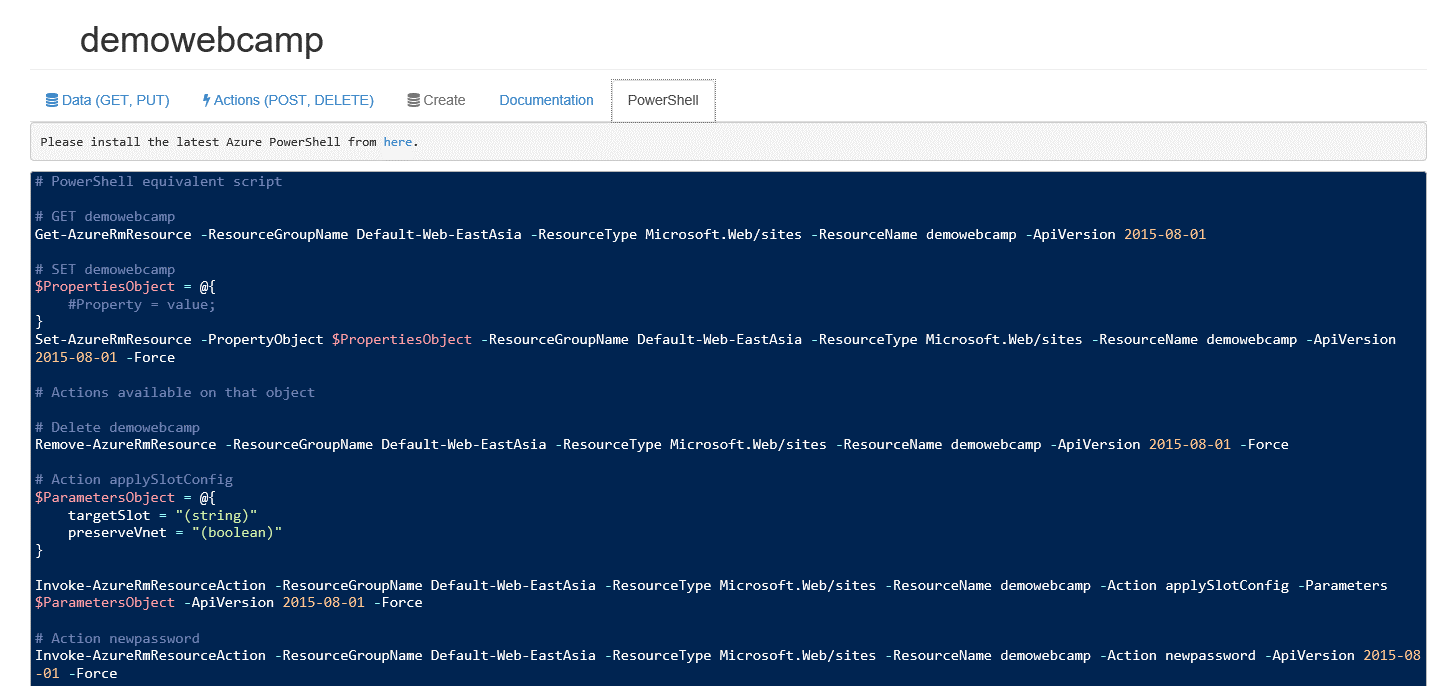
Notice that in the above window, we are not even using any AzureRM.Websites Cmdlet (like Get-AzureRMWebApp or Set-AzureRMWebApp) and the tool is showing the generic Azure Resource Manager Cmdlets (like Get-AzureRMResource, Set-AzureRMResource, Remove-AzureRMResource) with the right set of parameters applied for WebApp so configuring something in a WebApp now is as easy as finding out where the setting lies in the resource tree shown by https://resources.azure.com and then clicking the PowerShell tab to understand how to write the script for changing that particular setting.
So whenever we want to write some powershell script which has to modify or configure something, just follow this approach
- Open https://resources.azure.com and find the resource that you want to configure (For e.g. WebApp or App Service Plan)
- Expand the tree nodes beneath the resource to identify the setting that you want to configure
- Switch to the PowerShell tab in the tool to identify the right set of PowerShell command corresponding to that operation.
With that, let’s see the code for some of the common tasks that you might want to perform on WebApp
- Stopping / Starting / Restarting WebApp
- Creating A New WebApp in a New Resource Group
- Downloading Publish Profile For a WebApp
- Configuring Always-On for WebApp
- Adding a Virtual Directory Marked as an Application to the site
- Scaling the WebApp from one pricing Tier to another
- Configure Connection String for a WebApp
- Append New AppSetting to the existing list of App Settings for a WebApp
- Adding a HOSTNAME for a WebApp
- Adding a SSL Binding for a WebApp
- Adding a NEW Slot to a WebApp
- Adding a Sticky To Slot Setting for a WebApp
- Performing Swap operation on a WebApp
- Delete a WebApp
- Modify CORS setting on the WebApp
- List Sites in App Service Plan
- List Disk Usage of all Sites in App Service Plan
Most of the snippets below use the following function which is required to get the resource group name for a WebApp so this should be included in the script snippet
Stopping / Starting / Restarting WebApp
Creating A New WebApp in a New Resource Group
Downloading Publish Profile For a WebApp
Stopping / Starting / Restarting WebApp
Configuring Always-On for WebApp
Adding a Virtual Directory Marked as an Application to the site
Scaling the WebApp from one pricing Tier to another
Configure Connection String for a WebApp
Append New AppSetting to the existing list of App Settings for a WebApp
Adding a HOSTNAME for a WebApp
Adding a SSL Binding for a WebApp
Adding a NEW Slot to a WebApp
Adding a Sticky To Slot Setting for a WebApp
Performing Swap Operation on a WebApp
Delete a WebApp
Modify CORS Settings For WebApp
List sites in App Service Plan
Find Disk Usage for All sites in App Service Plan
If there is some common operation that you need to automate, then kindly mention it in the comments and I will try to update the blog with the code for that.
Hope this helps !!!
Comments
- Anonymous
May 12, 2016
The issue really is - how to get a list of all the Web/API Apps hosted on an App Service Plan...- Anonymous
June 10, 2016
@Ron - I just added the "List sites in App Service Plan" in the article to achieve this. Sorry for the delay !!!
- Anonymous
- Anonymous
July 19, 2017
The comment has been removed - Anonymous
November 10, 2017
The comment has been removed